Indy |
Post Reply 
|
Page <12 |
| Author | ||
Rusty_bits 
Newbie 

Joined: 07 December 2010 Location: Canada Status: Offline Points: 12 |
 Post Options Post Options
 Quote Reply Quote Reply
 Posted: 07 December 2010 at 1:03pm Posted: 07 December 2010 at 1:03pm |
|
|
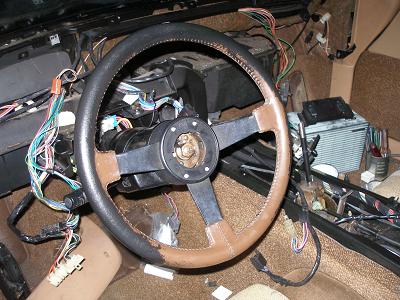
Regarding the 84 SE parts car, does it still have the steering wheel and which steering wheel is it?
|
||
|
regards, Rusty_bits
|
||
 |
||
|
Indy
Newbie
Joined: 14 October 2010 Location: Canada Status: Offline Points: 37 |
Post Options
Quote Reply
Posted: 07 December 2010 at 6:12pm |
|
|
I have the steering wheel and am not planning on keeping it. Tilt steering with cruise control. Please call me at 604-986-8199
|
||
|
||
|
Rusty_bits
Newbie
Joined: 07 December 2010 Location: Canada Status: Offline Points: 12 |
Post Options
Quote Reply
Posted: 07 December 2010 at 6:29pm |
|
|
Thank you for posting the photo but I will have to pass
|
||
|
regards, Rusty_bits
|
||
|
||
|
Indy
Newbie
Joined: 14 October 2010 Location: Canada Status: Offline Points: 37 |
Post Options
Quote Reply
Posted: 08 December 2010 at 2:27pm |
|
|
Guys The wiring harnesses that I got from PickAPart are in good condition. However, I am quickly learing that although the difference between AT and MT is a bit important, what are far more important are the installed options, particularly aircon and to a lesser extent cruise control. The MT harnesses from PAP (both the three C500 associated ones and the ECM) are a good fit for my MT, but the PAP harnesses includes cruise that my Indy does not have and it does not have aircon, that I do have. I now plan to not install the cruise control, since I see that it is more effort than I am prepared to expend. I am inclined to merely clip the cruise wires, most or all of which go only through C500. Right now aircon is not important. However the aircon wiring involves quite a few connections to the ECM, via C504, C505, and C203. I can easilly transfer the correct connectors from my now junk Indy ECM harness. However if I use my Indy ECM (that believes it has an attached aircon) and don't complete the aircon wiring, will the ECM view that as a fault and send an unimportant fault message, while perhaps not idenfying a real fault? It is not that big of a task to install a harness, so options are to go with what I have for now, or right now find an 84 ECM harness from a car with aircon. If someone for the club does not have access to one, I will try Pennock's. Am I making it more or less complicated than it is? One other item. The brown dash from the 84 SE is in perfect condition, unlike the light grey / black one from the Indy. If anyone has a perfect grey / black one, I am in the market. Game plan B is to paint the one from the SE. Is that a good idea? thanks Gary @604-986-8199
|
||
|
||
|
Romeo
Senior Post God 

Joined: 16 November 2008 Location: Canada Status: Offline Points: 3033 |
Post Options
Quote Reply
Posted: 08 December 2010 at 10:00pm |
|
|
Haven't seen the wiring diagram, but is it possible to simply trick the PCM by routing in a resistor in place of your A/C to make it think the A/C does turn on?
|
||
|
Never shift into reverse without a back-up plan.
|
||
|
||
|
Dawg
Senior Member 

Joined: 15 August 2009 Location: Canada Status: Offline Points: 988 |
Post Options
Quote Reply
Posted: 08 December 2010 at 10:18pm |
|
|
I think the Fiero Store has matching interior paint for sale. If you clean everything well and spray evenly, it should turn out well. I've used vinyl paint many times with good success.
The Dawg |
||
|
You dream it up....I'll make it
|
||
|
||
|
Indy
Newbie
Joined: 14 October 2010 Location: Canada Status: Offline Points: 37 |
Post Options
Quote Reply
Posted: 08 December 2010 at 11:07pm |
|
|
Dawg You were right about fierostore and matching paint. Thanks. Wiring harness I stared at the ECM harness for a while and realized that the only problem was getting the missing aircon wires (but now transferred from the fire damaged Indy harness) through the bulkhead. I opened up the grey / black "heat / noise seal" that goes throught the bulkhead and decided that with a bit of heat and perhaps some filing, I can create a cableway for those 4 wires. Within a couple of days I should be able to test out the electrical circuits. Cheers Gary
|
||
|
||
|
Indy
Newbie
Joined: 14 October 2010 Location: Canada Status: Offline Points: 37 |
Post Options
Quote Reply
Posted: 31 December 2010 at 2:14pm |
|
|
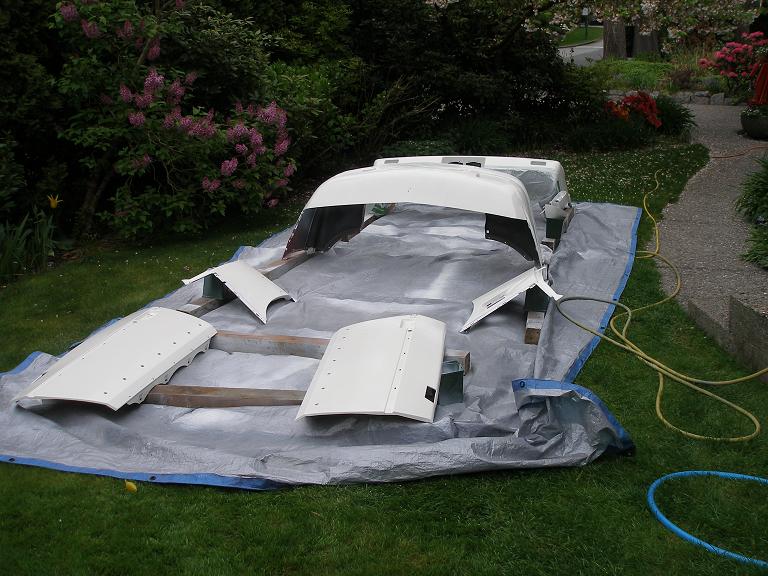
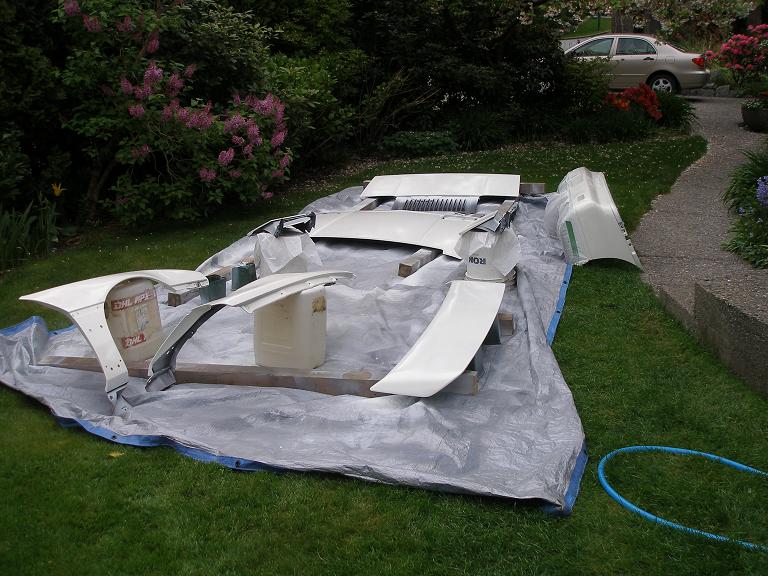
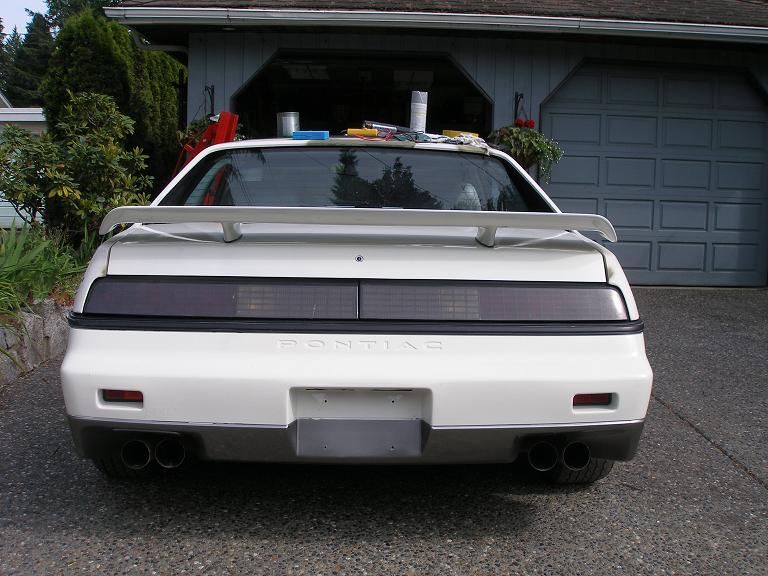
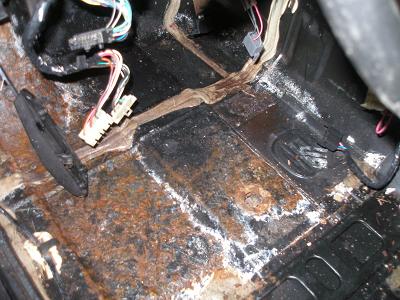
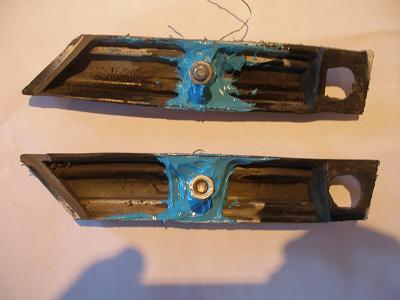
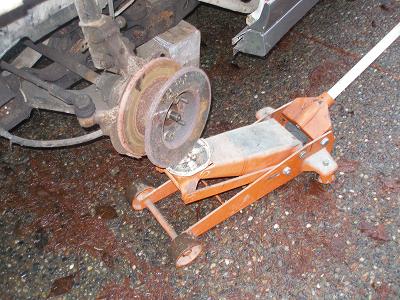
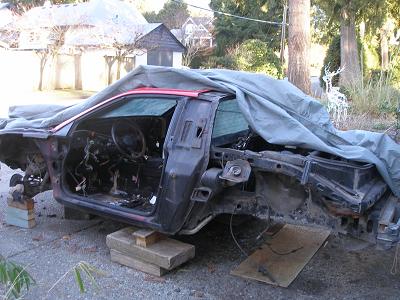
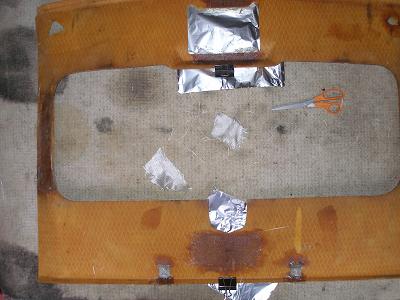
Year end progress report The various wiring harness are now installed with just a few bare ends. When I started the engine yesterday for the first time, the "check engine" light went out, so I expect that is a good sign. The engine does sound decent, but it runs for only a few seconds, then dies, but will immediately restart and does the same thing again and again. Part of the hobby. I bought a GT front fascia with the later round molding design, and am adapting it to the earlier ribbed molding type that was used 84 to 86. On the later versions the side marker and molding that connect the fascia to the fender are one piece and merely bolt on. On the earlier version, the short molding "piece" immediately behind the marker light is part of the fascia. I cut them off the damaged Indy fascia with a hacksaw and used plastic filler and abit of stainless stell wire to install a small mounting bolt. see photo below. The SE dash has now been repainted and installed in the Indy. Looks very good. I did a small repair to a crack in the upper corner using body filler, after gouging out the soft foam to get to a solid attachment. Pretty much invisible repair. The headliner was still decent on the Indy otheer than the fwater damaged fabric, but it was very difficult (I am inclined to say impossible) to remove the upper interior door molding with it in place. I therefore cut the headliner in two (see photo) and slid it out, then easily accessed the 6 mm headed machine screw that secures the mounting clip (there will be 1 or 2 of them on each side). Once the molding was off the car I was easily able to remove the spring clip(s) that were still attached to it, then remounted the clip to the body in preparation for re-installation. I fiberglassed the headliner back together and painted to for additional strength. And yes I will drill the drain holes on the sunroof surround. In dismantling the brake system on both cars, I noticed that the torx end on several of the caliper mounting bolts were poorly formed and I had difficulty removing them. After-market junk. Since the SE parts car is now stripped of everything but the main roof, and since many of those panels are in better condition than on the Indy, I decided to paint the panels off the car and with the aero body parts also removed. A March or April project. I am now wondering how to remount the riveted aero body side molding etc. since the rivets were destroyed on removal. I will post a separate question about that on the site so that any answers don't get lost in this thread. Since this is mainly a one person project, I had difficulty re-aligning the rear suspension after I loosened the two large bolts. By installing a spare rotor backwards, I was able to realign the parts with my floor jack. There was some rust under the parts car carpet, (photo) so I will check that on the Indy while the seats are out. Gary in North Vancouver @ 604-986-8199
|
||
|
||
|
Indy
Newbie
Joined: 14 October 2010 Location: Canada Status: Offline Points: 37 |
Post Options
Quote Reply
Posted: 23 January 2011 at 8:49pm |
|
|
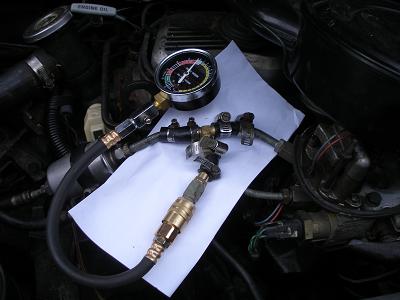
Another update Some of this might actually be useful to someone else. Fuel Pressure The engine would initially run for only a few seconds. I assembled a spool piece using fuel line from the parts car and determined that the fuel pressure was only 4 psi. After dropping the fuel tank the only problem was the 1 1/2" long rubber hose that connects the fuel pump to the steel discharge pipe. The hose was very spongy and was destined to fail. I installed the spare fuel pump with hose clamps as someone suggested on Pennock's. 11 psi now, well within the 10 - 12 psi specs. The engine now runs and should be OK with a tune up.
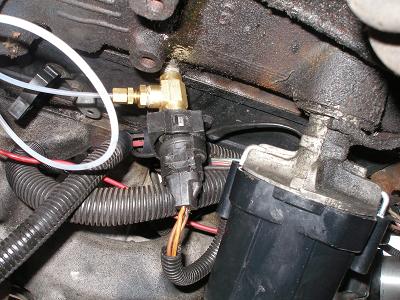
Oil Pressure I also installed a "hydraulic" oil pressure gauge that I will leave permanently mounted in the engine compartment. 25 psi oil pressure.
Compression The engine compression is 140 - 160 after running for perhaps 15 minutes. Clutch Next problem was the clutch system that no matter how many times it was bled never managed to move the clutch arm more than 1/2", and not enough to disengage the clutch. There was no apparent problem with the clutch pedal (no "bent pedal" syndrome). The "stamped" clutch arm had been replaced with the cast version. However when I disconnected the banjo, the pedal jumped up by about 1/2", so that it "rested" above the brake pedal. The 1984 version of the clutch pedal has what has been described as a redundant wound spring, and that is what caused the pedal to rise. Although it would have been less effort to buy one of Rodney's adjustable master cylinder push rods, that would not have contributed to the "hobby". I therefore removed the master cylinder, cut the push rod shaft and brazed in a 1/2" long piece of round bar of the same diameter as the push rod. To secure it better than perhaps was necessary, I salvaged a 3" long piece of fuel line from the parts car and slotted it full length. With a small interference fit it was quite tight even prior to brazing. Installed it, bled the system, and presto, the clutch now works for the first time. The push rod was initially 6 3/8" long and now is 6 7/8". The 1/8" is not important, but the extra 1/2" is what provided sufficient travel on the master cylinder for the slave to work properly. Rodney's website stated that he had seen "short" push rods on several after market master cylinders. Dew Wipes There is another way to remove the outer dew wipe, but it works only if you can justify removing or at least loosening the outer door skin. With the windown down, the fasteners are all easily accessed with a conventional Phillips screwdriver and a 10 mm wrench except for the two center screws. The standard way to remove them is with a tool from Rodney or a home-made equivalent. Since I was going to remove the skin for painting in any case, I used the opportunity to easily "back out" the centre screws. When I replace the dew wipes, I plan to reverse the center two screws and install them from the outside. There are "fastener" distributors in the US selling generic dew wipes in 8' lengths at less than $ 30 (the Fiero dew wipes are 36 1/2" long). The catalog that I have shows wipes that are pretty close, so I am going to contact the supplier to see whether they can locate identical replacement Fiero moldings to which the old, and still good attachments can be re-fitted. Long shot, but it is a hobby. Has anybody been able to do that? Headliner Fabric We went to Bellingham a few days ago and bought 1 1/2 yard (about 52 " width) of light grey headliner fabric at Jo-Ann Fabric in the large retail complex just west of I-5 in downtown Bellingham. That length will be sufficient for the sun visors as well. They have a few colours in stock, all foam backed. Jo-Ann is a USA wide fabric store that has been mentioned in Pennock's by several Fiero owners as a good source of head lining fabric. A bonus is that Jo-Ann's is just around the corner from the recently opened Harbor Freight store. Cheers Gary Hawthorn
|
||
|
||
|
Capt Fiero
Admin Group

Founding Member Joined: 12 February 2007 Location: Canada Status: Offline Points: 4039 |
Post Options
Quote Reply
Posted: 23 January 2011 at 11:28pm |
|
|
Harbour Freight, you gotta get me an address, my wife and I go to Bellisfair Mall twice a month or so now. If there is a Harbour Freight anywhere close by, she can drop me off there and I might be done by the time she is done looking through the entire mall. If she left me with the car I might not be picking her up until the following day.
Your car is coming along amazingly well. Funny that hose went bad, as I just replaced one in my now sold 88 Coupe. Owner thought the motor was blown because it would not run. I replaced the hose and installed a V6 fuel pump and car ran fine, new owner drove it all the way to Victoria, said it just kept driving better and better the more he drove it. Aside from an oil leak I think the engine may have been fine.
I'll have to keep that fabric store in mind as I will need to redo the head liner on my 88GT once I get the windshield replaced, as it is leaking badly at the top of the glass. 25psi at hot idle is OK, however I like to see more like 35psi, I would move it up to 10w30 and add a bottle of Lucas oil stabilizer to the mix. If your tests were done with less than 1hr of run time, I would move to 15w40 Rotella oil. Its great stuff. and was the only thing GM would put in there Caddy motors. |
||
|
Capt Fiero
88 Fiero GT 5spd V6 Eight Fifty Seven GT V8 5spd. |
||
|
||
|
Graeme
Senior Member
Joined: 17 October 2006 Location: Canada Status: Offline Points: 249 |
Post Options
Quote Reply
Posted: 24 January 2011 at 1:11pm |
|
|
Just found this build thread, great job
 I recently took my fiero out for the day the other day and all this stuff is making me want to get back into messing around with things.. gotta find the time somehow. I recently took my fiero out for the day the other day and all this stuff is making me want to get back into messing around with things.. gotta find the time somehow.
|
||
|
||
|
Patrick
Newbie
Joined: 19 April 2008 Location: Vancouver Status: Offline Points: 5 |
Post Options
Quote Reply
Posted: 25 January 2011 at 12:21am |
|
...
What's with the upside-down picture?
|
||
|
||
|
Indy
Newbie
Joined: 14 October 2010 Location: Canada Status: Offline Points: 37 |
Post Options
Quote Reply
Posted: 25 January 2011 at 8:54am |
|
|
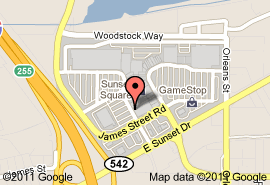
Folks Attached is a map showing the location of Jo-Ann Fabric. Turn left at the second set of lights on Sunset East (Hwy 542). Harbor Freight is straight ahead partially hidden behind a couple of conifers. Jo-Ann's is a little jog to the left and just around the corner. The headliner fabric is against the back wall more-or-less in line with the cutting table, and about waist high. The clerk who gave us directions did not actually put us at the right location, and it was just dumb luck that we actually found what we were looking for in about 1 meter of shelf space.
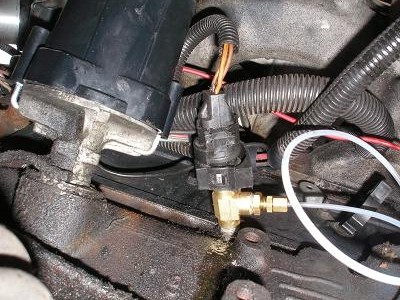
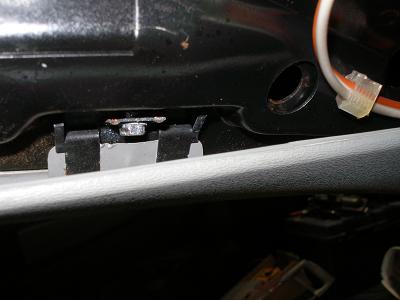
And yes the oil pressure sender photo is from the bottom side. It was the only position from which I could get a decent photo. I contacted the generic dew wipe material supplier. The guy I talked to deferred to someone else who will not be back until Friday. Apparently they have access to other profiles, since what is in their catalog is not quite correct for the Fiero. Can I reasonably assume that the wipe itself is the same for all Fieros and the 84 differs only in the accessory mounting? If anybody is keen to replace their dew wipes I can order more than the 1 - 8' "stick" just for me, providing what they have is correct and not merely a poor substitute. Probably < $ 30 for the standard 8' length. I will have them cut it into 2 pieces since the long length incurs higher shipping costs and you cannot get more than 2 wipes out of 8'. I am away and won't be at the February meeting, but March should work for me. Cheers Gary
|
||
|
||
|
Patrick
Newbie
Joined: 19 April 2008 Location: Vancouver Status: Offline Points: 5 |
Post Options
Quote Reply
Posted: 25 January 2011 at 10:53am |
|
|
Gary, there's this great feature in photo programs called "rotate".
|
||
|
||
|
Patrick
Newbie
Joined: 19 April 2008 Location: Vancouver Status: Offline Points: 5 |
Post Options
Quote Reply
Posted: 26 January 2011 at 2:36pm |
|
|
Gary, I imagine you've seen this thread Here comparing the two types of ready-made dew wipes that are available to Fiero owners? Great info there. I'm definitely interested in hearing what you find out from your supplier. Do you also have access to the dew wipe "pad" material from that same supplier? If it turns out that the raw material you can get will indeed do the job, you might wish to post about this in a thread of its own as not everyone will be looking in an Indy "build thread" for info which might be of benefit to their non-Indy Fiero.
|
||
|
||
|
Indy
Newbie
Joined: 14 October 2010 Location: Canada Status: Offline Points: 37 |
Post Options
Quote Reply
Posted: 21 June 2011 at 9:54am |
|
|
June update Since the last posting in January, I have made significant progress:
I have registered the Fiero (and the 71 Opel GT) in the July 17 Show & Shine in Edgemont Village, just a couple of blocks from my home in N. Vancouver, so I have imposed a dealine on completion. I have a small want list that I will post separately.
Having the 84 SE parts car was a real blessing since the body was in better shape than the Indy, so it provided several replacement body panels and was an excellent source of fasteners, etc. Cheers Gary Hawthorn
|
||
|
||
|
Dawg
Senior Member
Joined: 15 August 2009 Location: Canada Status: Offline Points: 988 |
Post Options
Quote Reply
Posted: 21 June 2011 at 10:27am |
|
|
Nice!
The Dawg |
||
|
You dream it up....I'll make it
|
||
|
||
|
Patrick
Newbie
Joined: 19 April 2008 Location: Vancouver Status: Offline Points: 5 |
Post Options
Quote Reply
Posted: 21 June 2011 at 10:35pm |
|
|
Mods, please get this SPAM out of here. Thanks. [EDIT] Whomever did it, thanks for getting rid of that crap.
|
||
|
||
|
Post Reply
|
Page <12 |
 Tweet
Tweet
|
| Forum Jump | Forum Permissions You cannot post new topics in this forum You cannot reply to topics in this forum You cannot delete your posts in this forum You cannot edit your posts in this forum You cannot create polls in this forum You cannot vote in polls in this forum |


 Topic Options
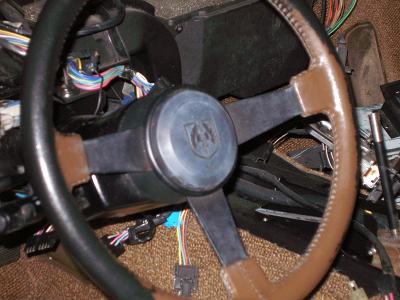
 .
. Indy wrote:
 .
.