Ferrari 308 Replica Rebuild
Printed From: West Coast Fieros
Category: Technical Topics Forum
Forum Name: Build Threads
Forum Description: A Place to post step by step build threads.
URL: http://www.westcoastfieros.com/forum/forum_posts.asp?TID=2128
Printed Date: 29 May 2025 at 12:29am
Software Version: Web Wiz Forums 12.01 - http://www.webwizforums.com
Topic: Ferrari 308 Replica Rebuild
Posted By: Linlor
Subject: Ferrari 308 Replica Rebuild
Date Posted: 10 October 2010 at 8:47pm
Wow, I just spent the past 20 minutes typing out a long winded explanation of how I came to be here and why I am posting a build thread. Well, I am not sure what button I hit inadvertently as I feverishly typed away but I lost it all.... So, I start again but I doubt I will be as verbose as I just was. Probably not a bad thing really....... I am going to post more often in my thread here so I don't get too far and lose everything again. Name is Don Ostergard. I have been out on the West Coast in Victoria for a year now... how time flies. Came back to BC from Calgary after 20 years away in various locations across Canada. Can't believe I waited 20 years to come back. Anyway, another story that needs a beer.... I have liked the Fiero since I owned a 1986 SE notch back in 1988 out in Halifax as a young fellow. Lots of fun to drive and it is a different and unique car. Had I known there was a fastback version at the time, I would have owned one of those instead of the notch back. Better post before I lose this......  Cheers Don ------------- Ferrari 308 Replica Prova 5000s Countach Replica |
Replies:
Posted By: Linlor
Date Posted: 10 October 2010 at 9:13pm
|
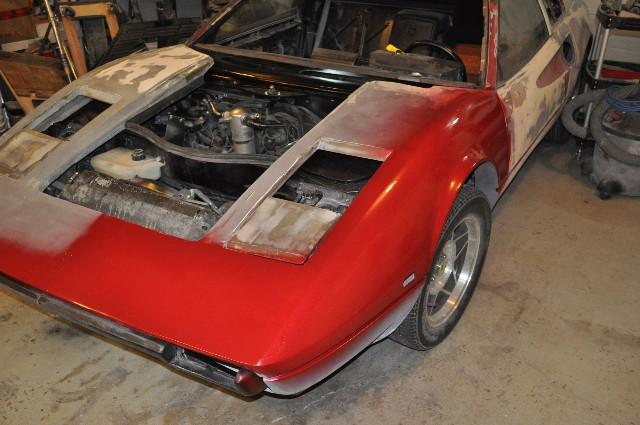
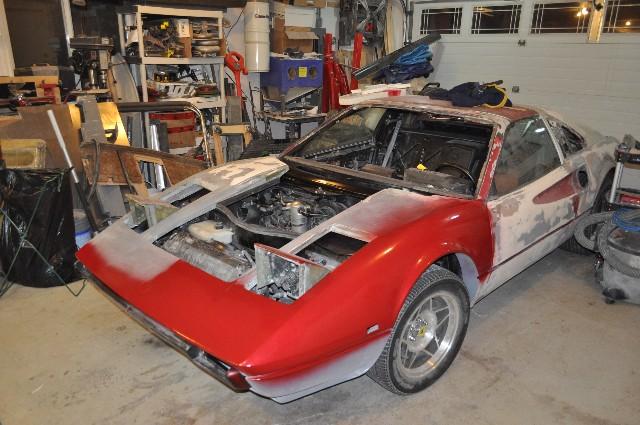
I also had another wish in my life and that was to build a Kit car. I have been an avid kit car fan since I was 15 back when the VW's were the base of choice. Once the Fiero came out, I was hooked. It took me a long time to get a kit car but 10 years ago I bought a set of replica Ferrari 355 panels from a fellow in Duncan and drove them back to Calgary in a U-Haul truck. I started in one the project back then and worked away on the Fiero and the panels for several years. Had I known then what I know now about fiberglassing and body panels, I would never have bought the panels to begin with. They were terrible. Over the past 10 years, i have replaced or modified every panel on the project to getting to line up and work properly. My build thread for that car is on Madmechanics.com in the build diaries section called Don's build progress. After so many years of having a hanger queen, I decided I wanted a kitcar I could actually drive for a change. I found a 308 replica over in UsedVictoria and it was actually over in Langley at Radical Rides Hot Rod shop just off Hwy 10. Radical Rides was supposed to redo the replica for the owner but it was going to cost way too much to have it rebuilt by them so the owner went and bought a real 308 instead. That left this sitting over in Langley and the owner wanting out. I offered a low amount for the car compared to what it has and what he originally paid for it and he accepted. I went over to Langley and towed it home to Victoria. When I got the car, it had a couple things wrong with it that I figured I could fix pretty easily. It had a broken front bumper and a broken front air dam. there are other items on the car as well but these two items were the main things that needed work for me to be able to drive it around. I took a break from the 355 build and dove into this one for a change. I put the 355 in storage and got room the garage for the 308 to be worked on for a few weeks and then I could drive it for the summer...... That was in May of this year. I am still working on it. Apparently, like a lot of you guys, I can't leave anything well enough alone.....  A picture of how the car looked when I went over to have a look at it before I bought it. 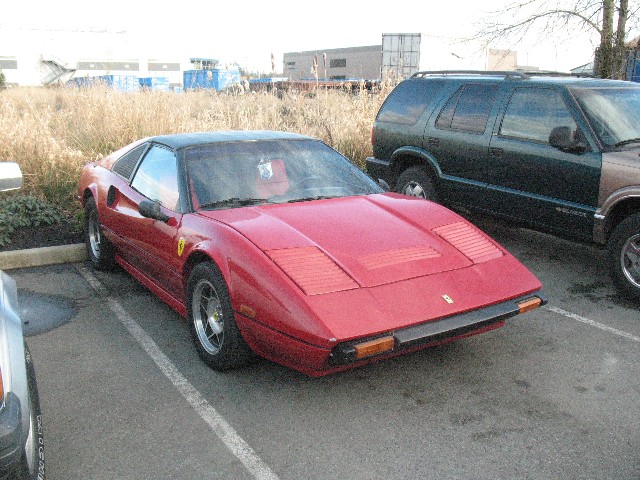 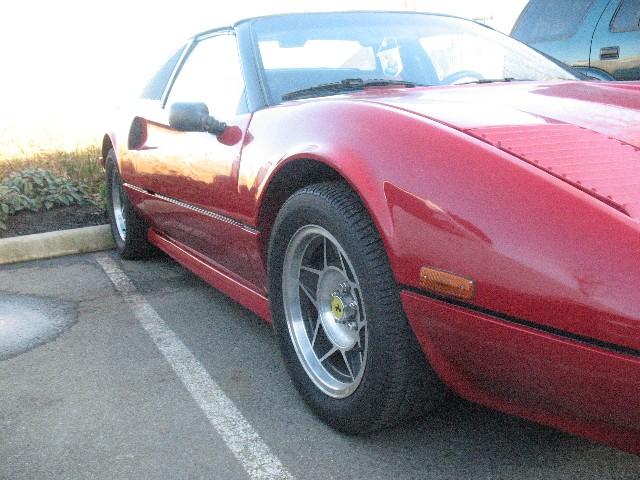 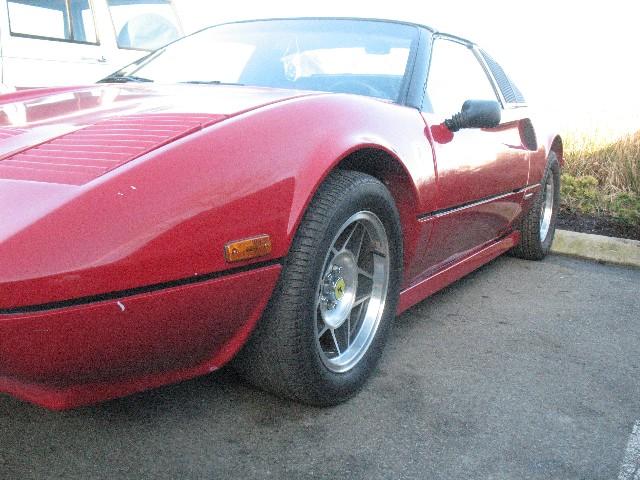 This car has had a lot of work done to it. Most good, some not so good. It has a pretty decent quality kit on it. The original builder back in the mid '90's spared no money on the build. It looks like it would have been a really good looking replica when it was first built. It has seen many years of use and it is now in need of a refresh. Which i am doing. The car was bought down in the States and sent to Aldino down there and had a targa top put into it. It was then shipped up to Canada where the previous owner ordered a new full Pisa euro interior and full gauge setup. The interior is not in it yet but I have it. He also bought the Trueleo intake and headers that I posted here over the summer. They ended being sold to fellow down in California. I planned on fixing the bumper and front air dam, match the paint colour and drive it for the summer. I got the bumper and air dam fixed within a few weeks, but then cut a deal with Sue of Fiero Conversions out in Windsor to sell her my old 328 panels I had laying around and I agreed to pull a set of moulds off the front clip and the bumper of the 308 so they would have both a 308 and 328 panels to sell to their customers. This moulding took much longer than I anticipated and destroyed the paint on the front clip. I was now into a full paint job or at least the front clip at a minimum so I said, what the heck, in for a penny, in for a pound. Fixed bumper and front air dam. 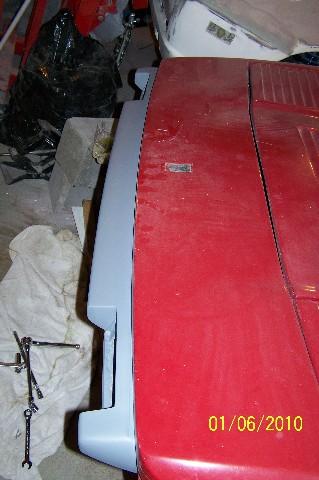 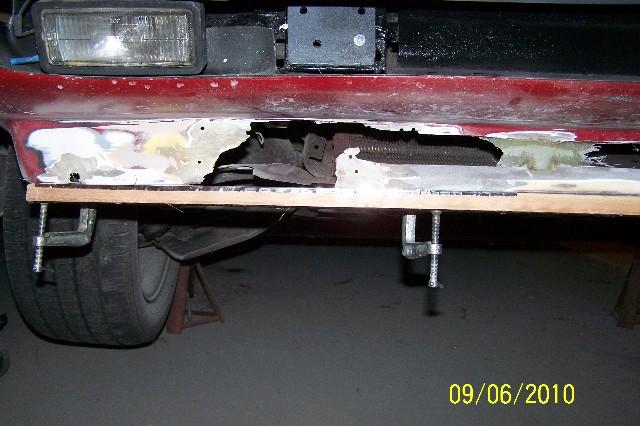 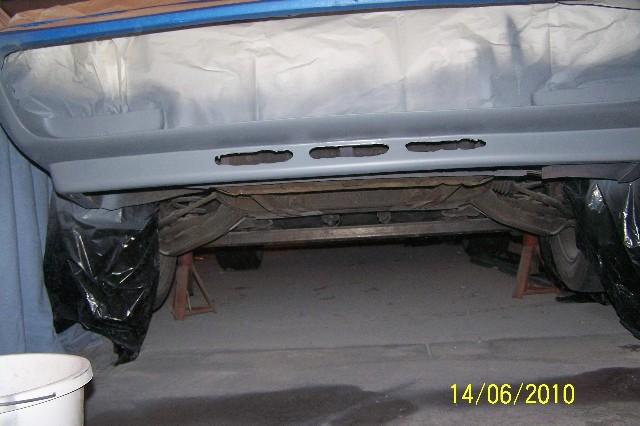 I decided to reconfigure the replica front end which I always thought was dead giveaway for being a replica with the full width front trunk lid and fenders. I decided to make a closer to oem look with top fenders being moulded into the side fenders and clip and having a narrower, more oem front trunk lid. I am about 60% complete doing the front clip conversion. I just figured out how to get pictures up so I will post a few and show the progress. taking moulds of the replica trunk so I could make the new pieces. The front clip paint was ruined anyway so I wasn`t worried about wrecking the paint on the front trunk either. Good thing as it peeled off a lot as well when I took the moulds off. I thnk the original fiberglass and bodywork when the car was first painted was not sealed properly as it pulled paint right down to the original gel coat. 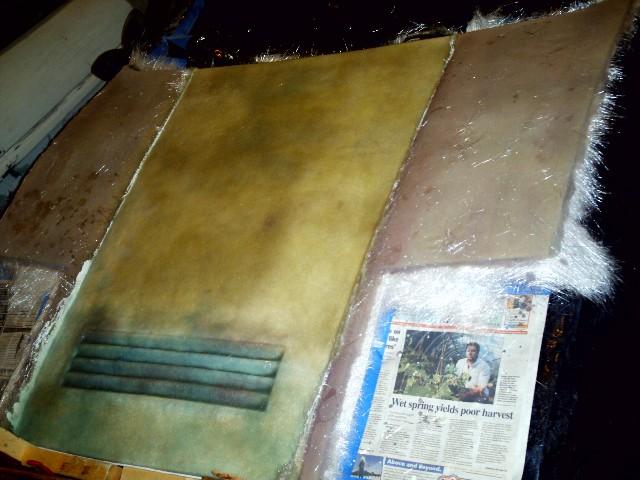 One off moulds to give me the basic shape to work with. ------------- Ferrari 308 Replica Prova 5000s Countach Replica |
Posted By: Linlor
Date Posted: 10 October 2010 at 9:37pm
I set the one off moulds with bars across the fender tops so I could retain the exact same position when I went to make the new fender tops. I turned the front clip over and aligned the moulds so that the fender tops were in the correct position and then fiberglassed the fender tops in position.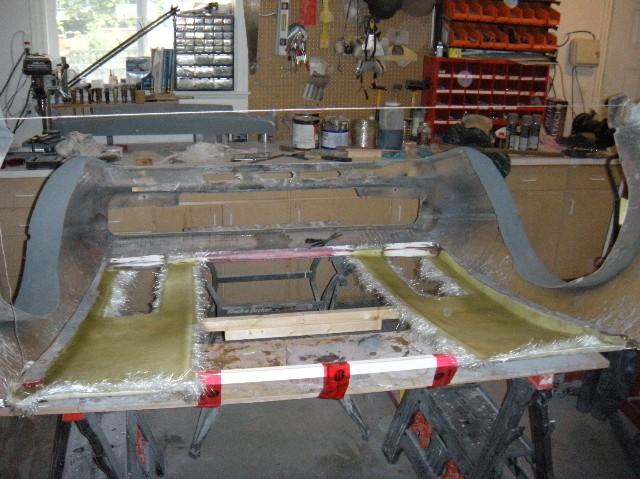 Once the tops were cured, IO took the moulds off and positioned the clip back on the car so I could figure out what to do with the new trunk seals etc. I ended up making sides to the inner fender edges and these walls come down on to two seal tracks welded in the front trunk so I can take the old trunk seal and cut it up to create a new trunk seal. the areas under the new fender tops, I plan to make metal tops that will screw on to the seal lips and seal off the outer portions of the trunk that are now open to the elements under the fender tops. New clip on the car for positioning. 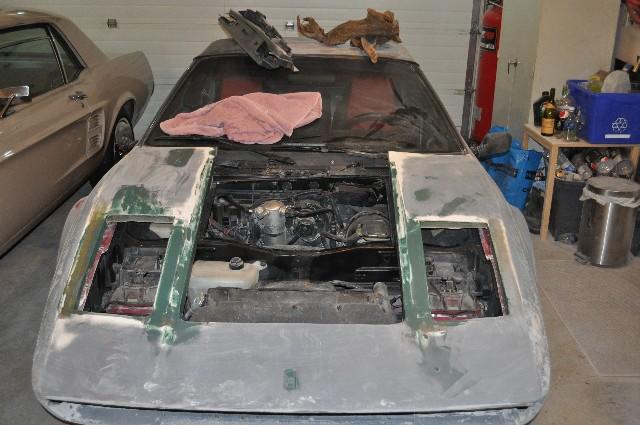 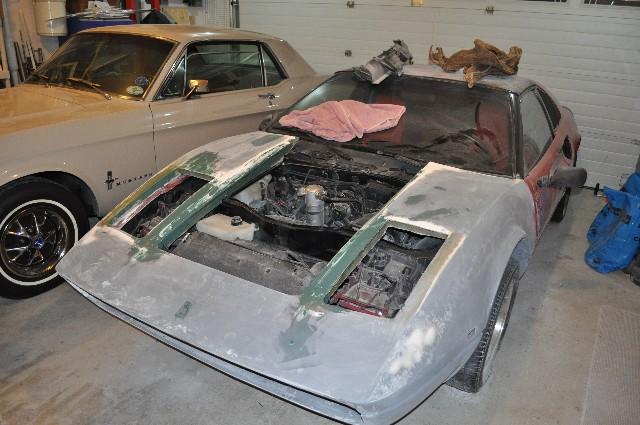 I have made the headlight openings 10 inches wide which is 1 inch wider than oem since the fender tops on the replica are about 1.5 inches wider than oem so everything still fits proportionately. I am now at the point where I have made the new trunk lid, I have cut the new seals for the new trunk position and I have retrofitted the Fiero trunk hinges to work on the now, narrower trunk lid. A few pics of the new trunk and initial metal bracing to create the proper shape. ------------- Ferrari 308 Replica Prova 5000s Countach Replica |
Posted By: Linlor
Date Posted: 10 October 2010 at 9:48pm
|
Trunk lid and metal braces. Since this picture, I have welded in cross braces and mounted the hinges and mounted the Fiero hood latch. I don`t have any of those pictures with me as I am currently sitting in a hotel room in Yellowknife killing time waiting for tomorrow to fly even farther north to Cambridge Bay for a few days of work. Front trunk lid and retrofitted hinges. 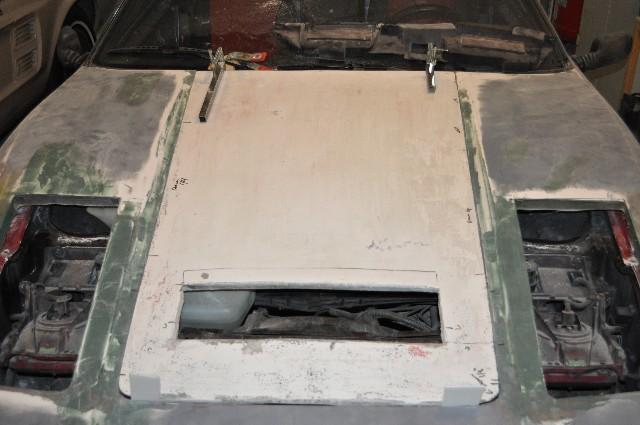 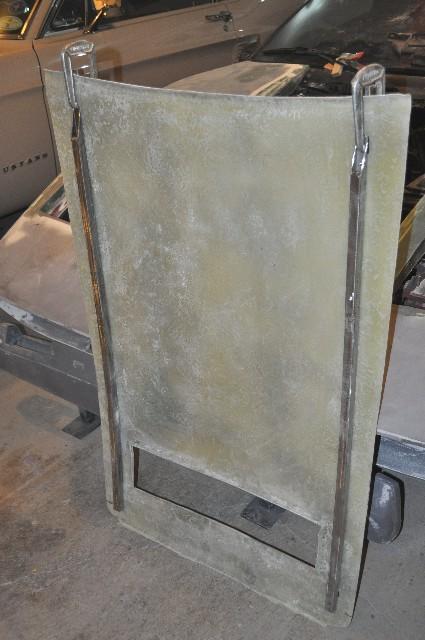  Actually,here is a pic of the new trunk seal frame. Didn`t realize I had that one as well. The portions on each side of the metal seal frame will be covered with sheet metal to seal out the elements but still allow me to get in to do repairs on the clutch and any other items on the outsides. I wil have to relocate the windshield washer tank to the centre of the spare wheel like oem Ferrari. 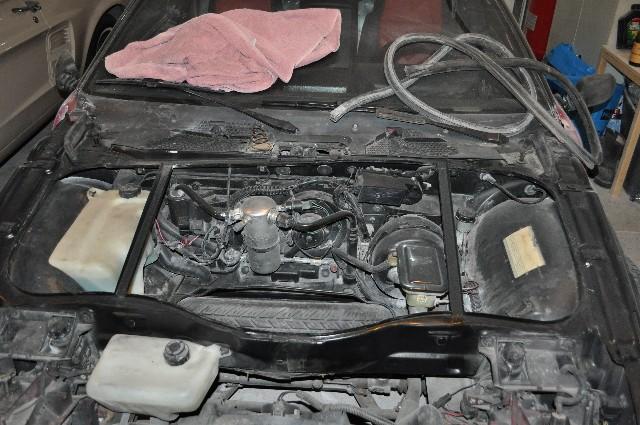 The best part is everything still bolts to original Fiero mounting points at the front and I have made two mounting points for the inner fender lips on to the new trunk seal pieces. I will have to move the headlight motors forward and down slightly but not much and the front bumper remains intact which is uncommon for kit cars on Fieros. That is all for now. I am back at it again this coming weekend when I am back from the frosty north so I will post more progress later. Cheers Don ------------- Ferrari 308 Replica Prova 5000s Countach Replica |
Posted By: Car-2-Lo
Date Posted: 10 October 2010 at 10:36pm
|
Hi Don, your project build here is refreshing and very interesting, great work, looking forward to seeing all your build thread.
Love that targa roof 
|
Posted By: Romeo
Date Posted: 10 October 2010 at 11:13pm
|
Looking good, brother! Planning on leaving the drivetrain alone, or is that going to be just as modified as the bodywork? Keep us posted! ------------- Never shift into reverse without a back-up plan. |
Posted By: Capt Fiero
Date Posted: 10 October 2010 at 11:34pm
|
All I can say is WOW that is an amazing amount of work, with the number of fiberglass experts in the club, I think you will be able to teach us all how to be fiberglass gods and all of us will have custom body cars in a matter of years. ------------- Capt Fiero 88 Fiero GT 5spd V6 Eight Fifty Seven GT V8 5spd. |
Posted By: Fire451
Date Posted: 11 October 2010 at 10:43am
|
that looks fantastic, i wouldn't be suprised if you get contacted by fiero308 about a front clip.. ------------- 
|
Posted By: Linlor
Date Posted: 11 October 2010 at 3:34pm
|
Romeo; I have 2 3400 DOHC's for the projects so I will put the '96 in this one and the '95 in the 355 when I get back to it. I still have the one off moulds for the front clip work so anyone is welcome to borrow them and do the same their front clip of their 308 replica. I don't plan to take an other mould from the front clip as I WANT IT ON THE ROAD. My original plan was to take this car and drive it for last summer and then coming winter, pull the panels off and stretch the frame and then begin the process of converting the car to a 288 gto. Essentially a 3" stretch to a 308 with longitudinal twin turbo engine and flared front and rear fenders and a dead sexy stance in my opinion. Ferraro took a pretty darn good looking car and made it gorgeous. Now that it has taken me quite a bit more work to get the car to where I want it as a 308, I doubt I will do the conversion on this one this year. I wil swap the motor this winter and do some interior updates etc. but I want to play with it for a while before putting it back up on blocks. As for the targa, I have a bit of a proposal for everyone. This targa top looks to be a pretty good rendition as it was done by Aldino. There is square tube reinforcing underneath done fairly well and the targa top area looks good but will need some work around the seals. I have ideas for the seals as well but I am not there yet. I don't really care for the targa to be honest. Yes, it looks great when off and has the cool factor but I am way too fussy and would spend a loot of time and energy to make the targa fit perfect and be 100% water sealed etc. I know me and I wouldn't be happy until it was there. I will swap out the frame of this 308 with another one that someone has that is a hard top with a 5 speed Isuzu or Getrag (preferred) transmission. Engine is not as important so can be higher mileage as I am replacing anyway. (My 3400 DOHC is pretty much ready to install except for finishing my headers.) No rust or easily fixable rust. My ultimate goal is to have the 288 GTO replica so it doesn't have a targa and I want to slightly slope the roof line back and down maybe 1-2" maximum to get a better flowing roof line than stock Fiero. I have an idea that I can do a similar chop as I have seen but not push the front windshield portion down as normal choptops are doing. I would cut the rear B-pillar at 1" at the front edge and slightly more at the back edge, cut the triangle into the front A-pillar as normal and then pivot the roof back to match back up to the bottom of the B-Pillar that was cut. I would then rotate the side window tracks the same amount of angle so that the side windows still go up and down in the same tracks, but the rear B-Pillar is slightly sloped back, the roof line is slightly sloped down and |I don't have to swap out side windows. the amount of inward angle to the B-Pillar should still allow me to get a good seal on the side windows if I add a bit more curve into the window track. If I could get an '88 to all this too, that would be my ultimate as well as it has the updated suspension but they are very few and far between up here. Having said all that, I would work with the person to strip all panels off the swapper and mount the panels back onto the targa Fiero so they could either drive away or work on from there. The 308 has newer brakes before it was parked for rebuild, lots of engine work done and it runs well once warmed up but hasn't run regularly for a couple years so needs a tuneup and probably some sensors cleaned and an ALDL run to check for codes. It is 2.8 with 4 spd. I am pretty sure it is an '85 but not 100% sure. I can confirm when I get home. If I can get the swap done before I paint, thatwould be my best scenario. Otherwise, I will deal with the swap when I am ready to swap over to a 288 GTO in the future. I can also always get another Fiero and do all the work to it over the winter as well and then swap the body over if no one bites but thought I would offer up a targa to everyone here first before going that route or waiting. Thoughts and feedback? Don ------------- Ferrari 308 Replica Prova 5000s Countach Replica |
Posted By: Romeo
Date Posted: 11 October 2010 at 4:49pm
|
Ooohhh, should sound very exotic when it's done. ------------- Never shift into reverse without a back-up plan. |
Posted By: Fiero308
Date Posted: 11 October 2010 at 4:59pm
|
Hi Don,
Just caught your thread. It looks like I have the exact same kit see http://www.westcoastfieros.com/forum/forum_posts.asp? TID=402&PN=1 Unfortunately I haven't updated the thread. At present Dr. Fiero is adding a turbo to the completed SBC 383 installed in the thread. To accomodate the increased HP we have switched from the Pontiac G6 stick to an automatic transmission setup. Seeing your front clip setup I definitely want one. Can we work on a deal. We are also fabricating a new rear deck to accomodate the new turbo etc. I would love to get together with you and the good Dr. as I have a lot of spare parts up for barter Hugh |
Posted By: Linlor
Date Posted: 11 October 2010 at 8:08pm
|
Hey Hugh; I remember reading through some of your build thread a while ago but I did not get through all of it. I will definitely have to go through it all. You are more than welcome to my mould setup for your car. I don't plan to pull any more moulds off mine so we can meet up next time I am over in Vancouver for work and I will bring the moulds over for you.e not great by any means but they give the basic shape you need to start the rest of the build. The trunk mould is the worst as the bottom near the front clip was pretty knarly when I pulled the moulds off the buck. I just left it as it was and put gel coat down knowing I was going to be doing a lot of sanding and shaping anyway by the time I was done. I do plan on making new headlight buckets to replicate the oem ones and I may pull moulds from them but not sure yet. I did a set of moulds from the 355 and planned on selling those to other 355 builders but i just don't get the time out in the garage to make a go of it. I have probably 10+ people wanting 355 headlights as well but again, no time. Anyway, I'll touch base before I am over in Van again and we can meet up. Cheers Don ------------- Ferrari 308 Replica Prova 5000s Countach Replica |
Posted By: Patrick
Date Posted: 12 October 2010 at 1:40am
|
Don, it's been awhile since we met up at the Tim Horton's on Terminal Avenue back in June. Glad to see you're finally posting about your projects here. I knew the fellas in the club would be pretty excited when they found out about all the neat stuff you've been doing.
|
Posted By: Patrick
Date Posted: 13 October 2010 at 10:25pm
|
Don and Hugh, is it a "Stinger" kit that you fellas both have? If so (or even if not so), you'd probably enjoy http://www.fiero.nl/forum/Forum1/HTML/083063.html - This thread at Pennock's by Bloozberry, a fellow Canadian in Nova Scotia who's one talented guy around Fieros.
|
Posted By: Linlor
Date Posted: 14 October 2010 at 12:10pm
|
Both of our kits are not Stingers. These look like they were taken from a Mera. I have been reading the Bloozeberry North* rebuild thread. Thanks don ------------- Ferrari 308 Replica Prova 5000s Countach Replica |
Posted By: Patrick
Date Posted: 14 October 2010 at 12:16pm
|
Yeah, I began to suspect that when I noticed the door handles on the Stinger. Strange looking things.
|
 Linlor wrote:
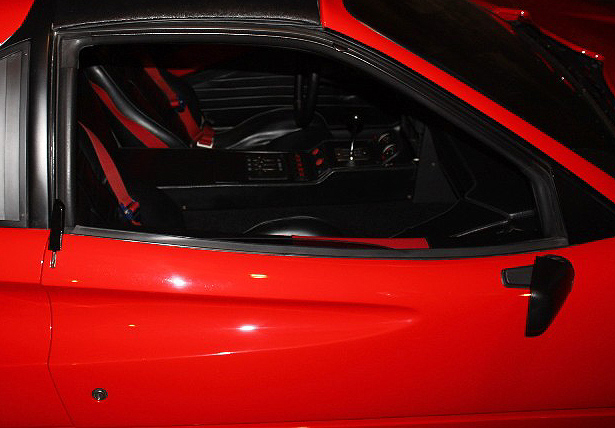
Posted By: Linlor
Date Posted: 14 October 2010 at 6:19pm
|
Actually Patrick, the door handles on Bloozeberry's car are pretty much corect oem. The rest of our replicas use the original Fiero door handle moved down to a slot in the body line where you push your fingers through the body line and pull up on the handle. oem Ferraris have the same handle setup as Bloozeberry's. ------------- Ferrari 308 Replica Prova 5000s Countach Replica |
Posted By: Patrick
Date Posted: 14 October 2010 at 6:44pm
|
Doesn't negate the fact those door handles are still strange looking things.
|

Posted By: Linlor
Date Posted: 18 October 2010 at 1:56pm
|
Well, Got a bit of work done last night after returning from a week away. I am into the headlight buckets now. Because the fender tops are wider on the replica than they are on an oem 308, I have to make new headlight buckets to match the holes I have in the fenders that will get everything looking proportional. I got the frame bonded into the trunk lid and cleaned up the lid a lot and got some sanding done so tonight I will get back into more sanding and edge matching and then put some more time into the headlight buckets. I will be using 7" round headlights as the opening is 9" so the headlights need to be a bit bigger than oem so fit into the buckets,. I also need to source some round headlight bucket containers or whatever they are called to mount the headlight into and then mount that into the bucket with adjustment screws. That won't be hard as I have already done that with the 355 build where I took oem 355 buckets and made moulds and retrofitted Cavalier headlights into them so I know how to do that work now. BTW: I bought Dave's 1988 Fiero so I can now have the '88 suspension in the car without the targa top. Looking forward to coming over to Van to pick that up and strip the panels off to start the install of the 3.4 DOHC..... If Hugh and I can come to an agreement, I might also have a 6 spd in it...... More to come. Don ------------- Ferrari 308 Replica Prova 5000s Countach Replica |
Posted By: Fiero308
Date Posted: 18 October 2010 at 4:21pm
|
Oh don't you worry you'll get a 6 speed in it. lol
Hugh |
Posted By: Linlor
Date Posted: 28 November 2010 at 1:44am
|
I haven't posted here for a while so I thought I would update the 308 project. I have been working a lot on oem replica Ferrari 355 headlight buckets lately but in my down time, I have been progressing on the 308 build. I have also been traveling quite a bit fr work and will be for most of December..... Bummer. I have been concentrating on the headlights trying to figure out how to get the 7" round headlights to fit in properly and work., I came up with using the stock Fiero headlight motor and 6x9 headlight mount as a base and mocked up some plywood and foam to see how everything fit together. I moved the motor outward a couple inches and forward 3/4" to get it in the right spot and then mocked up a round headlight ring on a piece of thin plywood to see where everything worked out. It turned out very nicely. I need to build sides and bottom and a proper front fascia now but I found out that the spray foam for your windows isn't eaten away by fiberglass so instead of buying very expensive 2 part foam, I will head over to Rona or Home Depot and pick up a couple cans.... This foam is not as firm as the 2 part though so you have to take that into account.... Some mock up pics. Fiero Headlight Motor Mounted outward and forward a bit. 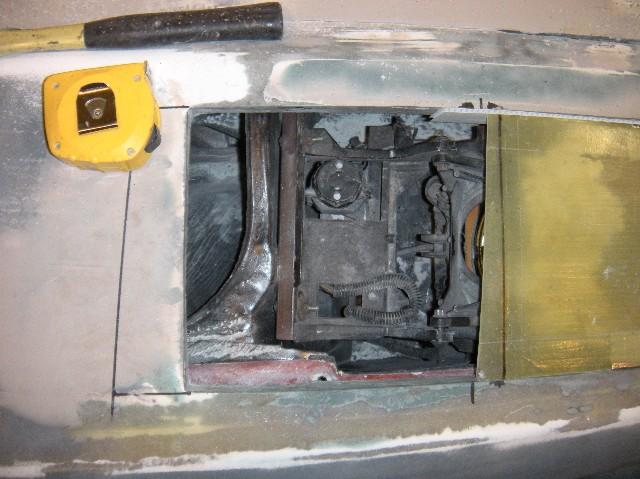 Mocking up the headlight. 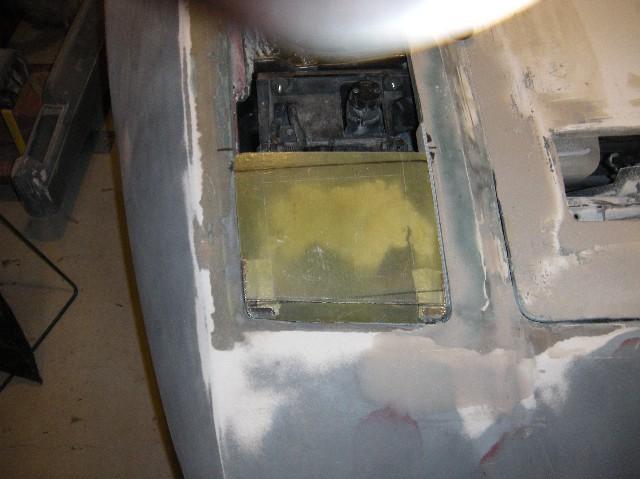 Open position front view 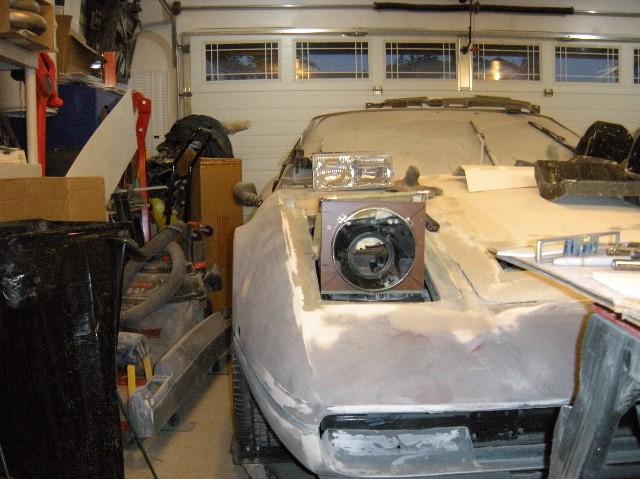 Open Position side view 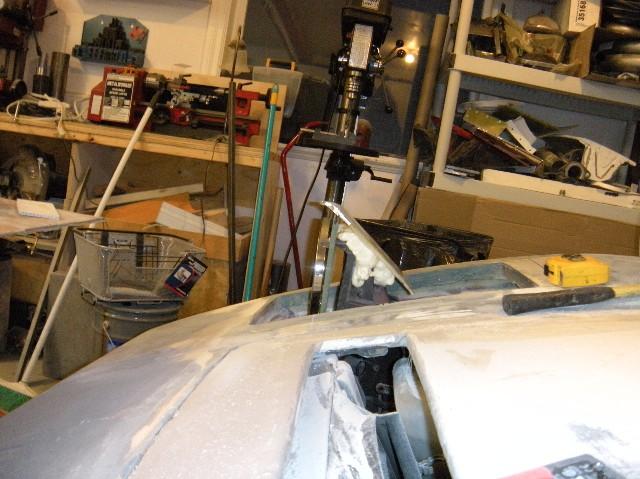 The pics above are from a few days ago. I took the top off to glass in the front angle tonight so I can finish fitting the tops to the Fiero mounts tomorrow night. (Grey cup tomorrow so no work during the afternoon....) I also went after the front clip and the driver's side of the car today to start cleaning up the nicks and bangs from the 20 year old paint job.... I go tteh front clip into priomer to see where ai astil need to so some work to get it all smooth. It looks really good and has motivated me to keep going. Unfortunately, I start my busy month on traveling on Monday..... A few more pics of the front clip in primer. Some edges and more sanding needed but it is looking very nice. 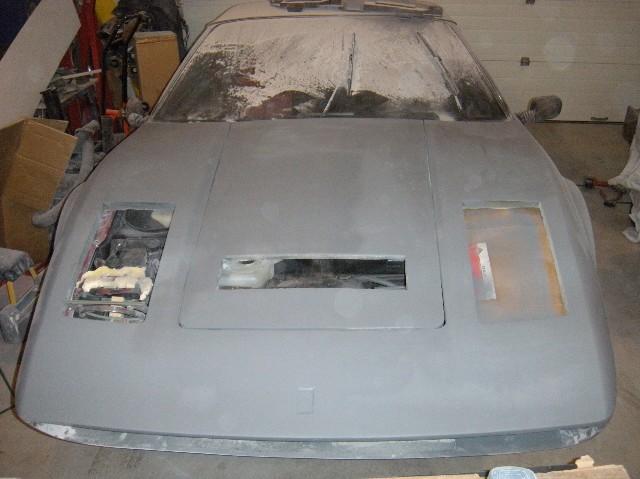 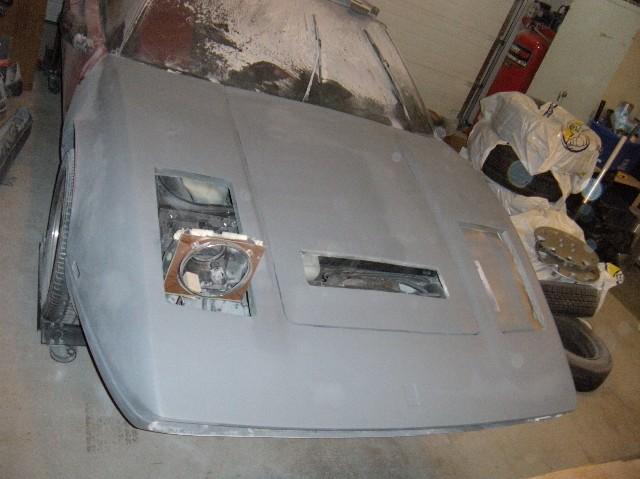  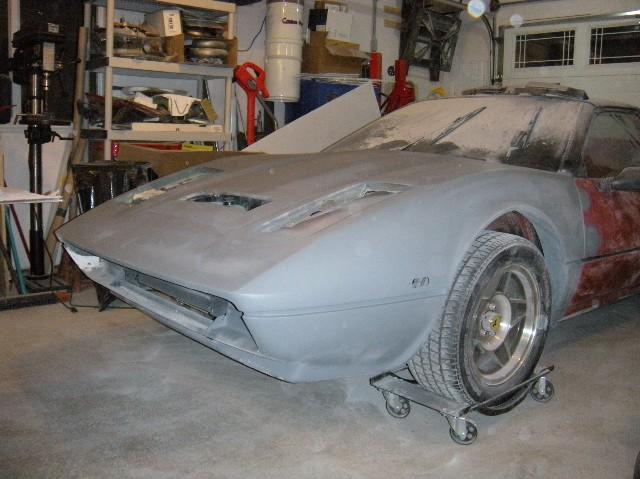 I most likely won't be getting any more significant progress until the New Year now. Take care all. Cheers Don ------------- Ferrari 308 Replica Prova 5000s Countach Replica |
Posted By: Linlor
Date Posted: 19 January 2011 at 1:52am
|
Once again, I have been away from this forum. I do most of my updating on the madmechanics.com forum so don't get here much. I have been busy on the 308 headlight sand have pretty much figured them out. I will be going with the smaller 5.75" headlight as it doesn't need to lift the headlight bucket as far out of the body so easier to configure to not interfere with the fender louvers. I found that my current frame with the targa top still has way too much flex to it so I still plan to swap in the '88 frame I got from Dave. I will have a cheap targa top Fiero for anyone here fairly soon. You will need to reinforce the frame some but I can show you what needs to be done. I just don't feel like doing it..... I plan to swap the 88 panels over to this frame including interior as the '88 is in great shape and I have a 308 replica interior. A few pics to show the updates. If you want to see more, you can head over to Madmechanics forum and see my updates there as well. Cheers Don Both headlight buckets installed in the car for fitment confirmation before making the headlight mounting plates to go in them. 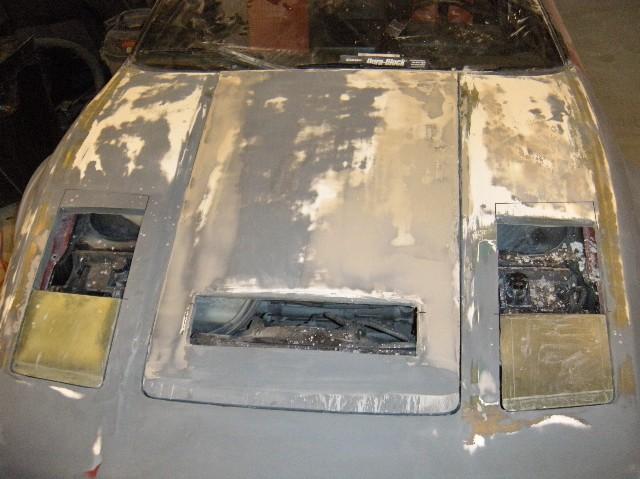 A mockup of the fascia to see what it will look like with the smaller headlight. I just used sealing expanding foam to get an idea. I have proper expanding foam to use when making the final bucks to pull fascia moulds from. 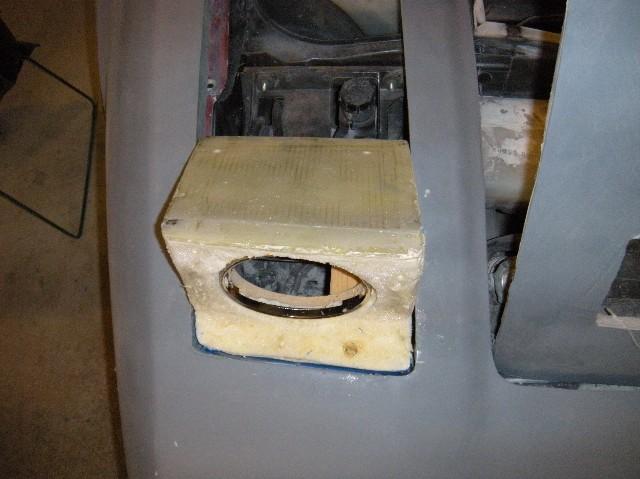 The start of the headlight buckets. These will be cleaned up and cut to shape once I mount both back on the car for fitting. The black plug coming out the side will be extended to use as a stop for up and down. You can also see an edge of the Ferrari 355 headlight buckets I am working on to be able to produce replica headlights for the 355 guys. Lots of projects going at the same time. 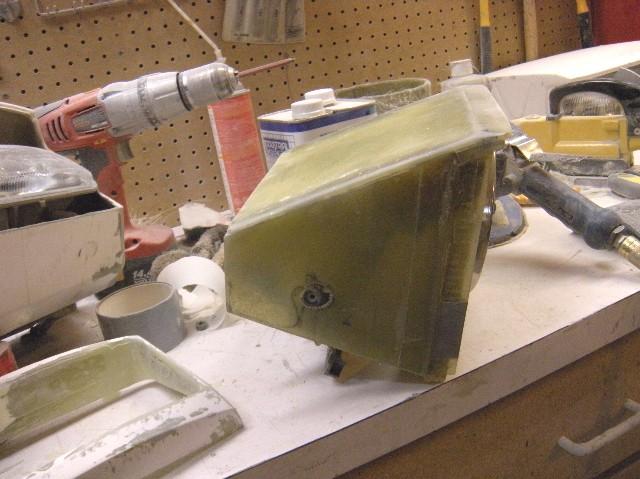 ------------- Ferrari 308 Replica Prova 5000s Countach Replica |
Posted By: Linlor
Date Posted: 17 February 2011 at 4:21pm
|
A few more updates and progress. I have the passenger side headlight bucket fascia in foam and a couple layers of bondo on it in order to pull a mould so I can get a fiberglass piece to clean up. I will be doing the driver's side tonight and I don't plan on having the headlight in the driver's side to pour the foam for the fascia as I found the headlight in the way. I'll cut the headlight hole after I get the fascia ready for bondo. I have also cut more aesthetically pleasing fender vent holes and working on the passenger door to fix the broken fiberglass. I also started on some moulds of for the side scoops so that I can have more accurate side scoops instead of the flat holes the replicas have. I plan to mould the existing scoop and then pour some foam on the mould and shape more accurate scoops and then pull a piece for the mould and then graft that in. I can do the grafting when I take the body panels off to move over to the '88 frame. A few pics. Cheers Don Headlight pics 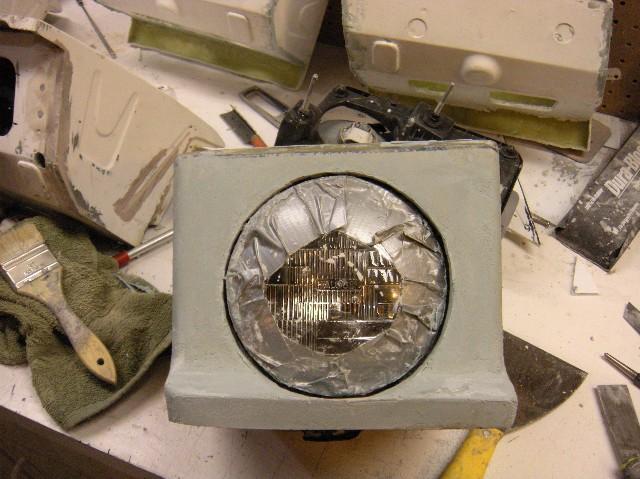 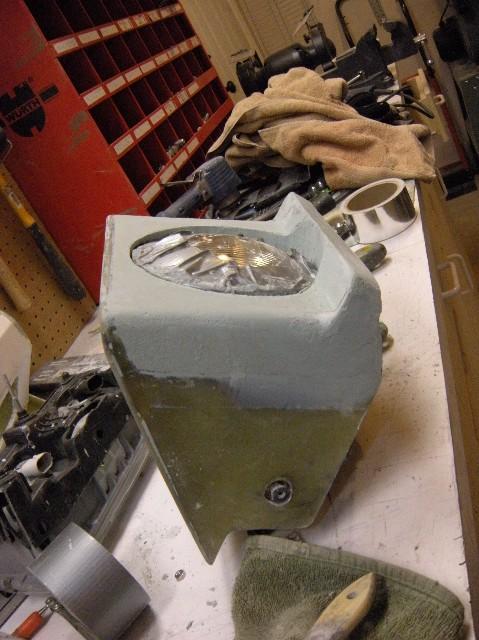 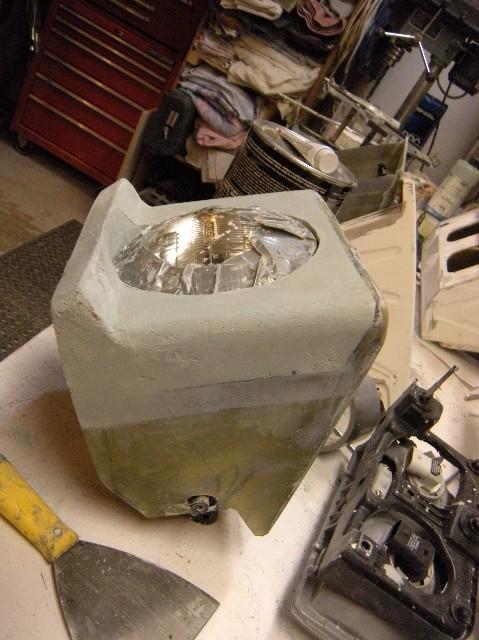 ------------- Ferrari 308 Replica Prova 5000s Countach Replica |
Posted By: beken
Date Posted: 17 February 2011 at 4:23pm
|
Looks like it's coming along. Slow but surely. ------------- 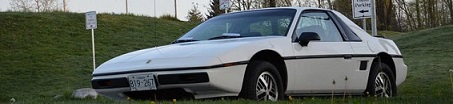 Beken (aka Ken) - bekentech@westcoastfieros.com Original and still the owner of an 85SE 2M6 4spd |
Posted By: Linlor
Date Posted: 17 February 2011 at 4:26pm
|
The fender vent holes and the moulds for the side scoops. I still need to add in some 45* plates at the top edges which will effectively become the top most vent stringer or whatever they are called. Cheers Don 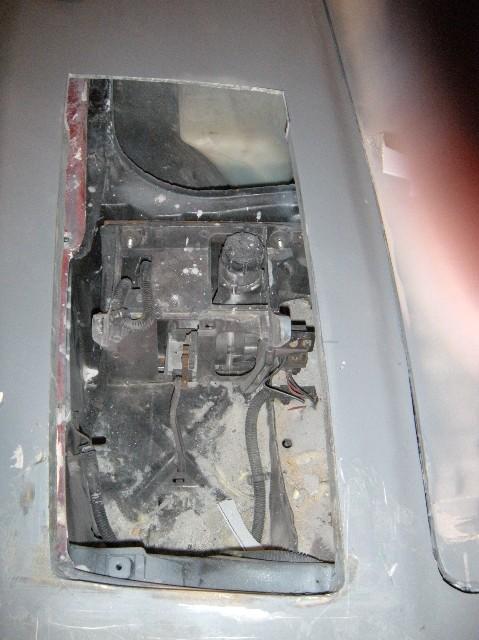 Pics stopped uploading. I'll try again in another reply. Thanks Don ------------- Ferrari 308 Replica Prova 5000s Countach Replica |
Posted By: Linlor
Date Posted: 17 February 2011 at 4:28pm
|
Nope, pics stopped working for me. I'll try later or maybe wait til I have the moulds off the car and the foam shaped. Don ------------- Ferrari 308 Replica Prova 5000s Countach Replica |
Posted By: Nexus
Date Posted: 19 February 2011 at 3:23pm
|
keep the updates coming!!
------------- Charlie 84 SE |
Posted By: Linlor
Date Posted: 01 March 2011 at 12:32am
|
I have been quiet but busy..... I finished off the foam and bondo work on the headlights fascias and pulled the passenger side and rough trimmed to see how it looks in the car. Looks pretty darn good in my opinion..,,,, Just need to clean it up and make a proper circle for the headlight with recesses for the adjuster screws and I am good to clean, sand and prime.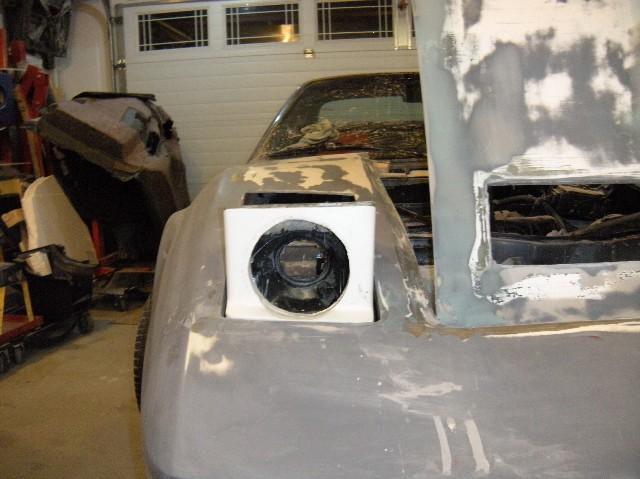 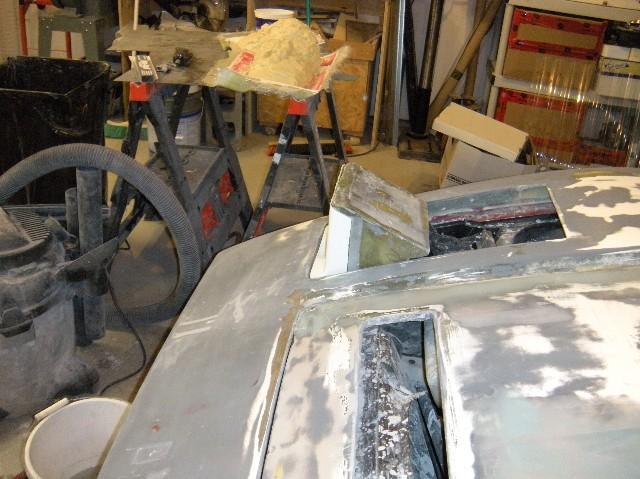 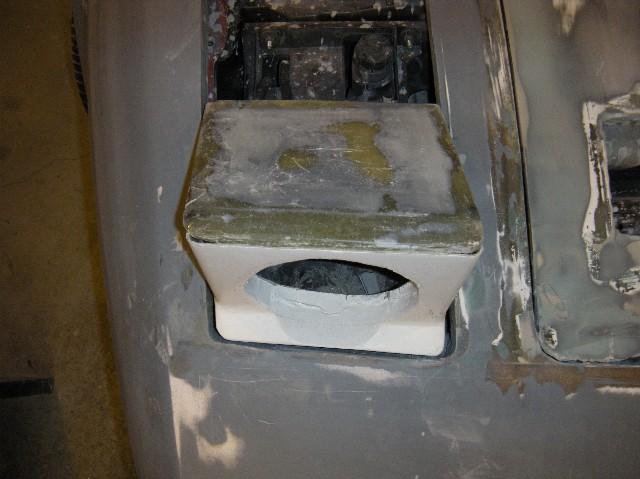 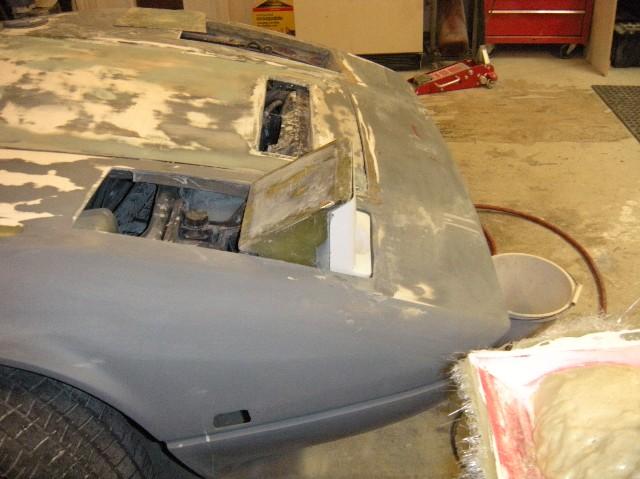 I have one off or few use moulds built for the fascias but I have not built moulds for the headlight buckets at all. Not sure I will unless I get a bunch of people wanting them for retrofits into the Fieros or something. I can still build Hugh his headlight buckets if he wants to go ahead with the front conversion with someone (maybe me if I get mine done and out to paint by April) but the moulds won't do much more than a few parts and then be unworkable. They were really meant to be one offs so I could get the fiberglass to finish up the shapes a bit easier than sanding and bondoing foam. I also found a what seems to be a great body guy to help me get the car prepped and then painted. I have a lot of waves in the older fiberglass so he showed me how to work through all the waves properly and then some other tricks. I plan on doing the major grunt work like sanding off all the old paint and then have him come in and make it pretty and get it into paint for me. I have also been hard at work on retrofitting 355 Ferrari headlight buckets to accept Cavalier Headlights so us 355 kitcar guys don't have to pay $1500 each for a bucket and $1000 each for lights..... A couple pics of they progress on those  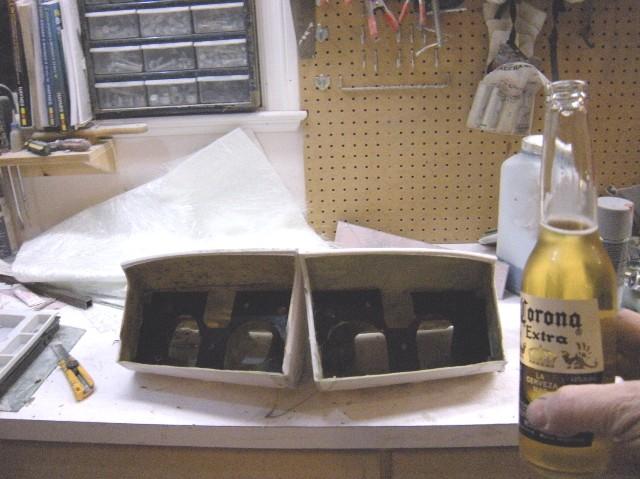 I took oem 355 headlight buckets and moulded them and then retrofitted Cavalier Headlights into them so we can pay $130 instead of $1000 for replacement headlights. Also about $600 for a set of the finished buckets rather than $1500 each. Cheers Don ------------- Ferrari 308 Replica Prova 5000s Countach Replica |
Posted By: Nexus
Date Posted: 01 March 2011 at 4:57am
|
Coming along nicely!! Great work so far ------------- Charlie 84 SE |
Posted By: Dawg
Date Posted: 01 March 2011 at 5:13pm
|
You haven't forgotten about the hubs you bought have you? They're right on my bench waiting for ya. The Dawg ------------- You dream it up....I'll make it |
Posted By: Fiero308
Date Posted: 01 March 2011 at 8:43pm
|
I still most definitely want to do the front conversion on
my car. So does this mean I can pencil you in for May?
|
Posted By: Dawg
Date Posted: 01 March 2011 at 10:19pm
|
Once Don picks up his hubs and drops off a set of rotors I'll have some fresh meat to play with....:) The Dawg ------------- You dream it up....I'll make it |
Posted By: Linlor
Date Posted: 03 March 2011 at 8:36am
|
Dawg; I haven't forgotten, just did not get over to Van like I thought I was in the past couple weeks. Tell you what, if someone else wants the hubs you have waiting for me, sell them and I will get my hubs over and you can work those down for me. I have a spare set of 84-87 front rotors so I will get those over to you when I can and then once I have them installed with the new rotors, I can send over the ones currently on the car so you have another set to sell. I am now changing up contracts as of yesterday so I won't be getting over to Van as much as I would have staying with my other contract. I will have to see when I can get over there or pay you for shipping on Greyhound or something. Talk to you soon. Don ------------- Ferrari 308 Replica Prova 5000s Countach Replica |
Posted By: Dawg
Date Posted: 04 March 2011 at 12:22am
|
Ok Don. Thanks for that. If I get the chance I will sell them and we'll square up at a later date. I only sell these hubs on an exchange basis. So if I was to sell this pair, I would then have a set of rotors to transform. So I should be able to maintain a finished set on the shelf. Alternately, we could look into the Greyhound costs. PM me the closest station near you and I'll try and get the information. Armed with this, you can decide what you would like done. I'm easy either way. No worries. Cheers, The Dawg ------------- You dream it up....I'll make it |
Posted By: Linlor
Date Posted: 08 March 2011 at 7:00pm
|
Got both fascias done and sitting on the buckets in the car. the driver's is too far forward as I haven't trimmed it yet so it is sticking up too high. I will have to trim some of the front bumper frame off under the buckets area to get room to have the lights go up and down. I also bonded the rear section of the Fiero roof to the sail panel as well as made some side plates to look more oem with the side sail panel vents. On oem 308's the front section of the vents is part of the body not the vents and on replicas they are part of the vents. I cut one off and bonded it to the frame and I am now filling in the gaps with fiberglass and cleaning it all up. Working on finishing up the front fender vent holes as well and then into a LARGE amount of sanding to get all the old paint off so we can straighten all the panels out and put some colour on. A few pics. Don 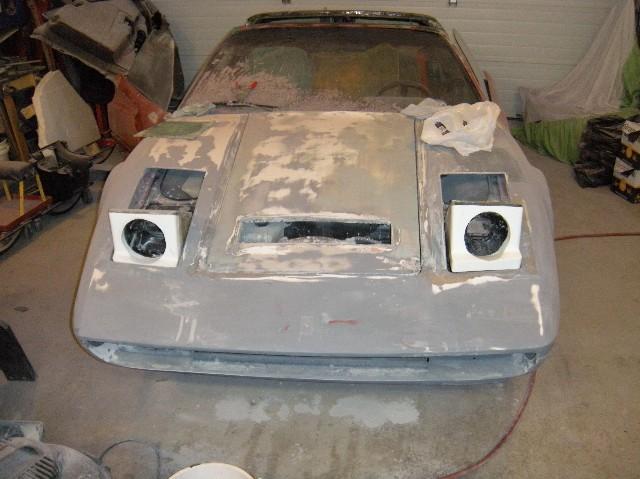 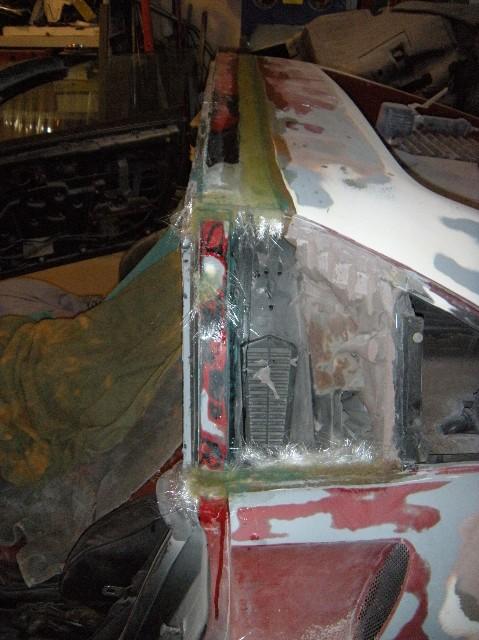 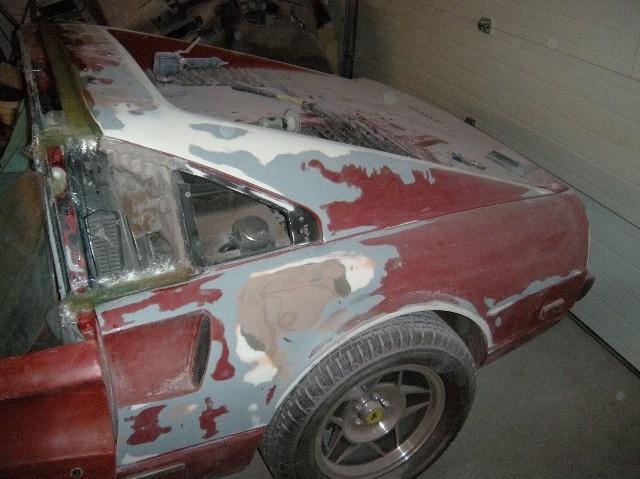 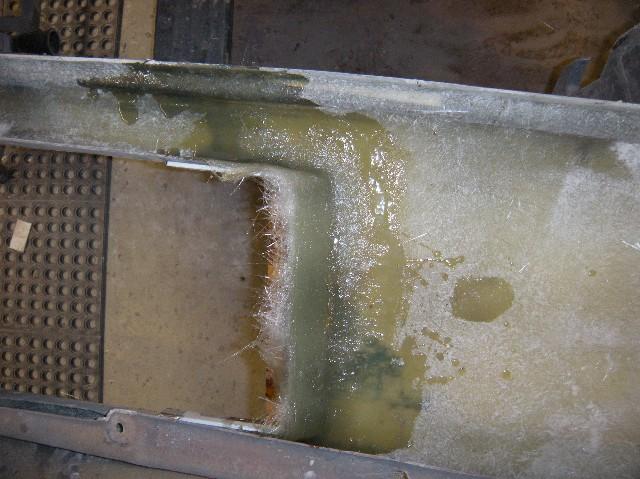 ------------- Ferrari 308 Replica Prova 5000s Countach Replica |
Posted By: Fiero308
Date Posted: 08 March 2011 at 8:40pm
|
Don I have to tell you that is some beautiful work. Keep
coming with the pictures. Hugh |
Posted By: Dawg
Date Posted: 08 March 2011 at 10:47pm
|
I agree. Everyone here loves to see creativity in action. It's inspiring! Keep it up Don. The Dawg ------------- You dream it up....I'll make it |
Posted By: Linlor
Date Posted: 09 March 2011 at 12:20am
|
Thanks for the replies guys. Always good to hear someone in interested in following the build. It has been a lot of fun for me so I like to share. A quick update. I got the moulds off the fender vent lips and cleaned them up quickly and tossed a bit of primer on them to show the definition all in one colour. I will have to sand it all off again.... sigh  but it is a good start to to see what the end product might look like. but it is a good start to to see what the end product might look like.Also got the last side glassed for the 355 headlight bucket fascias so I will be concentrating on those for the next couple days to get a set out to a guy waiting for them. He is my guinea pig so I can see how it will all look and work on someone else's car before I go into high gear and make a bunch of sets for waiting folks. Found a new location for the windsheild washer container as well since the fender now covers it up in its original position. In the spare tire. I will make up a bracket to mount it solidly in there and still be accessible for filling and removebale if the spare is every needed. More to come. Cheers Don A few pics 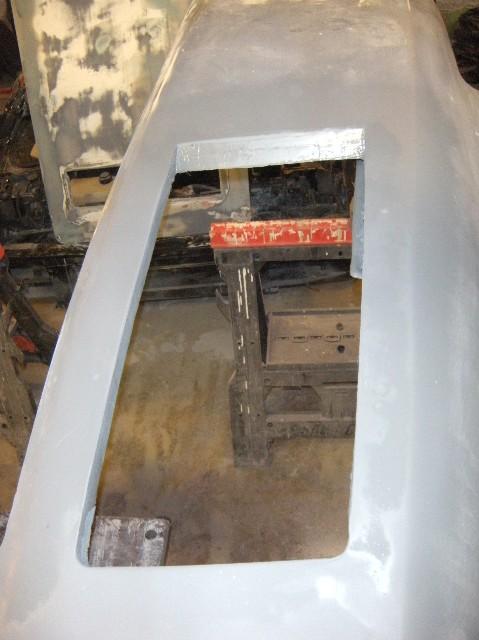 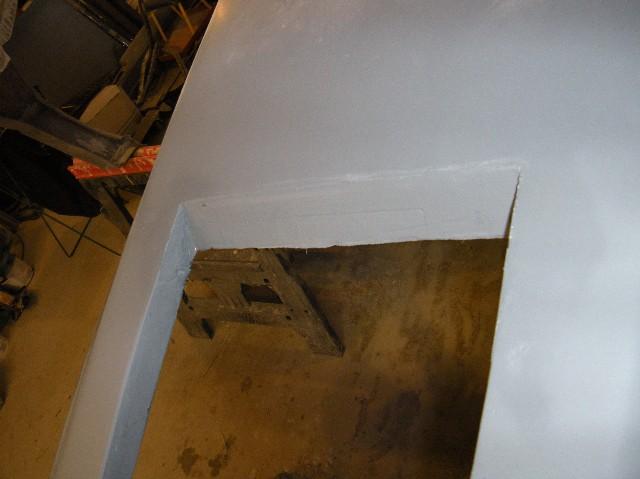 Definition shot of the lip 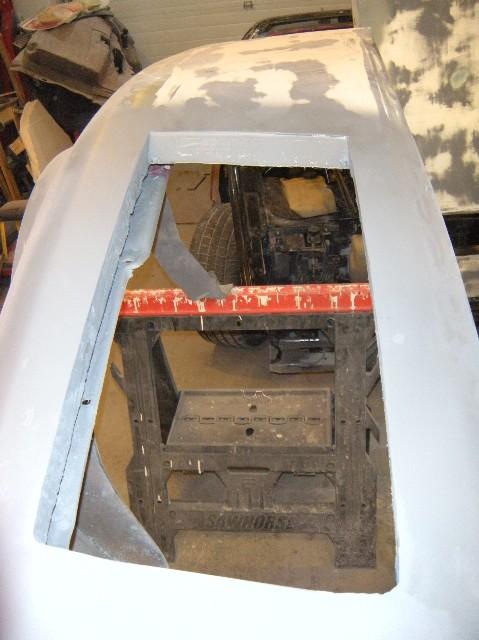 Washer Jug New Location 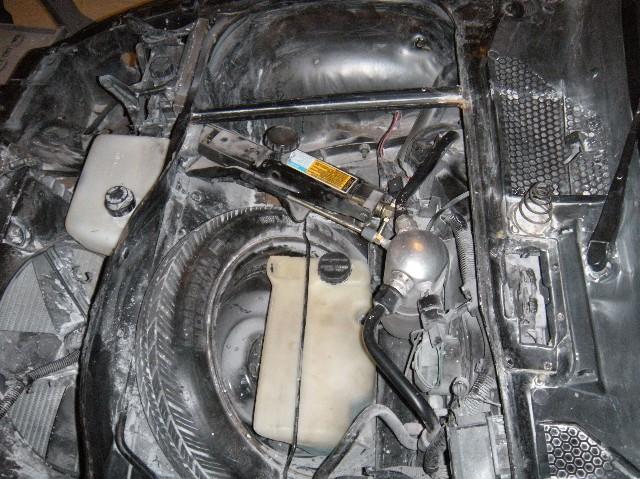 Hood by itself on the car. 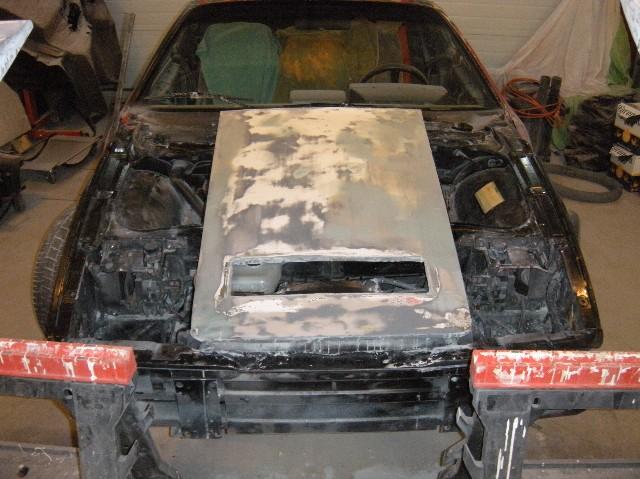 ------------- Ferrari 308 Replica Prova 5000s Countach Replica |
Posted By: Dawg
Date Posted: 09 March 2011 at 10:08am
|
I'm curious. Does the whole top tilt? Otherwise, how does one get to the master cylinder and so on? I've been throwing around the idea of creating a front end tilt kit. Maybe a back end kit also. I've always thought it would make getting to the motor so much easier if the bodywork was out of the way. Cool factor would triple also....:) The Dawg ------------- You dream it up....I'll make it |
Posted By: Car-2-Lo
Date Posted: 09 March 2011 at 10:25am
Don, thanks for posting pics, you have inspired me to do the same with front hood, but mine will be a bit wider. 
It's a shame Hugh doesn't post any pics
|
Posted By: Linlor
Date Posted: 09 March 2011 at 2:39pm
|
Dawg; The front clip doesn't tilt. The brake master is fine as it is pretty much under the hood but the clutch is in there a ways. I can get to the clutch reservoir and use a syringe or something like that to fill the required fluid. Thanks goodness the clutch doesn't rend to need much maintenance. Car-2-Lo; I was thinking about making it wider when I started but the front clip would have had to be cut up as well to finish off the fender lines and I wasn't sure I wanted to go that much more work for 2" of hood width. If you are doing a full front rebuild on yours, you can do the same thing or just leve the fender/hood lines where they are and cut the hood out further out. The new hood will then have to definition lines versus mine where that is the break points. I am looking forward to seeing how you do yours. Cheers Don ------------- Ferrari 308 Replica Prova 5000s Countach Replica |
Posted By: 328 mera
Date Posted: 27 March 2011 at 1:51pm
|
you 're doiing a great rebuliding job? Did You install by yourself the the Targa kit? |
Posted By: Linlor
Date Posted: 27 March 2011 at 7:55pm
|
No, The targa came with the car but I am rebuilding it to work properly as it
wasn't put together very well and I am sure would leak in rain. I am doing some work to get better seals and locking mechanisms created to do a much better job. Cheers Don ------------- Ferrari 308 Replica Prova 5000s Countach Replica |
Posted By: Linlor
Date Posted: 06 July 2011 at 1:37am
Once again, long time between updates so I thought I would post a few pics. I haven't had a lot of time on the car these days as I have been building the 355 headlight buckets as well as other honey-do projects that need doing.... I am making progress though. A few pics of a set I sent out to a happy customer. I built jigs to hold everything in the right place as I secure them to the buckets and also machined proper pins for rotation etc. They fit right onto the Fiero headlight motors.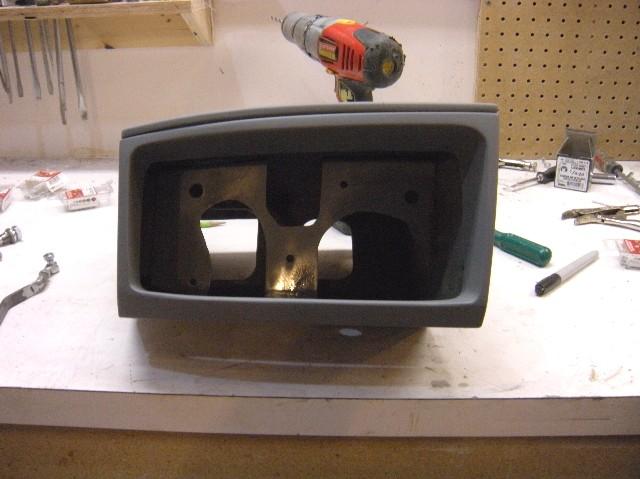 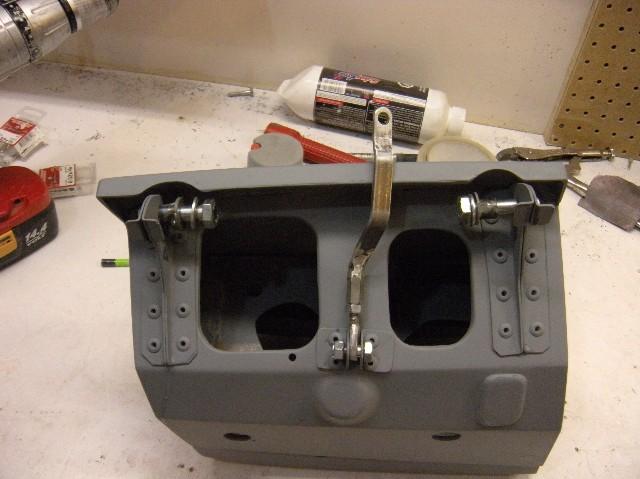 I have the 308 replica pretty much sanded down ready for a skim coat of filler to get everything smooth. This car was quite rippled so I decided to sand everything down to gel coat and start over with new primer and paint. Wherever there is grey, that is a dip in the body that I will need to flatten out with a skim of filler. I already sanded a bunch out of the gel coat but some were too large to remove. 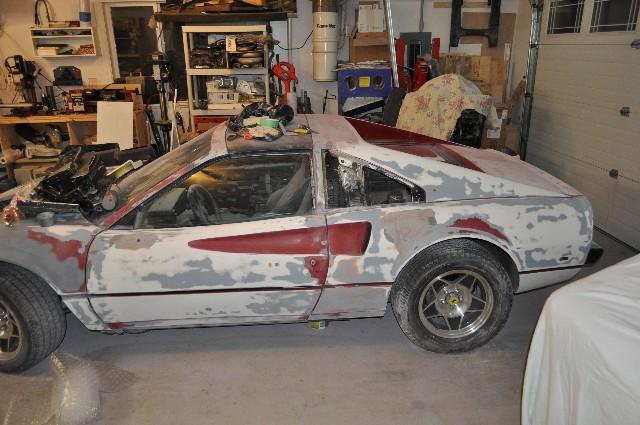 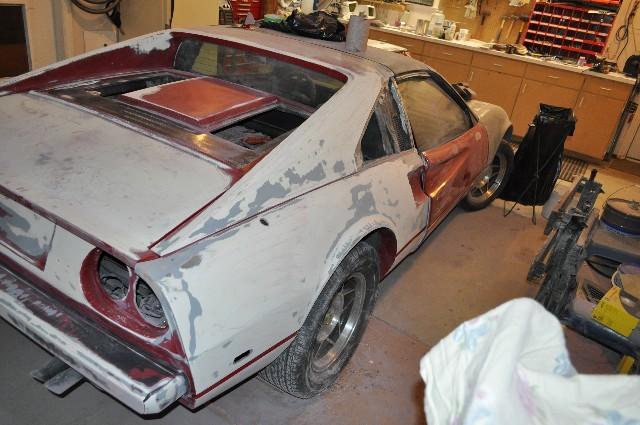 I still have the passenger door and front clip to finish up. I need to complete a small repair on the passenger door area as the skin was pulled away at the top and the door frame area needs some attention. I also moved the replica air vent back to where it meets up with the headlight tops as per oem. 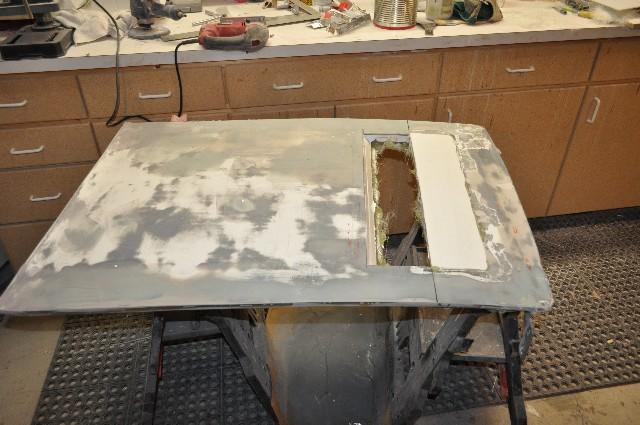 I need to sand the new glass down and then finish with a skim coat and then primer everything. I am still planning on pulling moulds off the front clip tops for Hugh but I want to make sure I have it well sealed so I don't get a reaction like I did the first time and I don't ruin my filling work like I did the first time.... I also added a piece to the front of the side louvers to make more oem looking as oem has a piece that goes up in front of the louver but the replicas have the front piece moulded to the louvers. Never liked that so I cut it off and pasted it to the car instead. 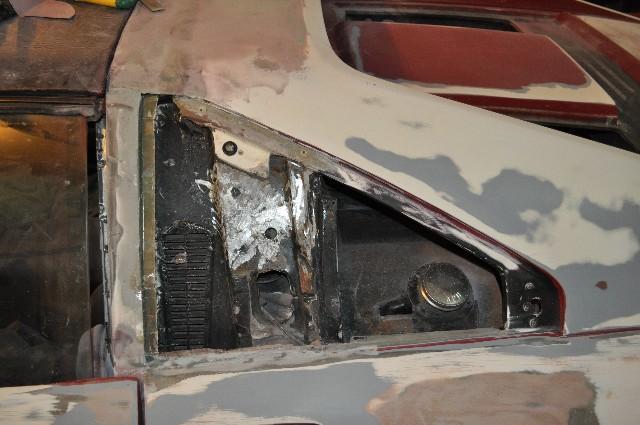 I also bonded the rear clip to the Fiero roof section so I don't have the line going along the top of the car. Headlights are all done just waiting for some time to finish sand and fit the fascias and cleanup. I have a custom extended windshield being built in Coquitlam that I will be installing after I take Hugh's moulds off. I have to adjust the back edge of the hood and fenders to match up with the new extended curve. This will really finish off the look of the car in my opinion. I hope to have the screens done in a couple weeks. That is about it for now. Cheers Don ------------- Ferrari 308 Replica Prova 5000s Countach Replica |
Posted By: Romeo
Date Posted: 06 July 2011 at 6:51am
Oh wow. You've done a ton of work making the car exactly as you want, that deserves a ton of credit unto itself. The fact it's also coming along very nicely deserves even more.  ------------- Never shift into reverse without a back-up plan. |
Posted By: Dawg
Date Posted: 06 July 2011 at 10:45am
|
Don, you obviously love doing this. Good times....eh? You really need to come by the Club when it's on the road again. Cheers, Dawg ------------- You dream it up....I'll make it |
Posted By: Linlor
Date Posted: 06 July 2011 at 12:01pm
|
Thanks for the comments guys. I will drop by one of the meetings once I have it on the road again. I really enjoy building these things up. More to come I am sure as I get closer to ready to paint. I have a Euro interior I will be putting in as well to get rid of the Fiero interior so that wil be a fun project once it is painted. Cheers Don ------------- Ferrari 308 Replica Prova 5000s Countach Replica |
Posted By: Linlor
Date Posted: 11 August 2011 at 2:39pm
|
Not much of an update lately on the 308. The time I have had in the garage has been working on 355 headlight buckets for waiting customers. I have the front hood pretty much sanded out and cleaned up now and fixed the passenger door and now to finish sanding the rest of the car and get a skim cost of bondo on it to smooth all the waves out. The extended windshield is out getting laminated so I should have it back in a couple weeks to install and then off to paint. I did take some time this past weekend though to go to Washington State and pick up the next project. A Lamborgini Countach kit. Needs a bunch of work but I plan to stop the 355 build and use that frame and parts as a base for the Countach. 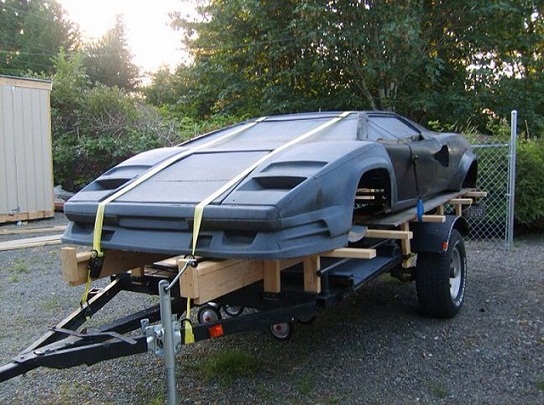 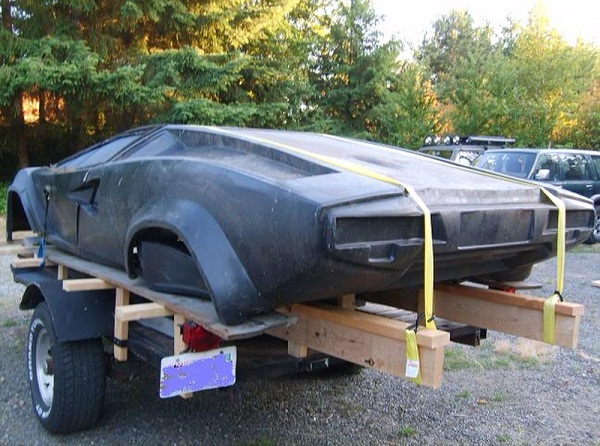 The shape is currently a mix between the 25th Anniversary edition and the 5000s. I plan to put it into a full 5000s rendition. More to come on all the projects. BTW: I will have some 18" 5x100 rims and tires for sale shortly. They are staggered sizes, 205/50/18 and 255/35/18 that were on the 355 project but I now have some Lambo wheels to put on the frame. These are FRD rims. The only pic I have of the wheels at work. I can get more pics later and I'll post in the for sale. 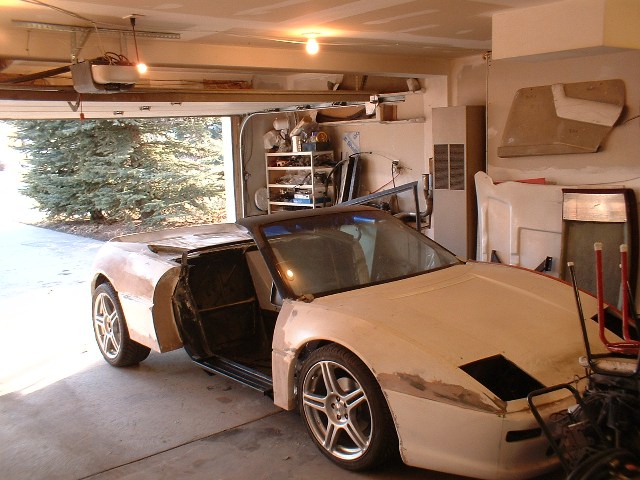 Cheers Don ------------- Ferrari 308 Replica Prova 5000s Countach Replica |
Posted By: Romeo
Date Posted: 11 August 2011 at 2:57pm
|
Aw, that Countach looks awesome. I love how flambouyant of a body it is. Hell, even the name is an exclamation males tended to say when seeing a beautiful woman in northwest Italy. Ridiculous, and awesome. Best of luck with the new project! Looking forward to it. ------------- Never shift into reverse without a back-up plan. |
Posted By: Bassman
Date Posted: 11 August 2011 at 4:25pm
|
Looking great...to have a garage...lol ------------- Brian (Bassman) 86 GT Fastback 3.2L 2013 Mazda3 Sport GS SkyActive [IMG]http://i170.photobucket.com/albums/u243/Bassman68/BassmanSignature.png"> |
Posted By: Linlor
Date Posted: 25 September 2011 at 6:34pm
|
OK; A bit of an update. I have made a couple more sets of 355 headlights and got those off to their respective owners but now I want to get some work done on the 308 so I can get it off to paint. I have pretty much finished up the front hood section and this past weekend I finished up the rough portion of the under hood seal plate etc in foam and laid up some glass mat on to it as a start. I now need to sand the mat down and throw a bit of bondo on to it so I can pull moulds of the top and bottom to go along with the moulds of the fender tops for Hugh if he still wants them. Once I have this doe, I will be making a new hood and cutting it up to fit the extended screen. I ended up talking myself into the screen as it will just look SO much better. Anyone wanting an extended screen on your Fiero, I have made glass locally. Not cheap though.... $750 each. I also got all the remaining glass work done on the car so that I can now just go around it and apply a skim of bondo and prep the panels for paint. A few pics Under the hood with the first layer of glass on it to set up for a proper seal. 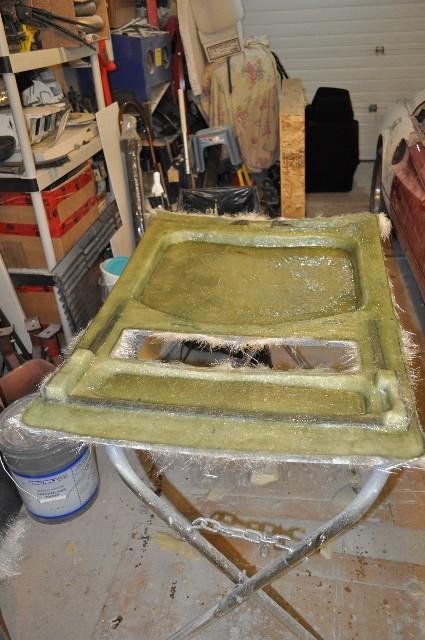 Passenger side Louver area (pics not loading any more. I'll try later) Cheers Don ------------- Ferrari 308 Replica Prova 5000s Countach Replica |
Posted By: Dawg
Date Posted: 26 September 2011 at 12:54am
|
From observing your sanding job, I can tell that there is very little material needed to get it flat. Want to save yourself a TON of work? Buy a gallon of epoxy based 2 part high build primer. I used to use PPG's K200 I think it was called. Because it's catalyzed, you can keep putting it on till you're confident the build up is enough. The real benefit is in the sanding later. It sands so well. Doesn't load the paper and makes getting a flat surface so easy. The only way to get a panel truly flat is this way because you are sanding the same material with the same density. As soon as you break through into bondo, you are sanding harder material and will be unable to keep things flat. Small amounts of "break through" are no big deal but "cow patch" is bad. Hope this helps. Dawg
------------- You dream it up....I'll make it |
Posted By: Linlor
Date Posted: 26 September 2011 at 9:12am
|
Thanks Damien; The first skim of bondo was balling up on the sand paper so I think I mixed it wrong. I will look into getting some today as I want to get this thing done. There are still quite a few waves in some of the panels though so how much will the epoxy paint fill in for me?? Thanks Don ------------- Ferrari 308 Replica Prova 5000s Countach Replica |
Posted By: Dawg
Date Posted: 26 September 2011 at 9:01pm
|
You would be amazed Don. It can fill some pretty deep waves.
Either way, it's easy to put on more if need be. Dawg ------------- You dream it up....I'll make it |
Posted By: Linlor
Date Posted: 30 September 2011 at 9:58pm
|
Thanks Damien; I will go on the hunt for it tomorrow. Hopefully it is available in Vic. I have been very busy on the 308 this past week. Hugh has jumped in with me and will be getting an extended screen as well on his 308 once I have mine done.... Pulled the Fiero screen out, laid the extended tray in place and moved the wipers to new locations and just cut the front clip to fit the screen tonight. I may need to move the driver's side wipe transmission but I will do that tomorrow once I go after the final cleanup of the hood and fender tops. IT LOOKS FREAKIN' INCREDIBLE. I am very happy with how it is turning out and I can say it is worth every hour I have put into it to get it to here. Enjoy the pics. Don Before cutting 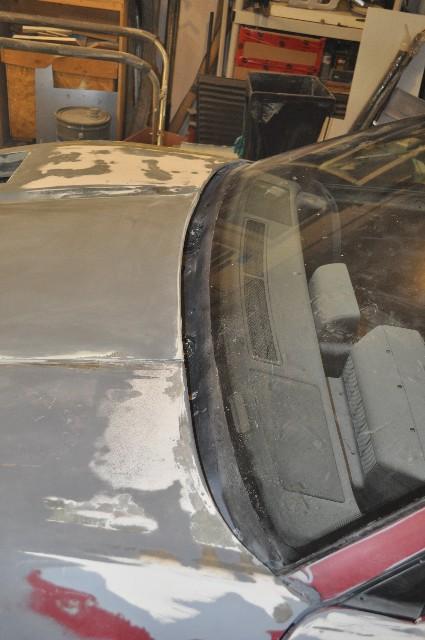 First fitting of the screen and clip. You can see the difference in the curvature. 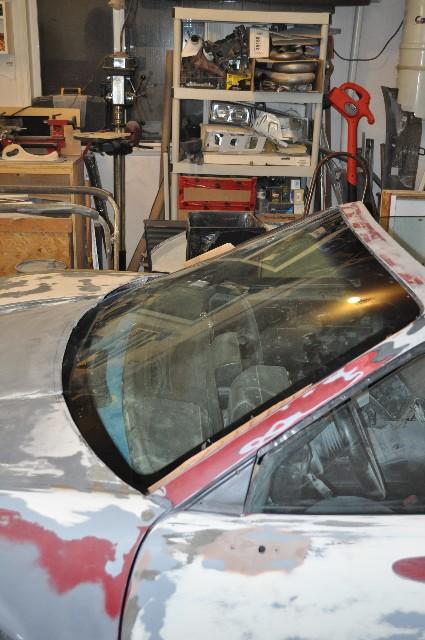 ------------- Ferrari 308 Replica Prova 5000s Countach Replica |
Posted By: Linlor
Date Posted: 30 September 2011 at 10:06pm
|
A few more pics. Moved the driver's side out about 3.5" 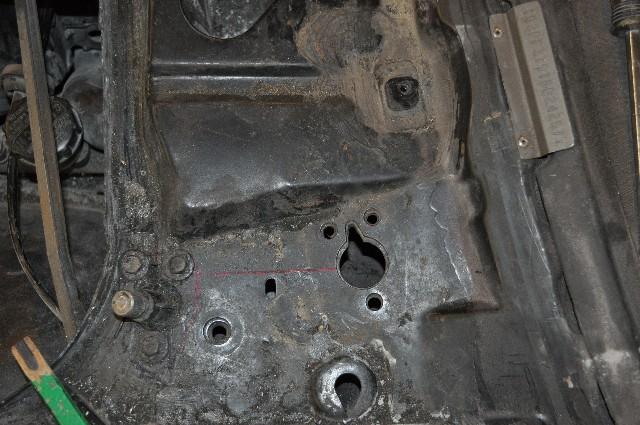 I had to do some metal bashing and make a new mount for the centre wiper transmission. I have some seam seal to brush on and then paint everything the frame black to match in. 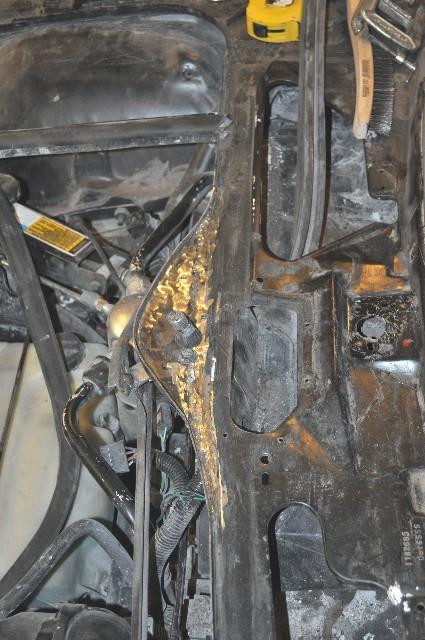 Another shot of the centre wiper tray. The hood seal will go along the edge and mate up to the inner side of the front hood to create a proper front trunk seal. 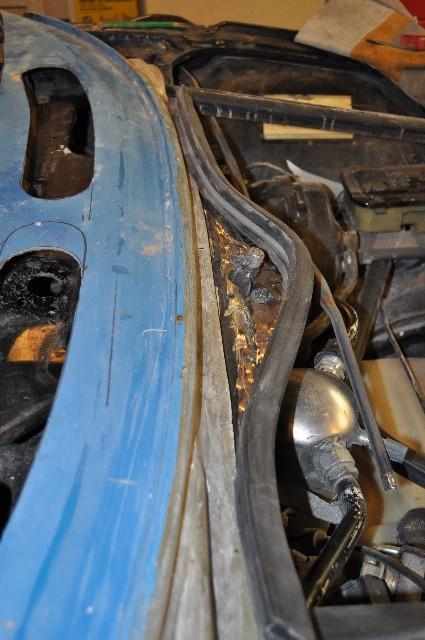 A couple final shots of the front clip installed and trimmed for the extended screen. Again, really worth the effort. 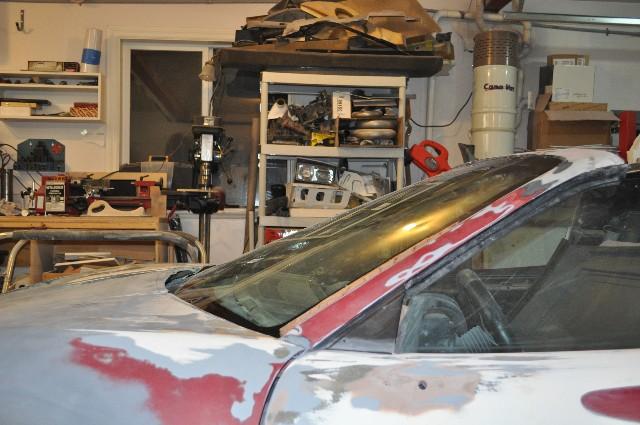 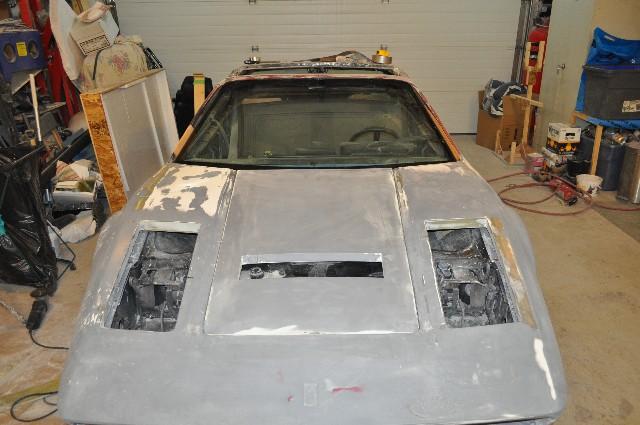 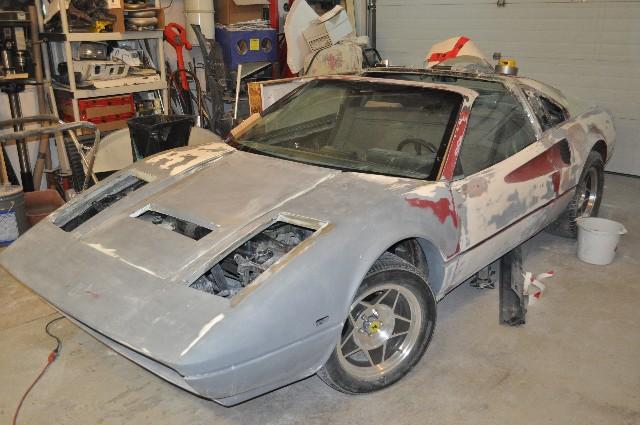 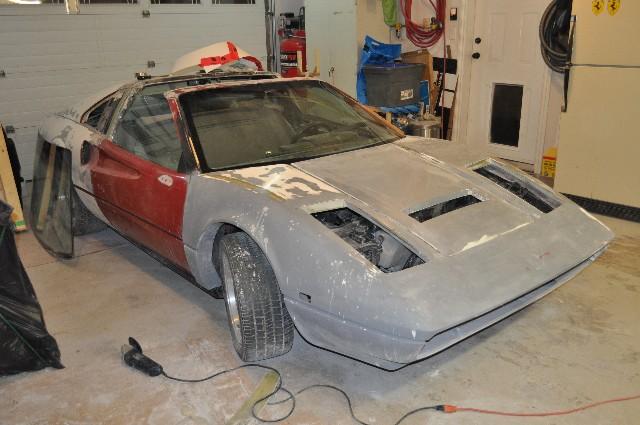 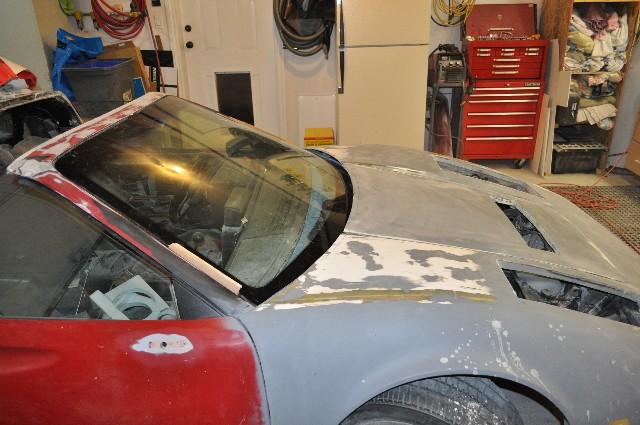 Cheers Don ------------- Ferrari 308 Replica Prova 5000s Countach Replica |
Posted By: Fiero308
Date Posted: 30 September 2011 at 11:36pm
| Wow you're not kidding that looks amazing!! |
Posted By: Capt Fiero
Date Posted: 01 October 2011 at 3:57am
|
The that car is looking amazing, I think Car2Lo has some real competition in the GT class this year. Man I wish I had those skills. Jon has been amazing and coming over and helping me with the body of the car. LOL, I would not call it helping, he did all the work and I just made sure his coffee was full, water was fool, and I tried to feed him many times but he would not eat. I may be interested in the tires and wheels I hope that was a type O though, about being 18x5 as you can't fit a 255mm wide tires on an 5" wide rear wheel. I figure I am grabbing Car-2-Lo's old leather seats, some new rims and rubber might be interested. Fire up some pics and what you want for them. ------------- Capt Fiero 88 Fiero GT 5spd V6 Eight Fifty Seven GT V8 5spd. |
Posted By: Linlor
Date Posted: 22 December 2011 at 12:25pm
|
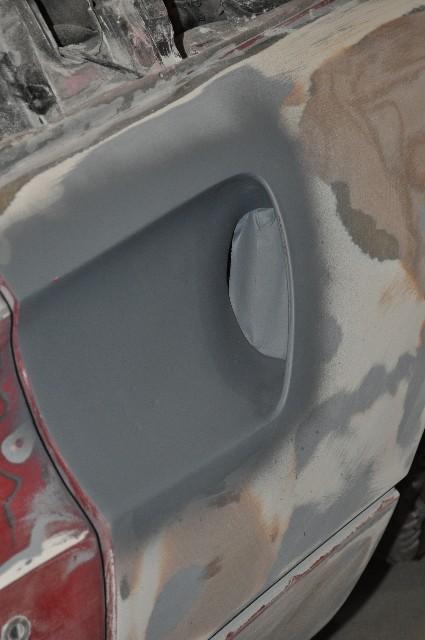
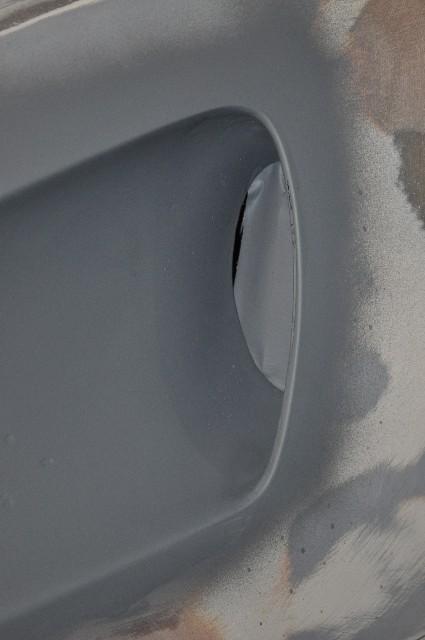
I thought I would post a few updates since the forum is a bit quiet these days with the holiday season almost upon us. I haven't had a whole lot of time to go out and play in the past couple months but I did get some work done on the side scoops. I have cut them into the body with additional glass so that they look a bit more oem. A few pics of the scoops built in but not yet sanded. I put some primer on them to to see how they looked all one colour as that is easier to see flaws than the multicolour glass, paint and gel coat.... I have since cleaned them up with some sanding and bondo skims and they are looking pretty darn nice if I do say so myself....
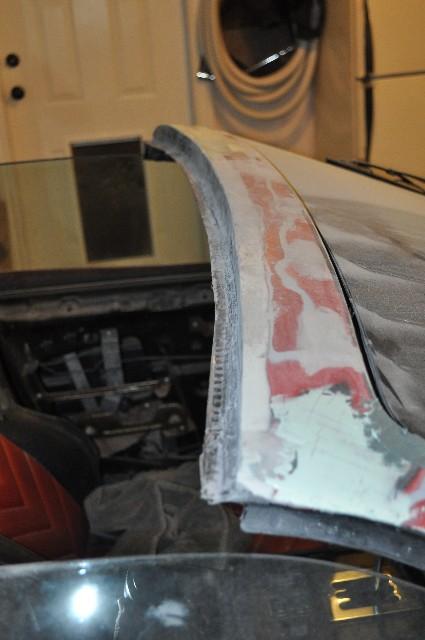
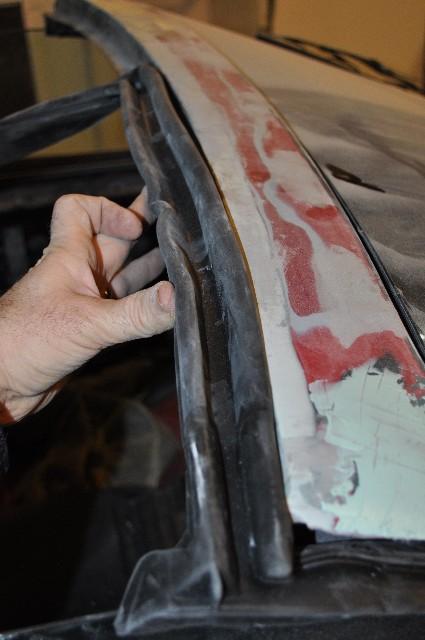
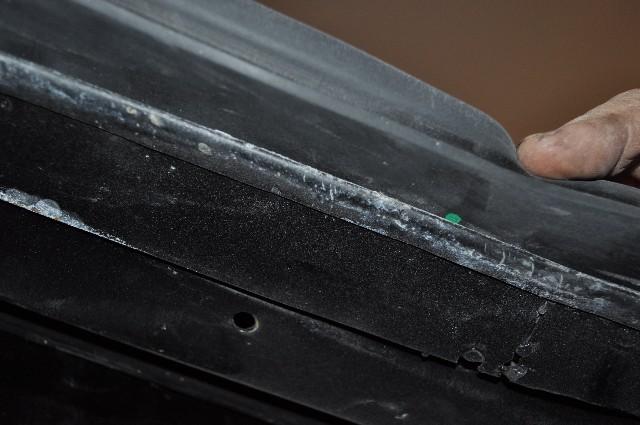
Passenger side looks pretty much the same only mirror image. I also got the front reinforcing bar cut out and new bar welded in closer to the frame. The old one hung down the 2" from the bottom of the car which essentially gave me about 3-4" of ground clearance. I now have the reinforcing all tucked up to the frame and back to stock or nearly stock clearance. No pics of that though. Sorry. I then cleaned up the front hood and fenders for the new screen setup and need to now finish sand all that along with the rest of the car in prep for paint. Also cleaned up the side louver areas to get them ready for final sanding. The stuff I am currently concentrating on is the targa area. The car has the targa roof but the sealing arraqngement was far from satisfactory. I read up on Pennock's that Doc John used 3rd gen Camaro t-top seals to get his targa to seal up. I ordered up a set of aftermarket seals and when they arrived, I set them loosely in place to see what it all looked like. I found that I will have to extend the platform the seal sits on by about 1" front and back as the seals are way wider than the shelf that was built in orginally. That also means I will be adjusting the targa panel to accomodate the wider seal area. Never ends........ A pic of the overhang I have to make.
As you can see, there is about 1" of seal hanging over the original lip. Adding a shelf will not be an issue at all. Just some cutting and bending and then welding to get the lip extension in place. The next problem I found myself facing was that I can not find the oem Camaro seal retaining tracks. I searched around and everyone seems to have the rubber seals no problem but no one seems to carry the tracks the seals sit in and oem are no longer produced. So..... I have to make some. I fabricated a small spacer out of flat stock that I use to hammer the lips over on. I cut the track with additional metal for the round over lip and then use the vice and a hammer to place to flat bar in place and round the lip over it. Move the flat bar to the next piece and repeat....and repeat.... and repeat..... I am about 1/4 the way through the straight back piece and I will post pics when done. I still have to do the front, curved one which will be a bit more work but still manageble. I am guessing a full night's work to get the tracks built. Hopefully, this weekend it will all be done and the targa sits on the roof and seals well enough. That is about all for updates right now. I hope to get some work done on the car over the Holidays and maybe we will see some updates inthe New Year.... I hope we do as that means I was able to get some work done on it...... Cheers Don ------------- Ferrari 308 Replica Prova 5000s Countach Replica |

Posted By: Linlor
Date Posted: 12 January 2012 at 1:27pm
|
Progress; I have pretty much redesigned and built the tagra lip to accept the Firebird T-Top seals as per pics below. I just need to finish the rear side for edge cleanup and then build the seal clip. The front seal clip was a bit harder than I had anticipated due to the compound curve of the windshield header section but it is done and the seal is locked in place. When I finish everything, I will goop the heck out of the seal bottoms and clips with sealant of some sort to make sure it doesn't leak through too badly. I don't think the car will be 100% weather sealed but it will be very good for being caught in the rain on a drive I think. Targa rear lip welded in place 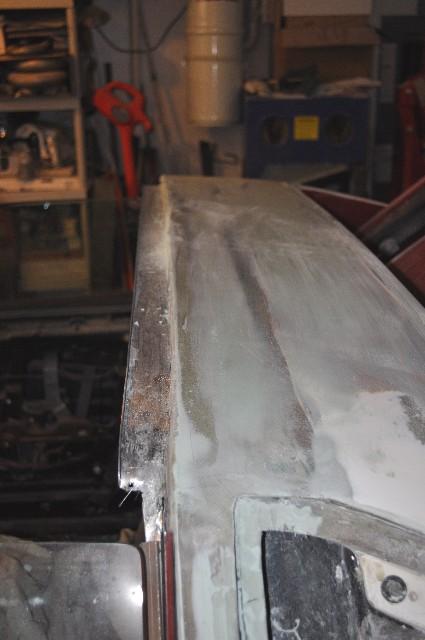 Front seal in place  View of front and back seals in place. Looks pretty good and nicely finishes off this area. 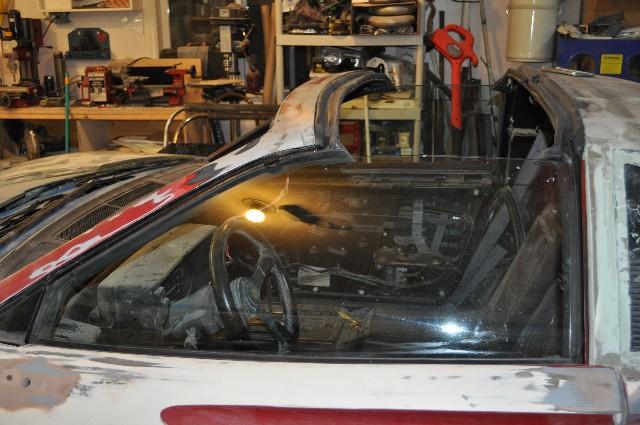 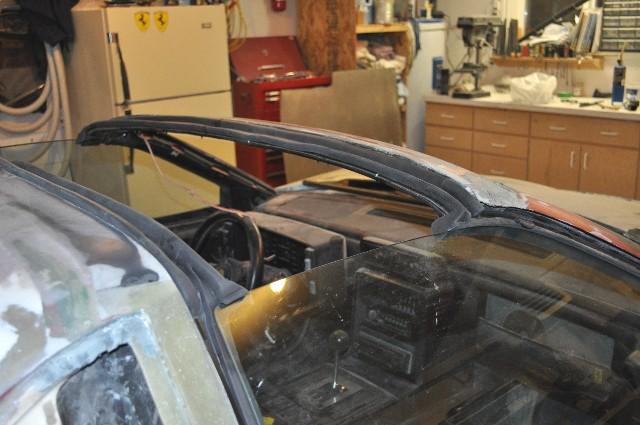 I also never liked the finish of the tops of the door skins on these cars as the edges just sat there about 1" or so away from the side glass. I took some of Pennock's user Stu DIY dew strips and cut the metal parts off and fastened the dew strips to the tops of the door skins. Pics show the difference in finished look. I like it. I also put some time into the new front bumper to get an oem bumper in place. Al for now. I am n ow down to 1 page of to do's to have the car ready for paint so I am only several weeks away from getting it out to colour...... Enjoy Don ------------- Ferrari 308 Replica Prova 5000s Countach Replica |
Posted By: Car-2-Lo
Date Posted: 12 January 2012 at 2:30pm
|
Don, great job on the targa roof, (that's my pipe dream).
You'll have the best finished 308 out there. ------------- Johnny-B-Good 
|
Posted By: Linlor
Date Posted: 13 January 2012 at 1:33pm
|
John; If I can give you any advice at all given all your great work on your project...... Don't cut the roof off and keep it separated if you can. Chopping still retains the integrity when welded back together. I have spent a lot of time sorting out reinforcing on this and my other car to get some rigidity back into the frame after removing the roof or a section of it..... I bought the 308 with the targa otherwise, I would never have done it to myself again. If you still want to do something with a roofless or targa, I can show you what I learned so you don't have to go through the same madness I put myself through...... Cheers Don ------------- Ferrari 308 Replica Prova 5000s Countach Replica |
Posted By: Linlor
Date Posted: 15 February 2012 at 3:57pm
|
Bit of an update I revamped the wiper arms to make them longer as well as mounted the wiper motor and washer bucket. I also made up some covers fo rteh front rtunk to keep wetah erou tof what is now the outside of the trunk area. Also did some more welding cleanup to close off holes made in the front frame area to get the headlight buckets to clear when down. I also updated the front bumper with additional mounts. Lots of smaller items as I close off the last items before sanding and priming. I am hoping to really be at the sanding step soon..... I picked up my custom windshield from Port Coquitlam and it fits not too bad for a copy. A few items would need to be adjusted but I think I will be able to have it work for me or Hugh if I ever get to his rebuild..... Everything turned out pretty good. Cheers Don 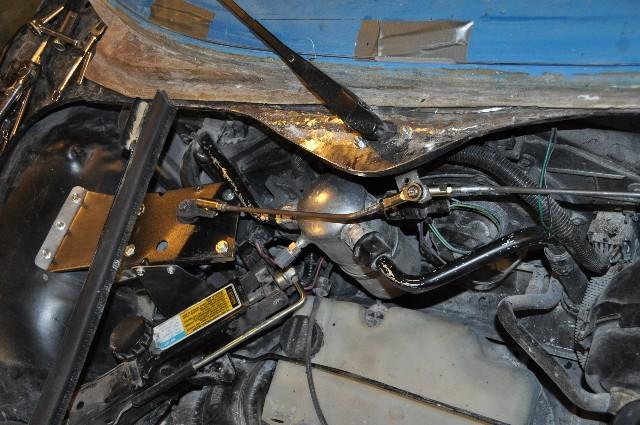 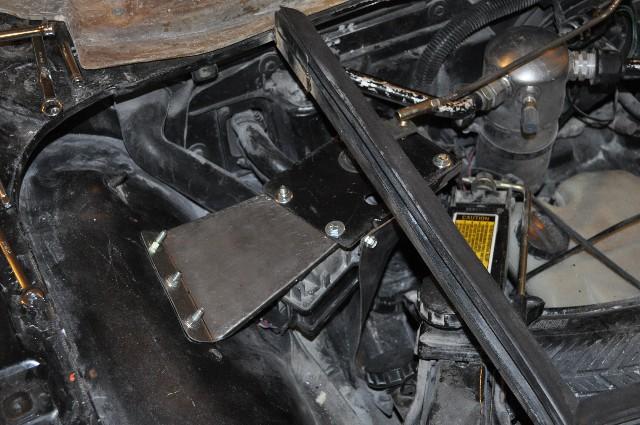 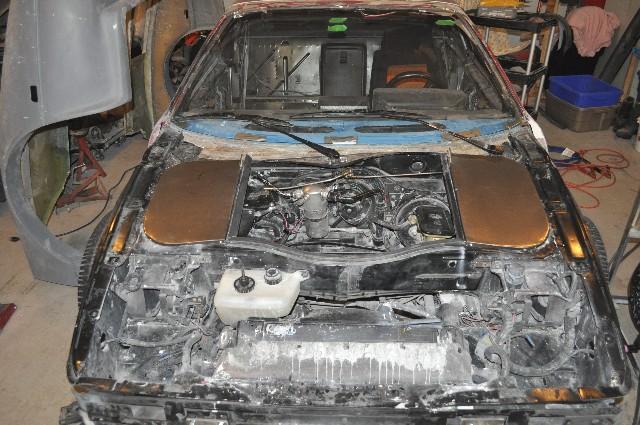 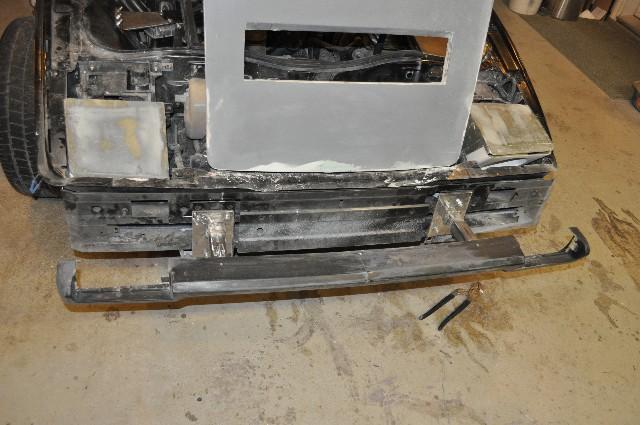 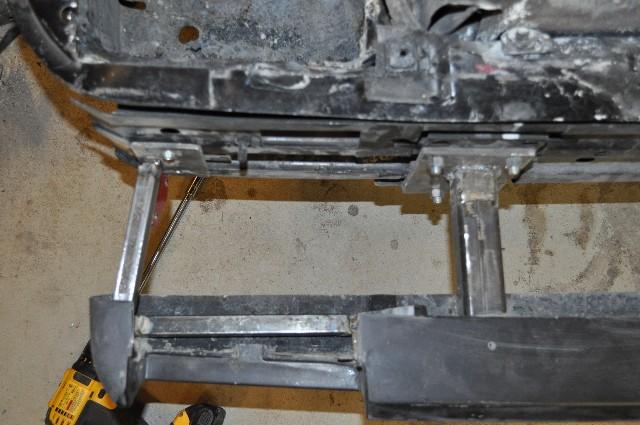 ------------- Ferrari 308 Replica Prova 5000s Countach Replica |
Posted By: Fiero308
Date Posted: 15 February 2012 at 9:49pm
|
What do you mean "If I ever get to Hugh's rebuild" Does
this mean it won't be ready by this Summer LOL. You are doing an awesome job here. It is just amazing. |
Posted By: Linlor
Date Posted: 02 March 2012 at 4:24pm
|
Update; I have been working dilligently on cleaing up the small items in prep for sanding to start. Crossing off items on my to do list feels good. I have the headlights going up and down to the right level with new stops built.
I have the centre wiper arm trans moved over about 2" to make the wiper arm the same length as the driver's side, I put the air vents in for the HVAC to not be completely starved from air with the extended screen, and I picked a colour for the car. I ended up with Ford Candy Red Metallic 09-11. It really looks good in person. I wanted a red matallic so I have been buying spray bombs of paint from the local paint mixer and testing on the fender. I have gone through 5 different red metallics in patches on the driver's fender. I finally sprayed this colour on the other night and loved it right away. It is a base clear coat system water based base and chemical clear. As soon as I sprayed the base I liked it and wanted to see what it looked like under some clear. I did a small patch of the clear but I had to see what the colour looked like on more than a patch so I sprayed the driver's fender and part of the nose section. I have to sand it all off again anyway before I start up the high build primer work so I am not worried about a bit more sanding to clear this back off. I keep going back out to have a look at it as I walk by the garage door......
I have also built engine lid stabilizing arms as the hinges are so much higher than oem on the Mera clone that the lid moves around alot when opening and closing. I built some braces similar to Rodney Dickman's setup for his Mera. I also put in gas struts to help lift and hold the engine lid but they are not strong enough. I need to go trade in my 45 lb struts for some 85 lb struts tonight to see if that works. I am now working on the front trunk latches. I got some rear hatch latches from an old Geo years go to use on the 355 build but never got there so I am using them on this build. I should have latches configured by tonight and will post some pics over the weekend. Cheers Don ------------- Ferrari 308 Replica Prova 5000s Countach Replica |

Posted By: Linlor
Date Posted: 05 March 2012 at 10:23am
|
Fairly decent weekend of work on the 308. I had to help my back
neighbour take down a tree in his back yard on Saturday so that we now
have a much better view of the water and downtown Victoria across the
water. One of the main reasons we bought where we did was the views and
proximity to the ocean. Made engine lid braces last week and installed them this weekend and got myself a set of 56 lb gas shocks to lift the lid. The shocks will hold the lid when open but don't really help while pushing up. I will leave these in there for now but will continue to look for stronger struts like maybe 75 lb or more struts to help take some of the weight of the lid while opening. 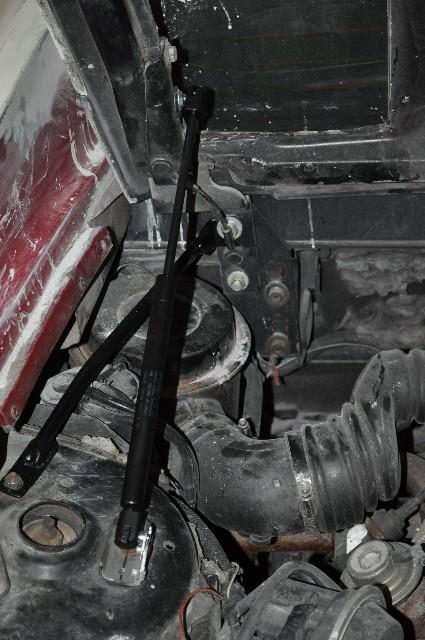 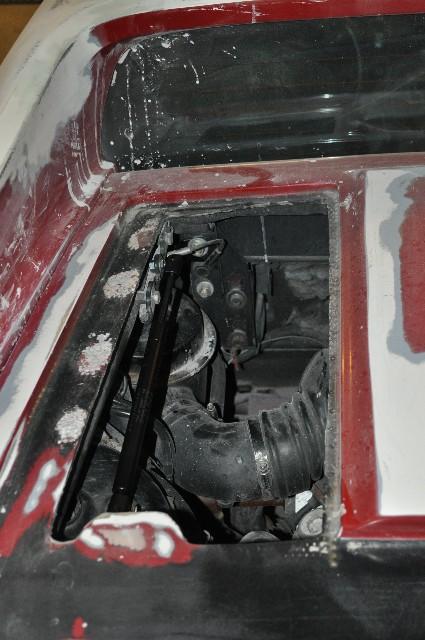 I also went after rear trunk. The company that made the car into a targa, cut the rear trunk back wall at each side and folded the back wall down and left it at that. There was no weather sealing on any of that area and the trunk was pretty much open to the rear fascia area and any moisture kicked up during a rain would go right into the trunk area. It was not sealed at all. I tried using the original rear wall to see if I could attach some new metal to allows me to make a rim to have the seal sit on. It wasn't going to work so I took the sawzall to it.. All gone and now I can make a new rear wall and attach it to the sides and cap off the top portions under the sail panels and make a full seal for the rear trunk. I will be buying a new seal from Infinitewil once I have the measurements. I have a pic of the targa sitting in the rear trunk and you can see how much more room it needs versus the original trunk area. Some cutting and pasting of the rear engine lid will also be required to move the back section of the seal face rearward to meet up with the new rear seal location. I will also be making a new rear latch mounting surface so that I can use the Fiero latch mechanisms.  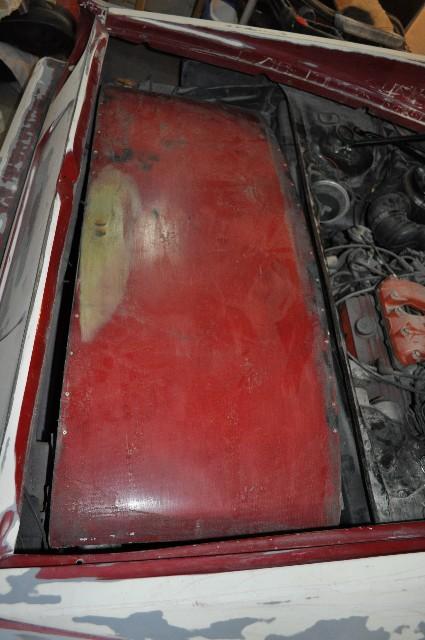 After all that, and a couple beers, I went after the front trunk latches. I made some pretty good progress in that I was able to cut away the old seal face I have made before moving the wiper transmission and installing the extended screen. Once that was cut away, I went about making a new metal brace to go across between the two side metal braces. I had to cut slots into the square tube to get the right shape and then weld the cuts back up. Turned out pretty well. It will be covered with foam and fiberglass in the end so I wasn't really worried about how clean the welds were, just as long as they are strong....  Once I had that in place, I made up some latch bar perches (really not sure what they are called) and welded the perches to the new cross bar. I then tried out my relatively new blind screw tool and inserted some blind screw pieces in. That also worked pretty well once I wasted a few figuring out how it works.... The end result is I need a few more blind screw pieces as I wasted some and I need some more expanding foam as I also ran out of that. For the latches themselves, I took some 2" angle iron and made mounts. These mounts will then be placed in the proper location inside the trunk and additional metal will be measured and welded on to locate the latches in the right spots to line up with the bars I made in the hood. I took a pic of more or less where the latches will sit inside the front trunk. 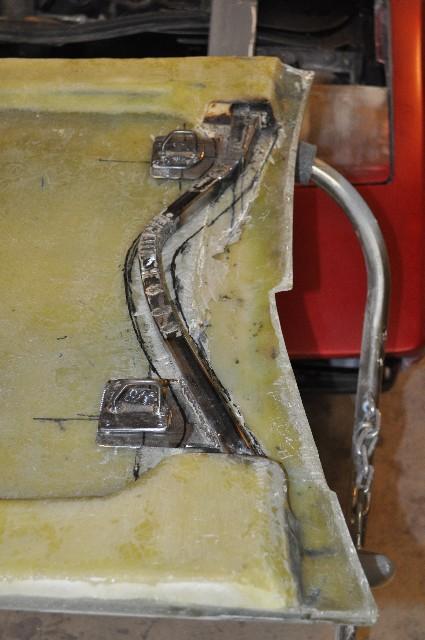 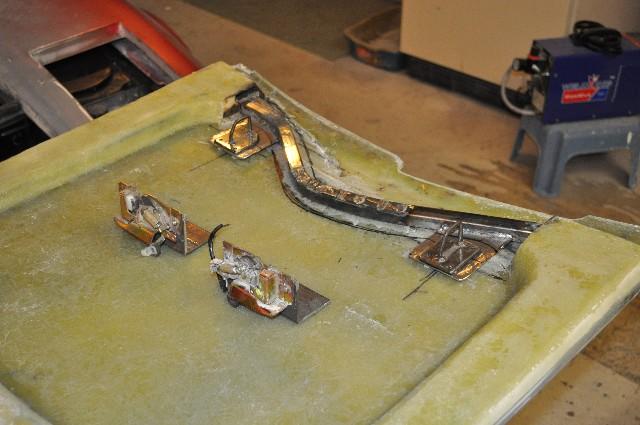 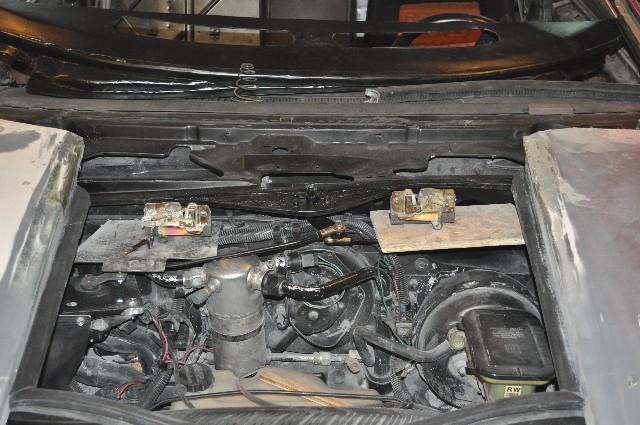 Next on the list is to mount the latches in the right spot, set up the central latch release mechanism and attach that to the Fiero release pull and then cover the bar and perches with foam and then glass to make the inner panel for the front lid. I hope that all gets done this coming week. Cheers Don ------------- Ferrari 308 Replica Prova 5000s Countach Replica |
Posted By: Car-2-Lo
Date Posted: 06 March 2012 at 8:10am
|
Hi Don,
What hood latches are you using, they look like the hot rod trunk side latches ?? I'll be doing that at some point and wondering what would be the easiest ?? Thank you so much for all your help... Super chop Johnny ------------- Johnny-B-Good
|
Posted By: Linlor
Date Posted: 06 March 2012 at 2:30pm
|
John; The latches themselves are from an old Geo if memory serves. I went to a pick a part out in Calgary several years ago and forget what I got them from but I do know they were from the rear hatch with a large window in it. Pretty sure it was a Geo. The latch arms or whatever you call them I made myself as I lost track of the ones I took off with the rest of the assembly. To many years in storage. Now that I made new ones, I will find them somewhere easily accessible I didn't think of looking in..... No problem on the help. I really enjoy this hobby so I help wherever I can. Most of the time my help usually isn't but once in a while I get lucky..... matter of fact, there is a good possibility my Porsche Boxster is going to be sold in the next few weeks and I might actually go out and buy a Fiero fastback to play with instead of another convertible.... these are more fun to work on than the Porsches etc. and by and large, less expensive.... unless, of course, you cut them up like we are doing...... Cheers Don ------------- Ferrari 308 Replica Prova 5000s Countach Replica |
Posted By: Linlor
Date Posted: 07 March 2012 at 11:50pm
|
Latch mounts are made and in place. I had to run around for a couple days looking for some more nutcerts to secure the latch bars to the lid.. I finally found some metal ones today and bought a pile of them so I don't run out again too quickly. I like the metal ones more as the aluminum ones will pull the threads out too easily. I positioned everything into the hood opening and lined up the latches to the bars and then made some plates to mount the latches to. It all worked out quiet well. I now need to weld in some gussets to the mount plates to stiffen them up a bit and then foam and fiberglass on the lid to finish it off. The bolts on the mount pates are only for initial positioning and I will weld everything up tomorrow night now that it is all lined up and working. I also plan to use the Fiero hood holding bar and will mount that tomorrow night as well. Cheers Don 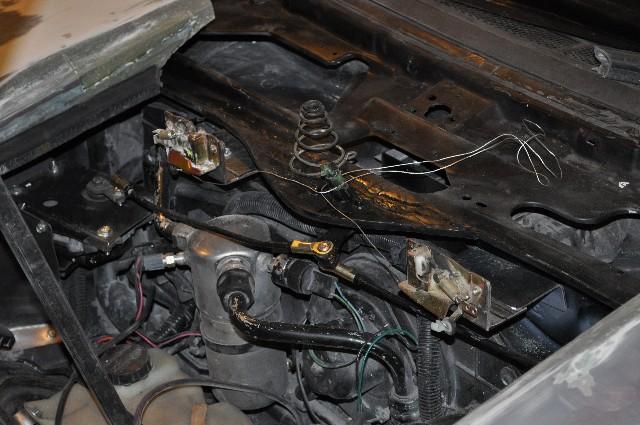 Nice to see the front hood on again and lined up. 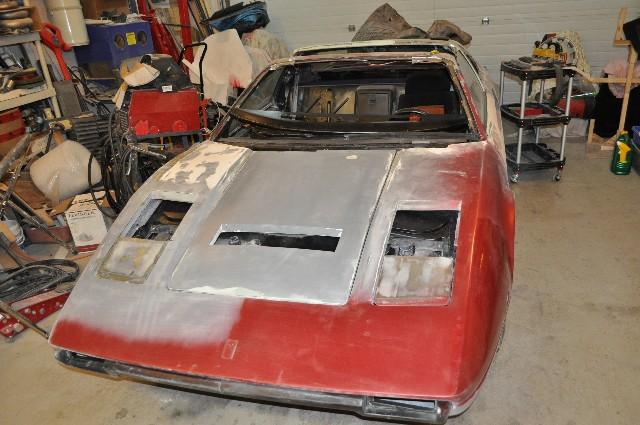 ------------- Ferrari 308 Replica Prova 5000s Countach Replica |
Posted By: Linlor
Date Posted: 17 March 2012 at 12:55am
|
Update; Finished off reinforcing the front latches and only have the pull mechanism to do now. This weekend to finish that off. For a change, I moved to the rear trunk area to get the latch built and get the rear section boxed in so it is weather proof. I have the main rear wall bent from 14 gauge sheet metal and I will be boxing in the end caps with 18 gauge as it is easier to work with for the complex corners. I have one end done and screwed into place for fitting and I will be on to the other side this weekend. I also need to make caps to go over each end to cover the portion under the sail panels similar to what is needed for the Fiero GT. Once everything is fitted, I will pull it all apart and put seam seal along all edges and rivet everything together and then seam seal over the final joints and install into the car. I may need to install in the car first before riveting but I will figure that when I get to that point. I also got into the engine lid to make a new seal ridge since the seal will now be so much further back from oem. The rear seal lip is 6" back from oem trunk back wall. The section in the middle is where I need to create a sunken area in the inner hood to accommodate the Fiero rear trunk latch. With the seal lip closer to the top of the trunk area, the latch needs to sit higher in the engine lid so I need to make a cupped section to clear the mechanism and also insert some metal with bolts welded on for securing the latch to the engine lid. Once that is done, I then align the latch bar to the latch mechanism and mount it to the rear trunk wall. I will also be putting reinforcing in behind the trunk wall to help keep that solid. A few pics Cheers Don 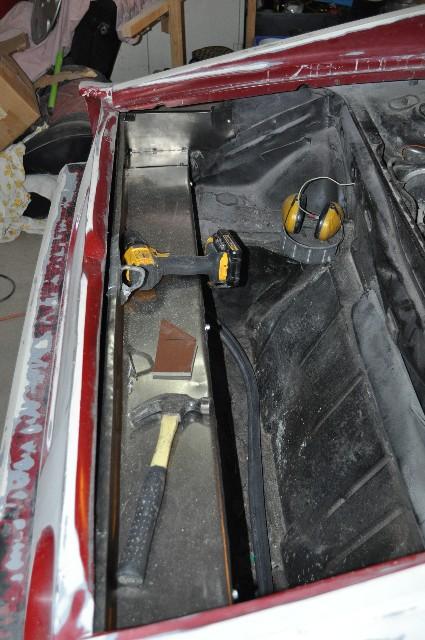 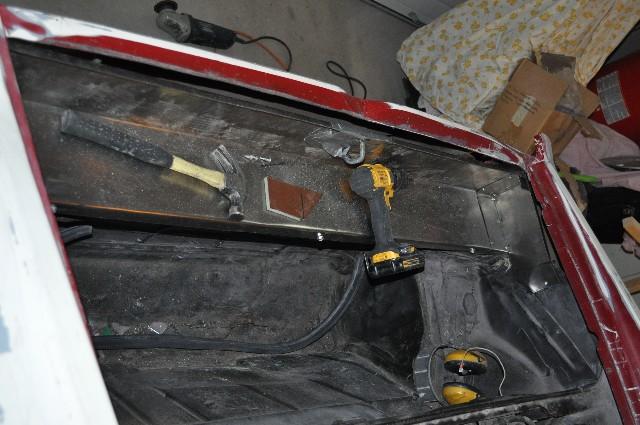  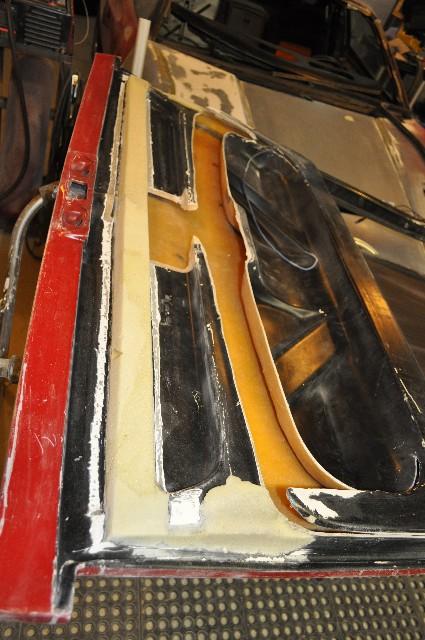 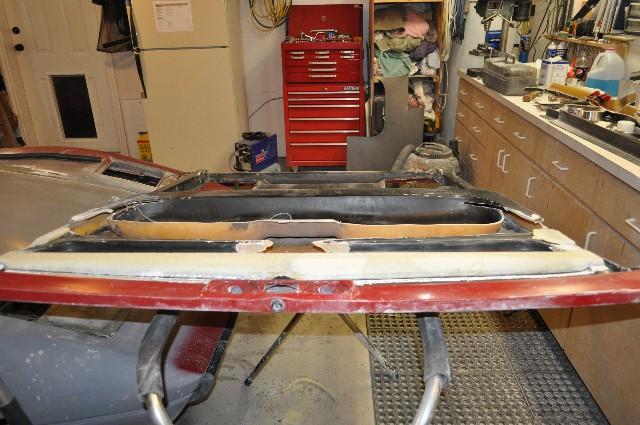 ------------- Ferrari 308 Replica Prova 5000s Countach Replica |
Posted By: Linlor
Date Posted: 24 May 2012 at 10:40am
|
Some progress, I am back from down south and I made some progress last week before heading away again for the
weekend. I find life is getting in the way of this build as well. We all find that I am sure. A couple month project turns into a couple years of mostly sitting and looking rather than doing..... I am now doing the rear trunk inner liner as I have the larger trunk space as explained above. As shown above, I started by cutting down the original inner liner and adding in a new seal ridge at the back to catch the new location of the rubber seal and just filling in the spaces where I cut the original real seal lip down. I just wasn't feelin' it though. Just looked too chopped up for my OCD tendencies..... 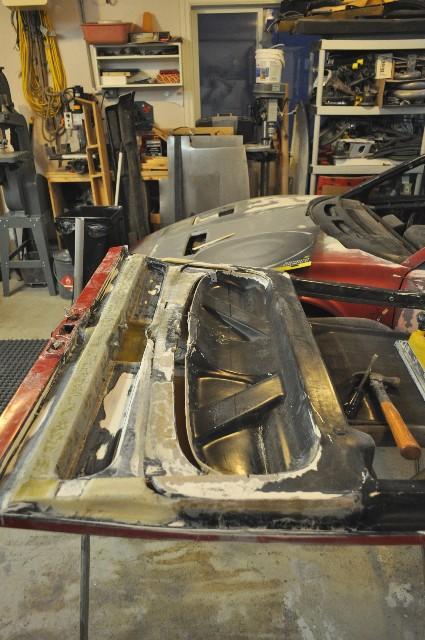 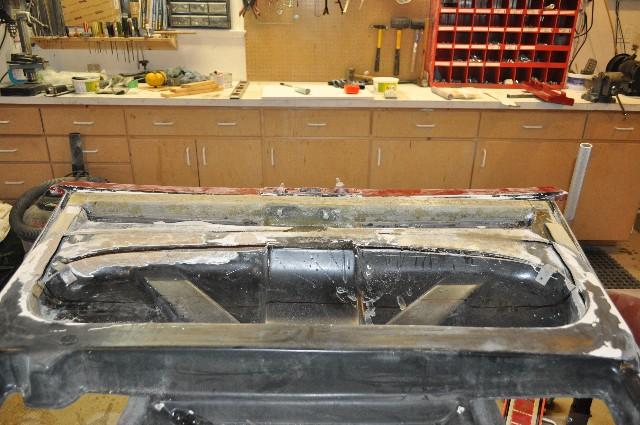 I took a couple pics of the partial progress on the original thoughts and then a few pics of my new direction. I like the new direction a lot better..... A lot cleaner and looks like it should be there rather than the chopped look I had going to start. Out comes the offending area..... 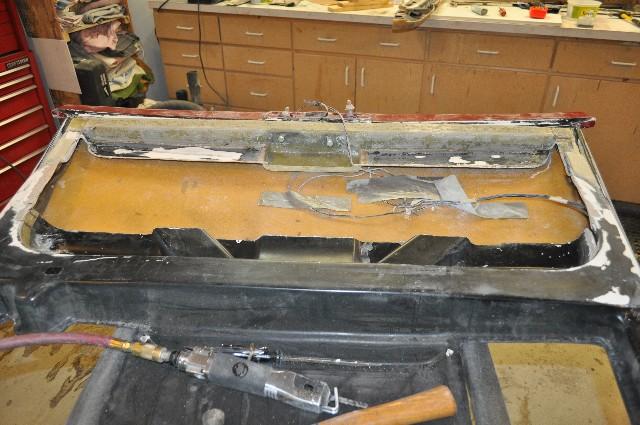 In goes some new wood forms to match up the inner liner ridges and braces etc. 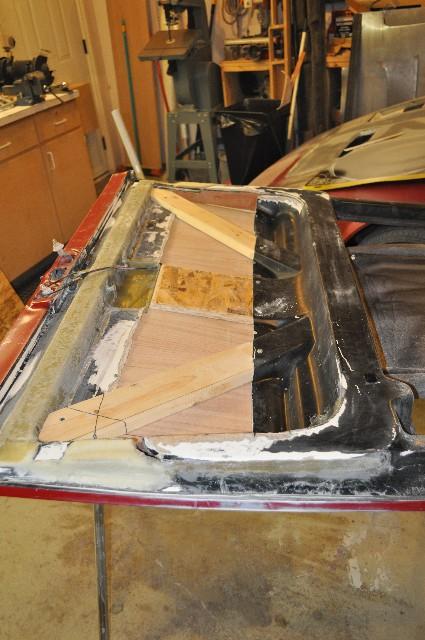 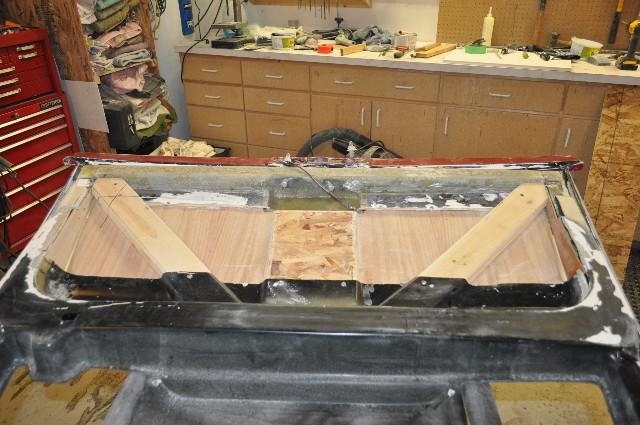 I haven't taken any more pics in the past few days but I decided to just leave the forms in place and glass over them. I was thinking about making a mold and cutting the buck out again and glassing in the new piece but it is too much work for an interior piece that stays closed most of the time. Everything will be sealed so no issues with rotting wood or anything. Also, there is so little in the way of forms that there is very little extra weight. I have since covered everything with a couple layers of fiberglass mat and last night I created a HUGE mess by grinding and sanding everything down and feathering of the new to old parts. I put some Duraglas on the new portion and it was setting up over night. I checked this morning and it was still a bit soft so I guess I need to take the heat gun to it tonight to get it to kick off and cure. I thought I had the right amount of hardener but I guess it was a little light..... Tonight, I go out to and kick off the Duraglas and then sand up to get it in good shape and do some filling and edging to get it all looking good. I have a long weekend this weekend so I should be able to get this and the major portion of sanding done on the car by next week. More to come. Cheers Don ------------- Ferrari 308 Replica Prova 5000s Countach Replica |
Posted By: Linlor
Date Posted: 31 May 2012 at 12:42pm
|
More progress cleaning up the rear trunk inner lid. Actually, I was just over looking at Dave's and Dawg's engine pulls thread and I had a DOH moment..... There, in all it's glory, was a picture of a GT inner liner with a seal lip and inner trunk shape pretty much exactly the same shape as I just spent a bunch of time building from scratch..... (Head slap)... A one off mould from an inner GT lid and a bit of lengthening and I would have saved myself a whole bunch of work. Son of A ...... Oh well, I really need to pay more attention to what is already out there.Now that the head slapping is over, I might as well show what a modded GT trunk seal lip for an extended rear trunk area would look like I just have a bit more cleanup to do on the sides and a few spots on the flat surfaces and it should be called good and I can move back to the front lid and do it over again on the area I built the front latches for. The putty layers are very thin just to flatten and fill dips so not really much weight added to the lid. I plan to have this one completed tonight and the front lid into fiberglass or at least expanded foam ready to shape and glass. 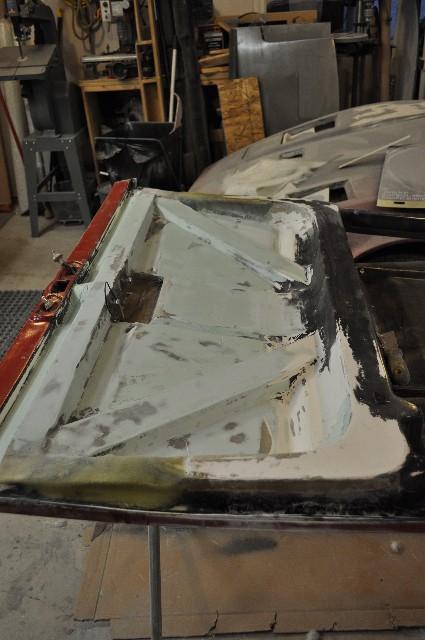 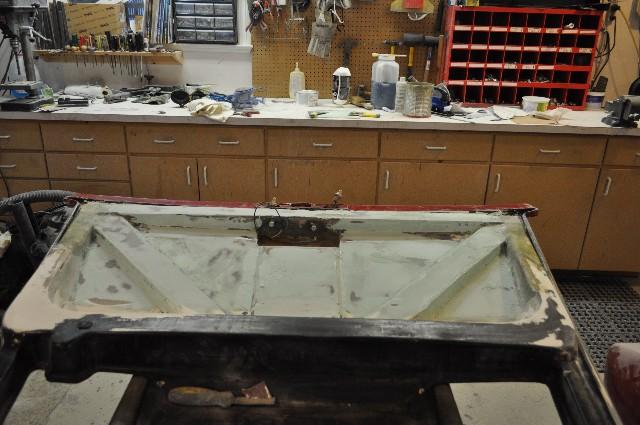 ------------- Ferrari 308 Replica Prova 5000s Countach Replica |
Posted By: Linlor
Date Posted: 25 June 2012 at 1:35pm
|
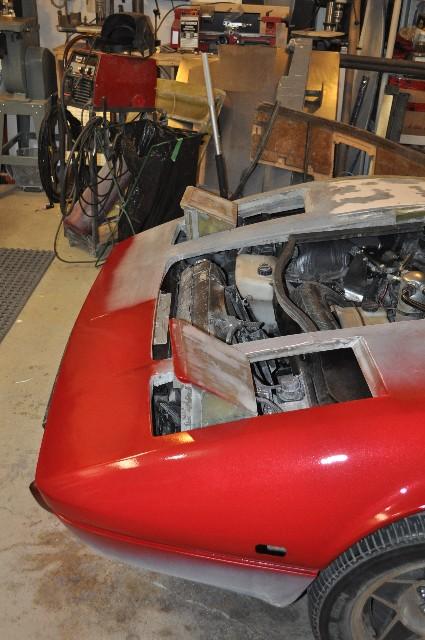
Another month pretty much gone with a little progress..... Finished up the rear trunk inner panels ready for primer and paint. On to front trunk. Shaped the foam and glassed and applied first couple layers of bondo to start smoothing out the surface. Again, sanding most of the bondo away just to get a smooth surface to take moulds from. Test fit the front lid on the car to see if I captured the shape for a seal. Worked out great. After putting the latches back on, it should suck right down on to the seals and keep the weather out. Cheers Don Rear trunk came out very nicely. Now that I have it all smoothed out, I can finish the metalwork in the rear trunk and then order some new trunk seal off the fellow on Pennock's.  Layer of bondo that hasn't been sanded down yet. Looks pretty good overall though. Should provide a good surface to seal the front trunk and allow for nice moulds to be taken. Lid is pretty heavy right now though with putty, glass and metal throughout....   You can see the rubber fits nicely along the lid surface. I still have to bolt the hinges and latches on to see if the lid closes now but it should all fit.  ------------- Ferrari 308 Replica Prova 5000s Countach Replica |
Posted By: Linlor
Date Posted: 05 July 2012 at 1:17pm
|
Funny story with the car. This car was always supposed to be a quick fix to clean up a couple items that were broken when I bought it, but that has turned into a 2+ year rebuild of many different parts of the car. The long term plan was to get it put back together, drive for a couple years and then cut and stretch the rear section to make a Ferrari 288 GTO out of it. Since I have been working on the car these past two years instead of driving it, I was actually very close to starting down the 288 GTO route. I even had the sawzall out and tape along the rear quarters where I was going to cut the fiberglass body to start the process. I have the front end all done to look oem Ferrari so I would have to only stretch 3" on rear quarters and frame and then pour and shape some foam to make the flared fenders.... I was close to starting the cuts and made myself stand back and ask myself if I was ready for another 1-2 years of additional work to make the car I was always really wanting????? I took the tape off and put the sawzall away but I don't think I have completely abandoned the concept........ (I feel like Johnny before he took the sawzall out on that fateful day last year to start RBS II....... )A pic of the 288 GTO for reference. One of the sexiest Ferraris ever built in my opinion...... 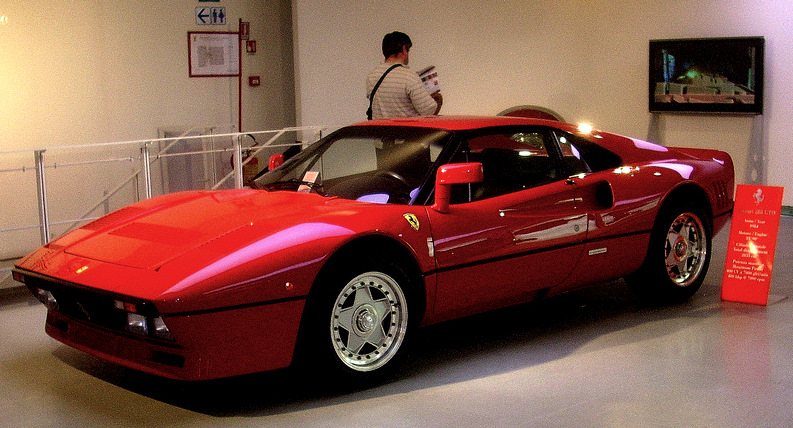 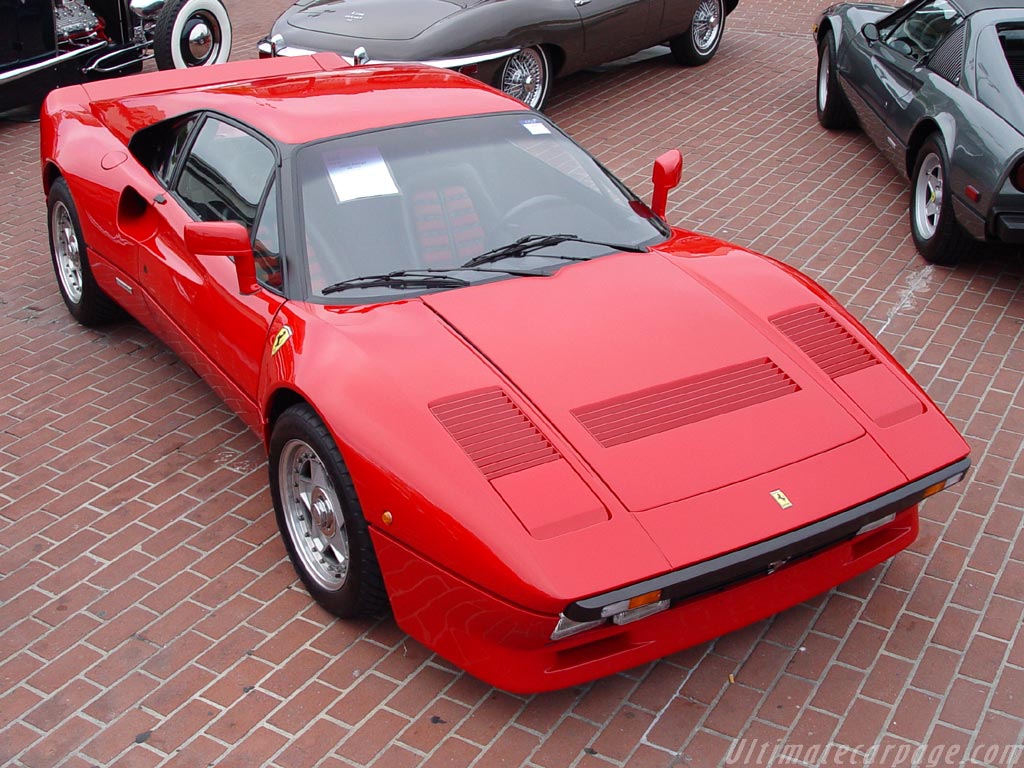 ------------- Ferrari 308 Replica Prova 5000s Countach Replica |
Posted By: Linlor
Date Posted: 28 August 2012 at 10:52pm
|
Primer is finally laid down.... I put a few coast on the engine lid and front bumper. Been many years since I used a proper paint spray gun and I used a touch up gun for tonight to help me get back into it and not mix too much primer at a time in case I was messing things up. Came out pretty good. I have a few spots to touch up where I missed holes that you don't see until you get it all one colour. This primer is a 2k urethane primer/sealer but I don't think it is high build. I am going to have to get the name and number and have a look online. I asked specifically for high build primer for fiberglass and the guy went around in a couple circles on me and gave me a quart of this stuff. I figured I could always practice on this quart on panels that are in good shape already like the front and rear lids and then get some high build for the remainder of the panels where there may still be a bit of minor warping after skim coating and sanding. Sprayed really nice with minimal over-spray. I was pretty happy with the way the first attempt came out. Some more cleanup on some other body panels and then premier again, I really just wanted to see a couple panels all one colour again for inspiration.....  A couple pics. Cheers Don 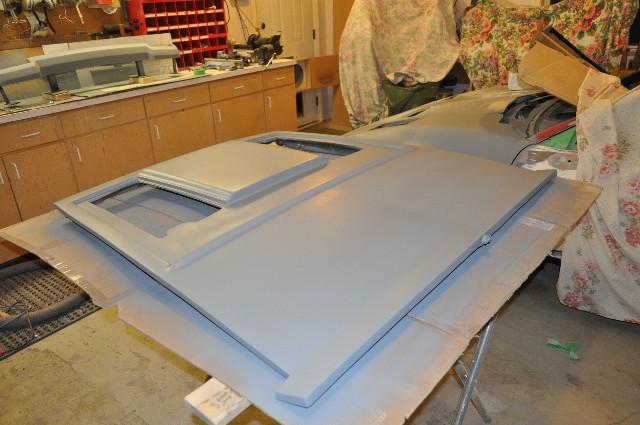 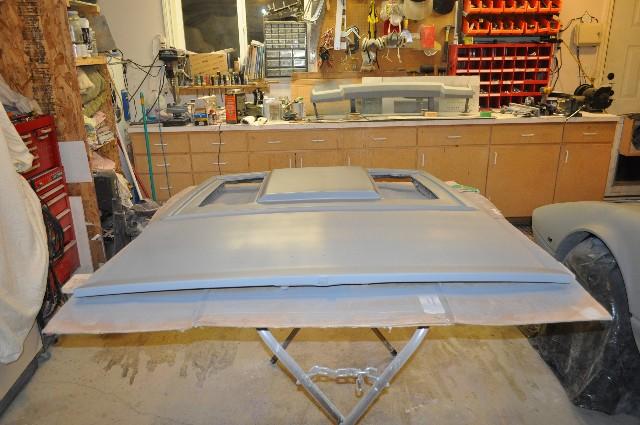 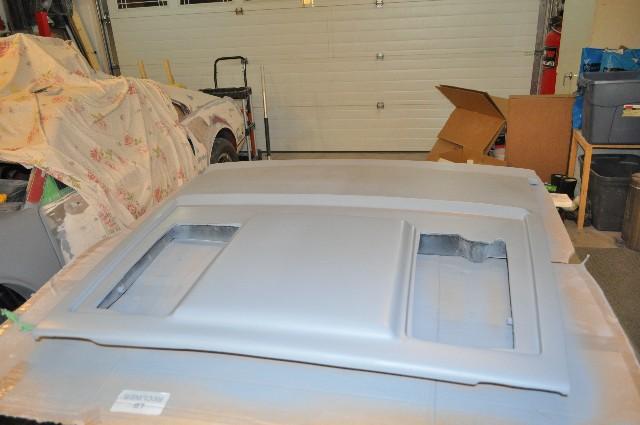 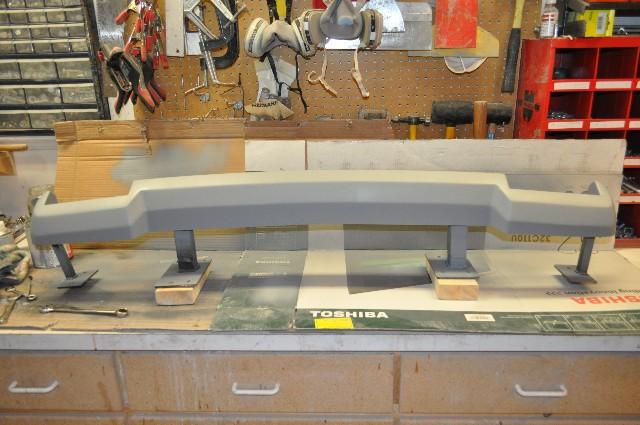 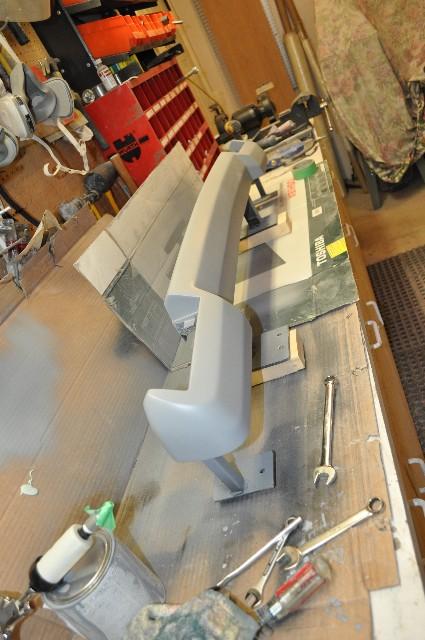 ------------- Ferrari 308 Replica Prova 5000s Countach Replica |
Posted By: Linlor
Date Posted: 28 August 2012 at 10:59pm
|
A few moulds from the Countach project as well. I pulled these off a Countach body down in Phoenix where a buddy is building an aluminum Countach from scratch. He is doing an amazing job on the aluminum panels. Like oem, the front bumper and flares are fiberglass and he doesn't know how to do that so I offered to make a set for him and I get a new front bumper and iar dam and flares for my build as well.. These will be worked on in a few weeks when the 308 is in primer and off to the paint booth. Cheers Don Edit: Spelling 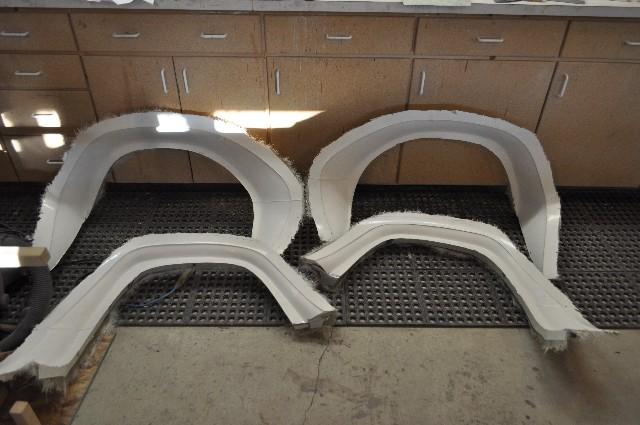 ------------- Ferrari 308 Replica Prova 5000s Countach Replica |
Posted By: Linlor
Date Posted: 05 September 2012 at 12:58am
|
Working on making it all one colour..... More body work and primer tonight. I have been working on the rear driver's door gap for the past several days when I can get out there. I am pretty happy with the way it turned out. The original builder riveted the rear panels on to the door frames and then bondoed about 1/4" thick over the joint areas to cover everything up,. Did the same thing on the inside of the doors where the panels mate to the doors. I had to chip all the door bondo away so I could take the doors off and do some repairs internally to the door handle and panel as they weer both broken. Got all that done and then went to work matching up the panels and making even door gaps. Driver's side looks good and I got a first coat of primer on the door and the area just behind the door to make sure everything looks OK one colour after the body working. A few touch ups still to go but the door is pretty much good to go so far. I also touched up some holes in the engine lid and then resprayed that as well. Not sure what I did with the spray gun tonight though but it laid down a horrible payer of primer. It has been many years since I have been spraying without a spray bomb so I pretty much forget all the tricks. Good thing it is a first coat of primer and I have to sand smooth again anyway..... I also laid down a skim of bondo to the rear quarter as there is quite a number of waves in the fiberglass so I will sand those out tomorrow night. to see where I end up. I have turned the engine lid over and now touching up the work I did on the under side and will prime that tomorrow night as well. Cheers Don Edit: No images showing up in the upload tool tonight. Will add some tomorrow if it decides to work. ------------- Ferrari 308 Replica Prova 5000s Countach Replica |
Posted By: Linlor
Date Posted: 12 December 2012 at 4:30pm
It has been a while since I updated this build thread. I have been quiet but busy on the car. I just got it painted in epoxy primer on Tuesday in prep for the ride out to the paint shop. My painter wanted to get it protected from our West Coast winters when it ships out to his shop. I had primed the car once and made an absolute mess of it so I had to sand it all down again and wait for him to have some time to come over and do it for me. He laid down two great coats and the car looks great.  We hope to be starting to ship the parts out to his place either later this week or next week. A few pics of the car in its current state as of last night. Cheers Don 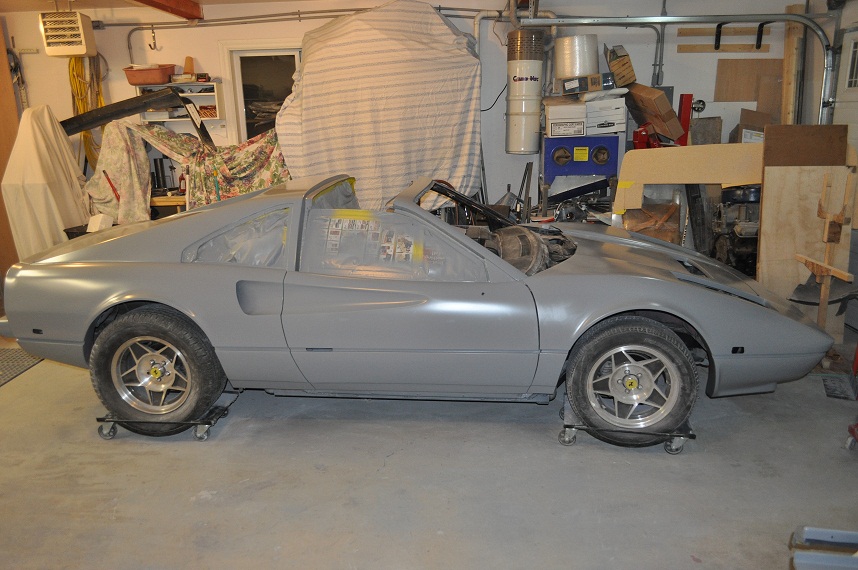 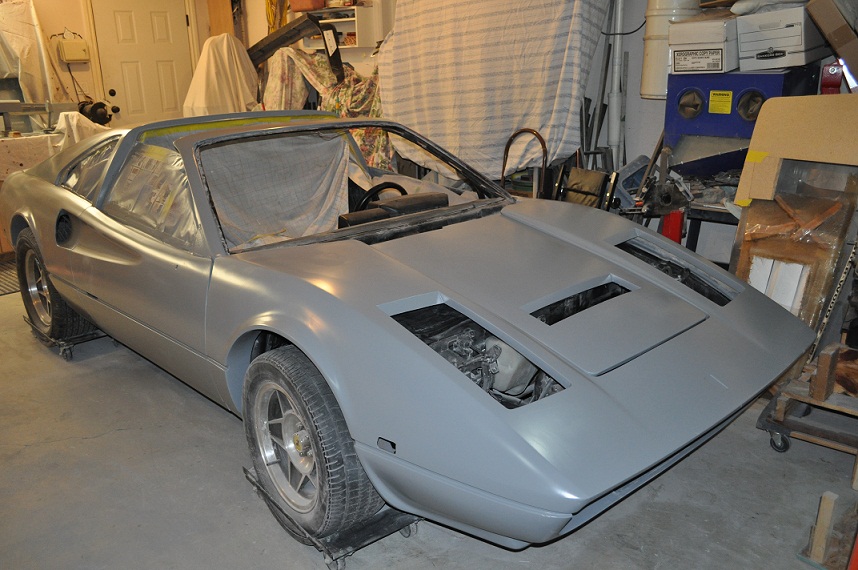  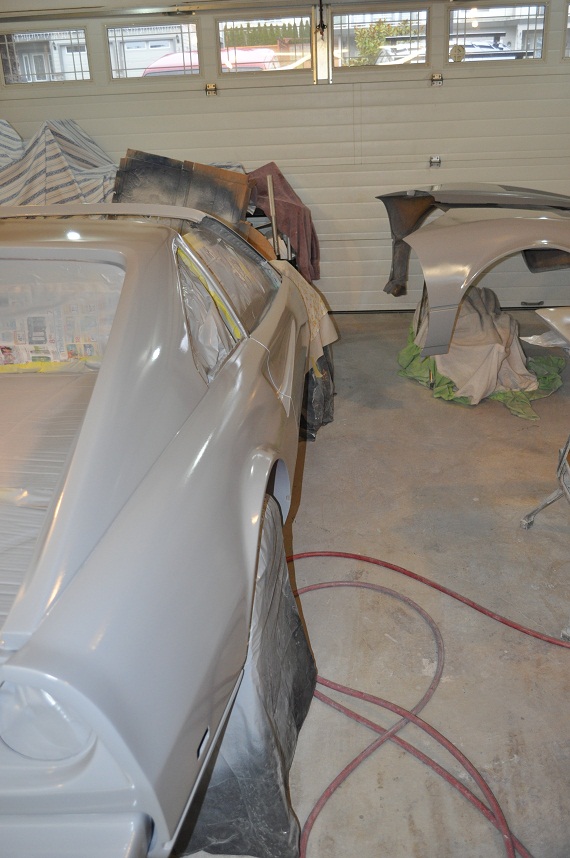 ------------- Ferrari 308 Replica Prova 5000s Countach Replica |
Posted By: Car-2-Lo
Date Posted: 12 December 2012 at 6:07pm
|
That's looking sweet Don just in primer
On the Countach  , what windshield are you using, I hope it's not a flat glass , what windshield are you using, I hope it's not a flat glass  ------------- Johnny-B-Good
|
Posted By: Dawg
Date Posted: 12 December 2012 at 6:18pm
|
Man....that poor car hasn't been one color in a very long time.....:) Coming down the home stretch....eh? Dawg ------------- You dream it up....I'll make it |
Posted By: Linlor
Date Posted: 12 December 2012 at 9:41pm
|
Carlo;
I plan to use a replica screen or make one out of a transport screen and cut it down. Dawg; Yeah it is so nice to see it one colour again. Really looking forward to seeing the car in the final colour as well. More to come Cheers Don ------------- Ferrari 308 Replica Prova 5000s Countach Replica |
Posted By: Linlor
Date Posted: 16 December 2012 at 6:52pm
|
308 parts heading to the painter's shop tomorrow night. He will start working on those while we are waiting for his last project to get the bumper back from chrome and then it is moved out of the shop and the 308 goes in. I hope to have a new painted car some time in January. I will post more pics when I get more progress. Cheers Don ------------- Ferrari 308 Replica Prova 5000s Countach Replica |
Posted By: Linlor
Date Posted: 27 December 2012 at 12:26pm
|
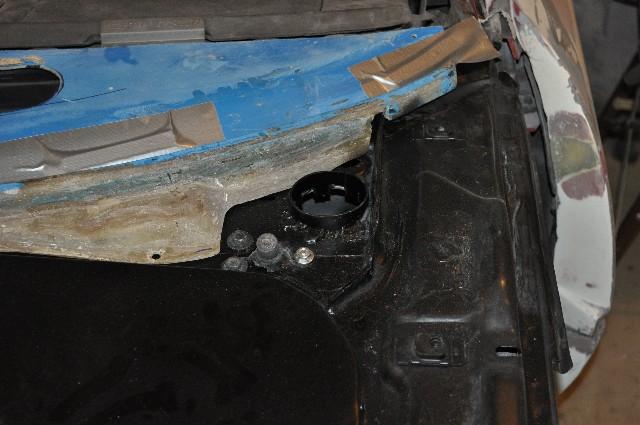
I ended up connecting with my interior guy and he has the car in his shop now doing the interior and the painter has the front clip, trunk lids and rockers to start the painting piece. Once the interior is in then I will take that back out and send the rest of the car off to paint as well. Probably take a couple a couple months to get it painted as my painter does it on the side. I talked to the interior guy last Monday and had the interior rebuilt and into the car by Friday so I could take it to the shop. A lot of late nights redoing the pieces I wanted for the interior. First was the extended dash as the Fiero dash setup did not protrude out far enough to cover the new area with my extended screen. I also needed to move the defroster vents outward as well to properly work against the new screen. I also wanted to redo the centre console as it was very plain and quite ugly. I now have the door panels back in my garage and I am making some speaker mounts for the door cards and map pockets. Just did the passenger side last night. Came out fairly well. I think it will look good covered in the tan. Cheers Don Extended dash piece I had to graft in and you can see the moved defroster vents. Will need to make some new air ducting under the dash.  Centre Console changes. Made a larger recessed portion that will house the shifter plate and all switches. The insert will be black. 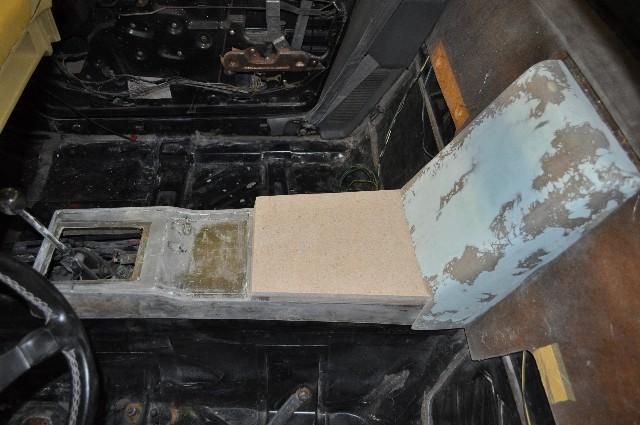 Another view of the dash with the gauge console cover. 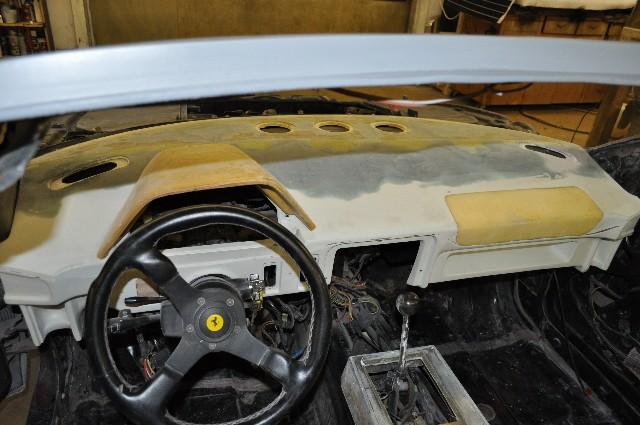 Loose parts all loaded up ready to head to the painter's 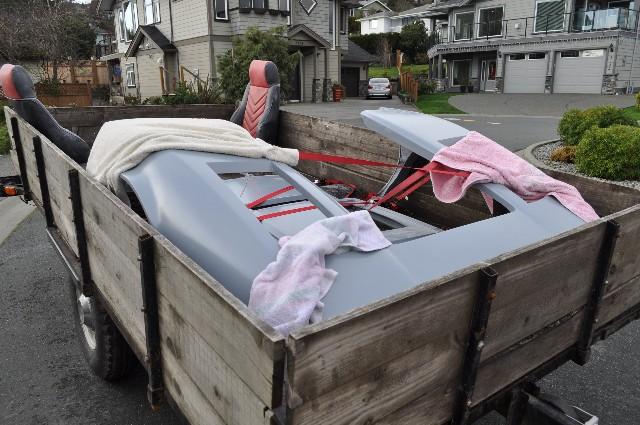 Car sitting on the ground for the first time in about a year and sitting the in the interior shop. 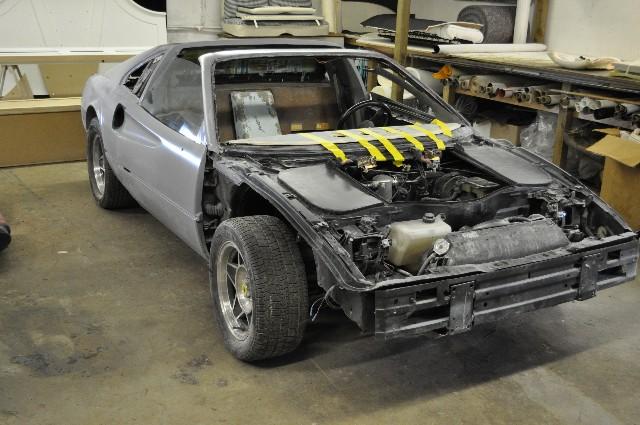 ------------- Ferrari 308 Replica Prova 5000s Countach Replica |
Posted By: Linlor
Date Posted: 31 December 2012 at 3:08pm
|
Some progress on the interior. The guy is doing a great job on the pieces so far. I made a map holder and speaker enclosure f or the door cards as well but the first attempt was a bust. Back into the garage I go for the second round on the doors.... Speaker enclosure wil be fine as it sits under the dash but the map pocket needs to be thinner and,....well.... just better looking as it doesn't flow right now at all... A few pics of the interior so far and my bad first attempt at a map pocket.... 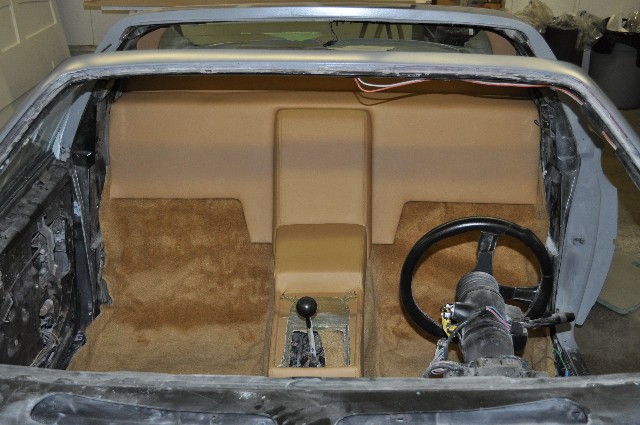 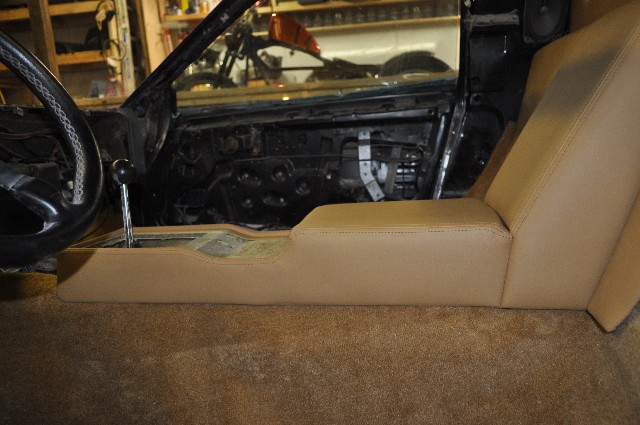 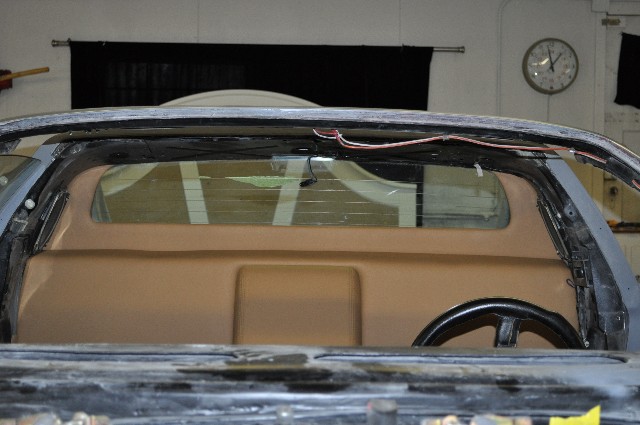 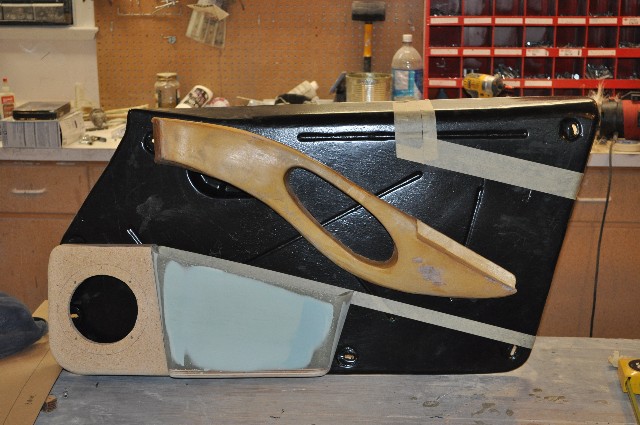 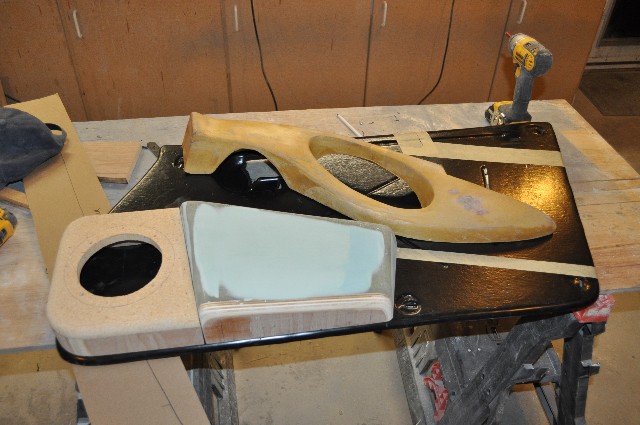 ------------- Ferrari 308 Replica Prova 5000s Countach Replica |
Posted By: Linlor
Date Posted: 14 January 2013 at 2:44pm
|
Thought I would update again o the interior and paint. I have the car back in the garage after the guy did up my full interior. excellent work and quite reasonable. I still need to finish up the headliner panels I got from V8Archie to match up with the targa section and cut and shape the tan a-pillar to match up to the targa section. I ended up needing to adjust the map pockets as they were too big, and the first round was for all intent and purposes, ugly.... . I ended up redoing the pockets to be flat up against the speaker boxes and I carved a section out of the driver's side to allow for easy access and movement of the e-brake. It all came out beautifully.I am also out of town right now until next week so doing lots of thinking and planing on what I want to do with the centre console area. I have a shift gate coming from Rob (Fiero conversions in Seattle) and I am looking for some good switches to take care of the following functions.
8 in total so it will be full depending on what I end up doing. I am looking at surrounding the shifter and the angled section down behind the shifter but there isn't a lot of room in under so I will be looking for small switches that will suit the console. The little section in front of the main centre console section will have the 12v (cig lighter), change tray and under the change tray, the ALDL connector Cheers Don 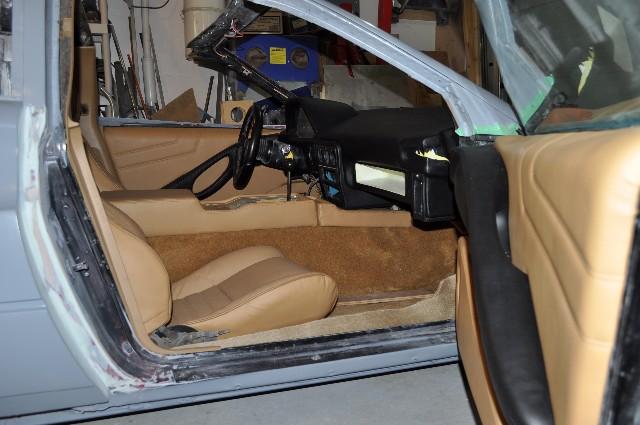 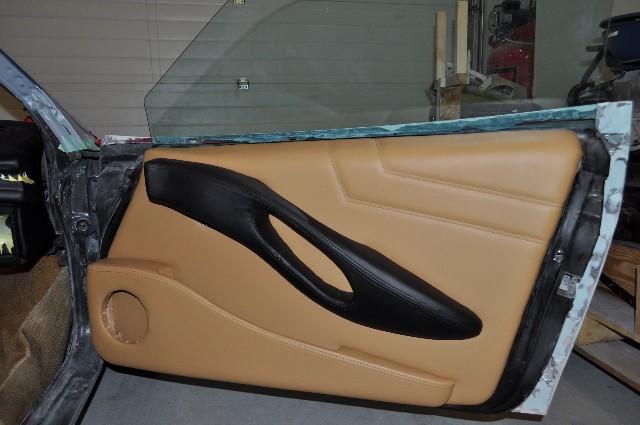 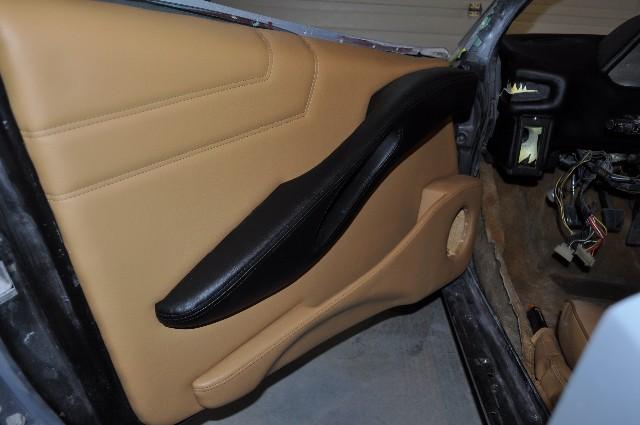 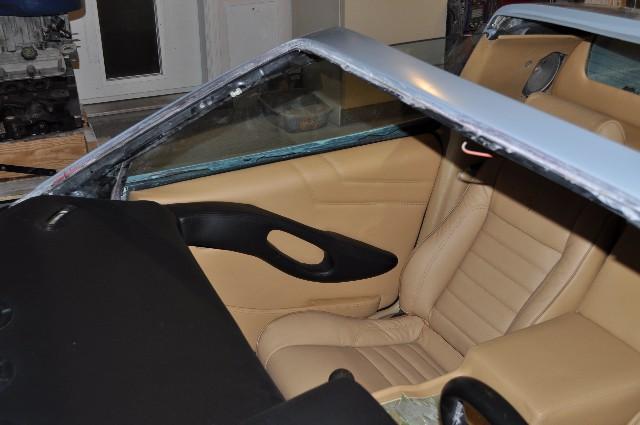 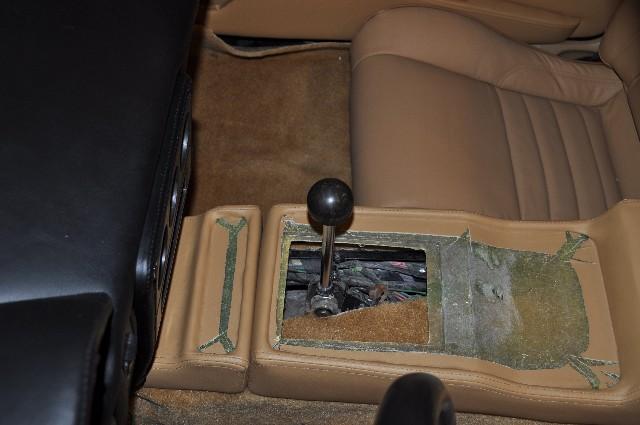 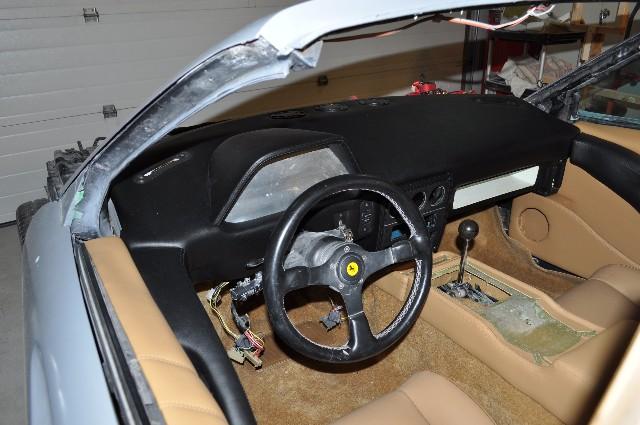 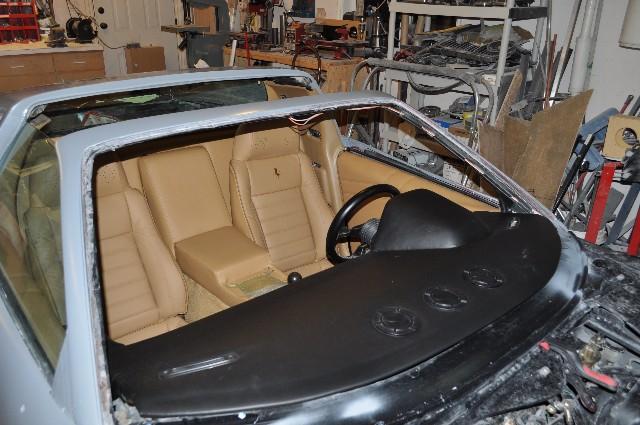 ------------- Ferrari 308 Replica Prova 5000s Countach Replica |
Posted By: Linlor
Date Posted: 14 January 2013 at 5:12pm
|
Doing some planning for switches and setup for the centre console. This
drawing set is not to scale and I am sure that will end up changing the
spacing between the switches a bit but some initial thoughts on
placement of switches. I am leaning toward option 1 as it doesn't look quite as cluttered. My biggest concern is also the depth I have below the angled portion where the seats/defrost switches are. Not sure how much room I will have under there so may need to get smaller switches than I am hoping. I have been doing a lot of searching for auto switches, not an easy search on the net and I found some really nice ones from Carling Technologies that are 1.75" long, 1" wide and about 1.5" deep. The depth is the part that has me wondering if they will fit. The switches I like come with illuminated windows that you can put the images into for each of the functions. Thoughts about either option or maybe another option. Anyone know of other auto switches sites I can go to? I haven't really found much online yet and I certainly don't want the $3 switches from Napa etc.?? Thanks Don 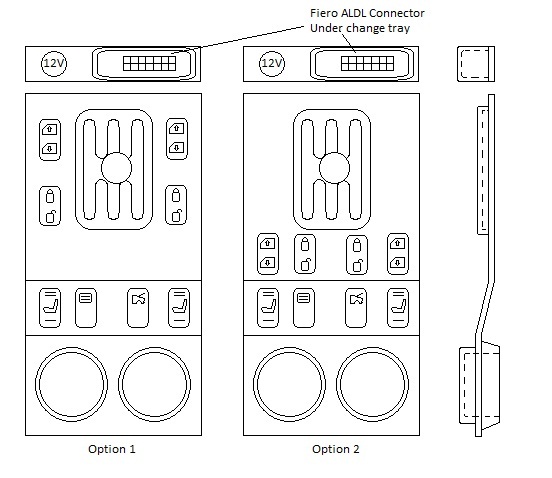 ------------- Ferrari 308 Replica Prova 5000s Countach Replica |
Posted By: Dr.Fiero
Date Posted: 15 January 2013 at 4:02pm
|
Totally prefer option #1. Word of caution though - make sure there's some kind of interlock on the trunk switch (ebrake, etc). I can see you bumping it with your arm/hand by accident being right there by the shifter. Why two door lock switches? Could use one as maybe fog light on/off? I'd swap the window and lock positions (more used control is closer then). |
Posted By: Linlor
Date Posted: 15 January 2013 at 11:33pm
|
Actually, I forgot about the fog light switch. Thanks John.... Now I need to find a spot for that as well.... Working details to maybe get some Carling Tech switches that don't have any images on them. I guess imaged switches from Carling are 250 minimum order. Don't need 250 of each...... If I get clear switches ordered from them, there is a distributor in New West, I can then source out some images to stick into the illuminated windows and get everything I want.... More to come. Cheers Don ------------- Ferrari 308 Replica Prova 5000s Countach Replica |
Posted By: Linlor
Date Posted: 11 February 2013 at 12:29am
|
Got all my switches when I was down in Phoenix and then Calgary. I
will be building the centre console inserts over the next few weeks. I also received some of my parts back from the painter. I will be sending the rest to the painter in March as he has another project he needs to get done in Feb. I really like the colour and looking forward to getting the rest painted as well.... I also got the front clip, rockers and front bumper but left them wrapped up in blankets to help save from potential paint nicks Enjoy. Don 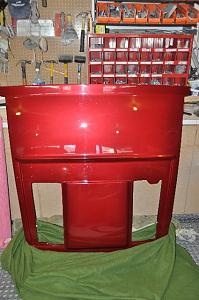
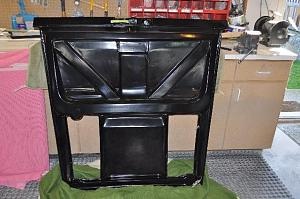
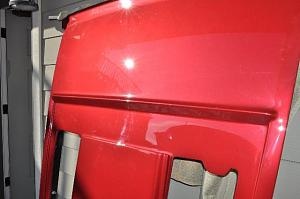
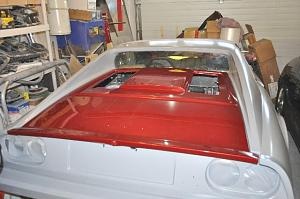
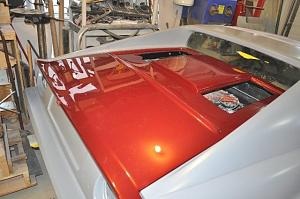
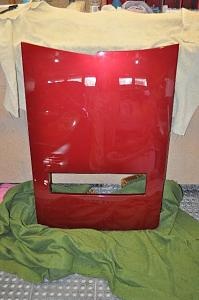
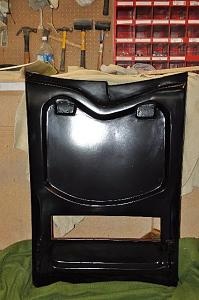
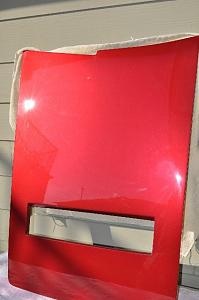 ------------- Ferrari 308 Replica Prova 5000s Countach Replica |
Posted By: Linlor
Date Posted: 04 March 2013 at 12:24pm
|
Rest of the car is out to the painter as of Sunday March 3. I estimate the month of March for him to work through the car. A couple pics of the progress I made before I towed it out to Sooke yesterday. I had to put the front clip on to readjust the driver's door out a bit so I took a couple pics of the clip on the car. This colour is spectacular.... Cheers Don Dash/Screen extension all sanded up and cleaned up and permanently attached to the car now. You can kind of see three lines in the centre area. These need to be cut out and the Fiero screen below cut out to allow for the new defroster vent channels to flow out to the new defroster locations. This pic was just after I added the edges of the tray to seal off the ends where the screen will lay in. It looks much nicer now after some sanding and cleanup. 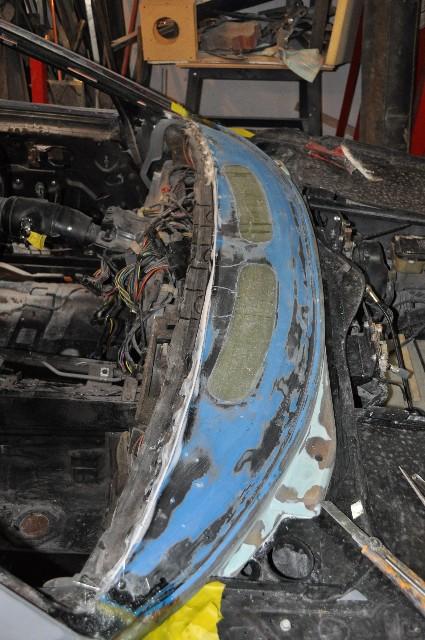 A few pics of the front clip on the car. The paint really pops when seeing it up close.... The garage and camera lighting don't do it justice. 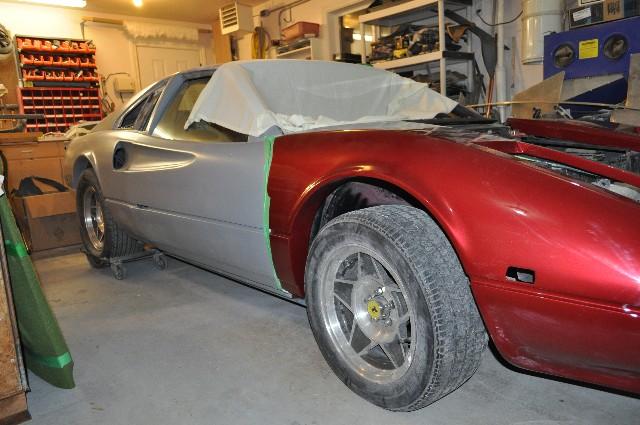 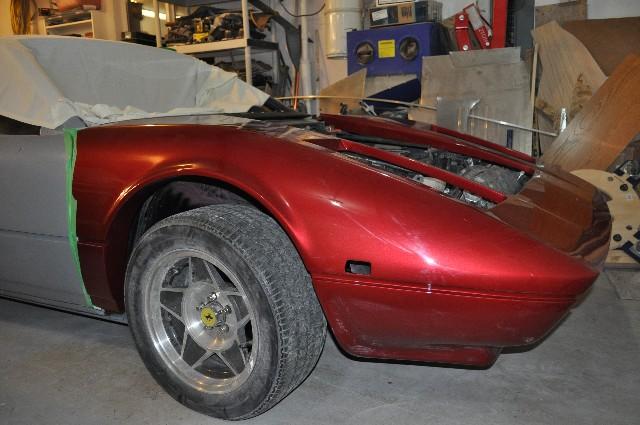 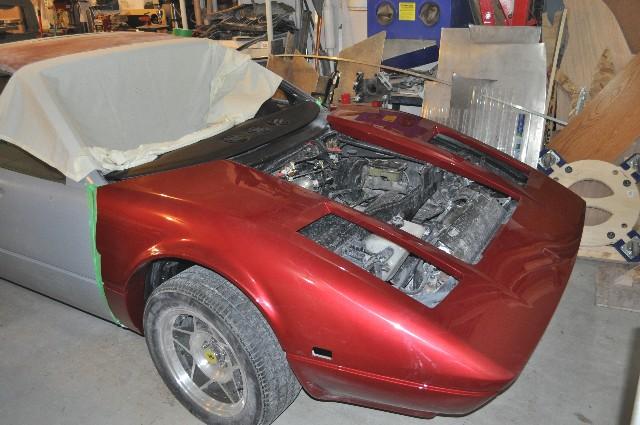 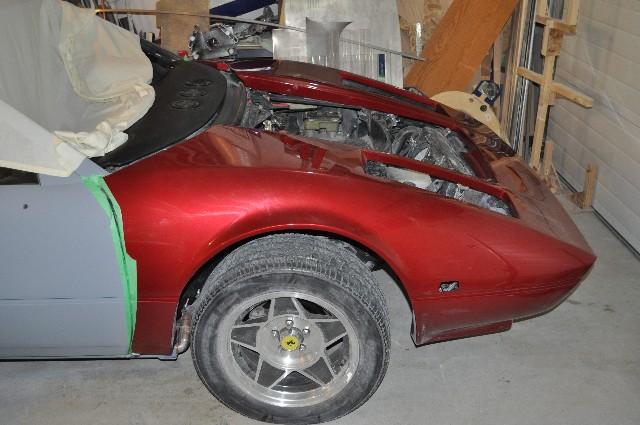 ------------- Ferrari 308 Replica Prova 5000s Countach Replica |
Posted By: Dr.Fiero
Date Posted: 04 March 2013 at 1:40pm
|
Killer! If it looks that good inside with crappy lighting, I can only imagine what it looks like in person! |
Posted By: Linlor
Date Posted: 01 April 2013 at 9:23pm
|
Thought I would post a few pics tonight. I got the rest of the car back from the painter today. It looks amazing. I have to finish off my Countach bumper and air dam over the next week and then on to putting this one back together. Cheers Don 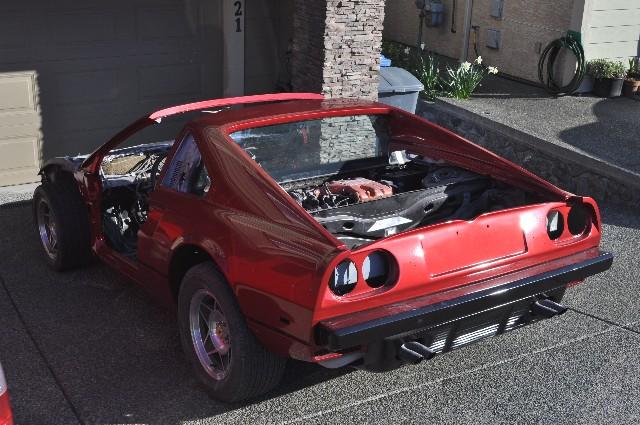 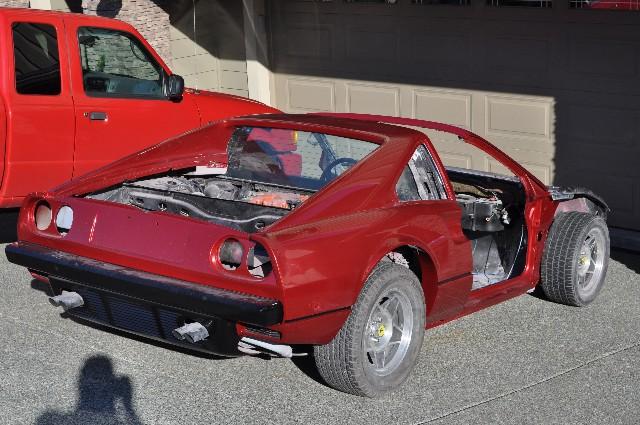 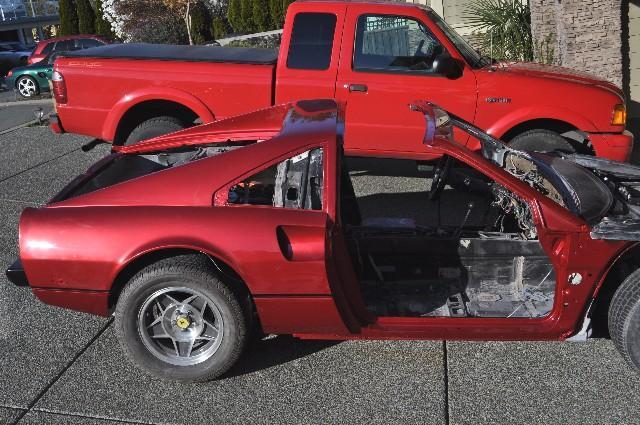 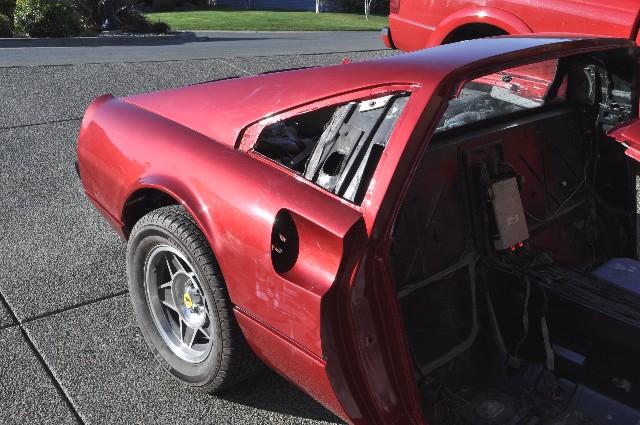 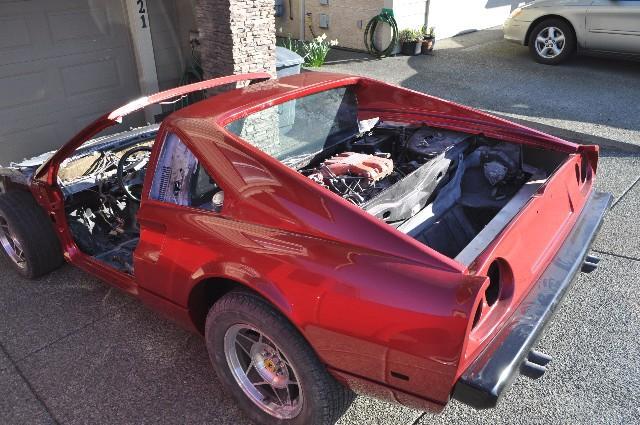 ------------- Ferrari 308 Replica Prova 5000s Countach Replica |
Posted By: Linlor
Date Posted: 10 September 2013 at 2:16pm
|
Thought I would post over here as I have made great progress on the 308 project. I have it all assembled as far as I can go right now for the time in over a year.... I plan to put the wheels back on the car and drop it on the ground tonight so I at least have it on display for my birthday weekend..... Sept 14th I turn 50 and my granddaughter turns 3 on the 13th so I wanted to drive myself and my granddaughter around the block in celebration A new brake line hole I found on Monday night killed that aspiration. I will at least have a good looking garage queen though...... Pics don't do the colour justice..... A few items I found when putting everything back together.
A couple more weeks of tidying up and it will actually be on the road. Enjoy Don 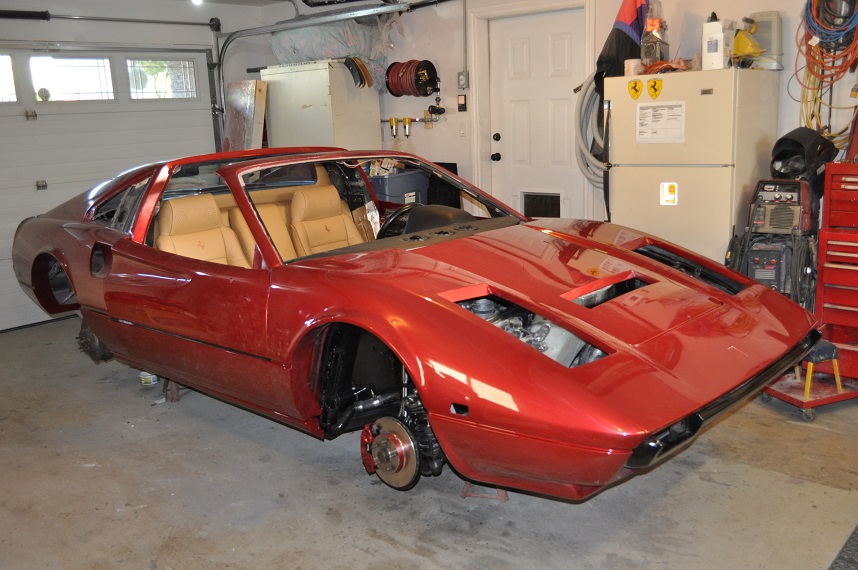 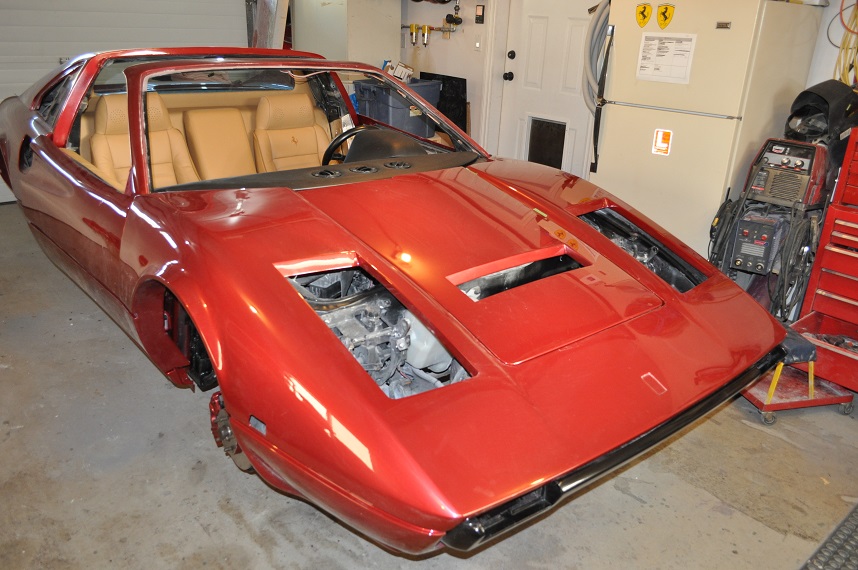 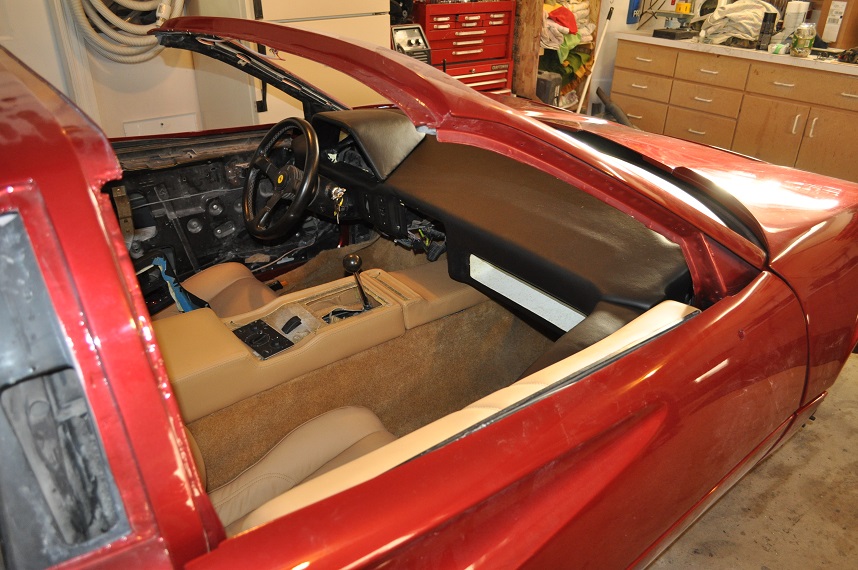 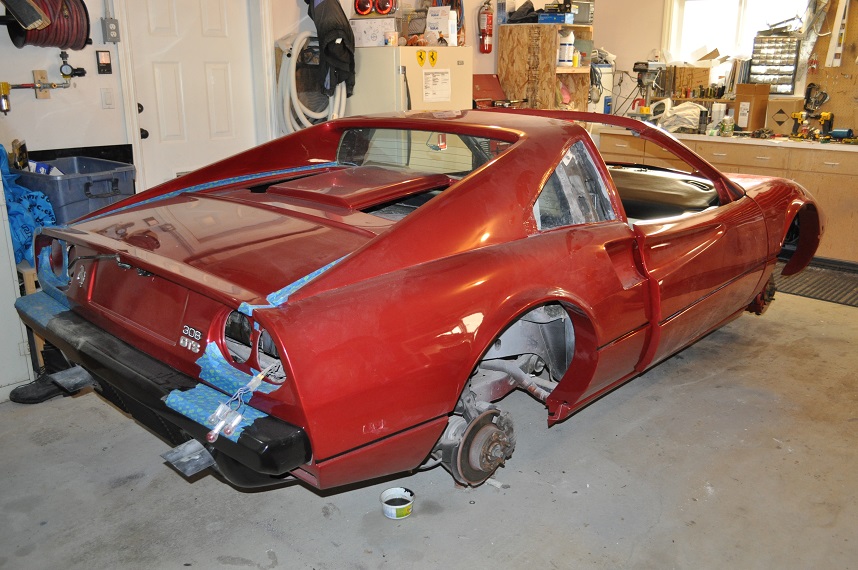 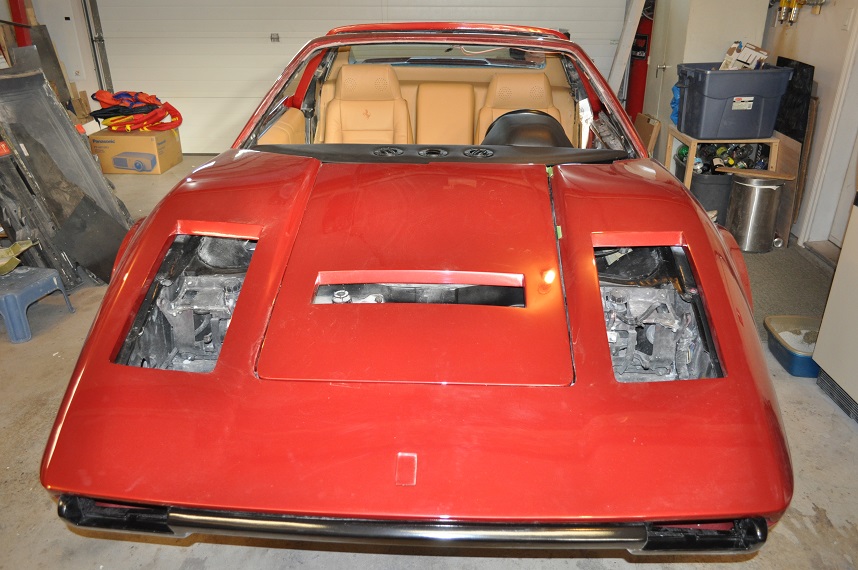 ------------- Ferrari 308 Replica Prova 5000s Countach Replica |
Posted By: Linlor
Date Posted: 02 October 2013 at 4:40pm
Installed the targa seal clips this past weekend. Should seal up quite nicely for the weather we inevitably get caught out in every once in a while.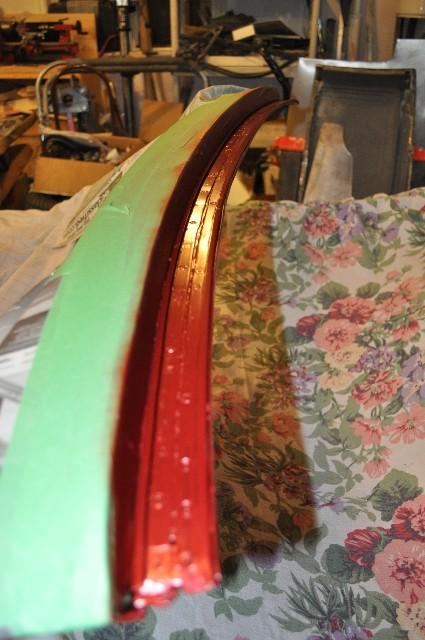 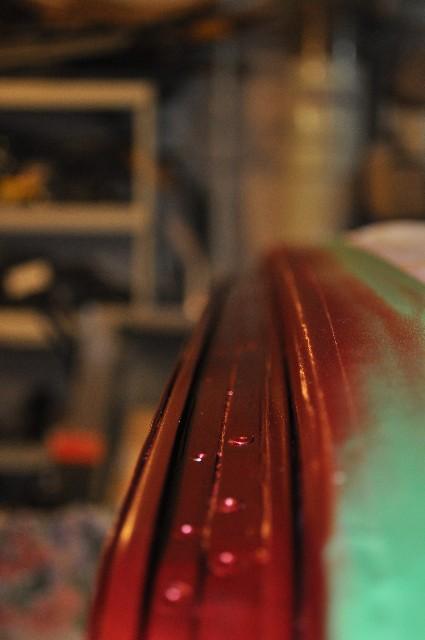 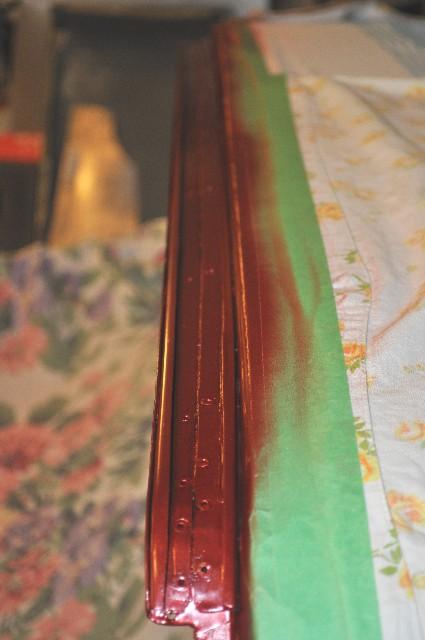 I also got the gauges installed ready for wiring. Only thing I found was that the speedo is mph only and VDO doesn't make a km/mph speedo so I guess I will stay with mph or maybe make a face plate that has both. Most likely stay with mph..... 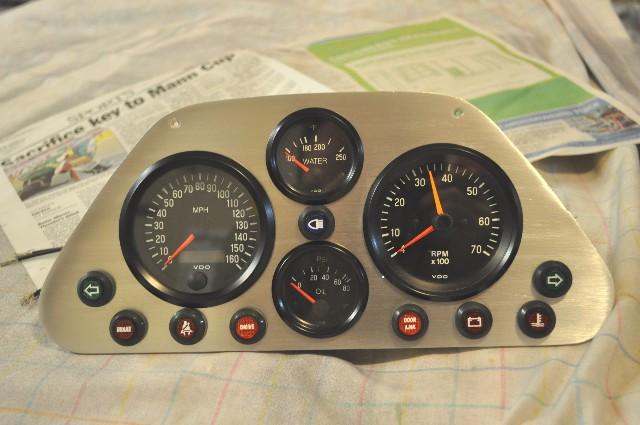 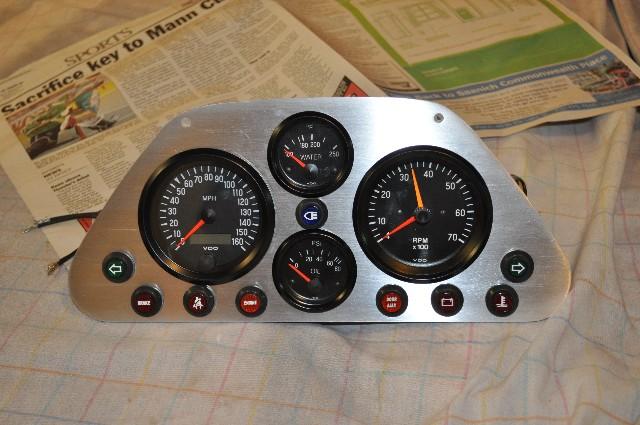 Cheers Don ------------- Ferrari 308 Replica Prova 5000s Countach Replica |
Posted By: ARTIC-1
Date Posted: 02 October 2013 at 4:57pm
|
Look @ Marine,you may find what you need. Like this. 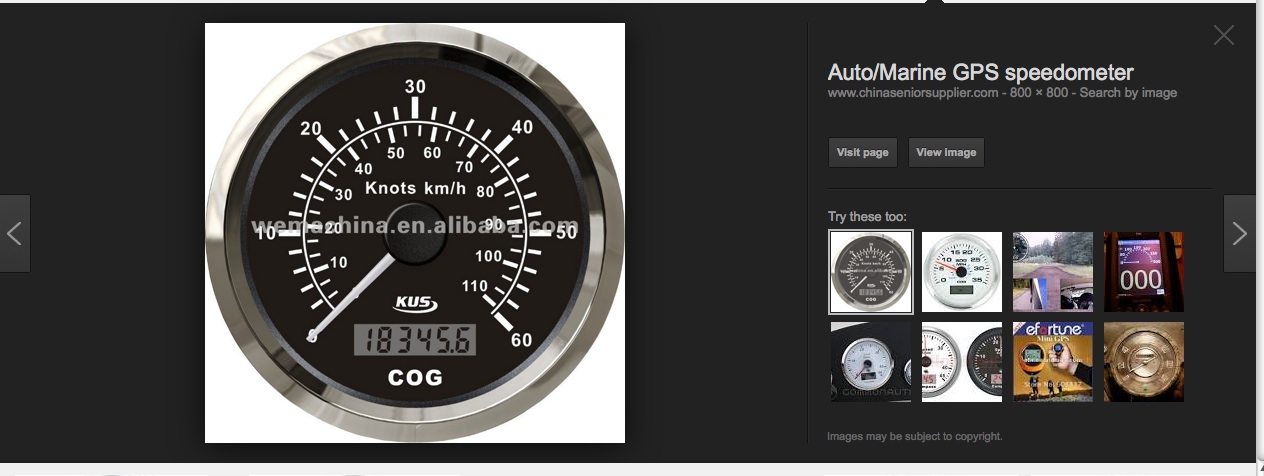 ------------- SNOW MAN 87-GT/AUTO-2.8_ WHITE 88-TTop/ Duke-2.5. RED |
Posted By: Linlor
Date Posted: 03 October 2013 at 10:04am
|
Thanks for the link. Yes, VDO also has a km/h gauge but it only goes to the 110 km/h so it would be buried or close to buried just driving on the highway. I will either stay with the mph and do the translation in my head or see about a new face plate sticker that puts both on where I have the km/h equal the mph..... Thanks Don ------------- Ferrari 308 Replica Prova 5000s Countach Replica |
Posted By: Linlor
Date Posted: 28 December 2013 at 6:25pm
|
A bit more progress. I have made a centre console insert and I have
covered with 3m 1080 scotchbrite carbon fibre vinyl to get an idea of what it will look like in cf. I can't believe another year passed already...... A couple pics. Cheers Don 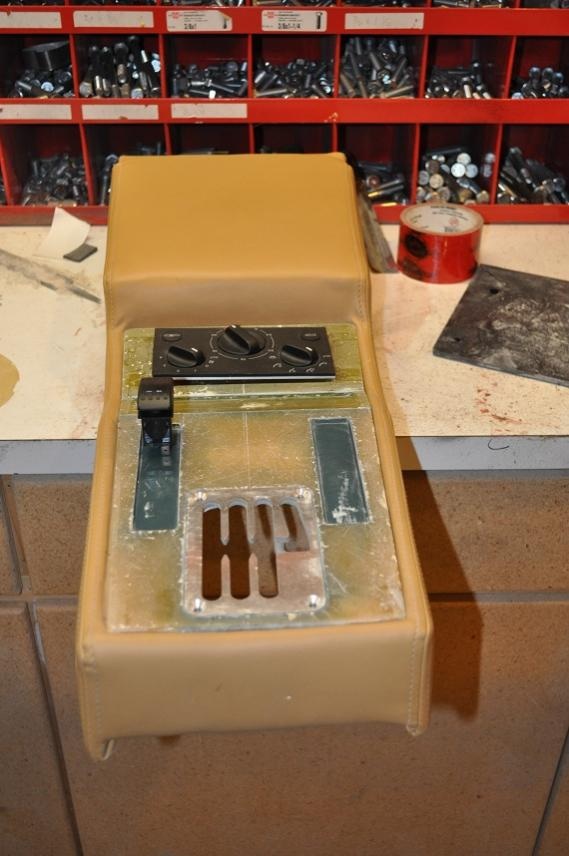
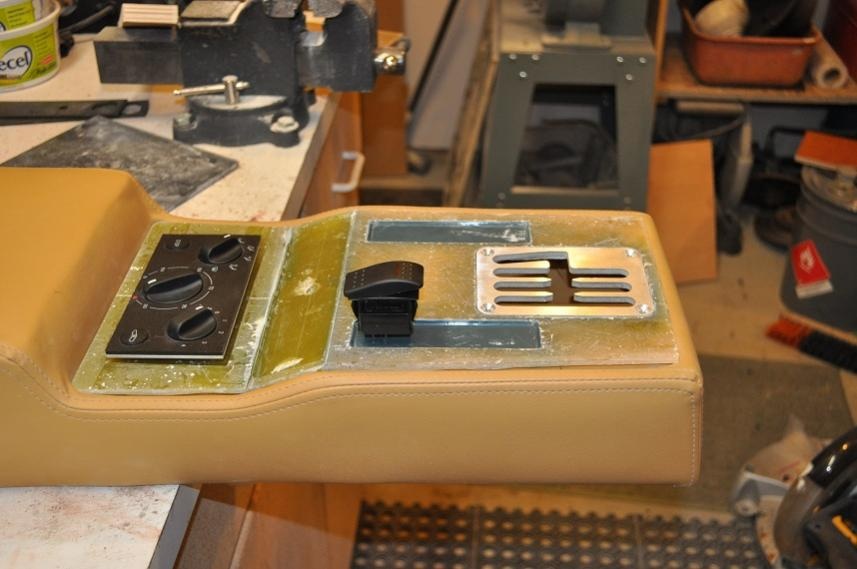
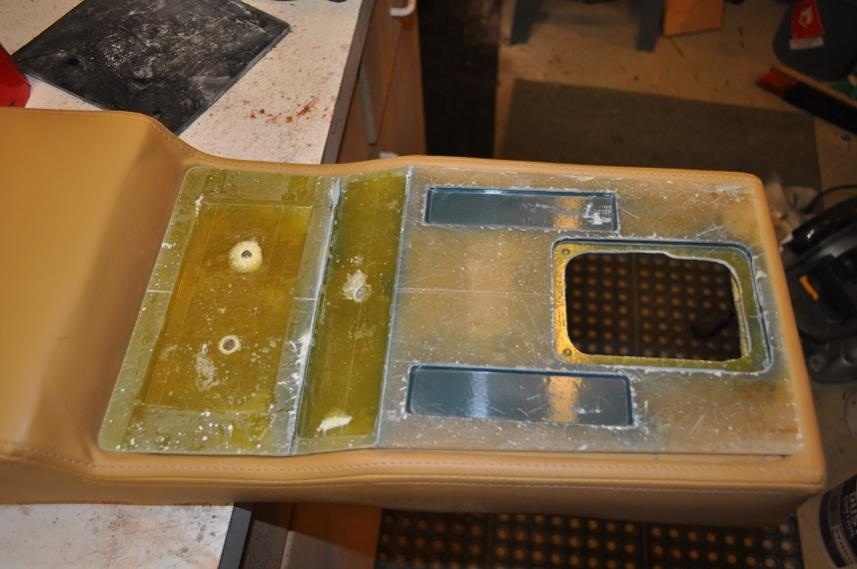
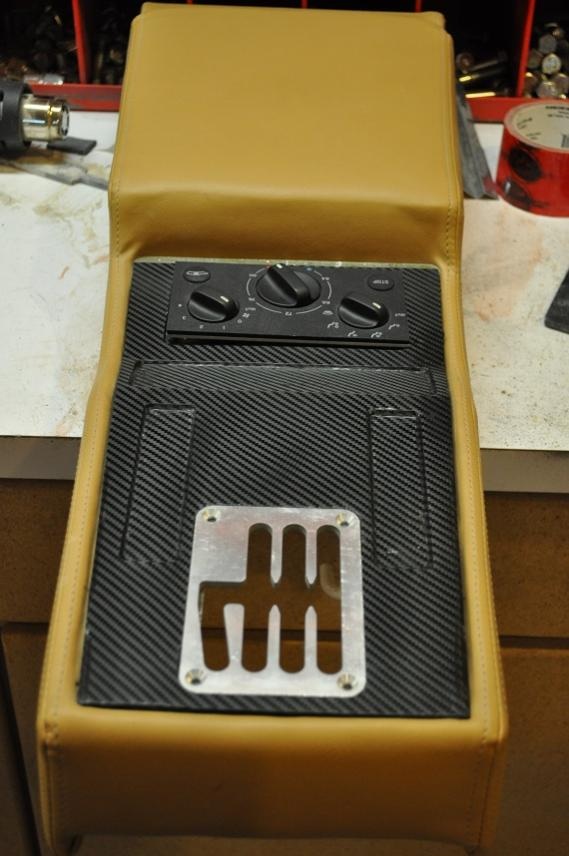
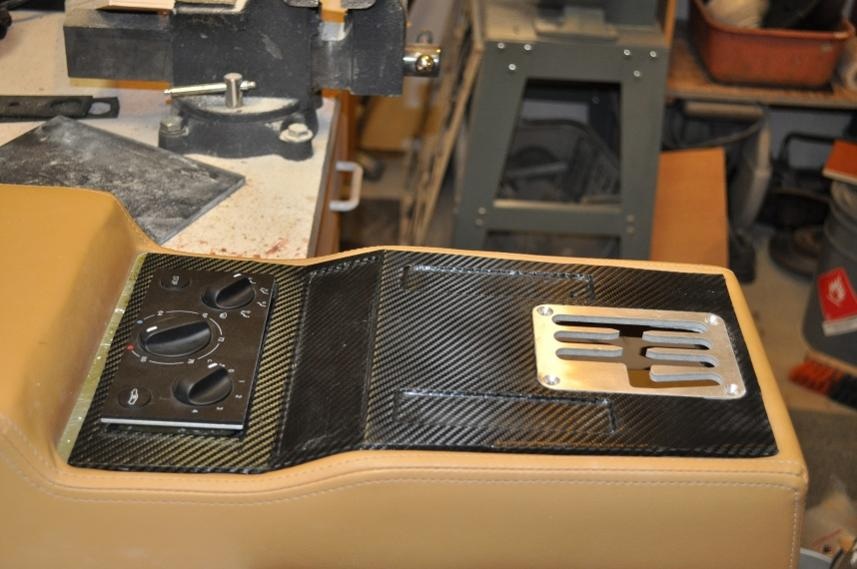 ------------- Ferrari 308 Replica Prova 5000s Countach Replica |
Posted By: ARTIC-1
Date Posted: 28 December 2013 at 6:43pm
|
Nice work,I beta! lot of time went into that console. Took me a year to Port the heads on my 2.8 Looks great. ------------- SNOW MAN 87-GT/AUTO-2.8_ WHITE 88-TTop/ Duke-2.5. RED |
Posted By: Linlor
Date Posted: 11 February 2014 at 11:51pm
|
I saw Johnny is updating the build thread areas so thought I better contribute as well., I am finally back at the car again and making the final push.... again.... I went through some carbon fiber tries a couple weeks ago and totally messed it up so had to sand everything back off and I am waiting to get the nerve back up to try again.... I needed to redo the headlight buckets as they weren't working for me. I made some jigs to get pivot placement and then tore the old Fiero headlight mount out and closed the bucket in to make a full and solid bucket. Much better arrangement to start with. I then made up some metal pivots similar to how I did the 355 buckets a few years ago. Worked out well on the passenger side and now I need to get after the driver's side over the next couple days. Cheers Don Ready for the eye surgery...... 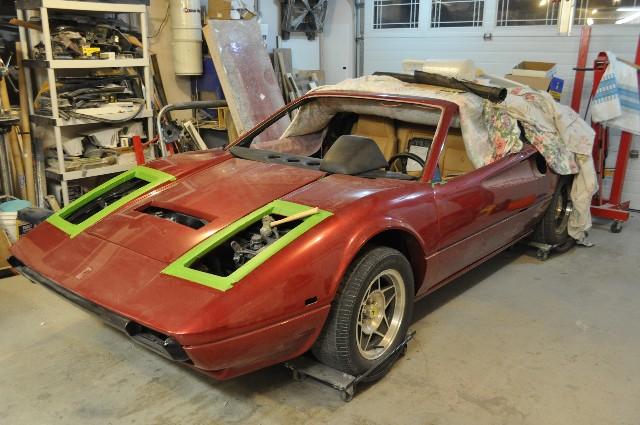 Old bucket internals. I had tried some expanding foam and it never set past a desert topping consistency so that put me over the edge to start it all over properly. 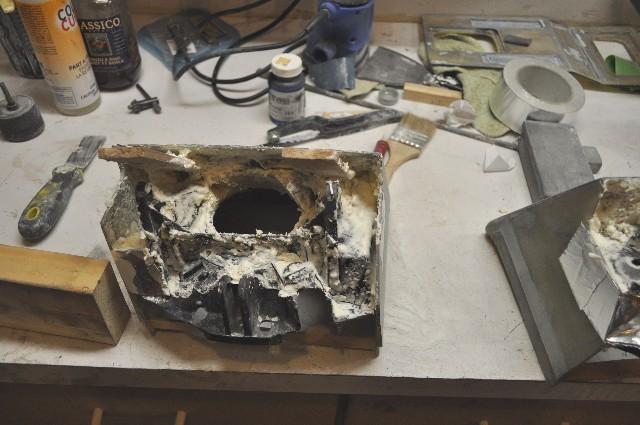 I closed in the buckets and redid the front fascias so they fit better on the new rearranged buckets. 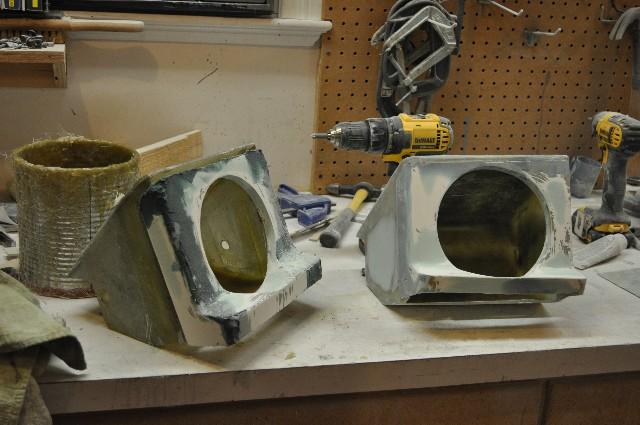 Next was the pivot design and build. The long ends out past the pivot will be bent over to be used as the open stop.  Passenger side installed in the car up and closed. 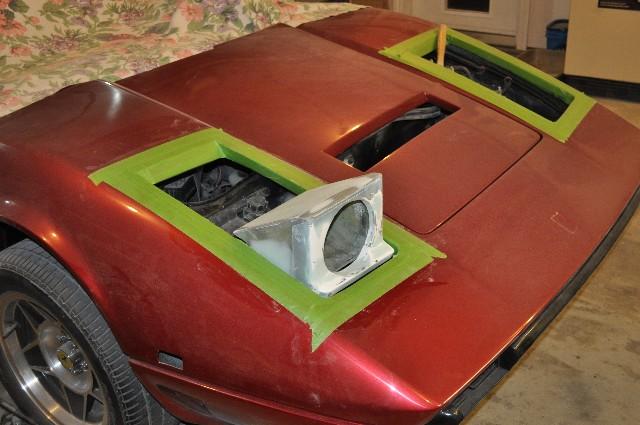 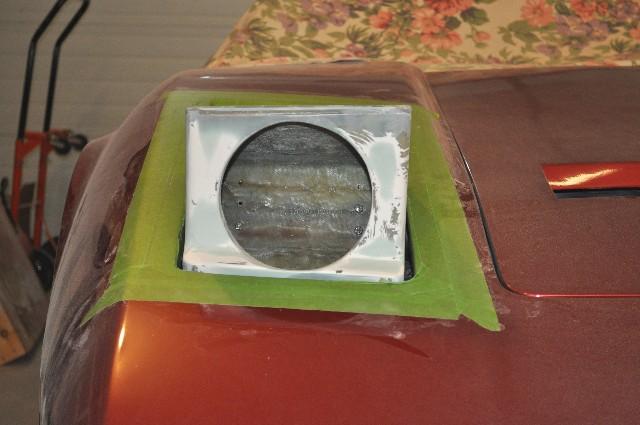 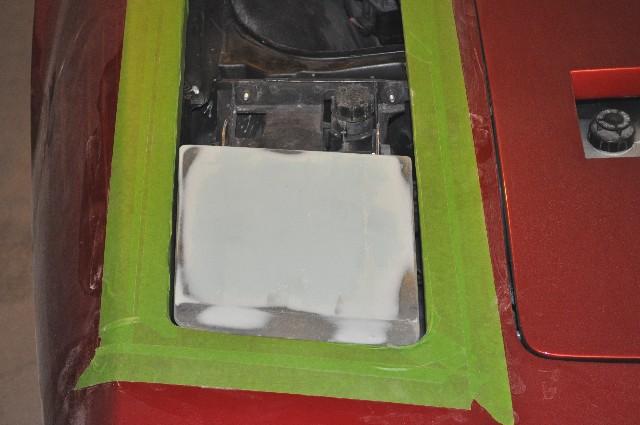 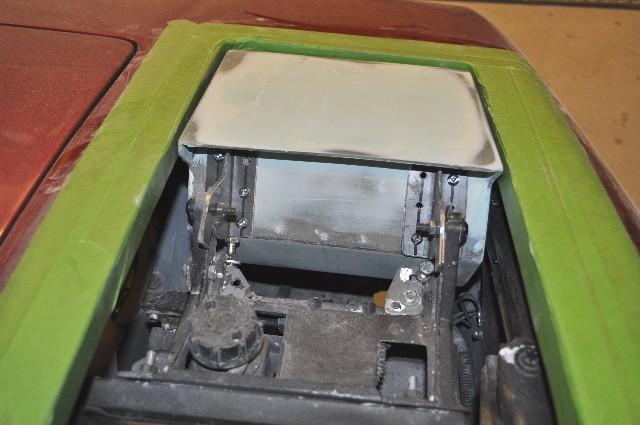 Rinse and repeat for the driver's side over the rest of the week. Cheers Don ------------- Ferrari 308 Replica Prova 5000s Countach Replica |
Posted By: Fieroman88
Date Posted: 15 February 2014 at 3:41pm
|
Luv what you've done. Certainly a labour of love. Consul
looks fab and the insides of the doors make a enjoyable difference. Good job. Hope to see it at a meeting soon. ------------- Fieroman88 |