3.5L LX9 Swap into ’86 2M6 4 speed
Printed From: West Coast Fieros
Category: Technical Topics Forum
Forum Name: Build Threads
Forum Description: A Place to post step by step build threads.
URL: http://www.westcoastfieros.com/forum/forum_posts.asp?TID=2825
Printed Date: 28 June 2025 at 5:39am
Software Version: Web Wiz Forums 12.01 - http://www.webwizforums.com
Topic: 3.5L LX9 Swap into ’86 2M6 4 speed
Posted By: bcampbell
Subject: 3.5L LX9 Swap into ’86 2M6 4 speed
Date Posted: 10 February 2012 at 10:37pm
|
Hey I'm new here and new to Fieros. My end goal is to
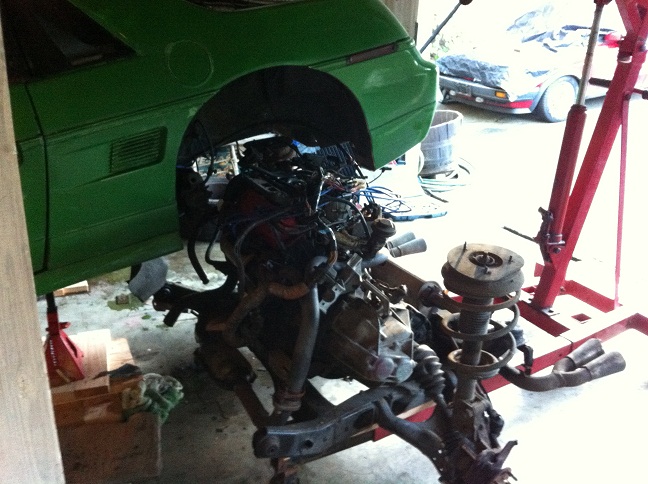
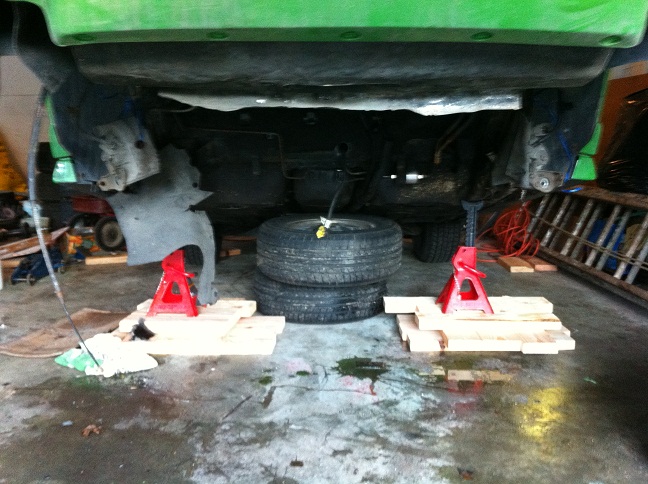
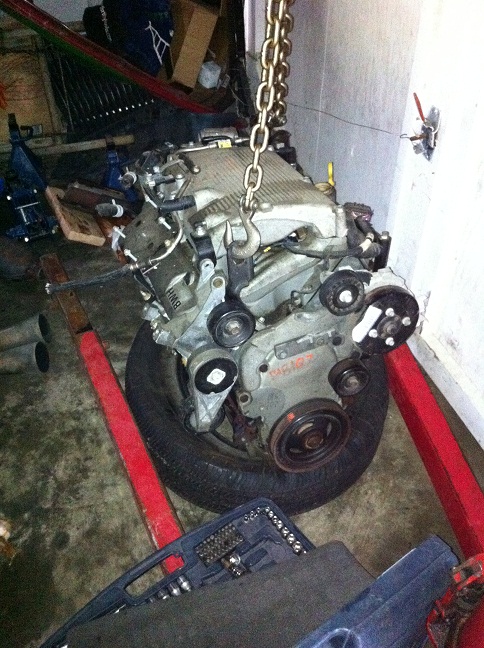
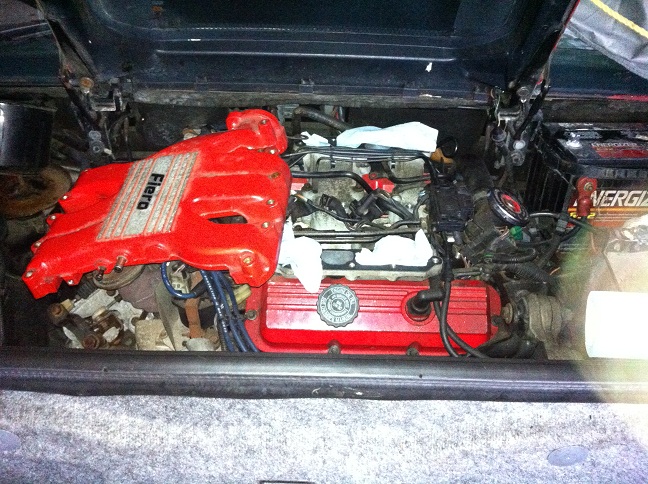
have a daily drivable Fiero that I can have fun with autocrossing occasionally. I'm not looking for something super fast as that's what my other car is for. I bought my Fiero back in December for $700 and it had a 2.8 in it that was rebuilt in '09 (sticker on the engine) by Cords Engine Specialists. However after trying lots of ways to get it running and also discovering cylinder #1 had >20 psi lower compression than #3 and #5 I decided to give up on the 2.8. There's minimal rust on the whole car so I really didn't want to just scrap it. The LX9 I got is from nfswift on these forums as he abandoned his swap. As a bonus, I ended up with his LX9 from an '06 G6, aluminium cradle bushings, poly rear control arm bushings, 3400 coils and ICM, TCE crank trigger, and 3 exhaust manifolds to play with for $600. My shopping list right now for remaining necessary parts includes: - '88 Flywheel - 7730 ECM and pigtails - Knock Sensor - Rad Hoses - LX5 Throttle body - Wiring from crank sensor to ICM - Either vette fuel filter or 3400 rails and injectors with regulator (haven't decided yet) - A tune, obviously - New motor mounts (don't trust old possibly 25 year old mounts) - Alternator (does anyone know if a 3400 alternator will bolt up?) Plans include to get the LX9 injectors tested (they've been sitting for a few years now and I just don't trust them), making a throttle body adapter plate for the LX5 throttle body, and wiring in a 7730 ECM per Darth Fiero's instructions available on-line. I also plan on de- looming the harness and routing the wires in a way that's ideal for the Fiero. Since my 4 speed clutch is practically brand new and I don't plan on a lot of WOT with this engine I'm going to re-use it. Since the LX9 didn't come with a starter I'll most likely re-use the 2.8's starter. And here's some pics of the car and the new engine: 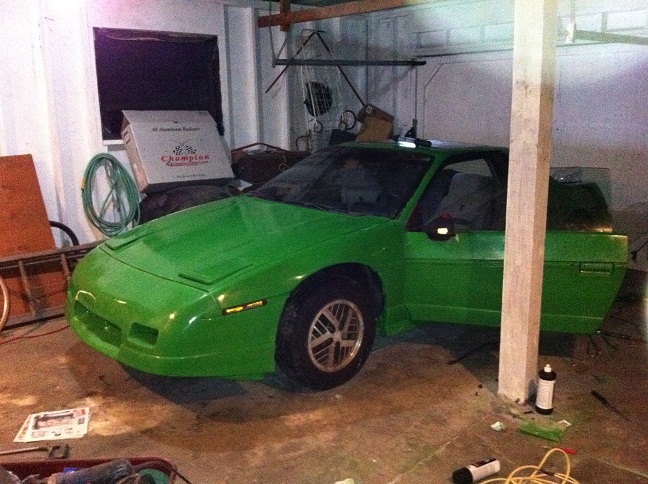
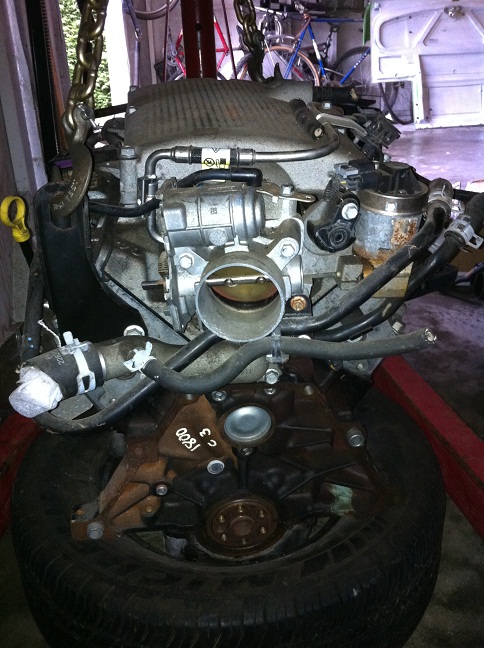
I want to have this running ASAP and I'm probably gonna make a parts run to Port Angeles since everything is so much cheaper in the US. My goal (probably unrealistic) is to have this started within 3 weeks. |
Replies:
Posted By: Dawg
Date Posted: 11 February 2012 at 1:10am
|
Looks like it's in nice shape for $700. Good deal I think.
Welcome to the group. Dawg ------------- You dream it up....I'll make it |
Posted By: bcampbell
Date Posted: 11 February 2012 at 1:26am
|
Thanks it was my first time painting a car and there's
lots of flaws with the body (been in a front end accident). However there's minimal rust on the whole car, the brakes were all done within the last 5000 kms, and the suspension is not showing any sagging. Most of the rust I've found so far has been cleaned and coated with POR-15. I'm probably gonna try going over it again with rollers after seeing how well my friend's truck turned out since I have tons of leftover paint anyways. And eventually I'll paint the trim in flat black and scrape off the red overspray on the windows from the PO's paint job  . .
|
Posted By: bcampbell
Date Posted: 11 February 2012 at 10:09pm
|
Minor update for today, I just took a wire wheel attachment
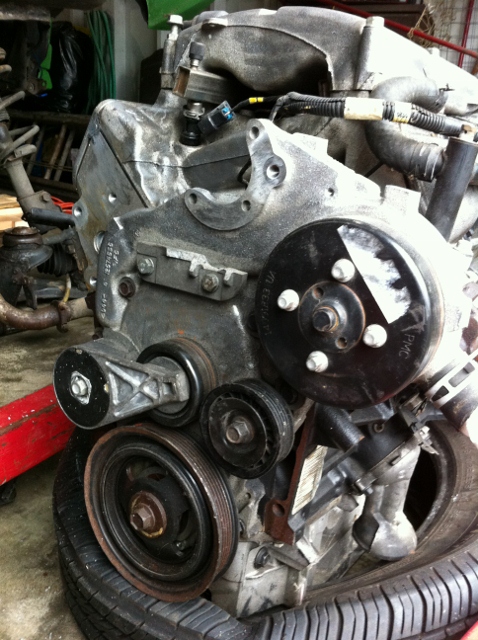
for my drill and cleaned up the aluminium parts a bit, then moved the tensioner and swapped its pulley with the idler below the water pump. 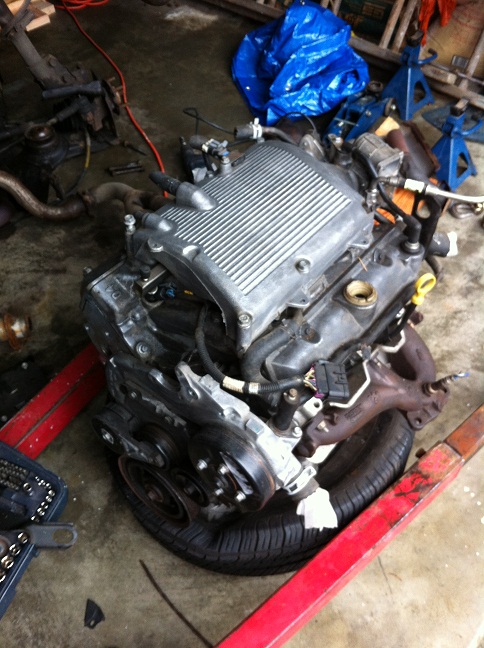
|
Posted By: CFoss
Date Posted: 12 February 2012 at 9:14am
|
bcampbell, where are you at? On the island somewhere? I was going to help nfswift with his swap (Electronics side) but then he moved on to other things. If you're looking at the 88 flywheel for the neutral balance, keep in mind you can just get the wieght on a pre 88 flywheel machined off and it's just as good. I did this for my 3.4 swap. It's 1/2 hr of work and $50. (Actually the guy charged me $25 cash and I gave him $40 and said thanks for doing it, it was his day off). Chay ------------- 86 SE 3.4 |
Posted By: bcampbell
Date Posted: 12 February 2012 at 12:26pm
Ya I live in Victoria and the car/engine is in Cowichan Bay. As for the flywheel, I can get a brand new one in the US for $55 so it's not really much more than re-using the imbalanced one. Plus I can get most of the other parts I need new there and I'll most likely also buy new motor/trans mounts ($10 ea, haven't priced them out here). |
Posted By: Capt Fiero
Date Posted: 12 February 2012 at 1:01pm
|
Please don't use stock mounts....... Do yourself a HUGE favor and order a set of dickman trans mounts. It will save you a TON of grief later on. ------------- Capt Fiero 88 Fiero GT 5spd V6 Eight Fifty Seven GT V8 5spd. |
Posted By: bcampbell
Date Posted: 12 February 2012 at 2:15pm
Why would stock mounts be inadequate? Wouldn't the stock G6 use rubber mounts anyways? As long as the mounts are new, I didn't think it would be a huge deal. Obviously, I'll need to fabricate a dog bone mount in addition to the three stock mounts. Edit: It looks like rodney's transmission mounts use a standard polyurethane GM transmission mount. I happen to have one of these leftover from my 89 Firebird project. How much work would it be to make use of it? |
Posted By: Capt Fiero
Date Posted: 12 February 2012 at 3:42pm
|
The Stock Rubber G6 would have been stronger. If you can use G6 mounts great. However the stock rubber Fiero trans mounts IMHO are Junk. Granted my V8 makes 300+lbs of torque, but the fact that I could put a new set of stock rubber trans mounts in, take it out to the street pop the clutch ONCE, and bust a Lordco Anchor mount, I stopped using stock mounts. If I could have used the Cadillac rubber mounts I would have been fine, but the Fiero mounts just can't handle the abuse of an engine swap. Even if you don't drive it hard all the time, if you plan to take it to the road course occasional, a good set of aftermarket mounts will give you a great deal of piece of mind. ------------- Capt Fiero 88 Fiero GT 5spd V6 Eight Fifty Seven GT V8 5spd. |
Posted By: bcampbell
Date Posted: 12 February 2012 at 5:07pm
Ok thanks for the info. Unfortunately, I can't really afford to spend $150+ on mounts right now so that will have to wait for the time being. I won't drive the car hard just to be on the safe side until if get some better mounts. |
Posted By: bcampbell
Date Posted: 12 February 2012 at 5:14pm
|
Anyone here have experience tuning OBD1? I took a look at the
injectors today and they appear to be in great shape, the only thing I'm wondering is that since if I use an LS1 vette fuel filter to regulate the pressure, it will constantly be at 58ish PSI. Does this present a tuning problem since the 7730 computer is designed to work with vacuum regulated (and thus variable with MAP) fuel pressure? I know I can get a vacuum regulated aftermarket regulator but I'd rather not spend the extra cash. |
Posted By: CFoss
Date Posted: 12 February 2012 at 7:40pm
|
I have the stuff...prom burner/reader and ostrich ii for tuning, and tunerproRT of course. You'd need a G2 (I think) adapter from moates if you want to borrow it and do it yourself. What code were you thinking of running in the 7730? My wideband 02/logger got destroyed though. I have to get a new one! As far as the reg goes, I've always wondered about the function of that beast. One way to look at it as the load increases it increases the psi to the injectors to help deliver more fuel. But hey, why not just deliver the fuel at a high pressure all the time and cut down the injector pulse width? My hypothesis is that is has more to do with lowering pressure at idle to better deliver smaller quantities of fuel at low injector pulse widths for emissions. My guess is that a solid 58 psi will be fine to tune with. You just have to make sure that psi won't overwhelm the injectors, but they are a new type so I'd guess them to be ok at that psi. As you are creating a map anyway, the regulator can be taken into account with the map. Other will hopefully chime in with more knowledge. Chay ------------- 86 SE 3.4 |
Posted By: bcampbell
Date Posted: 12 February 2012 at 8:30pm
|
IIRC I was planning on running the $A1 code. It would be really sweet if
I could borrow the tuning hardware. I already have a laptop and tunerproRT and an ALDL cable that should work. One thing I don't have is a wideband but can't the BLMs be used with data logging? I'll order a G2 adapter tomorrow if they're not too expensive. I have some more pics and updates I'll post later tonight. |
Posted By: bcampbell
Date Posted: 12 February 2012 at 11:54pm
|
So today I got some basics done, pulled off the upper
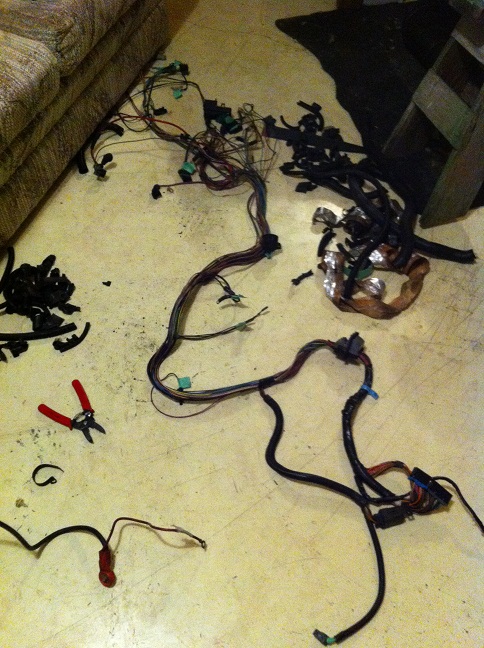
plenum and throttle body, pulled out the fuel injectors, took a look at the spark plugs, transferred the oil filter adapter and pressure sender from the 2.8, and de- loomed and labelled the 2.8 harness. After pulling off the upper plenum and the fuel rail I cleaned up the lower intake a bit as it had dirt and oil on it. Taking a look at the injectors, they are in great shape, and I'm having second thoughts about needing to have them tested. I was expecting to find some dirty or rusty injectors from sitting so long disconnected from a fuel system, but appearance wise they are fine. 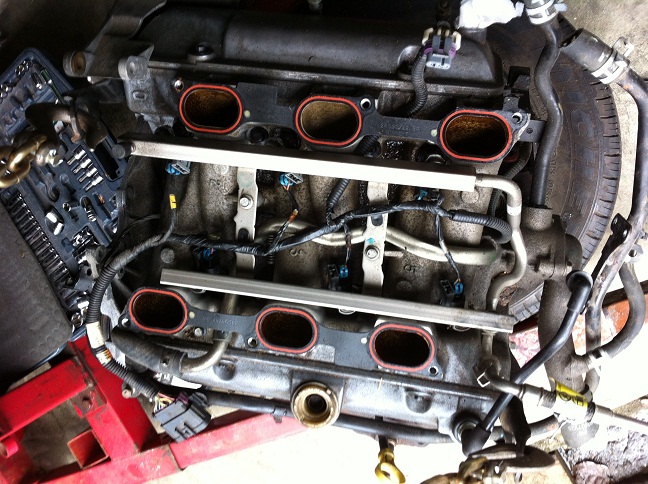
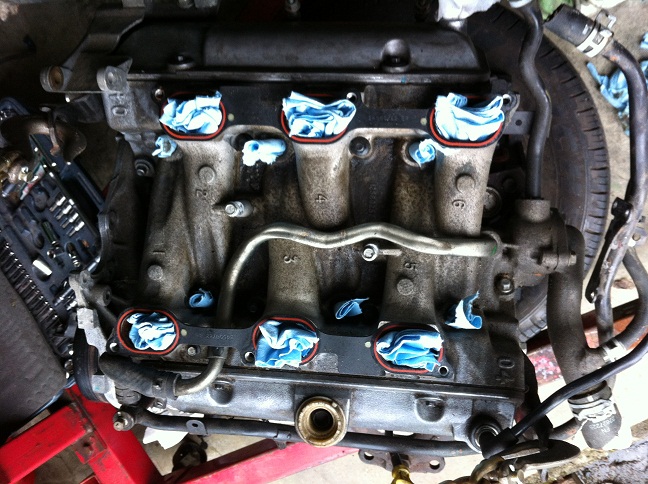
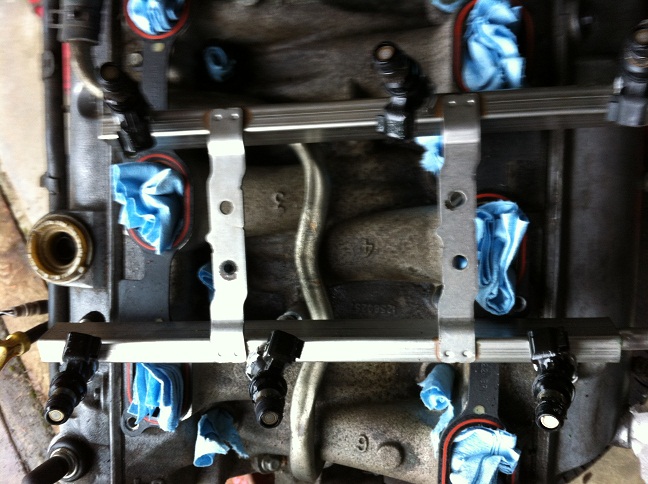
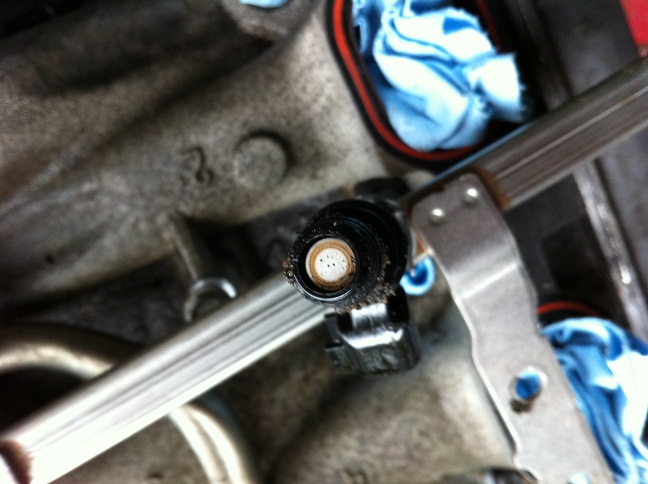
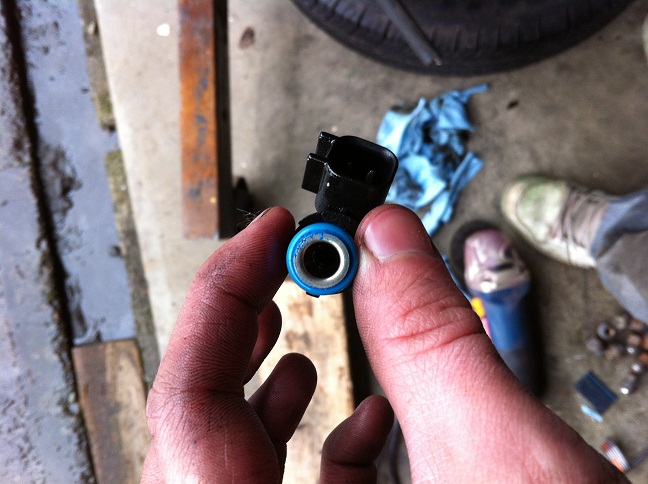
What do you guys think? Get them tested or not? I removed the stock 3500 oil filter mount as I have read it interferes with the Fiero cradle, and took the spin-on adapter on the 2.8 and installed it on the 3500. I used a 3/8 Allen socket to remove/install it; I don't think it was exactly the right size but it's close enough and that's the only allen socket I have that's nearly big enough. 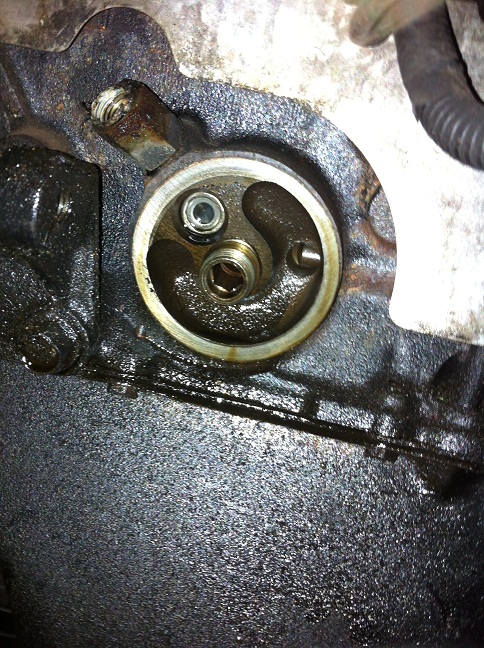
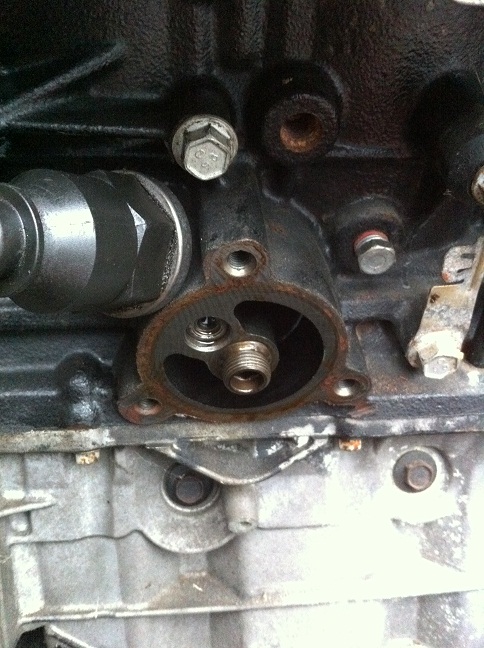
As for the oil pressure sender, I'm not exactly sure if I put it where it's supposed to go, but I saw a plug near where the oil filter mounts and found that the 2.8's oil pressure sender threads right in in place of the plug. Hopefully I got that right :). 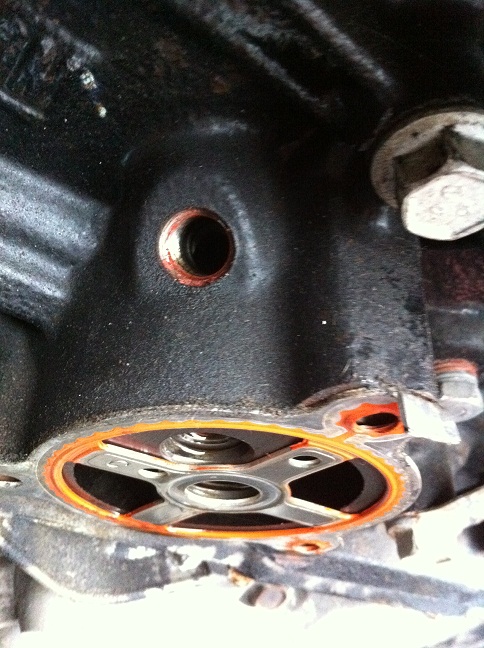
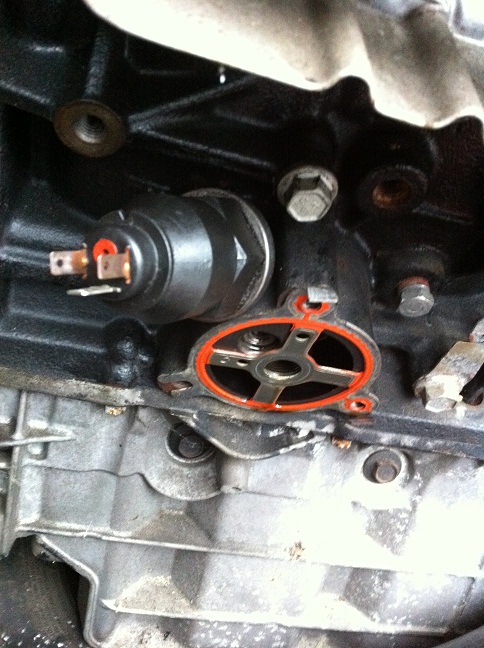
I also modified the front engine mount to clear the new oil pan and test-installed the CPS mount bolted over the motor mount. So far so good. 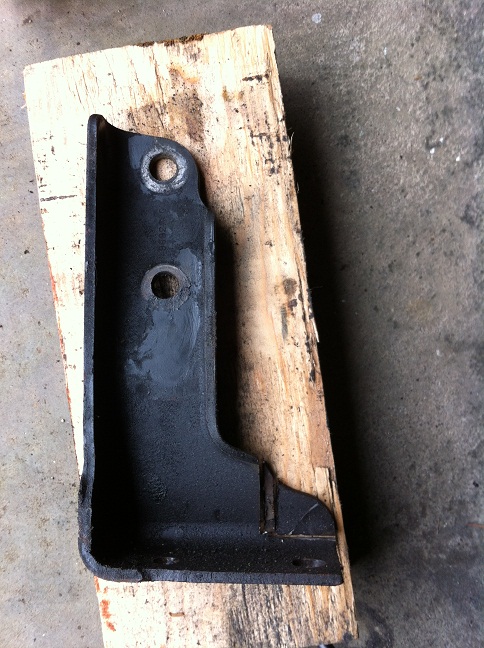
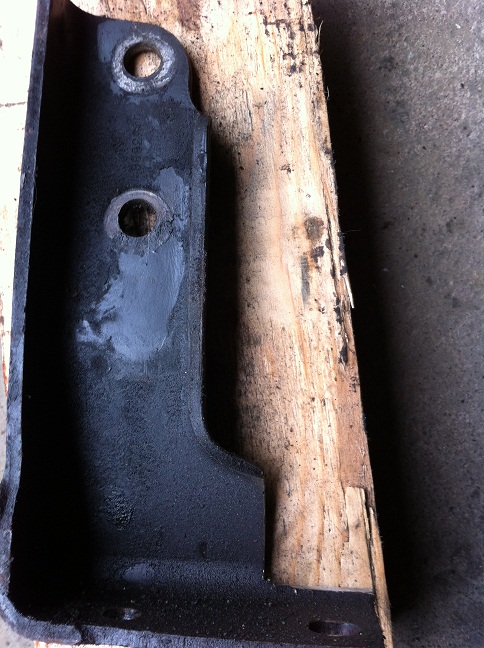
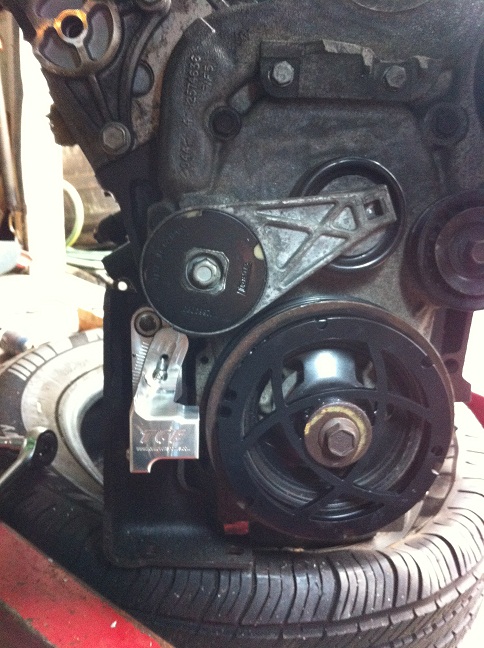
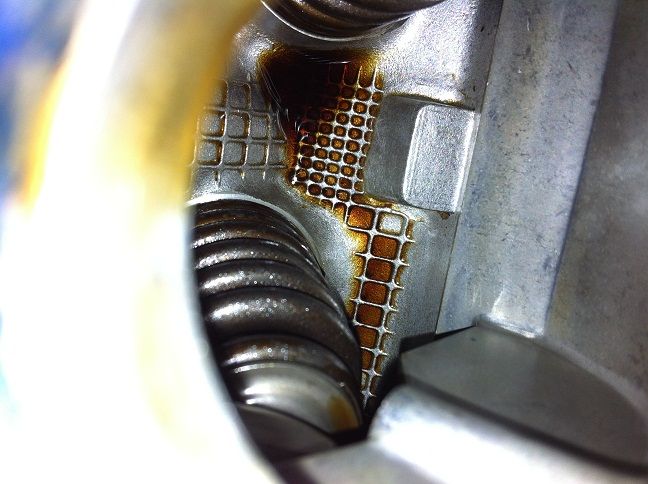
I then took a peek into one of the valve covers through the oil fill cap and checked out the spark plugs that were in the engine (#1-#6 left to right in the picture). 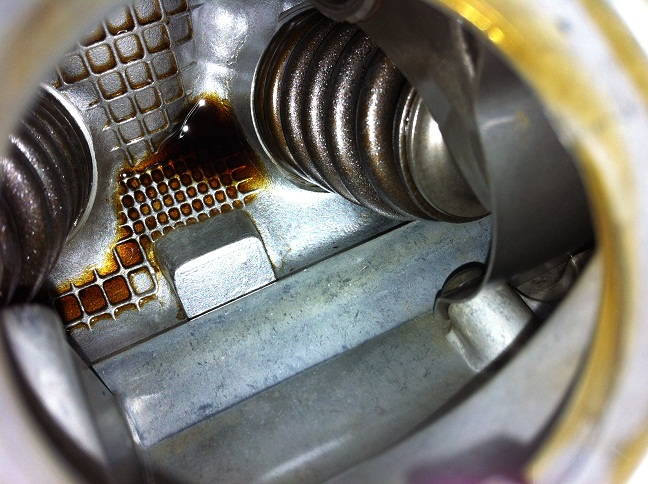
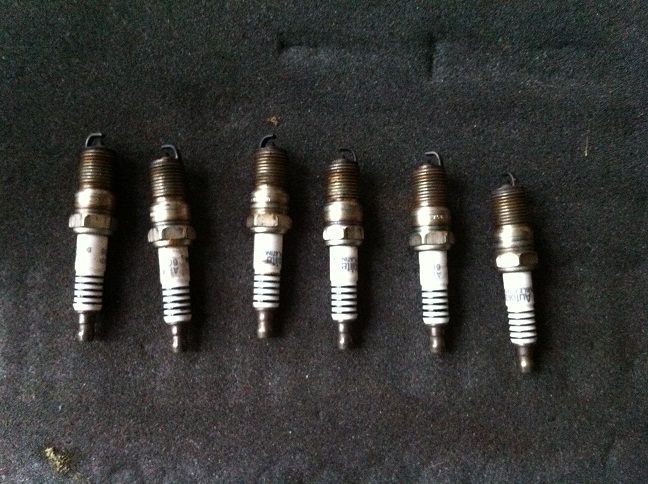
And then on to wiring. I'm thinking I'll try to use the whole 3500 injector harness instead of grafting the individual plugs onto the 2.8 harness. The engine came with a nearly complete harness so I have the other side of the connector that plugs in. The harness also has a plug for the new MAP sensor on it (in addition to the cam position sensor and CTS). If going this route I will change the pigtail for the CTS to a 3-wire sensor. 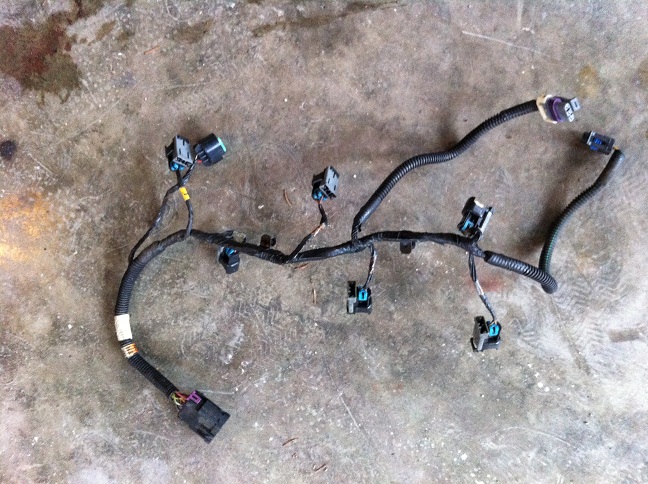
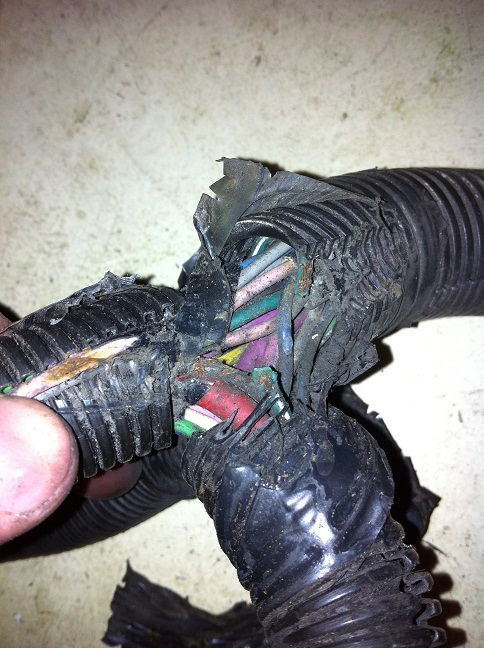
Question: If I switch to a 3 wire sensor, does that mean I have no wire for the dash temp warning light? The 2.8's gauge sender is a 2-wire while some other early V6s seem to have just a 1-wire sender. I'm thinking with the 2-wire sender, one wire is for the temp gauge and one is for the warning light, am I correct? If that's true, I can probably just wire in a 3-wire sensor and forget about the warning light. Finally I labelled and deloomed the 2.8 engine harness in preparation to be run neatly on the new engine. In the process I also discovered a problem area in the old harness where I'm assuming the harness was rubbing on the alternator belt and it completely cut through the fan switch wire, cut through the insulation on an alt pigtail wire, and cut through the insulation on a fuel injector harness wire. I'll be splicing in new wires to replace those three (fan switch will become knock sensor wire anyway). Anyone know if I'll need a new pigtail for my alternator (I'll probably be getting one off a 3400). 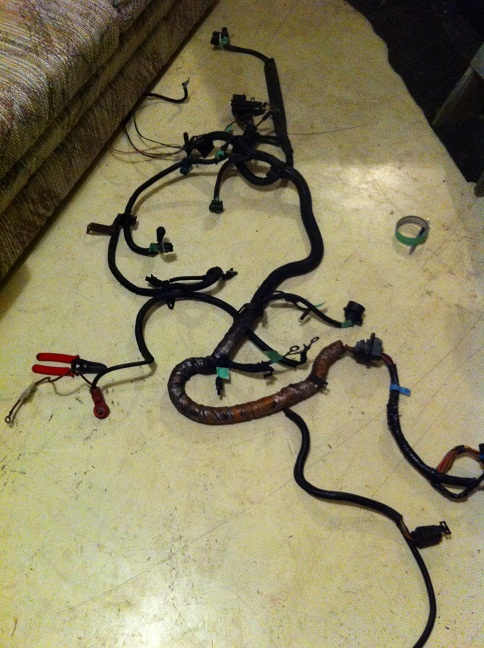
|
Posted By: bcampbell
Date Posted: 13 February 2012 at 7:58pm
|
Picked up a 7730 computer today and an LX5 throttle body
($75 and $65). ECM came with pigtails and the number on it read 16198262 instead of 1227730 but when I looked up the number it appears to be an updated number (ECM is a re-manufactured Delphi unit, so that makes sense). Throttle body came with an IAC and TPS installed, and I found some pigtails that will work for them. 1 is from the 2.8's ICM 4-wire and the other is a 3 wire I found in my box of leftover wiring from an LT1 swap. Was about to order a G1 adapter from moates and then found out shipping was $33! Anyone know a Canadian business that sells them? |
Posted By: CFoss
Date Posted: 14 February 2012 at 8:36am
|
I don't think there is a Canadian business that sells them, but I don't really know. I've never seen it. $33 is really excessive for a small super light part. What form of shipping did you choose? I use usps, and slow is good for me which usually makes it cheaper. Maybe phone those guys and see what they have to say. You can't use blm's exclusively. You can use them in closed loop if you want, but not in the power (fuel enrich) areas. In these areas the coorect a/f ratio is too low for the narrowband o2 to measure, and therefore blm's are not updated. You can borrow my ostrich no problem. I have to tune my own ride what I finally get it ready, but it's a 3rd car so I'm pretty flexible. One sugestion, you could use $59 (Sy/ty updated code) which is pretty easy to tune and has all the stuff for forced induction should you choose that route later. You would have to grab a 3bar map sensor. You are going DIS right? I suspect you have no choice with the intake. I'm pretty sure they have the settings available to do it. Check out code59.org. It's what I'm tuning with for the turbo, so I'm totally biased. Chay ------------- 86 SE 3.4 |
Posted By: Capt Fiero
Date Posted: 14 February 2012 at 8:46am
|
I have an odd question has anyone tried finding an OBDII system that will work on our engine swaps. My Caddy is from what I understand OBD1.5 or a very late OBDI Our club OBDI scanner won't work on my Caddy ECM, as it won't go to a new enough year. (Our old OBDI scanner would work though) I have been reading about OBDII stuff recently and really like the options on the newer systems. ------------- Capt Fiero 88 Fiero GT 5spd V6 Eight Fifty Seven GT V8 5spd. |
Posted By: CFoss
Date Posted: 14 February 2012 at 10:40am
|
I cna't see any reason why it wouldn't work.You may have to add sensors though (cam and or crank). It seems like the way to go for custom programming is efi live, or hp tuners. Chay ------------- 86 SE 3.4 |
Posted By: bcampbell
Date Posted: 14 February 2012 at 11:07am
I know there's someone that's used a '98 Venture PCM with their 3500 swap. The main reason I didn't go that route is because it's more expensive to tune, wiring is more involved (although equally as well documented), and another 24x crank sensor has to be installed on the engine. I understand the main advantages would be SFI and a faster, more capable engine controller. I would also have been interested in installing the stock 3500 PCM but there are zero aftermarket tuning options right now (HPTuners only lists the '07+ VVT/DoD 3500 engines as being compatible with their software right now). And of course without the ability to tune the PCM it expects lots of input from the BCM, like VATS. |
Posted By: CFoss
Date Posted: 14 February 2012 at 11:12am
|
I think it might be worth it if you can find an obdii code that runs lean burn/wideband 02 for the extra fuel economy. Also, I think the logging output is vastly improved with obdii. SFI doesn't do you any good except for a cleaner idle. Big deal. Chay ------------- 86 SE 3.4 |
Posted By: bcampbell
Date Posted: 14 February 2012 at 11:15am
On the website I selected the cheapest option (USPS). UPS (1 x 0.6lbs) is listed as $76.15.
When I tuned my LT1 swap, I just disabled PE mode to tune these areas and it was successful. However the tune was already much closer to being correct to begin with anyway. I know a wideband is definitely the way to go. It might be possible to borrow one from a friend who's car is parked right now anyways but I don't think his has an output for datalogging (just a gauge).
I'll look into it. I do happen to have a TGP turbo set- up that I'm trying to sell right now but if I am unable to sell it I may decide to use it on this engine in the future. |
Posted By: bcampbell
Date Posted: 14 February 2012 at 11:19am
Doesn't the $A1 OBD1 code have a lean burn/highway mode already? |
Posted By: CFoss
Date Posted: 14 February 2012 at 11:26am
|
To be honest, I'm not familiar with that code. Does it have wideband code in it? C ------------- 86 SE 3.4 |
Posted By: bcampbell
Date Posted: 14 February 2012 at 11:39am
|
Not that I'm aware of, but there's at least one hacked
version of it and it looks like it has wideband ability, in addition to having MAP tables with smaller (and I'm assuming more accurate) increments, and the ability to tune for much higher revving. It's called nAst1. |
Posted By: bcampbell
Date Posted: 14 February 2012 at 2:37pm
|
Just finished the first step of the wiring harness;
repinning the ECM connectors. On the second page of instructions, the first direction is to connect a wire to the A/C pressure sensor (5V reference). I'm assuming since I don't have A/C I won't need this wire. However in the 7730 pinout this wire is a 5V reference for the TPS sensor. I just want to check and make sure that the 5V reference for the TPS sensor will be provided with another already existing wire. |
Posted By: CFoss
Date Posted: 14 February 2012 at 3:48pm
|
These kind of questions...try to get a hold of a schematic for a car that used the '7730 instead of just a repin table. Then you will understand what you are doing. Like this one: 1991 corsica 3.1: 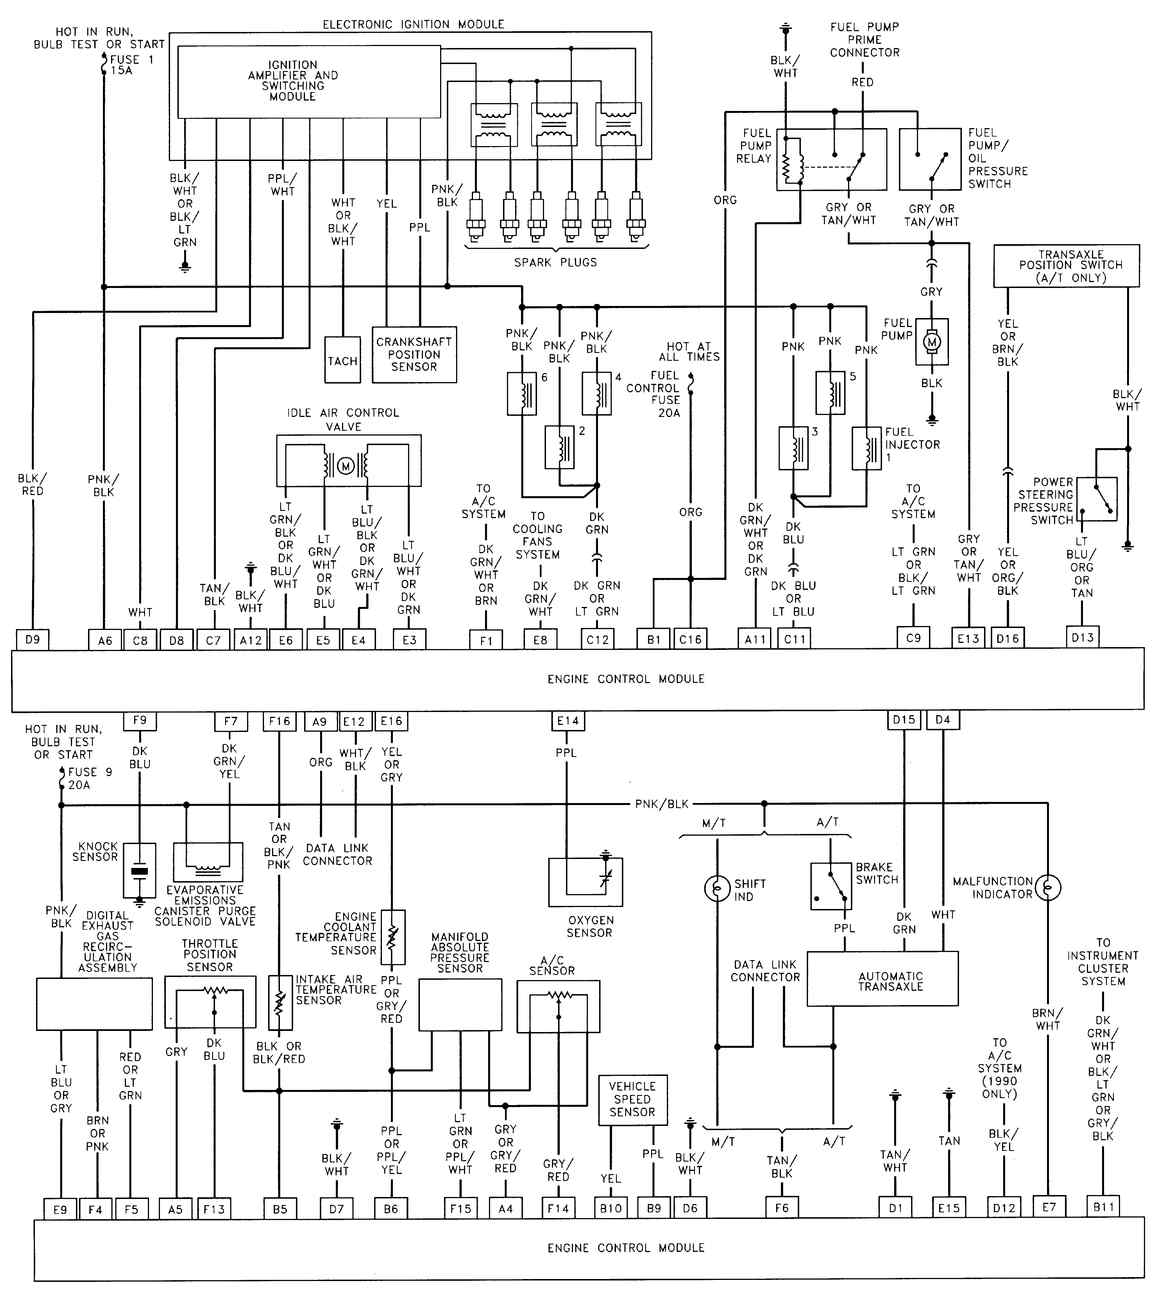 It seems like what you are talking about is pin A4 (Also known as BA4) which feeds power to the map, and ac pressure sensor. If so, just omit the connection to the ac sensor and you will be fine. Likewise on the ground (B5, or BB5) which is the ground for the tps, iat and ac sensor. Chay ------------- 86 SE 3.4 |
Posted By: CFoss
Date Posted: 14 February 2012 at 3:57pm
|
Having reread your question, it looks like the on the '7730, BA4 and BA5 are both +5 ref. The table you are working from shows you are supposed to change C14 from the old ecm to BA4 of the new ecm. C14 is the +5V connection to the tps and map, which you are then hooking to the BA4 +5 on the '7730. BA5 is therefore unused in the '7730. Chay ------------- 86 SE 3.4 |
Posted By: bcampbell
Date Posted: 14 February 2012 at 4:18pm
| Ok that's what I thought thanks |
Posted By: bcampbell
Date Posted: 15 February 2012 at 2:01pm
|
Ok I ordered the G1 package from Moates today, they told
me they could ship it regular USPS for $12.95; they are going to refund the money from the $33 shipping charge. I started wiring in the LX9 fuel injector/MAP/CTS harness today and just had a few things I would like to clarify. The Fiero harness has two IGN power sources for the injectors, one for each bank, while the new harness only has one source. I figure if I just use one of the Fiero wires (INJ 1), I can just double the fuse to a 10A and delete the other INJ 2 power wire. Also, I can just take the ECM signal wires for 1, 3, and 5 and 2, 4, and 6 on the new harness and splice them into their corresponding single wires on the Fiero injector harness. The remaining CSI wires on the Fiero harness are deleted. MAP sensor wiring is pretty straightforward, 5V reference, signal, and low reference (ground). CTS I'm thinking I'll run a 3-wire sensor, have two wires running through the existing LX9 harness, and have the third wire going to the gauge seperately. |
Posted By: CFoss
Date Posted: 15 February 2012 at 3:24pm
|
Re: Shipping costs...that's a bit more like it! Re: 10 A fuse: Just make sure that the wire guage is up to it. 10A should be a #16 at the minimum, #14 prefered. If you splice as you've explained above, split 3 injector wires to the +12 harness, and 3 to the ecm switched ground wire that'd be optimal. Then you should have lots of current capability. What's a CSI?? The guage and ecm coolant temp sensors are separate on the fiero. Don't mix the 2 circuits would be my advice. The ecm is just a variable resistor which is between an ecm pin and ground. The ecm measures the current flow and determines a temp. The guage circuit should be untouched?? It looks like this: 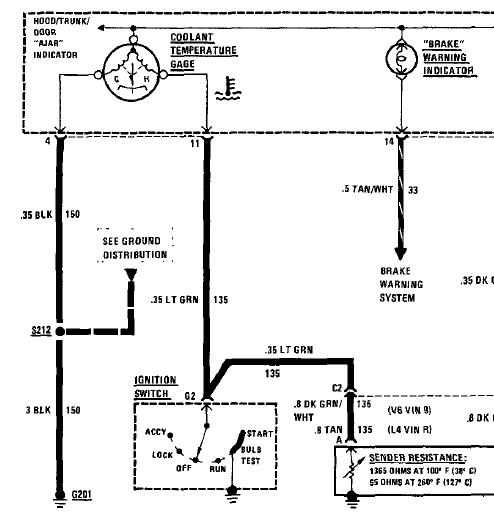 The ecm one looks like this: 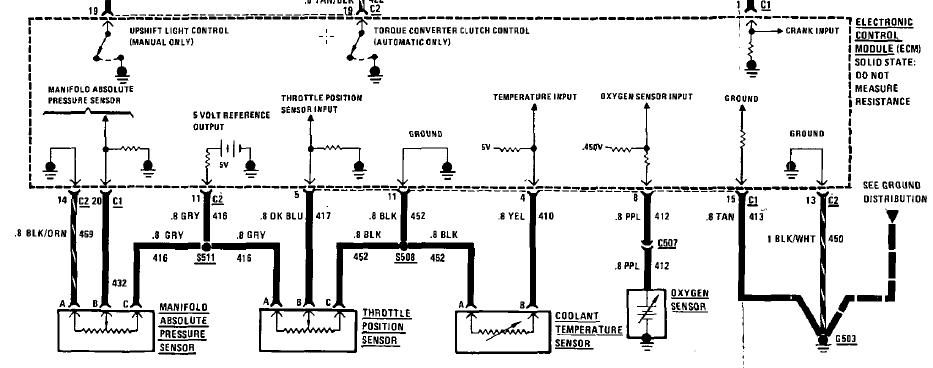 Chay ------------- 86 SE 3.4 |
Posted By: bcampbell
Date Posted: 15 February 2012 at 3:52pm
|
CSI=cold start injector no longer used with a 7730.
The power wire for the new injectors in the lx9 harness is of a smaller gauge than just one (either inj1 or inj2) injector wire from the fiero harness. I see no reason the wiring should be overloaded. IIRC the fiero wire was 14 gauge. As for the CTS, if I used the 2.8 gauge sender on the new engine that means drilling and tapping another hole for the sender. Some newer 60*V6s use a 3 wire sensor where 2 wires are exactly like a 2 wire ECT sensor and the third wire drives the gauge, so it's basically just two in one. This route means I would take the third wire on the new sensor and splice it into the 2.8 sender wire. |
Posted By: CFoss
Date Posted: 15 February 2012 at 6:02pm
|
Ah yes, the good old csi. 14 guage should be fine. Cool on the CTS. I've not seen a 3 wire, but it sounds like you have it fingered out! C ------------- 86 SE 3.4 |
Posted By: bcampbell
Date Posted: 15 February 2012 at 6:41pm
|
I did want to ask about the gauge sender though. Obviously one wire
on it is the gauge signal, but what's the other wire for? Is it for the warning light in the gauge cluster? Or is it just a ground? |
Posted By: bcampbell
Date Posted: 15 February 2012 at 7:50pm
|
Oh and I also meant to ask: would the now unused INJ 2 wire be a
good power supply for a heated o2 sensor? |
Posted By: bcampbell
Date Posted: 15 February 2012 at 10:35pm
To answer my own question it appears that one wire is the gauge signal and one is the warning light switch. I should just be able to leave the warning light switch wire unwired. |
Posted By: bcampbell
Date Posted: 16 February 2012 at 12:33am
|
Just did some reading up on codemask $59 and it looks like
most people running it have boosted engines. For the foreseeable future I plan on keeping this engine N/A so I'll probably just stick with $A1. If I wanted more power I would probably be more inclined to do a cam swap to maintain some form of fuel economy. |
Posted By: CFoss
Date Posted: 16 February 2012 at 4:47pm
|
$59 just give you the option is all. I was running it n/a and it worked well. Nothing wrong with the $A1 though. The o2 sensor...not sure. It's just amps and awg though, nothing special. I don't know how much o2 sensors draw. Chay ------------- 86 SE 3.4 |
Posted By: bcampbell
Date Posted: 18 February 2012 at 12:04am
|
Nice thing about the heated o2 sensors is that my engine
came with 3 of them. So if one doesn't work I should still have one that does. I'm probably going to make a trip to Port Angeles on Monday or Tuesday to grab at the very least a flywheel and a knock sensor. Those items are each $100 here and about $100 combined there so I'll be saving plenty. I'll also try to grab a 3 wire CTS, radiator hoses (using 3400 swap part numbers mentioned on 60degreev6.com) and a 2001 vette fuel filter. Maybe some fuel injection hose as well. Wiring is mostly finished now, I've changed the pigtails for the TPS and IAC, wired in the knock sensor using the fan switch pigtail, and connected the wires for the computer fan control. I still have to do the DIS wiring and crank sensor. Question about the crank sensor: does the twisted pair of wires have to be twisted the whole length of the wires? Cuz where the pigtails connect I'm not sure it's gonna want to twist perfectly... I've started routing the wires around the engine but want to get it back in the car to get everything perfect. I'll loom it up after I get the engine started. I'm thinking to mount the coils I'll use the 3500 mounting bracket and drill holes for the 3400 coils and ICM. 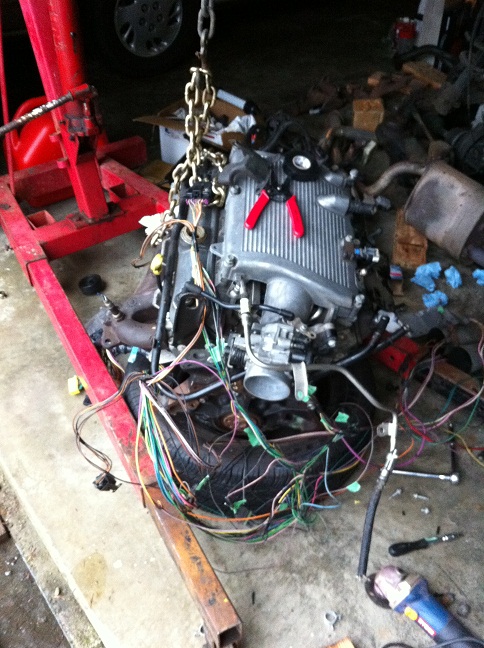
|
Posted By: CFoss
Date Posted: 18 February 2012 at 6:11pm
|
It's unlikely a bit of untwisting will hurt. The idea of a twisted pair is that it radiates less noise, and also rejects incoming noise better than parallel run wires. Try to maintain the same number of twist per foot as the original. A bit or error here or there should be fine. Chay ------------- 86 SE 3.4 |
Posted By: bcampbell
Date Posted: 22 February 2012 at 9:36pm
|
Ok so I went to Port Angeles and stayed overnight with
friends there. I spent almost $200 on parts and didn't get charged any duty so that was nice. I ended up getting a vette fuel filter, flywheel, oil cap, idler pulley (one of mine was broken), oil filter (wix), crank sensor, 3-wire CTS (for 97 Grand Prix, in case anyone is wondering), and a new front engine mount. When I called on Saturday they said they would hold a knock sensor for me but it wasn't there when I arrived. Oh well, I'll probably find a couple in a JY and hope one of them works. Today I installed my flywheel and clutch, I also bolted up the 2.8 starter; it comes very close to touching the oil pan but I don't see it being a problem, I just need to get a shorter bolt because one of the 2.8's bolts is too long for the new engine. I cleaned up the inside of the 4 speed's bellhousing and installed the new engine mount on the cradle. I'm about ready to mount the engine to the cradle. I couldn't find a part number for a pilot bearing and didn't see a bearing in the 2.8 so I'm assuming that the 4 speed manual doesn't use one. I also found out that a Canadian Tire pickle fork makes a perfect clutch alignment tool: 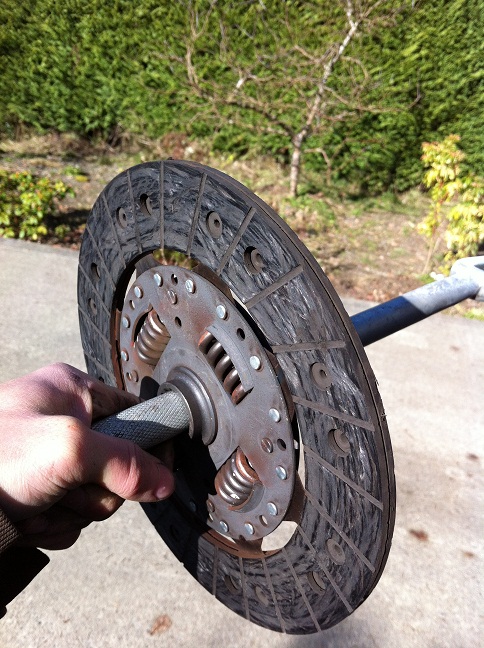
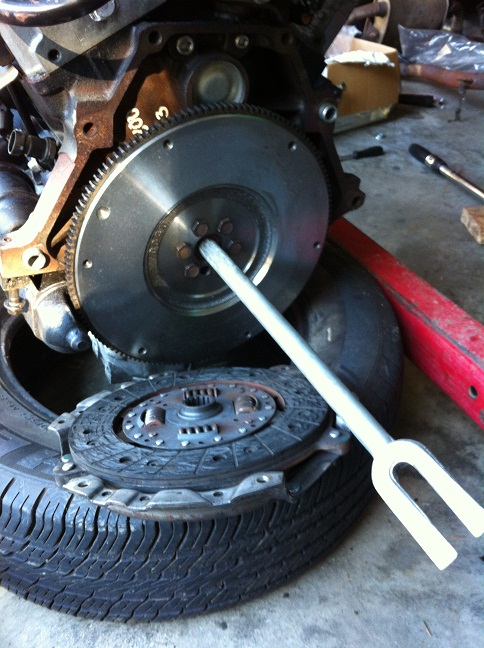
Some pics of the old flywheel vs new and the friction surfaces: 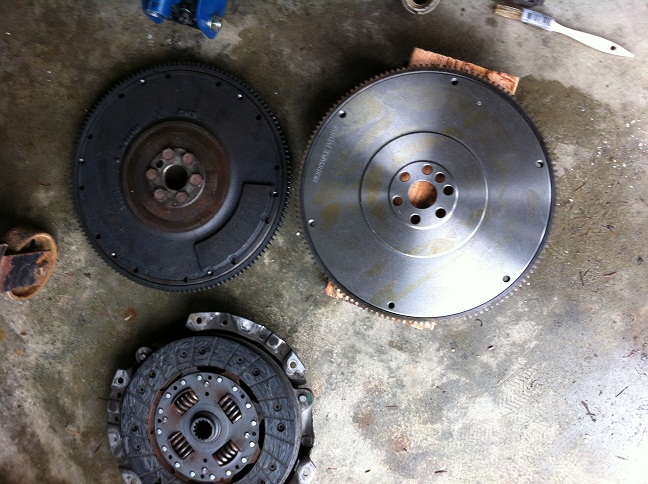
Thickness of the clutch: 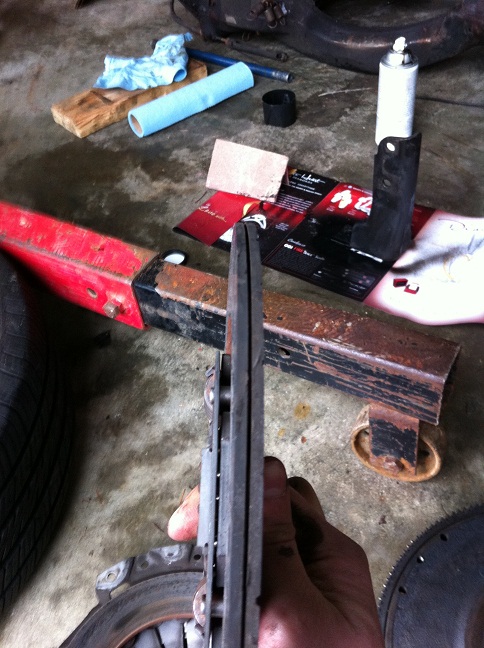
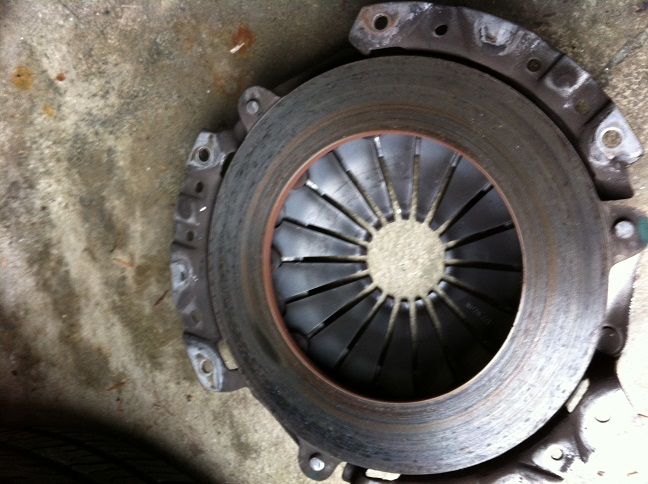
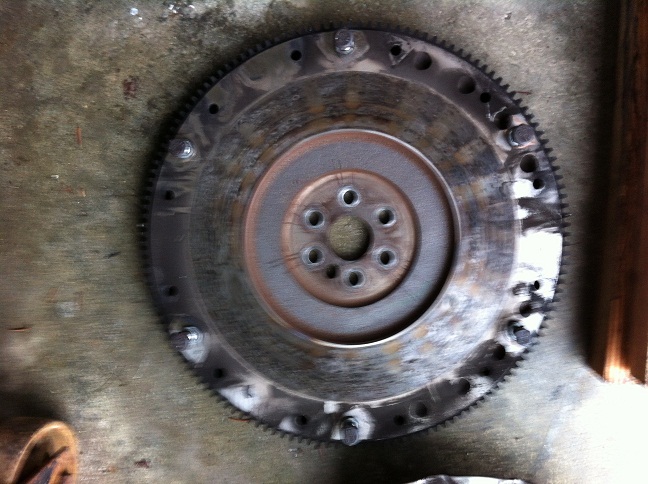
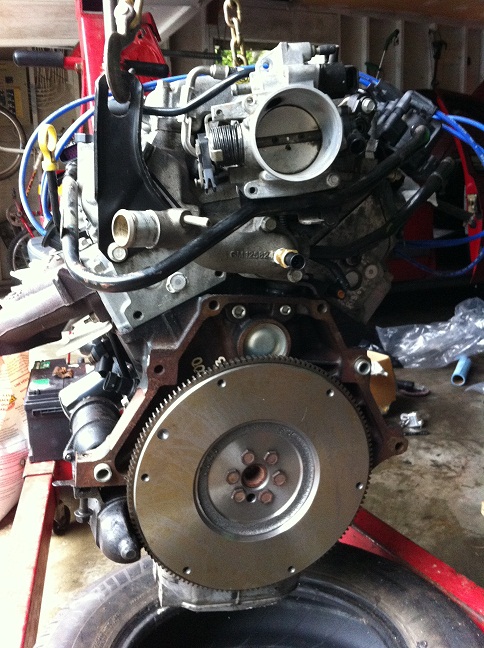
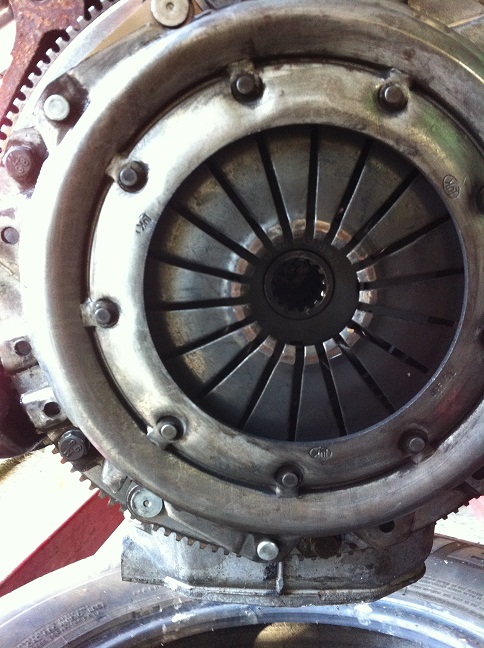
I found out the 2.8 spark plug wires work fine where I mounted the coils. They're a little on the short side for one side but they're not being stretched so I think they'll be fine (NGK). To mount the coils I drilled holes in the 3.5 mounting bracket and used nuts to secure the bolts. The original mounting bolts are still in-tact in case I want to go back to the 3.5 coils in the future. I did want to ask if anyone knows what this port in the rear side valve cover is for: 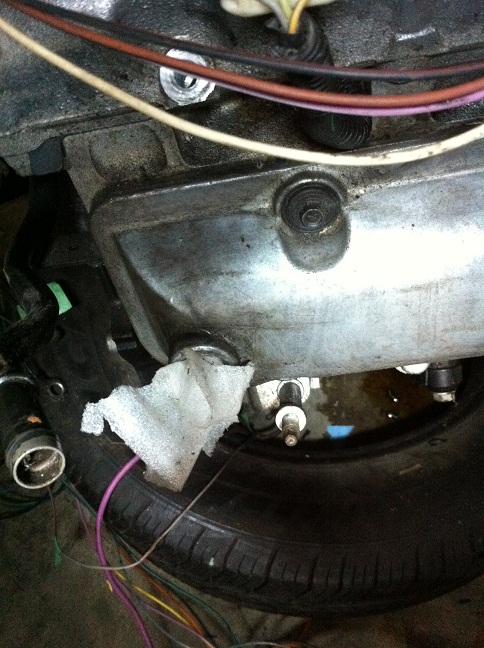
I'm assuming it's for PCV, but the other side valve cover already goes to just behind the throttle body so I'm wondering if anyone knows where the other port goes. Could I just put a breather on it or does it require vacuum? Edit: Found out it just needs filtered air. I'll probably put a breather on it. |
Posted By: bcampbell
Date Posted: 26 February 2012 at 1:48am
|
Some fairly minor updates. Got 3 of 4 rubber cradle
bushings out so far, hopefully the last one will be out by Monday and hopefully the engine will be going back into the car Monday as well. I'm debating whether or not I should do the polyurethane bushings on my rear control arms now as well but I assume that means getting a rear alignment. If they hadn't come with the engine I probably never would have bought them. Anybody have personal experiences they could share as to what differences aluminium cradle bushings and/or polyurethane control arm bushings make? Here's a pic of the engine about to be mounted to the cradle finally: 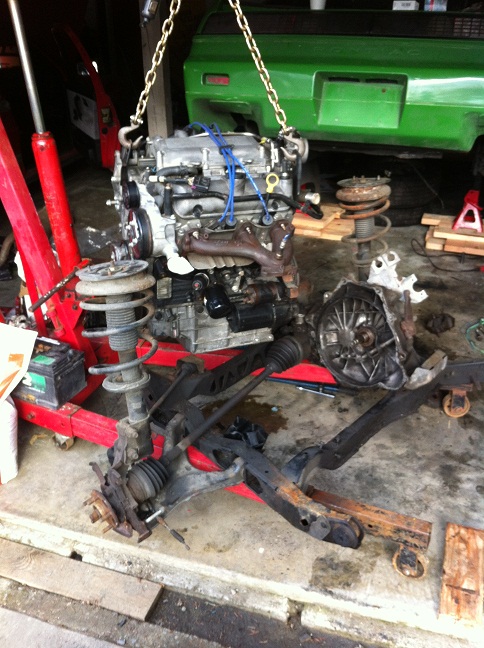
In the next pic you'll see the motor mount nut is almost touching the new oil pan. I carefully threaded it as I lowered the engine onto the mount because I did not feel comfortable 'clearancing' the oil pan. 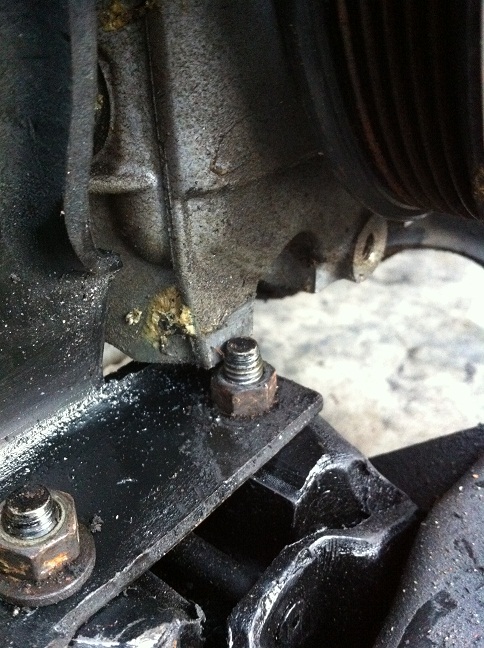
Another pic of the complete cradle assembly: 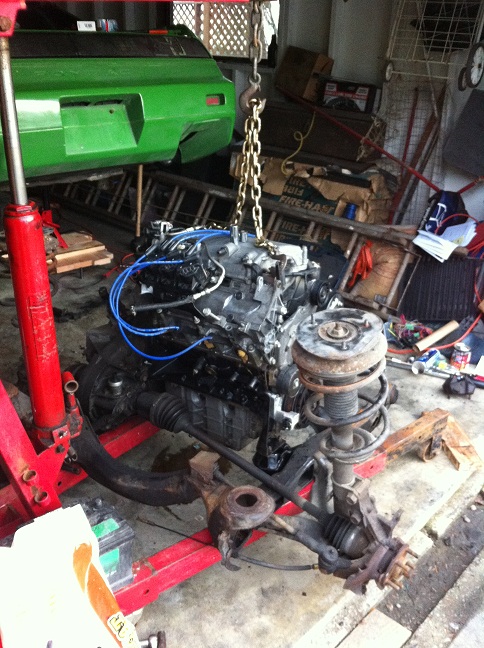
Next question I have is about the ignition coils. Are they in the right order? (This is the way they were when I got them). Edit: These are indeed in the correct order. 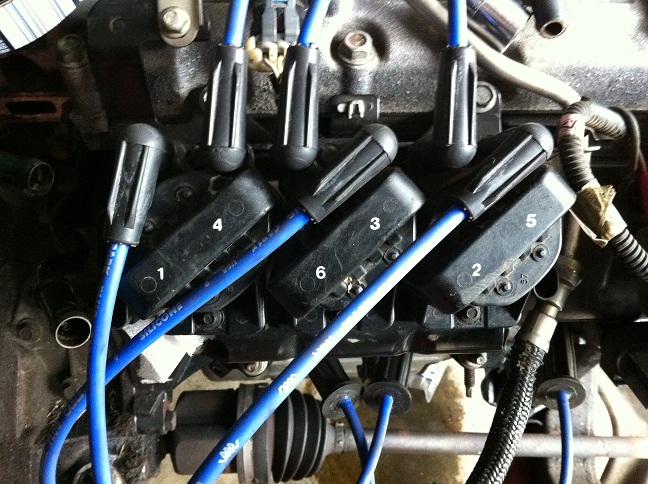
And finally I got an alternator and found a belt to fit (IIRC the size was 640). Originally I wasn't going to use the idler pulley right by the alternator, but since the belt was too short otherwise and I didn't want to go back to Lordco for a fourth time, I added it and the belt fit great. It's just as well as it gives the alternator a bit more grip. And for the record I ended up buying an alternator for a '99 Cavalier 2.4L as it came close to bolting up to the 3500 alt bracket and was only $55 (we'll see how long it lasts though). The two bolt holes on the side line up and the through bolt is a bit off but I think it will be fine for now. On my LT1 in my other car my A/C delete pulley is only held on by 2/3 bolts as well and it's held up fine. I did have to switch the pulley to one from an '01 Malibu though because the 2.4 Cavalier pulley was for a 5-rib belt. I still need to get a pigtail for the alternator. Anyways that's the end of my rant. 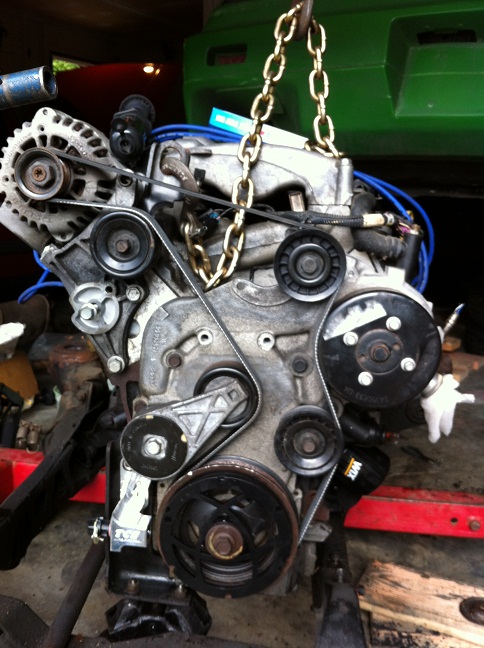
CFoss: If I'm gonna be borrowing your tuning equipment we should probably meet up some time. What part of Duncan do you live in? |
Posted By: Capt Fiero
Date Posted: 26 February 2012 at 10:47pm
|
Looking really good. ------------- Capt Fiero 88 Fiero GT 5spd V6 Eight Fifty Seven GT V8 5spd. |
Posted By: CFoss
Date Posted: 27 February 2012 at 9:33am
|
When you're ready, I'm near Queen of Angels school, towards Maple Bay on Tzouhalem road. When do you think you'll need it? Do you want me to see if I have a prom that'll work after you're done tuning? I think I have some EEproms (fast rewritable) around here somewhere. I'm jealous of your serpentine belt. I hate the slippage on the old v belts! Chay ------------- 86 SE 3.4 |
Posted By: bcampbell
Date Posted: 27 February 2012 at 6:55pm
|
A few more things done. Pretty much all the wiring is
finished except for wiring in the new alternator but I'm gonna wait till tomorrow because it's really cold outside. I also threw some paint on the parts of the cradle starting to rust. My G1 adapter also came in the mail today and I got a knock sensor for $11 from Maxwell's and an alternator pigtail for free from Blacky's.
I hate V-belts just as much as you do :P I ordered a couple of chips with the G1 so I think that's covered. The car is parked in Cowichan Bay near the building called the 'Old Firehall' so if you want to come see the car let me know. |
Posted By: bcampbell
Date Posted: 27 February 2012 at 8:02pm
|
I was also thinking since I don't know yet how my exhaust
is going to be routed and (correct me if I'm wrong) the 7730 ECM only supports 1 O2 sensor, I would use the existing O2 bungs and tune 1 bank at a time. To simplify switching between O2 sensors I would build an extension harness to reach around to the O2 sensor on the opposite side. I just don't know yet how the Y-pipe will be routed/if I will have a Y-pipe. |
Posted By: bcampbell
Date Posted: 27 February 2012 at 9:48pm
|
Oh and I'll be ready to start the engine probably in a
little under two weeks. I'd be ready to start earlier but at the moment I'm low on funds so can't spend anything on exhaust manifold gaskets or fuel injection line or other misc. items. For the coolant hoses I'm going to see if any of my L98 hoses fit at all since I have no use for them since I swapped the engine in my Firebird (they're brand new blue Goodyear hoses). I am hoping to get the engine in the car tomorrow. |
Posted By: CFoss
Date Posted: 28 February 2012 at 8:42am
|
Right on! My parents live off of Payne Rd. (About 2 minutes from the old firehall) so I do know what you're talking about! The 7730 does only support 1 02. I suspect that both banks will perform about the same, so there will be no need to switch back and forth. You may want to do it just to check everything is similar. You are using batch fire anyway, so you can't tune the sides independently. " I just don't know yet how the Y-pipe will be routed/if I will have a Y-pipe. " Does this mean you're considering a dual exhaust? Chay ------------- 86 SE 3.4 |
Posted By: bcampbell
Date Posted: 29 February 2012 at 6:02pm
|
Yes I am considering a dual exhaust. Is it just me being crazy or does it simplify things? I'm thinking a pipe coming down from each manifold, turning towards opposite sides of the car and just glasspack mufflers straight out to the rear. (Which might sound like crap I guess but I can deal with annoying exhaust until I can afford something better) Throttle body adapter plate arrived today, so I bolted that up. It seems like no-one makes gaskets for the 3.5 throttle body (stock is an o-ring), so I just used black gasket maker to seal it up and I'm thinking that will be fine for a while. I guess I could get some of that generic gasket paper and cut it out myself but I don't really think it's necessary for now. I guess I'll find out soon anyway though. I think the wiring is to the point where I can't really go any further until the engine is in the car. It's pretty much all routed where I want it and ready to be loomed, I just have to figure out the alternator wiring and add the 7730 ECM grounds (which I'll probably do once the engine is in the car. I was planning on getting the engine in on my days off (Monday and Tuesday), but it's been super cold out so I decided to hold off. In any case I got 3/4 aluminium cradle bushings installed. Those front ones seem super tight compared to the rears but they're doable. I threw some anti-sieze on them so that there's a possibility of removing them in the future. I'll upload some more pics soon. |
Posted By: CFoss
Date Posted: 01 March 2012 at 8:44am
|
I don't think you are crazy, but I don't think there is any performance enhancement. The wye pipe can be kinda hard to build if you don't have the tools to do it. I did some 'inside work' on my car the last few days. Kinda cold and still dark by 6 or so. I'm going to use a single 2.5 or 3" glasspack on my car. I don't really care how it sounds though, just how it goes! I'll have the turbo in the way consuming some noise too. The gasket maker will make a mess if you have to remove the throttle body. I've used the generic in the past with lots of success. I actually have some hanging around if you need it. Chay ------------- 86 SE 3.4 |
Posted By: bcampbell
Date Posted: 01 March 2012 at 9:56pm
|
So today I believe I've finished up the wiring except for
the two remaining ECM grounds. I'm hoping the way I wired the alternator is correct but I'll find out soon enough. I wired the "Alternator field duty cycle signal" wire to the brown wire on the Fiero harness, which as far as I can tell goes to the warning light in the dash, and the "Alternator output - Regulator reference voltage" wire to the red wire on the Fiero harness that connects to the large wire going to the charging post. I left the "Fuse output - battery" wire alone because the other 99 Cavalier wiring diagram I used didn't even mention that wire. This is the method I used to get my front solid cradle bushings installed: 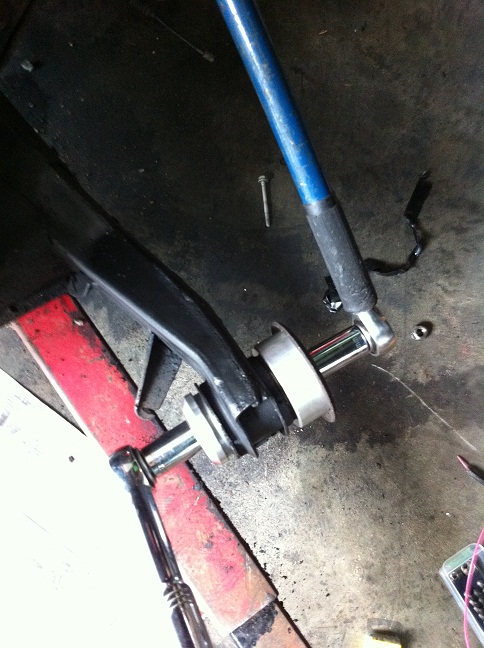
I stripped two or three bolts using this method but I eventually got them both in. This is a comparison of the 2.8 manifolds and the 3.5 manifolds: 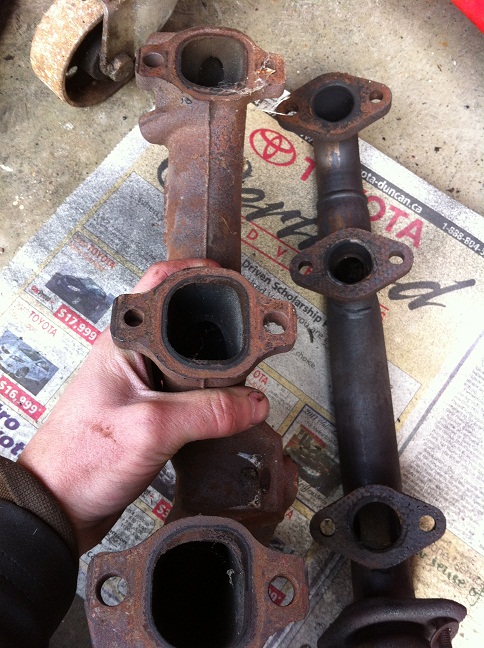
And some other random pics: G1 adapter: 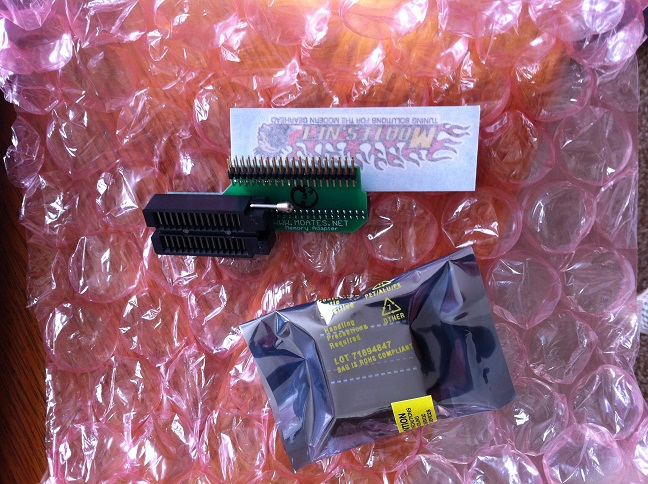
Throttle body adapter: 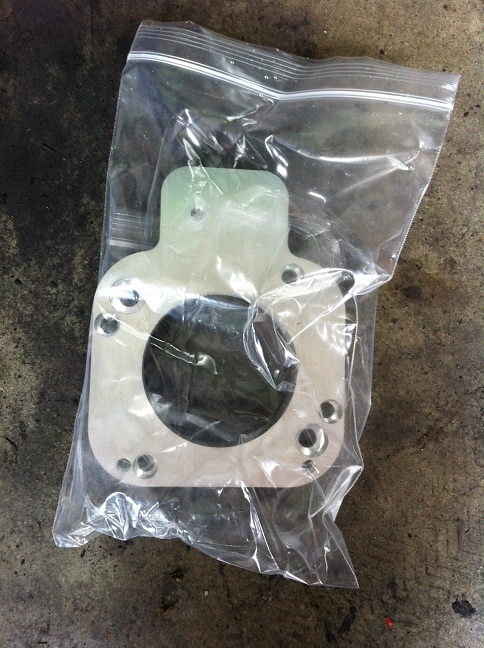
O2 sensor that came with the motor. Looks in much better shape than the O2 sensor I pulled out of the 2.8's exhaust: 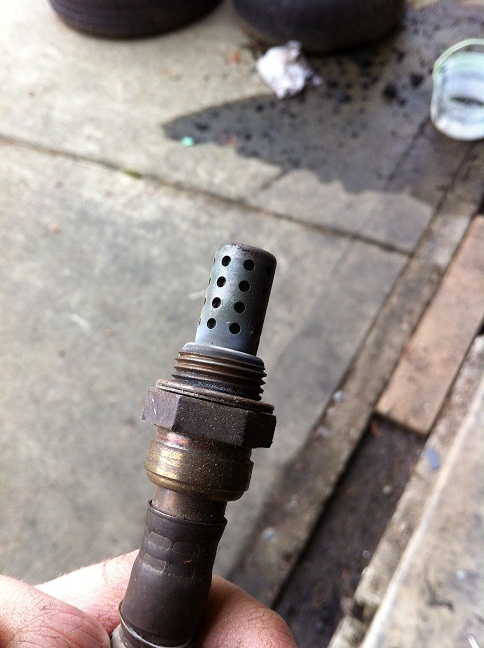
Wiring finished: 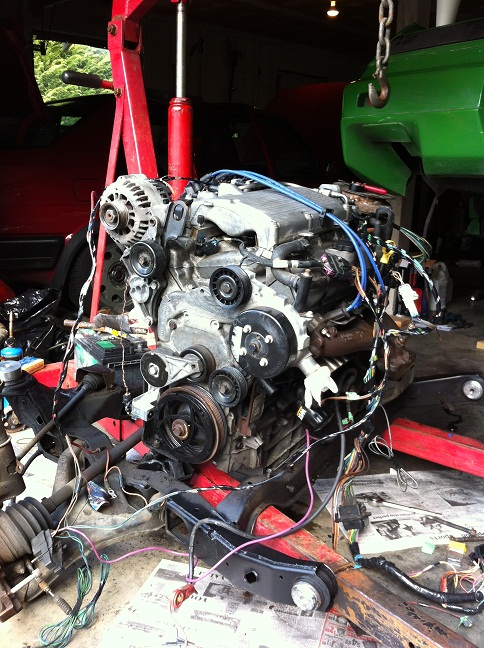
And everything draped over the engine ready to be installed: 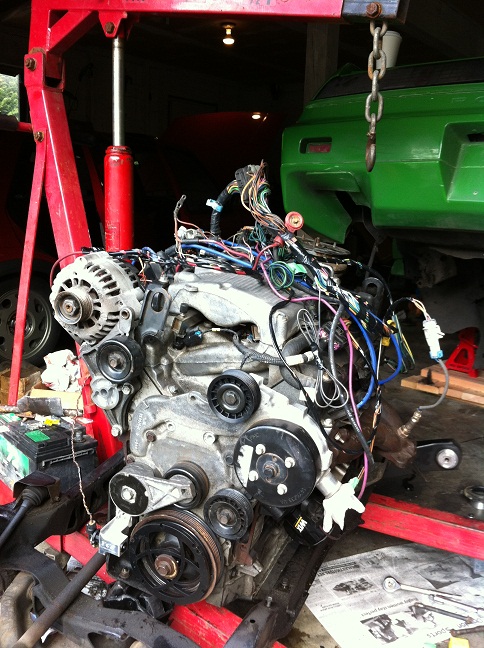
Edit to add my todo list to complete the project: - Install cradle in car and finally get the car back on the ground! - Fuel lines. I need something to attach the quick- disconnect side of the vette fuel filter to either fuel injection hose or one of the stock hard lines. The 'in' side and return line can just be attached with rubber fuel injection hose I think. - Fill engine with oil... any recommendations? - Fill engine with coolant... any suggestions on getting all the air out? I was thinking just raising the front of the car high enough that it's the highest point in the system. - Get an exhaust gasket and install rear exhaust manifold - Hook up my fuel pressure gauge so I can monitor the fuel pressure when trying to start the engine - Wire in two more ECM grounds - Start the engine and troubleshoot when it doesn't start! - Tune - Missing anything? I'm thinking of buying a base tune from Superdave on the 60degreev6 forum. It will cost $50 but should get me to the point where I'll only really need to dial in the tune to my specific needs. Otherwise I'll be starting out with a 3.1 tune. My friend said I could borrow his AEM wideband so that should work out. Since I have an O2 bung in each manifold I can run the ECM off one and have the wideband in the other. |
Posted By: CFoss
Date Posted: 02 March 2012 at 9:38am
|
If there is a starting tune it's always nice to have, that's for sure. It'll save you a bunch of time. I like the zif socket on the G1. Mine's an old press socket, the zifs are much nicer for repeated connections. 1 thing I did do was sharpie the code revision and type ($whatever) on the ecm so I woudn't forget what I have in there. I just checked that out so I was glad it was there. Amazing what you forget over a year! Oil...there's a way to start a flame war! I always ask if anyone has ever worn an engine out. I haven't yet and I've really tried (I went broke trying to finish off my old Ford 351...just wouldn't die, had to sell it). I was looking at some braided fuel line you can attach tips to so you can custom it up (Summit racing). Something like this: http://www.summitracing.com/search/Part-Type/Fuel-System-Plu mbing-Kits/?keyword=braided+fuel+line I haven't quite got there though. Chay ------------- 86 SE 3.4 |
Posted By: CFoss
Date Posted: 02 March 2012 at 9:40am
|
Check this out too: http://www.jegs.com/c/Fittings-Hose/181705/10002/-1?gclid=CJ Kn44nhyK4CFQV_hwodSRdsBg Chay ------------- 86 SE 3.4 |
Posted By: bcampbell
Date Posted: 02 March 2012 at 10:58pm
Thanks for the tips on the fuel lines. I might see if I can find something at a junkyard too that will fit. It looks like the G6 calls for a 5w-30 oil. Not sure if I'll go synthetic or not. I test-fitted some radiator hoses today and I think I can make the ones I already have work. Here are the hoses: 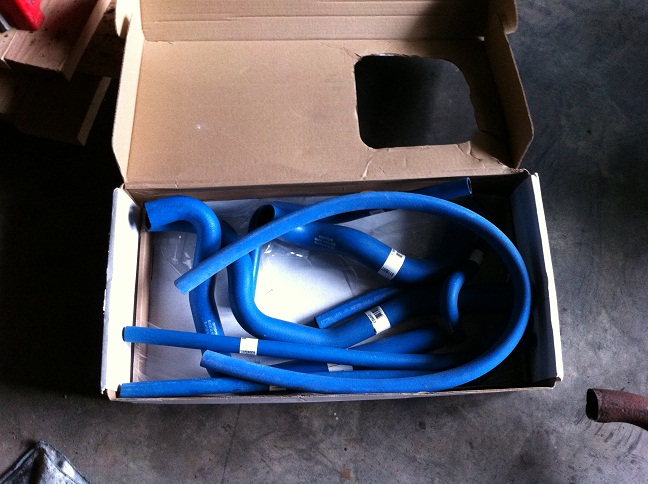
They're for an 87-92 IIRC F-body and they're Goodyear Super Hi-Miler hoses. They came with my Firebird I bought last year and have no use for them in that car but it looks like they just might fit a 3.5L in a Fiero. I'm thinking this one will work if I snip it where my hand is (passenger's side): 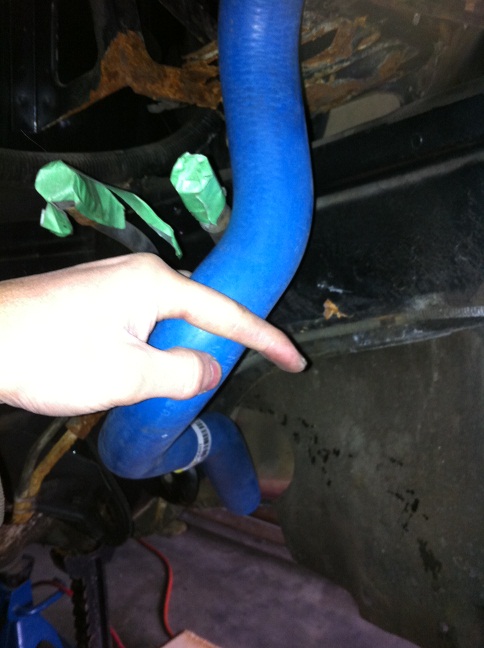
And this one might work without trimming on the driver's side: 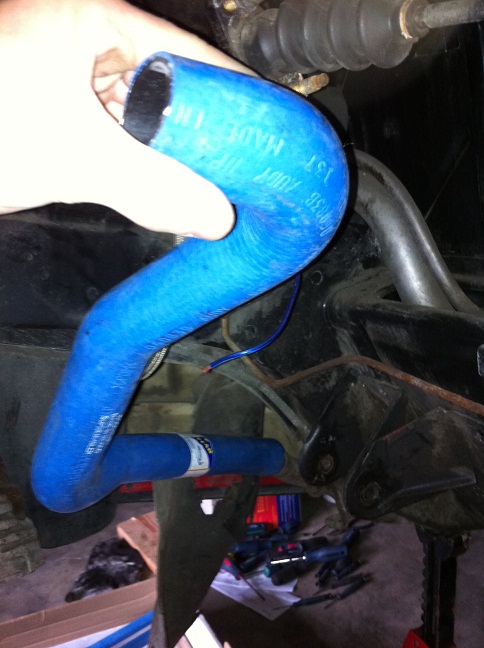
I do have questions about the heater core lines though. I see there are two on the fiero. This one on the trunk side below the dog-bone: 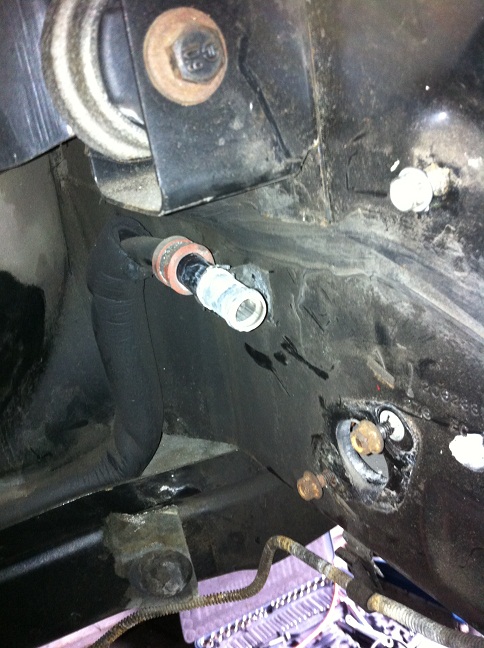
which actually seems to just come out to beside this one on the firewall side: 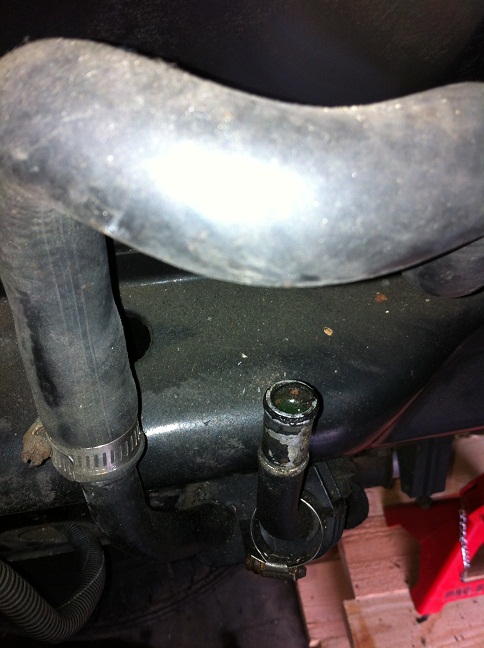
Which one is supply and which one is return? I should probably replace the battery tray soon... 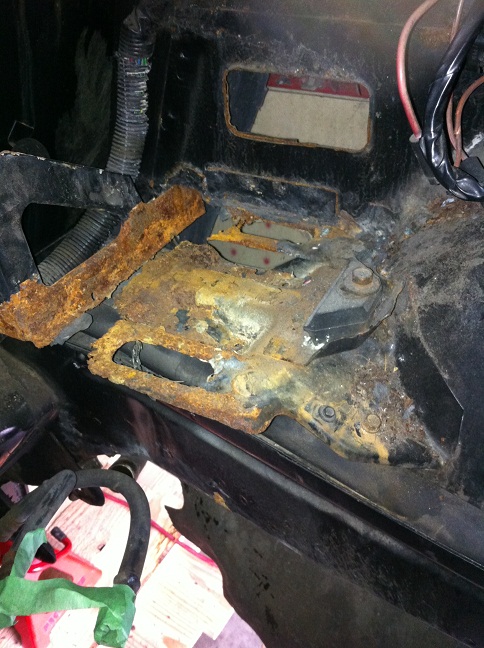
And my driver's side hinge is damaged: 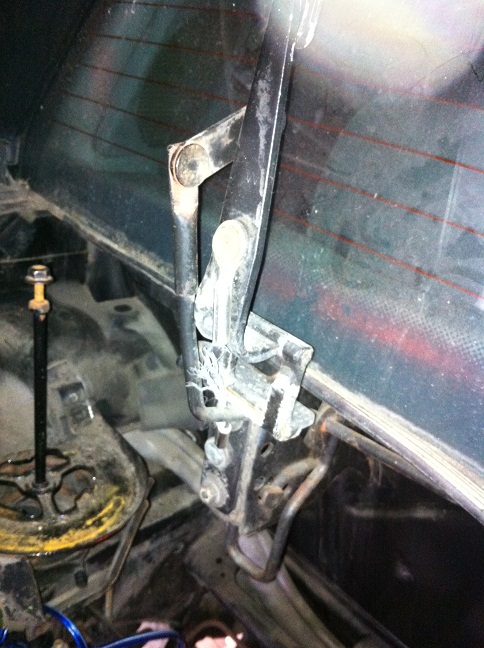
You can see where the metal cable has come out of it's clamp and there's nothing to prevent the hinge from lifting futher. Does the hinge need to be replaced? If so I'm thinking I might just remove it and install a strut on that side instead. |
Posted By: bcampbell
Date Posted: 06 March 2012 at 12:02am
|
Engine was installed today. Good news is that the rad
hoses I have will work with the new engine. I did find that there is hardly any room for the shifter cables but they fit, and I found that the clutch is now very soft. So I guess the slave needs to be bled. Also got some things to try out with the fuel system and hooked up my fuel pressure gauge. I'll need a vacuum line for the brake booster to come around to the front of the engine from the rear. The alternator was hitting the stock dogbone mount so I had to grind off some of it to get the engine in. I think I'll be cutting it off completely in the end since I didn't really trim enough of it off and it will probably knock when the engine rocks. Pics to come soon |
Posted By: Dawg
Date Posted: 06 March 2012 at 10:49am
|
The heater core doesn't really have an in and out I don't think.
Dawg ------------- You dream it up....I'll make it |
Posted By: bcampbell
Date Posted: 06 March 2012 at 8:34pm
|
So I started attaching a few more things today. Got most
of the coolant hoses hooked up, hooked up a brake booster line, put my air cleaner assembly back in place, etc... Here are the pics: At this point the cradle was nearly lined up. Btw instead of spending time building a rolling dolly for the cradle, I just had the cradle on the lift legs and dropped the car onto the cradle. Lining it up was difficult at first but mostly because the alternator was hitting the factory dogbone mount. After removing the alternator it practically lined itself up. 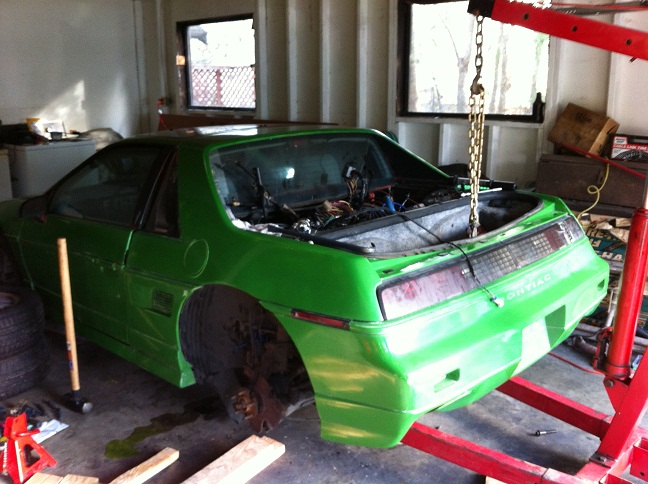
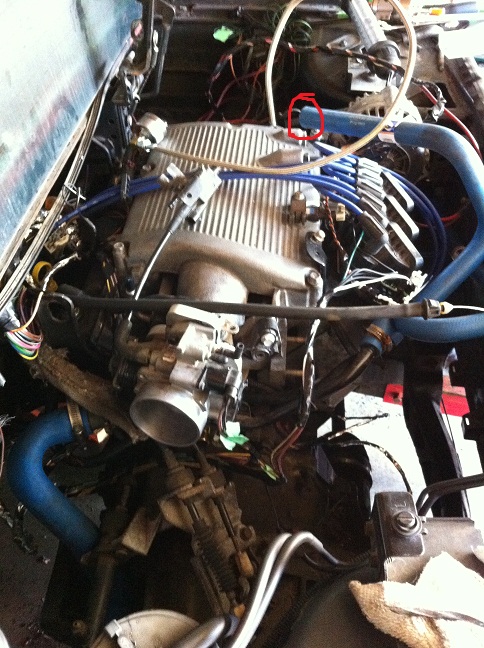
And a couple pics of the engine finally installed in the car: 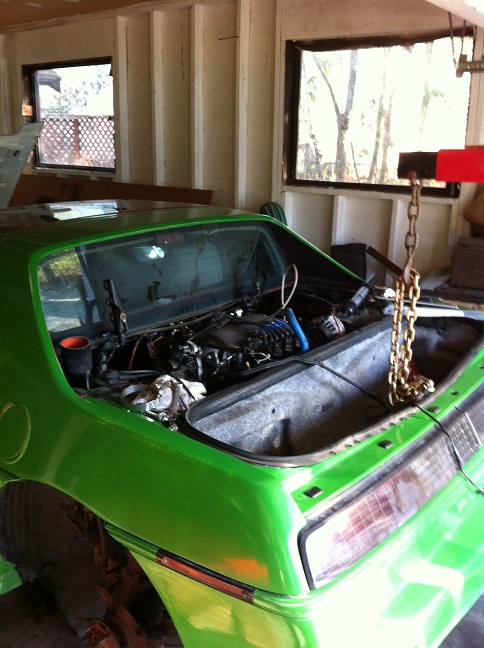
Put the brakes back on today: 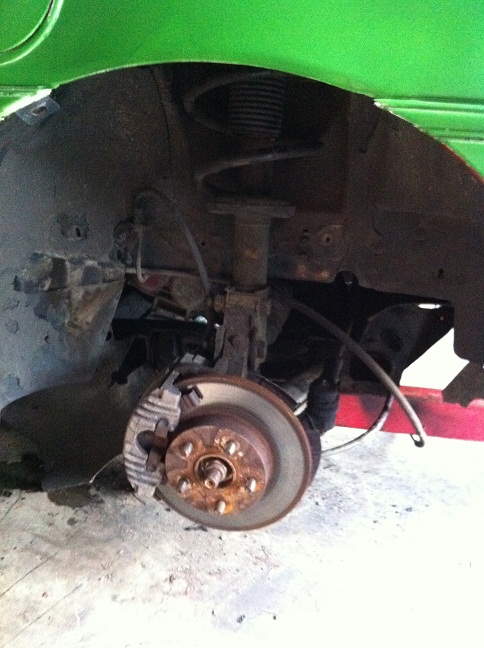
This is a pic of where I had to clearance the dogbone mount. I'll most likely end up taking the rest off as when the engine rocks I can see it making a horrible knocking sound... 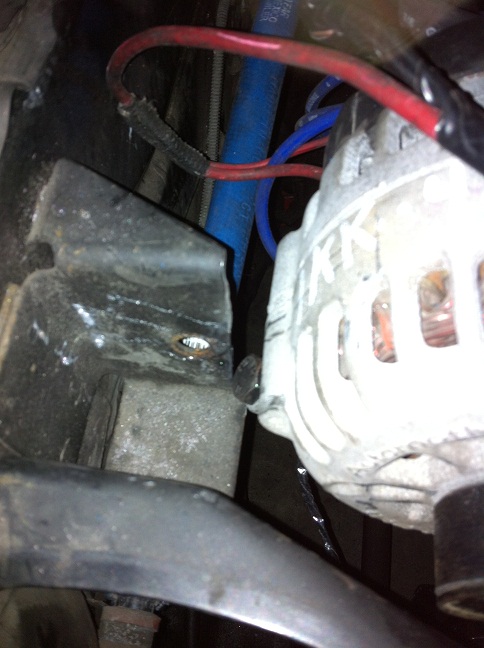
For the brake booster line I used some rubber hose that used to be attached to the charcoal canister in my Firebird and hooked that up to the 2.8's booster hard line, which ended up going to the rubber line on the firewall side. A red circle shows where the hard line attaches. Looks decently clean to me: 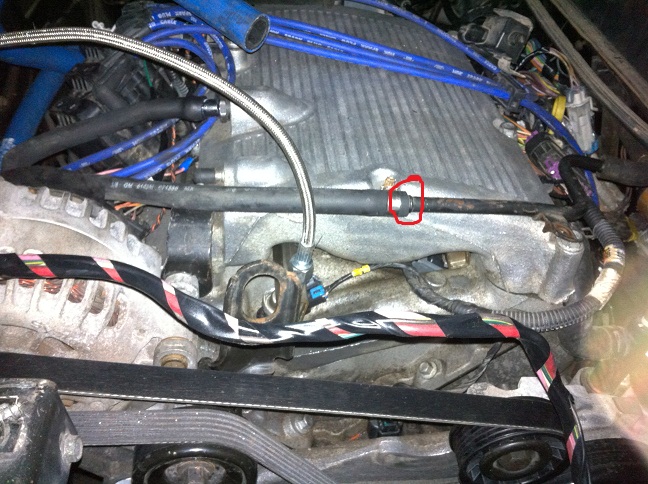
Some pics of the rad hoses: A couple of inches had to be trimmed off this one, otherwise it's a perfect fit: 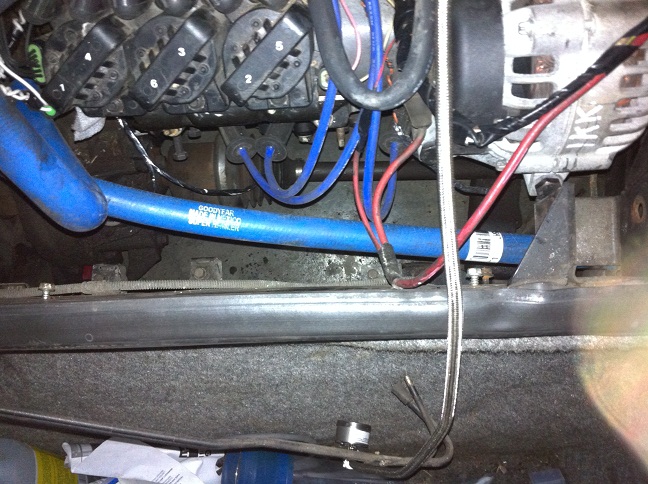
The flared end needed to be trimmed off this one: 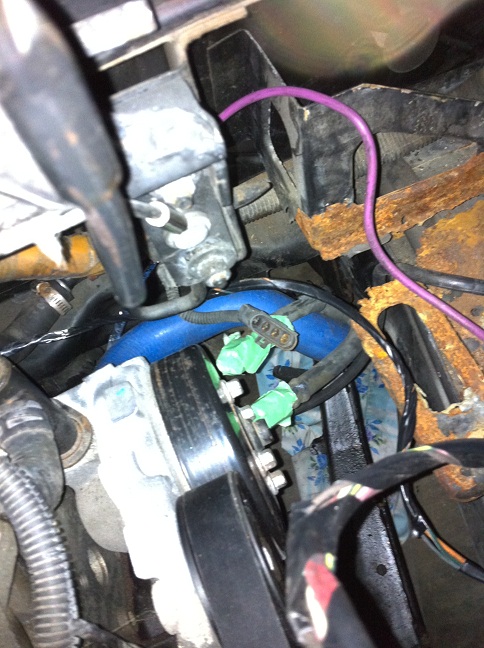
And the last one was a perfect fit with no trimming: 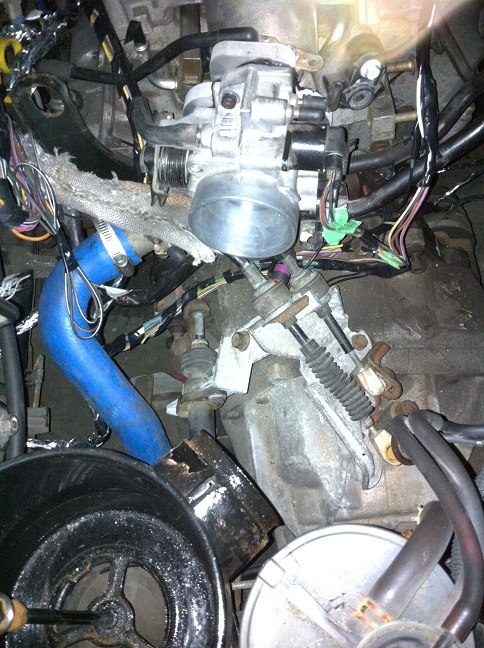
For the other heater core line I plan on putting in a place to fill the coolant from the engine bay (red circle in closeup of engine in car). I found an EVAP solenoid that came on my LT1. Anyone know if it will work with a 7730 ECM? 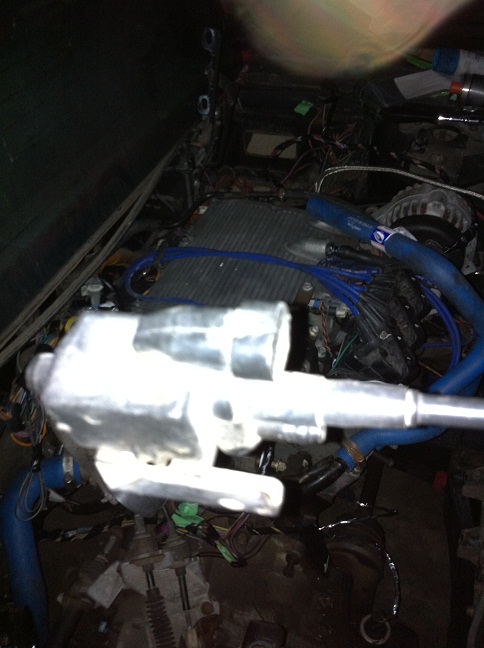
And for the intake I grabbed a 6" piece of 3" pipe from Canadian Tire and I'm thinking if I get a 45* coupler it will work out: 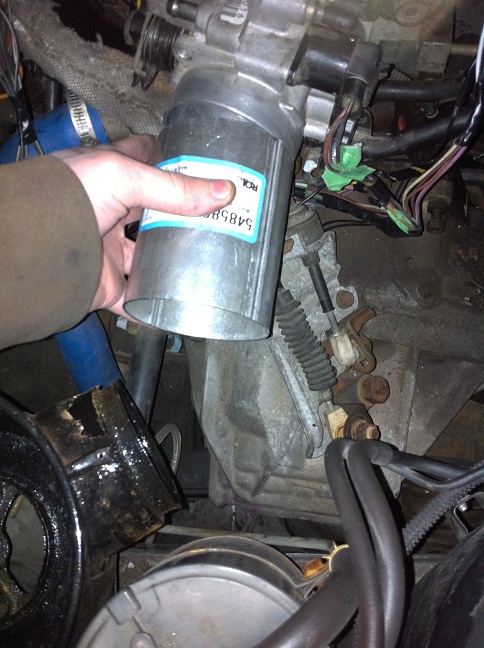
|
Posted By: bcampbell
Date Posted: 12 March 2012 at 12:58am
|
So a few updates for tonight. First off, I finished
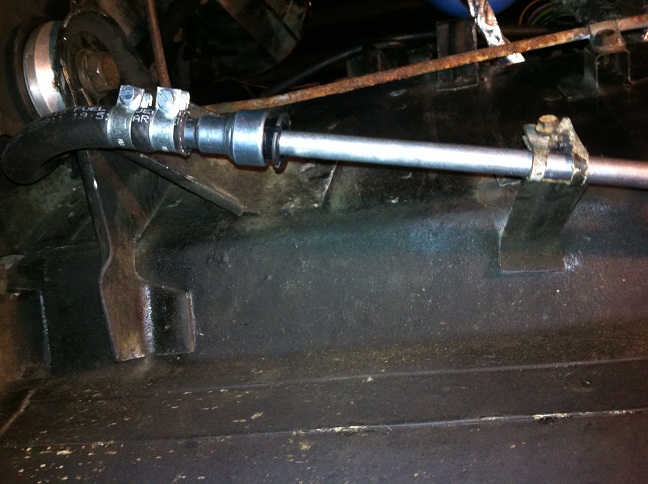
installing everything and was able to get the engine cranking but it's not firing. I believe it's not getting fuel. More on that later. For the fuel system, I got 4 (3 x 3/8, 1 x 5/16) Dorman quick disconnect adapters and 4 ft. of fuel injection hose and clamped everything down. Fuel pressure builds and holds at about 55 psi and there have been no leaks. I also added a ground wire for the fuel filter since it's zip-tied in place and it has a ground strap on it that's designed to ground static developed by fuel flowing through the filter. 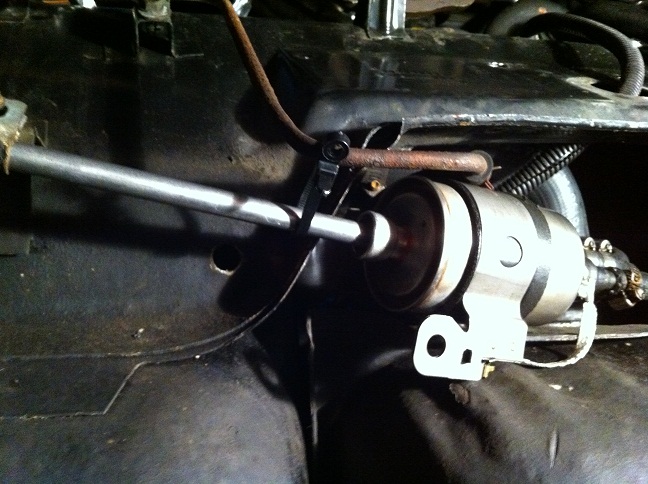
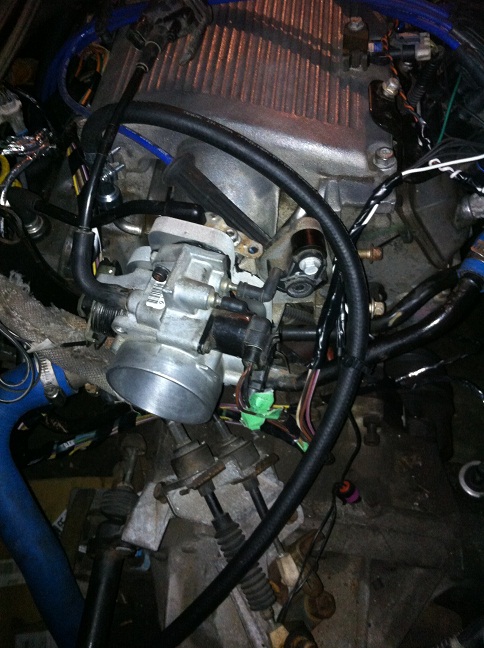
Pic of the G1 adapter installed in the ECM: 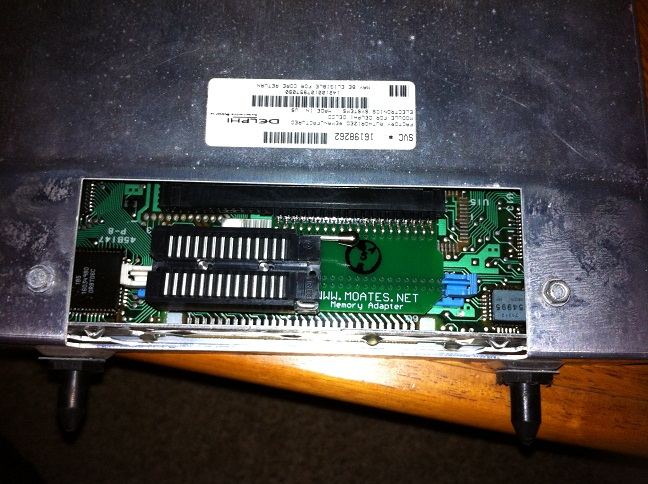
Is it just me or is there more room in front of the engine with this motor? 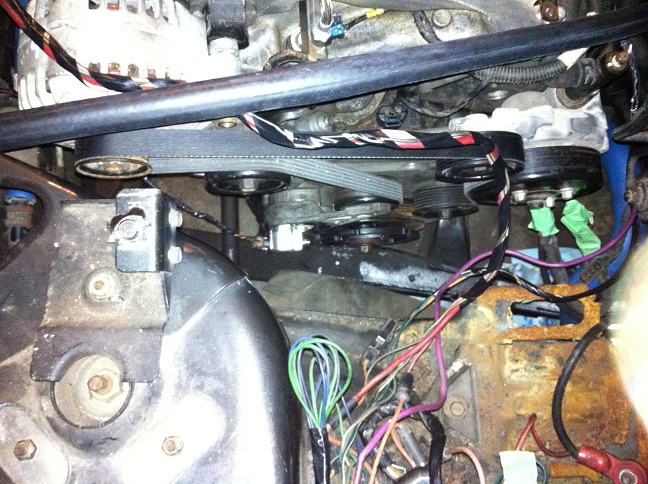
Pic of the firewall side of the engine from underneath: 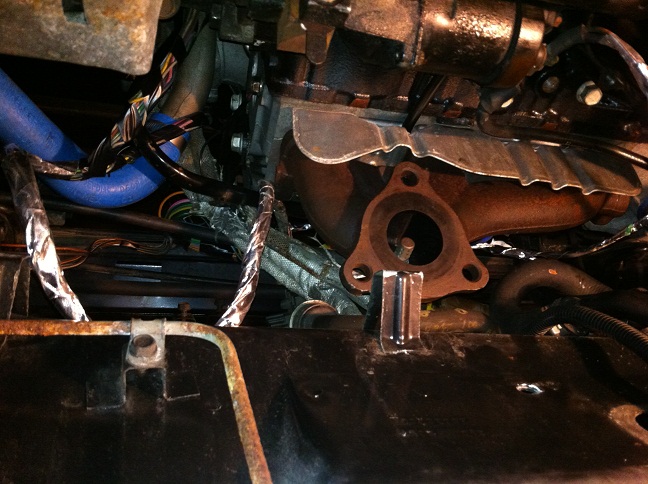
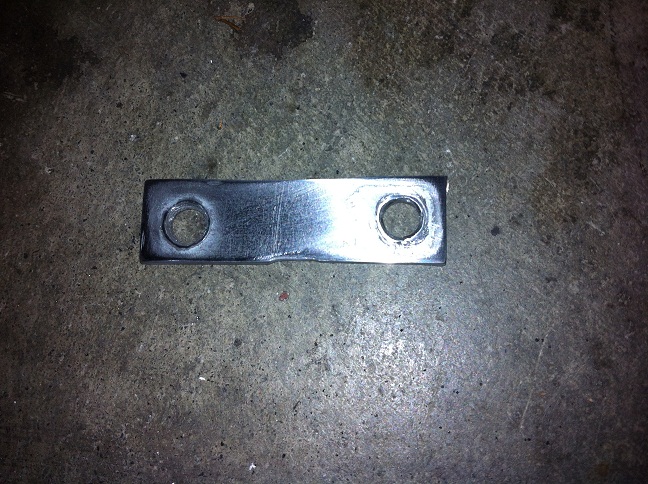
Finished my EGR block-off plate today. Used a piece of scrap metal that used to do something to hold on the inner bumper on my Firebird. It's not a work of art but it gets the job done. For the EVAP solenoid block-off I was able to use an LT1 manifold EGR block-off plate. 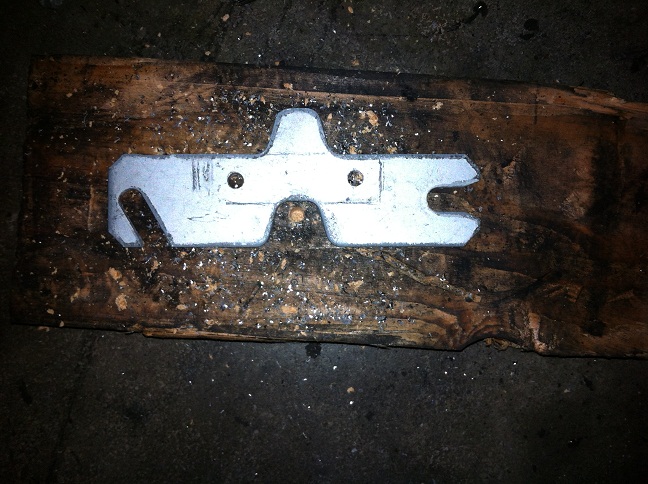
For the intake I was able to get a 45* coupler from Super Street Imports in Victoria for $20. It fits pretty nicely although I had to heat it up to slip it over the air cleaner (3"): 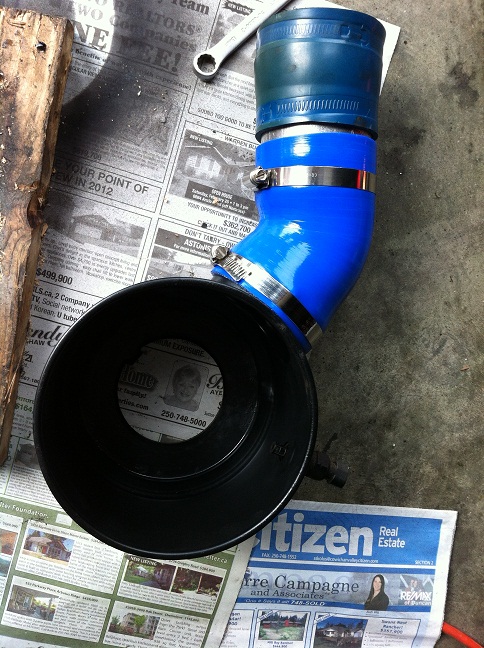
In the next pic you can see my engine-side coolant filler. $6.50 at Canadian Tire (supposed to be used to flush cooling system with a garden hose). Filling was a slow process but I do believe it works: 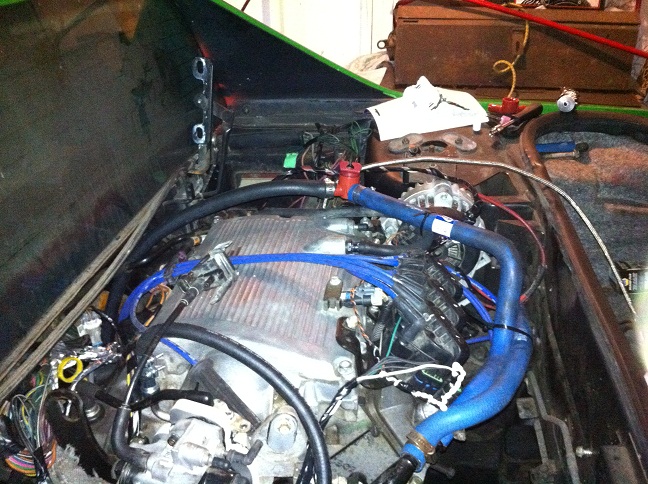
And finally a pic of the engine just about ready to be started: 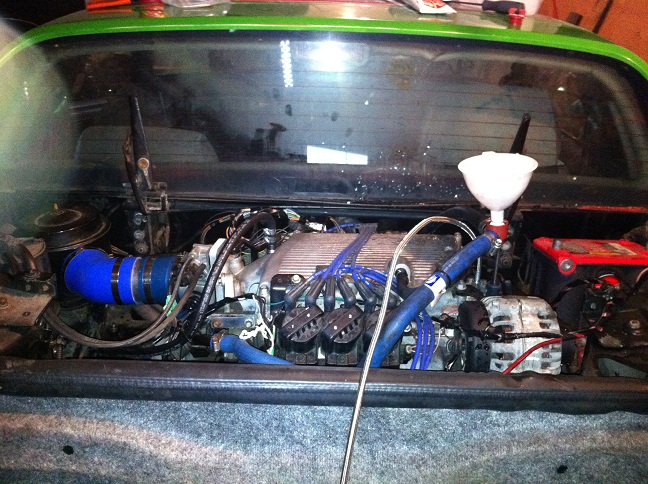
For grounds I used the factory ground strap and added another 4 gauge ground strap. I'm using the stock battery cables. Now on to the starting problems. First thing I did when it didn't fire was a compression test/test for spark plugs firing. I did a compression test on the rear 3 cylinders and they read 200, 190, and 200; good compression in my opinion. At the same time I found that all 6 cylinders are getting spark (since each coil sparks a plug on each bank, it should only be necessary to check 3 cylinders to verify spark on all 6). Since I'm not even getting the odd fire happening at all, I'm convinced the issue is fuel related. My friend had the idea that since the regulator is near the tank there could be a lot of air in the system. We then bled all the air out of the system by opening the schrader valve and re-priming. I did find that after 'bleeding' the fuel rail, my gauge indicated that it was priming much faster than before (not having to compress air I guess). However that didn't change anything. As for wiring, I did a basic test to see if the injector harness was getting a signal to fire. I was reading about 12V at the injector power wire and during cranking I saw fluctuating readings at the ECM ground(?) wires. Someone please correct me if I'm wrong but to me this indicates the injectors are getting a signal to fire. Another possibility I suppose is that the tune I'm trying to use (91 3.1L J-body) isn't giving it sufficient fuel to start the engine. There seems to be no fuel exiting the exhaust manifolds. One thing that seemed strange to me is that I can't get any data to come through the ALDL port (using my ALDL cable). Is it possible to get data to come through while using the emulator? In tunerpro RT it just says "DA: Connecting" when I'm trying to get a datastream. I've already verified that this cable works on my friend's 93 Sonoma. Oh and I also tried to jumper the A and B pins on the connector but that didn't cause the check engine light to flash. However, the check engine light DOES light up with key on, engine off as it should. That indicates that the ECM is at least partially working, I think. I'm just thinking if I could get a datastream that it will help determine if the sensors are getting proper readings and it could also help to indicate any wiring issues. Anyways that's where I've left it for tonight, hopefully tomorrow with a fresh perspective I can make some more progress. |
Posted By: CFoss
Date Posted: 12 March 2012 at 9:00am
|
Can you hear the injectors clicking? IF you have an automotive stethescope and can get to the injectors, use it and the injector clicking should be easily audible. When you say the injector power wire, you mean the one going from the injector to the ecm right (Not the solid +12 one)? If so, you are correct, the wire should go to ground to fire the injector so what you saw is a good thing. I have a handheld scope we can hook up to further analyze this if you want. That way you can actually see the duty cycle, and period of the injector shot.
I don't remember the '7730 needing a-b. It does require a 2 transistor type cable though, where some of the older ecm only require the 1 transistor type. This could be your issue. I can build you one if you want. The one I have is in use on my boat at the moment. I have found Tunerpro to be more finiky than winaldl, but for the '7730 winaldl won't work (too fast).
Search on 3rd gen for some alternative programs that are stand alone. I know I saw some, but I got the tunerpro working.
How did you make out with finding an wideband o2 sensor? I just ordered one which does logging (Zeitronix ZT-2) after I got my last one wet (It died a sad sad death). I'd highly recommed something like it, especially for power enrich settings. I found that I didn't really tune with the ecm, I used the wideband mainly. It is still good to nail down the blm's with a good tune though, so you need it, but it's a little less important.
Chay ------------- 86 SE 3.4 |
Posted By: bcampbell
Date Posted: 12 March 2012 at 12:21pm
I haven't listened for the injectors and don't have an automotive stethescope
I've tested both wires (to make sure it's getting constant power as well)
The cable I'm using has been known to work with a 7730. It's from aldlcable.com I've also tried using Freescan to get data as that's what I use with my other car. Did I also mention that the fan always turns on with the key in the on position?
I can borrow a wideband from a friend but haven't done so yet. |
Posted By: bcampbell
Date Posted: 12 March 2012 at 6:52pm
|
Did some more testing today and it looks like all but one
of my injectors are stuck. They don't look dirty but I guess after sitting for a few years they've just gotten stuck. I can get the #5 injector to fire by manually jumping it with a 9V battery but the rest of the injectors aren't opening at all. Another issue is that with the fuel rail out and the engine cranking, it doesn't look like it's firing #5 anyway. It may be computer related because I still can't get a datastream after trying a couple different code masks. I also double checked the pinouts on the ECM connectors and they all appear fine. It doesn't seem normal that the fan always runs with the key in the on position either. Tomorrow I'll take the injectors up to Action Fuel Injection in Nanaimo and hopefully they can get them cleaned for a reasonable price. |
Posted By: bcampbell
Date Posted: 16 March 2012 at 12:05am
|
Ok so did a little research and it looks like I need to set
my codemask to $AA to disable the checksum checking during emulation. It seems that by not disabling the checksum, it could be putting the ECM into limp home mode which is why the fan turns on with the key in the on position (always happens AFTER the fuel pump primes too). Apparently this can also prevent data from coming through the ALDL port. Also, my fuel injectors are supposed to be ready to pick up tomorrow, so I'll be grabbing them as well. Hopefully all goes well. |
Posted By: bcampbell
Date Posted: 19 March 2012 at 10:23pm
|
Got the engine running today and took the car for a couple
spins around the block. Pics and vid to come soon! |
Posted By: bcampbell
Date Posted: 20 March 2012 at 12:06am
|
So injectors were the main problem, also my chip adapter
wasn't pushed in all the way...  . Anyways, after the . Anyways, after the
cleaned injectors were installed and I loaded a 3.1L tune into the emulator, it started up first try! After that we took the car off jack stands and took it for a spin around the block a few times. Feels so good to finally drive it! 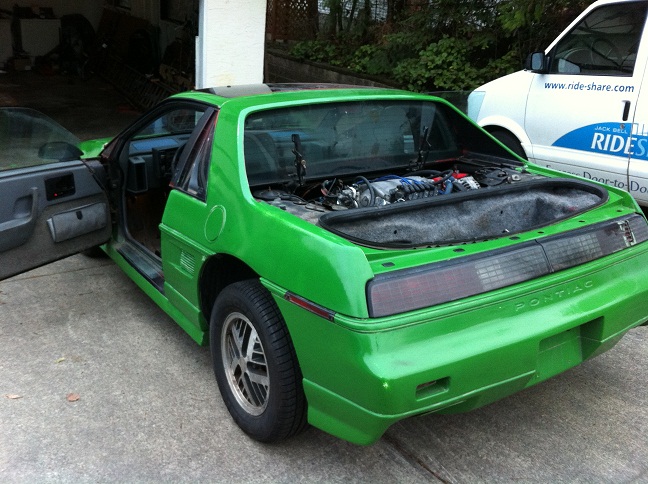
And here's the video: http://youtu.be/x-Sg8IZc5p0 - LX9 Start-up |
Posted By: CFoss
Date Posted: 20 March 2012 at 3:55pm
|
Congrats! Sounds good with no exhaust! Nice vid, especially like the 'he's got no liscence on that thing' at the end. Classic. Chay ------------- 86 SE 3.4 |
Posted By: bcampbell
Date Posted: 31 March 2012 at 5:13pm
|
Exhuast will be done on Monday or Tuesday and I'm gonna put
plates on it soon after and really begin to dial in the tune. I decided to get a y-pipe made at Mill Bay Muffler to keep things fairly inexpensive (using the stock muffler and tips) and they're gonna weld up my cradle nut and battery tray as well. If I want a better exhaust later I can always upgrade to a better stock-style muffler. How much longer till your turbo build is done Chay? |
Posted By: CFoss
Date Posted: 01 April 2012 at 11:15am
|
It'll be a while yet. I'm working on the exhaust right now...lots of tricky fab work because the 2.5" mian exhuast and 2' wastegate tubing has to come together at some strange angle. You have at least a couple of weeks, probably more like a month...no rush! Chay ------------- 86 SE 3.4 |
Posted By: bcampbell
Date Posted: 05 April 2012 at 7:57am
| Put plates on the car yesterday after getting the exhaust done and having a battery tray made. The car is much quiter now but still sounds really good IMO. The tune is fairly close now at least with part throttle driving; just running a little on the rich side now. So far no problems with knock retard so I might play a little with timing advance as well. I'll probably get a video of the final exhaust sound later. |
Posted By: Dawg
Date Posted: 05 April 2012 at 10:44pm
|
That thing is going to kiss ass!
Dawg ------------- You dream it up....I'll make it |
Posted By: bcampbell
Date Posted: 06 April 2012 at 8:08am
|
Thanks! Gas mileage doesn't seem to be too terrible right now so that's a good sign. I was worried at first about how bad the 4 speed manual would be. I think it probably helps that the torque peak of this engine is relatively high compared to the 2.8 (4800 rpm IIRC), so it should in theory be more efficient at mid-high rpms. Once I enable lean highway cruising in the tune it should get even better. Only issue right now is that it's been stalling once warmed up but I think I figured that out so I'll find out later today. I think it tries to go into single fire mode when idling and that's causing the stalling. Disabling single fire mode will hopefully solve the problem. Oh and since I still don't have an upper dog-bone mount I'm driving pretty conservatively right now. Hopefully I'll be addressing that on Monday. |
Posted By: bcampbell
Date Posted: 06 April 2012 at 6:03pm
|
Disabling single-fire in the tune made the idle problem go
away. VE maps are also just about done. Not too much left! |
Posted By: bcampbell
Date Posted: 07 April 2012 at 6:09pm
|
Tuning is just about done. I'll probably set up a nAst1
tune and a regular A1 tune just because the nAst1 has a few glitches here and there. It's great for tuning with though. This engine is just begging for a 5 speed swap! Maybe I'll get around to that by late summertime. ------------- '86 2m6 F23 5-speed, LSD, 3.5L LX9 '89 Firebird 3500T, T56 |
Posted By: bcampbell
Date Posted: 21 April 2012 at 12:59pm
|
So tuning is pretty much finished. Also had to replace and require my
alternator recently. And I now have a dog bone mount. I'm planning on going to the 1/8 mile drags at western speedway tomorrow so we'll see how that works out. ------------- '86 2m6 F23 5-speed, LSD, 3.5L LX9 '89 Firebird 3500T, T56 |
Posted By: bcampbell
Date Posted: 22 April 2012 at 9:38pm
|
Had some good fun at the SISLA event today. Best time
ended up being a 6.489 @ 62.27 MPH. Didn't break any transmission mounts and did some light burnouts. Wow it's really easy to get a good launch with these cars. With some better tires I could probably shave another 1/10 of a second away. I thought it was pretty awesome beating most of the V8s in street class and also having one of the most quiet cars there. It's a 384-foot track. On the other hand a brand new Shelby GT500 crashed on its first run... 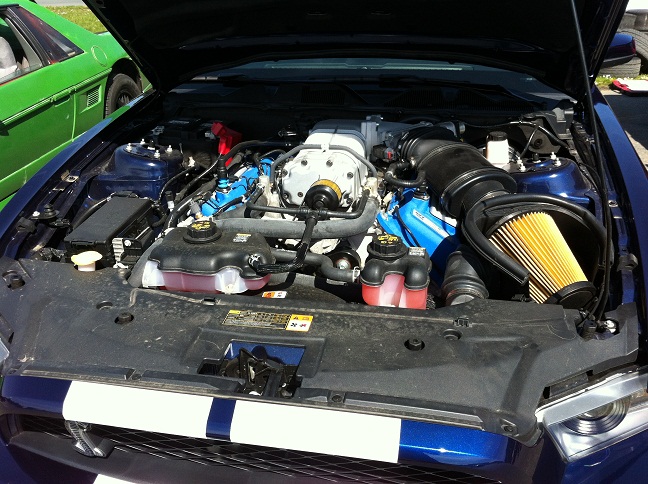
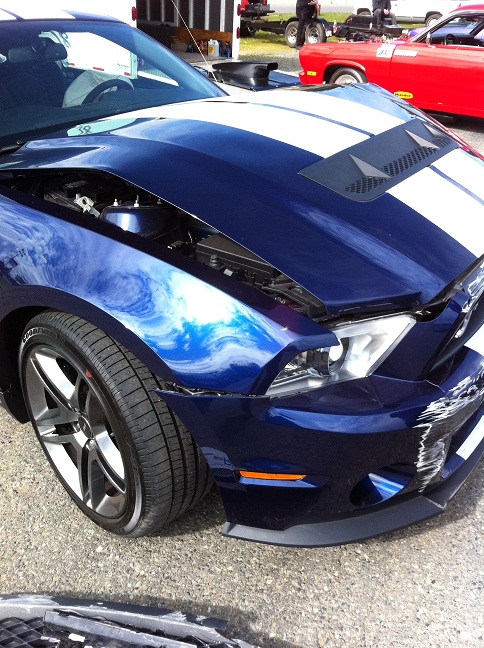
And I snapped a pic of my dog-bone mount and the car with the stock wheels now painted satin black: 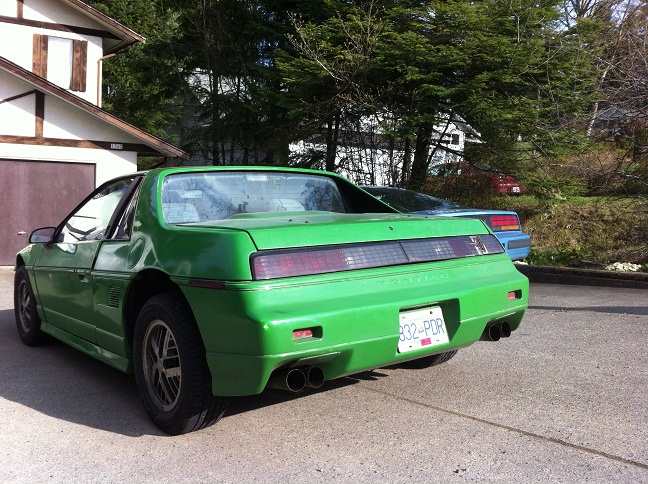
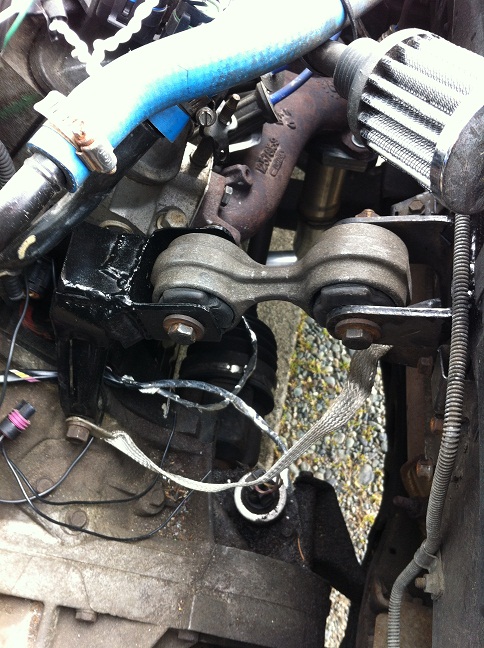
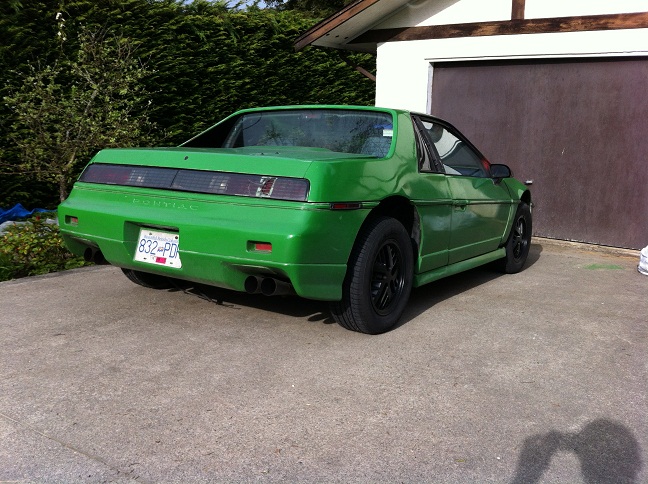 ------------- '86 2m6 F23 5-speed, LSD, 3.5L LX9 '89 Firebird 3500T, T56 |
Posted By: Capt Fiero
Date Posted: 22 April 2012 at 10:36pm
|
Your times seem really odd to me. I went back and checked some of my old time slips from when I was running a strung out V6 (2.8 with mods) My best 1/8 mile with 9.4 at 75mph. (3 seconds slower but 10mph faster) which does not make any sense to me? I was racing against a Turbo Miata at the time in my now deceased 85GT with a 4spd trans. I was car 3641 with a 14.6 quarter mile. Scan of my slip is here, http://www.captfiero.com/missiontime.JPG - http://www.captfiero.com/missiontime.JPG
------------- Capt Fiero 88 Fiero GT 5spd V6 Eight Fifty Seven GT V8 5spd. |
Posted By: bcampbell
Date Posted: 22 April 2012 at 10:38pm
|
Yes it's not an 1/8 mile track it's a 384 foot track.
Sorry for the confusion. ------------- '86 2m6 F23 5-speed, LSD, 3.5L LX9 '89 Firebird 3500T, T56 |
Posted By: bcampbell
Date Posted: 22 April 2012 at 10:40pm
To compare, my best 330-foot time was 5.711 ------------- '86 2m6 F23 5-speed, LSD, 3.5L LX9 '89 Firebird 3500T, T56 |
Posted By: Capt Fiero
Date Posted: 22 April 2012 at 11:12pm
|
To get a 5.7 330 you were cooking along really well. I am impressed. ------------- Capt Fiero 88 Fiero GT 5spd V6 Eight Fifty Seven GT V8 5spd. |
Posted By: bcampbell
Date Posted: 08 May 2012 at 11:09pm
|
Just added some more videos today:
http://www.youtube.com/watch?v=t2en4b4MX-s - LX9 Autocross Run http://www.youtube.com/watch?v=qURrkcbCryE - Fiero vs. 4.6L Mustang http://www.youtube.com/watch?v=xtN4YeRAxW4 - Fiero vs. Dodge Magnum ------------- '86 2m6 F23 5-speed, LSD, 3.5L LX9 '89 Firebird 3500T, T56 |
Posted By: CFoss
Date Posted: 09 May 2012 at 9:42am
|
Very cool. Lotsa fun! Engine sounds good!
Chay ------------- 86 SE 3.4 |
Posted By: 88 Addict
Date Posted: 11 May 2012 at 3:09pm
|
Looks like good work on a budget. Don't think I could get results like that for what you have spent. Let me know when you are ready to do your 5 speed swap. I have a 282 from a cavalier that I spit the case on to replace the speedomiter drive gear and left sitting in the garage till I moved back to the Island. It is sitting in the basement looking for someone finish putting it back together. Would be interested in getting your 4 speed shifter for my current project which is an f40 6 speed swap. PM me the next time you plan to come through Mill Bay and have the time for coffee. ------------- So many Fiero's, So little time. |
Posted By: bcampbell
Date Posted: 11 May 2012 at 9:41pm
|
I LOVE the sound of this engine. It's funny my friend
was the one driving it mostly at the track on Sunday and he wouldn't stop revving the engine every chance he got. Too funny. The heater core blew Sunday morning but we just did a quick bypass so it could still go to the track. I drove my Firebird at autocross and the Fiero beat me by about 1/10 of a second. The hairpin turns really killed me; it just doesn't have as much steering angle and I couldn't make up for it with just the stiff suspension. I decided not to drag my Firebird because my oil pressure was dropping when coming to a stop (probably oil pump pick-up fell off oil pump and needs to be welded on). ------------- '86 2m6 F23 5-speed, LSD, 3.5L LX9 '89 Firebird 3500T, T56 |
Posted By: bcampbell
Date Posted: 19 May 2012 at 7:21pm
|
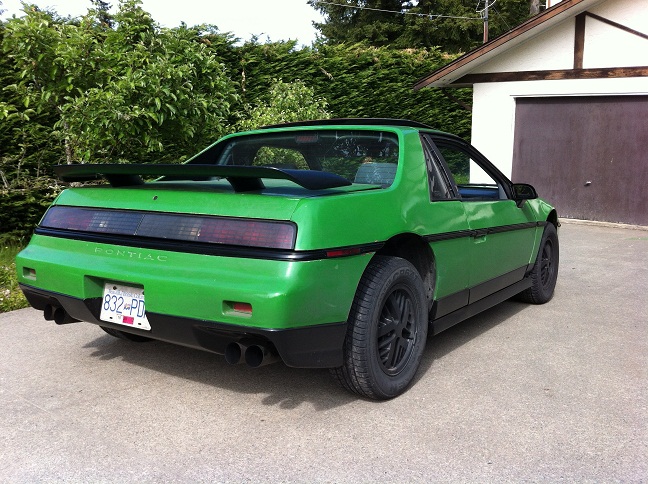
Just finished painting most of the trim satin black.
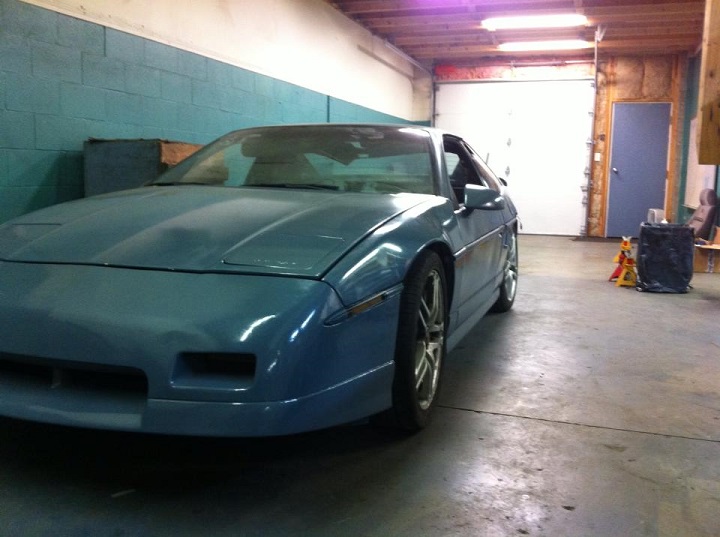
It's finally starting to not look like a piece of garbage on the outside haha. I'm also posting a few pictures of what it looked like when I bought it: 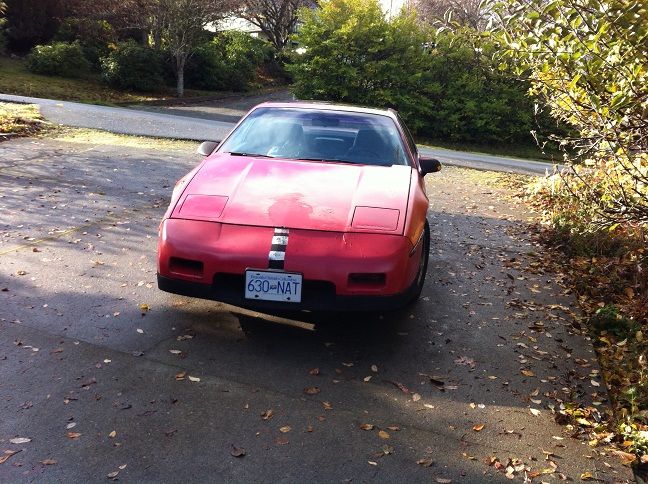
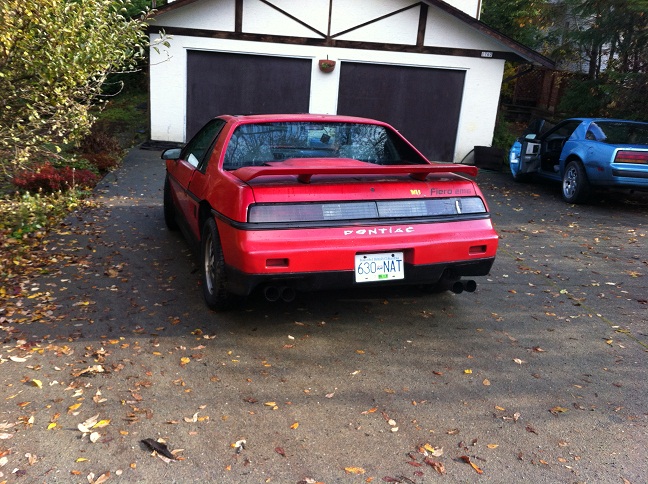
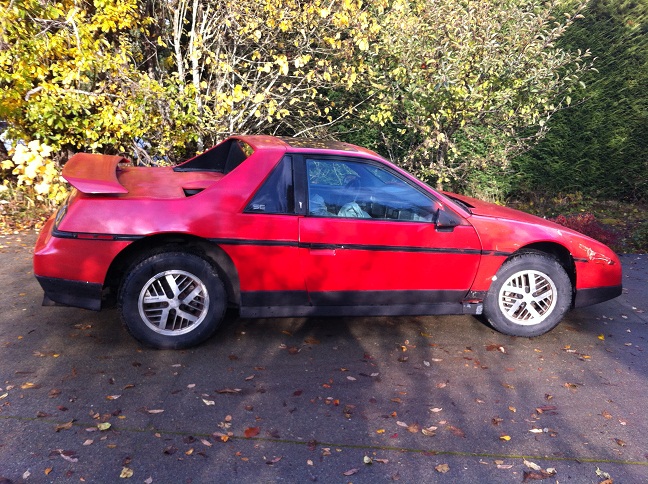
And now: 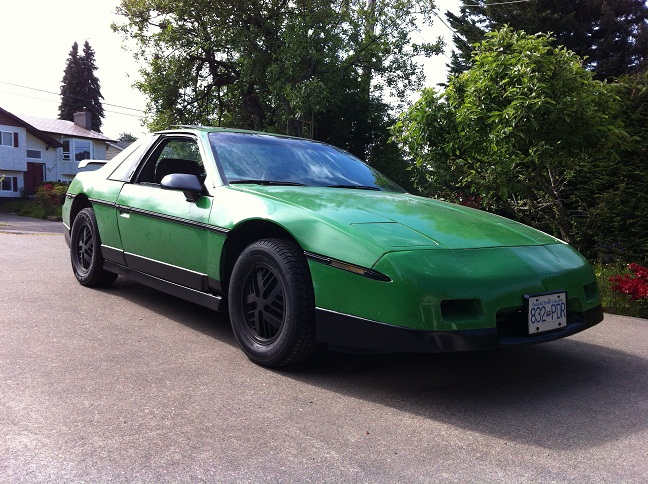
 ------------- '86 2m6 F23 5-speed, LSD, 3.5L LX9 '89 Firebird 3500T, T56 |
Posted By: Capt Fiero
Date Posted: 19 May 2012 at 11:15pm
|
The car looks great. However my personal taste I would have prefered the red/black look. Don't get me wrong you did amazing work and paint quality looks great. Just not a fan of Green/Black as a colour scheme on a Fiero. Although I have never seen your engine swap in person, it looks to also be top notch and the performance numbers you have posted speak for themselfs. ------------- Capt Fiero 88 Fiero GT 5spd V6 Eight Fifty Seven GT V8 5spd. |
Posted By: bcampbell
Date Posted: 31 July 2012 at 6:36pm
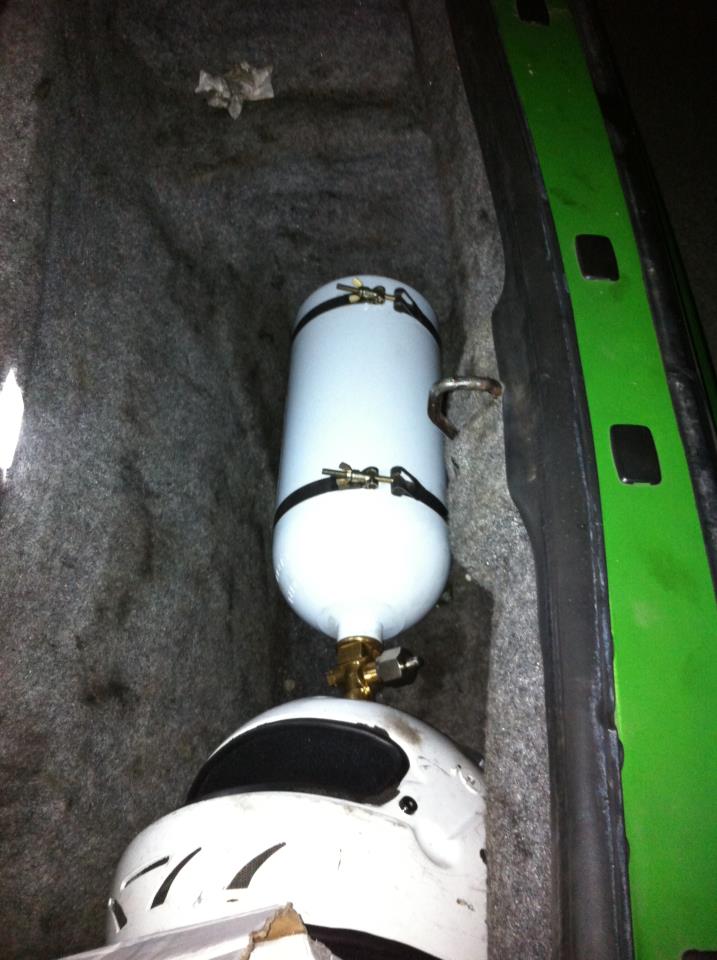
Going to Thunder in the Valley 2012. Can't wait to see some 1/4 mile times and probably going to use a 75 shot of N2O. ------------- '86 2m6 F23 5-speed, LSD, 3.5L LX9 '89 Firebird 3500T, T56 |
Posted By: bcampbell
Date Posted: 12 August 2012 at 6:49pm
|
Fiero really surprised me (and everyone else) by running a
13.686 @ 102.68 MPH!!! My friend was driving it for me (I was driving Firebird) and got a GoPro video of it racing an LS1 WS6 Trans Am which I will hopefully post soon. That time really surprised me as I was hoping for a best of 13.9. We ran the 75 shot of nitrous in 2nd, 3rd, and 4th. ------------- '86 2m6 F23 5-speed, LSD, 3.5L LX9 '89 Firebird 3500T, T56 |
Posted By: bcampbell
Date Posted: 29 December 2012 at 10:28pm
|
Wow I completely forgot to post the vid!
http://www.youtube.com/watch?v=W4bYR0-qSpQ - Here it is Car is still running great 25,000 kms later but needs a new muffler. My turbo Firebird project is nearing completion and the Fiero will get attention after that is driveable. 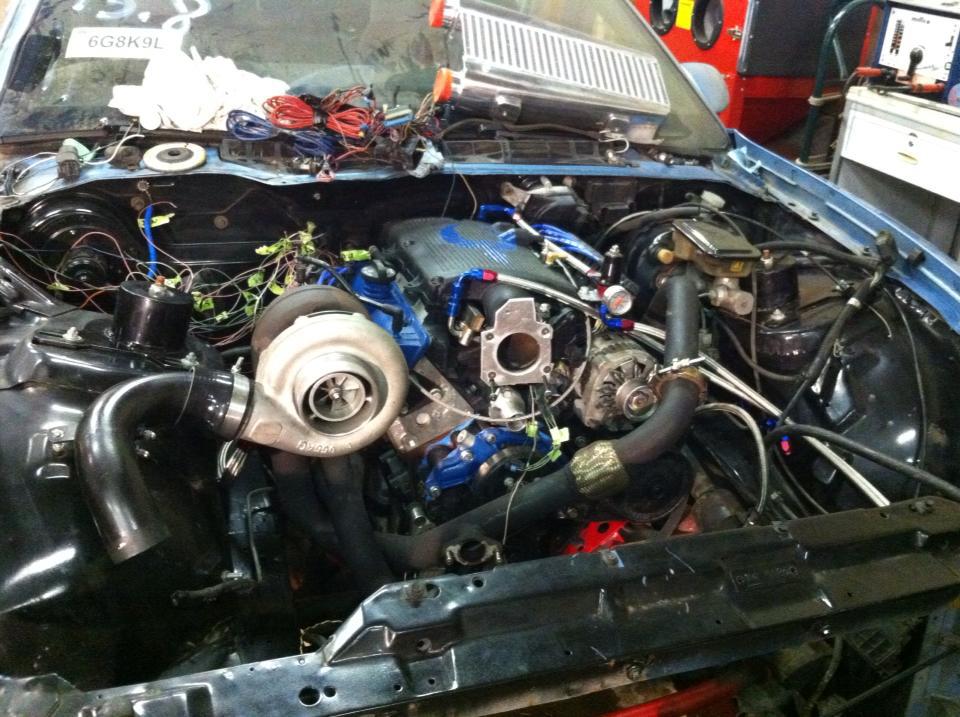
:D ------------- '86 2m6 F23 5-speed, LSD, 3.5L LX9 '89 Firebird 3500T, T56 |
Posted By: bcampbell
Date Posted: 08 July 2013 at 6:34pm
|
Getting this ready for the Port Alberni drags again; just
pulled the engine out the other day for a max-effort N/A cam, 8 lb aluminum flywheel, 6-puck ACT clutch, and F23 5- speed w/LSD. I'm also redoing the fuel system with a returnless rail and 28# trailblazer injectors, and tidying things up a bit more. Probably gonna set up the N2O on a WOT switch this year as well. ------------- '86 2m6 F23 5-speed, LSD, 3.5L LX9 '89 Firebird 3500T, T56 |
Posted By: bcampbell
Date Posted: 11 July 2013 at 3:52am
|
Got the cam in and installed the new flywheel/clutch.
Also started porting the manifolds. Transmission should be re-assembled by the weekend. 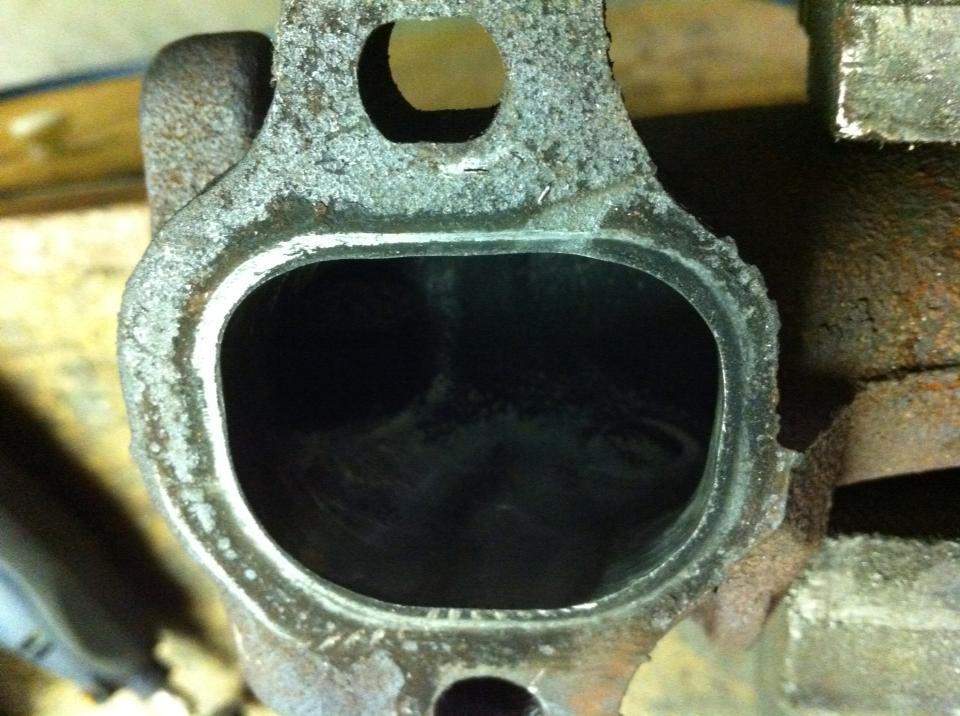
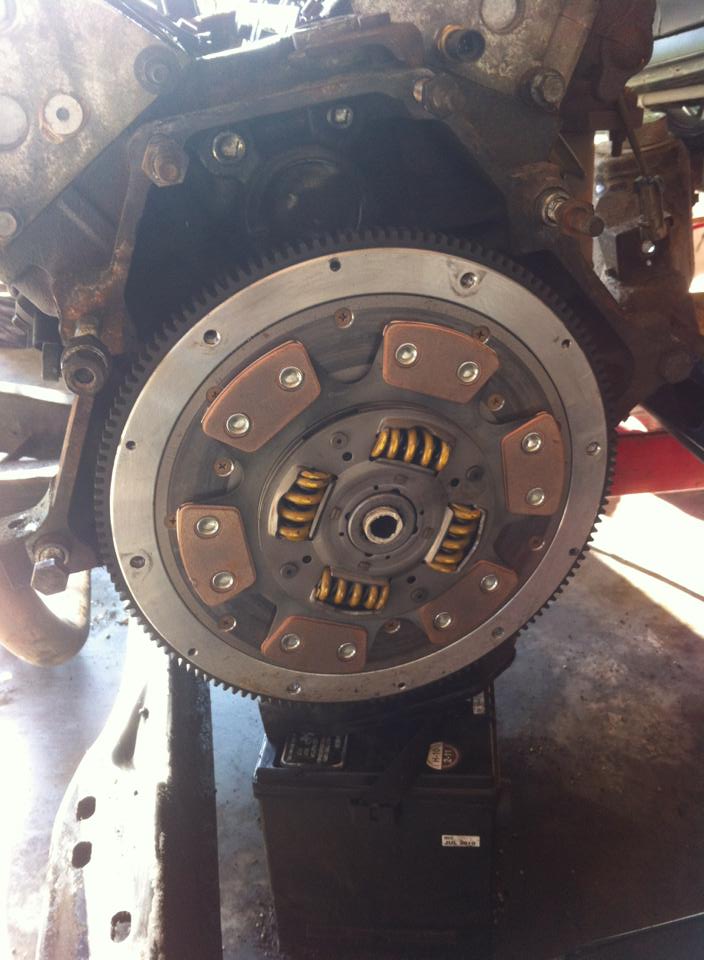
Despite the 35,000 kms of driving since the swap, the motor still looks brand new inside :). 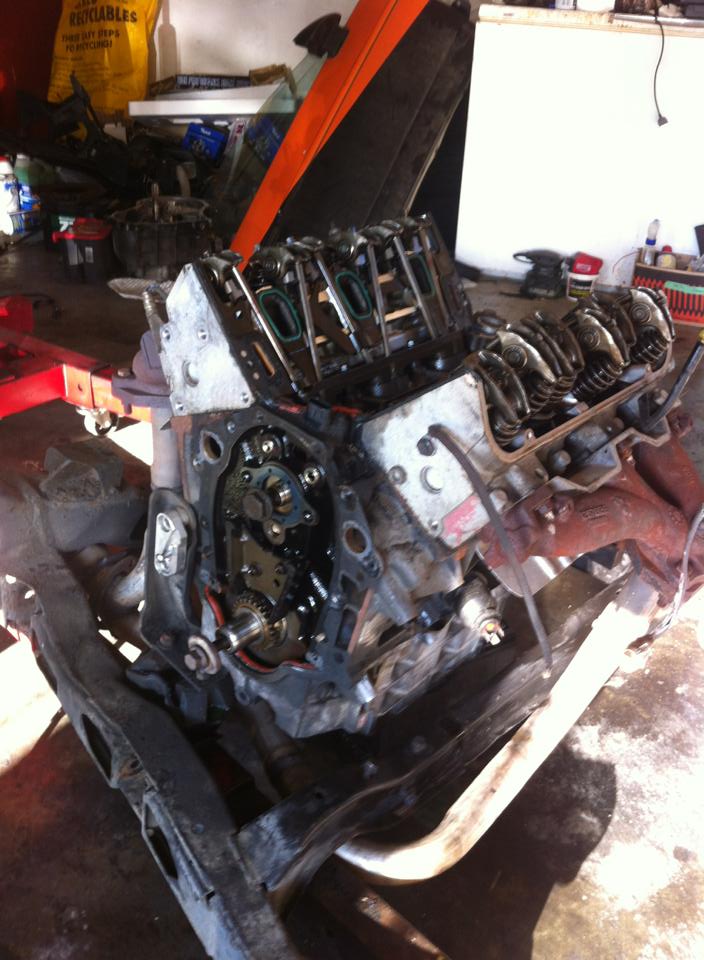
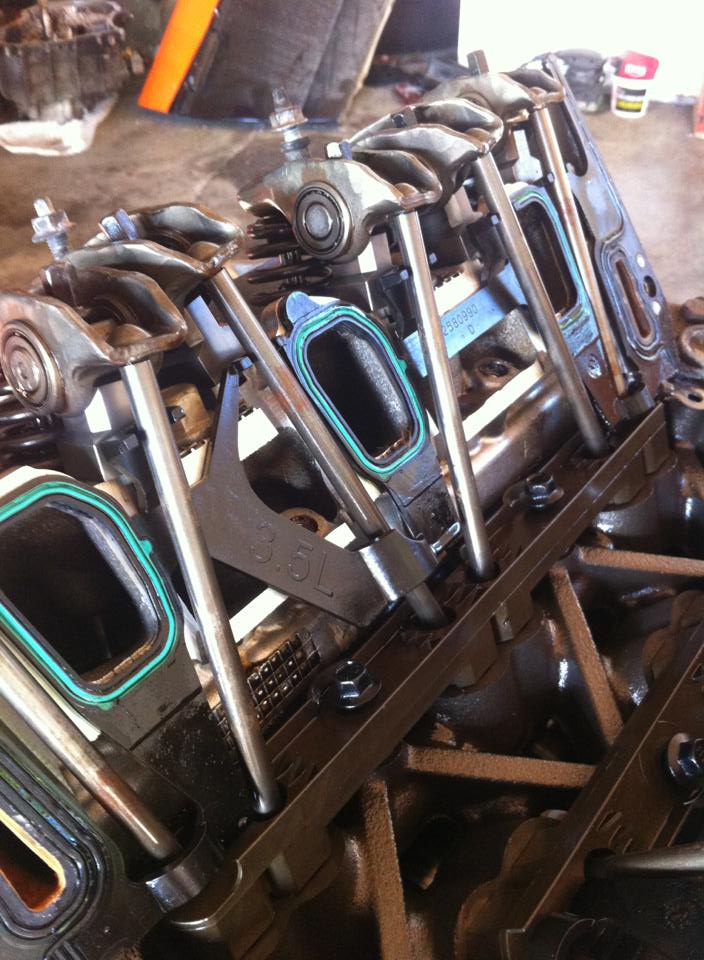
Anyone need a 4-speed? I also have a reinforced stock rear trans mount if anyone wants it. It originally broke into 3 pieces so we welded it back together with some 1/4" steel pieces to reinforce it. It held really well. ------------- '86 2m6 F23 5-speed, LSD, 3.5L LX9 '89 Firebird 3500T, T56 |
Posted By: Bassman
Date Posted: 12 July 2013 at 7:28pm
|
4spd trans?...
Good work by the way, looking good ------------- Brian (Bassman) 86 GT Fastback 3.2L 2013 Mazda3 Sport GS SkyActive [IMG]http://i170.photobucket.com/albums/u243/Bassman68/BassmanSignature.png"> |
Posted By: bcampbell
Date Posted: 13 July 2013 at 1:57am
|
I actually forgot to post this, but in January the stock
3500 dynoed at 205 whp and 250 ft-lbs wtq. I was really impressed with those numbers. That's stock manifolds, stock Fiero air cleaner, untouched engine. Ya, since I'm installing an LSD'd F23 I should no longer need the 4-speed manual anymore. I actually got the cam/valvespring/pushrods for a steal at $180 shipped because it's the same seller I bought the 3500 turbo manifolds off of for my Firebird. And after I finish this last round of upgrades I'm seriously considering selling the car. Kinda wanna replace it with an Audi A4. This cam won't be as good on gas as stock but should be plenty fun at the same time. Supposed to be good for power to/past 7000 rpm and on an otherwise stock 3400 was expected to make 245 whp. On a 3500 it should make a bit more. Specs: Intake 230 .578" lift Exhaust 236 .573" lift LCL 110 LSA 112 Oh and rear control arms are getting poly bushings now. I'll probably do the fronts later as they really should be done. ------------- '86 2m6 F23 5-speed, LSD, 3.5L LX9 '89 Firebird 3500T, T56 |
Posted By: bcampbell
Date Posted: 05 August 2013 at 1:42am
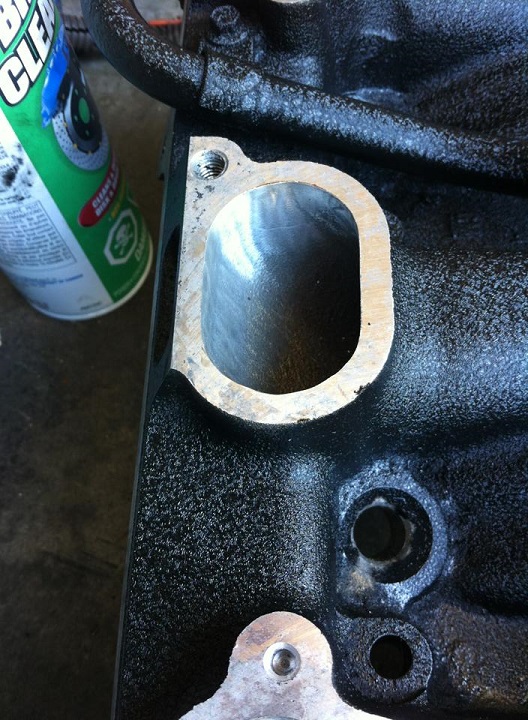
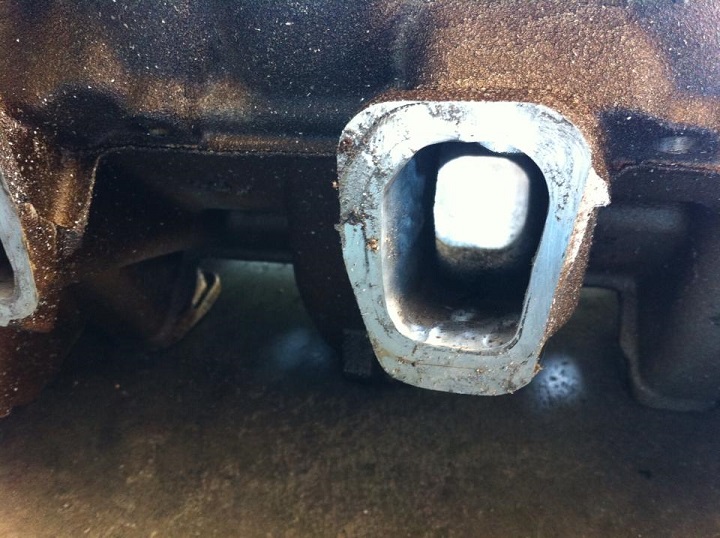
Finished up the minor porting to the intakes
Put the trans back together now with a rebuilt OBX. My first time shimming a trans so hopefully this works out ok. 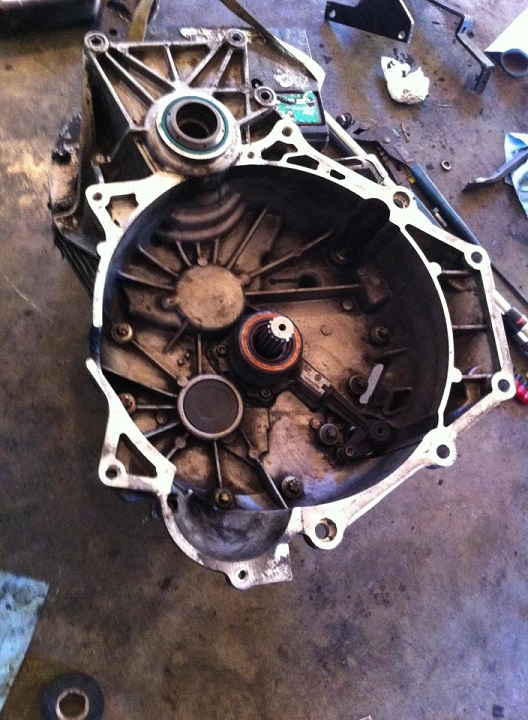
Did some major wiring cleanup; changed the routing of a lot of wires and grouped everything together a lot better than last time. Integrated the nitrous system wiring as well. Also swapped to a 3400 returnless fuel rail with 28# trailblazer injectors and drilled/tapped the rear valve cover so I could properly install a breather on it. 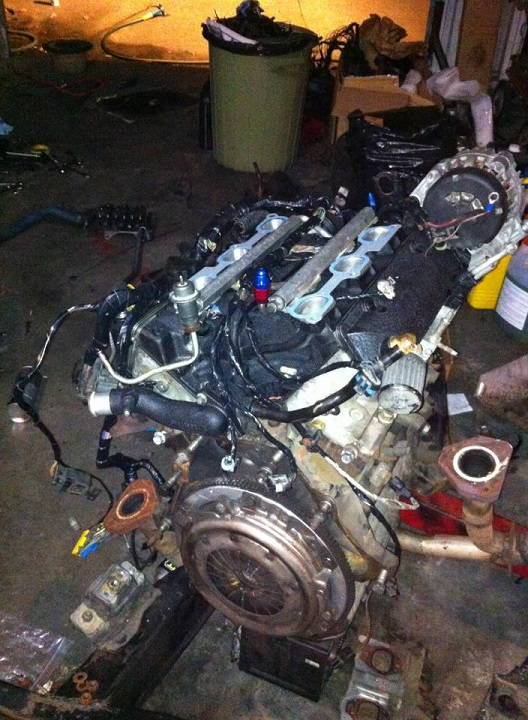
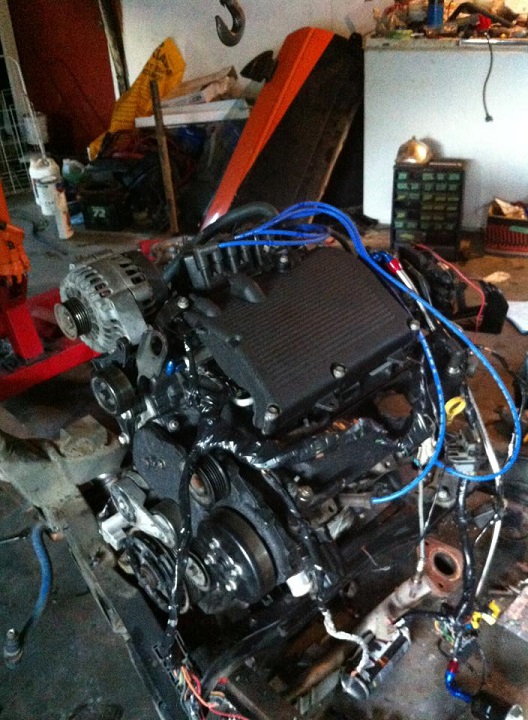
Mounted the transmission with Fieroflyer from fiero.nl's mounts. The mounts are nice and beefy and they work, but quality could be better. For example some of the bolt holes needed to be spaced away with washers to make the other bolt holes line up. Rear side mount had to be pried a little to get all the bolts started. The nice thing at least is that after the mounts were installed, they lined up perfectly with my poly trans mounts. 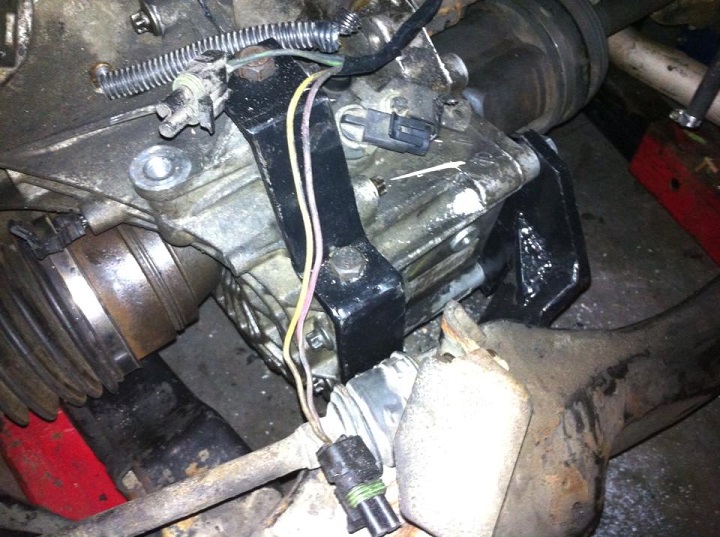
Had to do a minor notch to the cradle here to clear the transmission since the mounts were designed for an 88 cradle. Pic also shows poly control arm bushings now intalled. 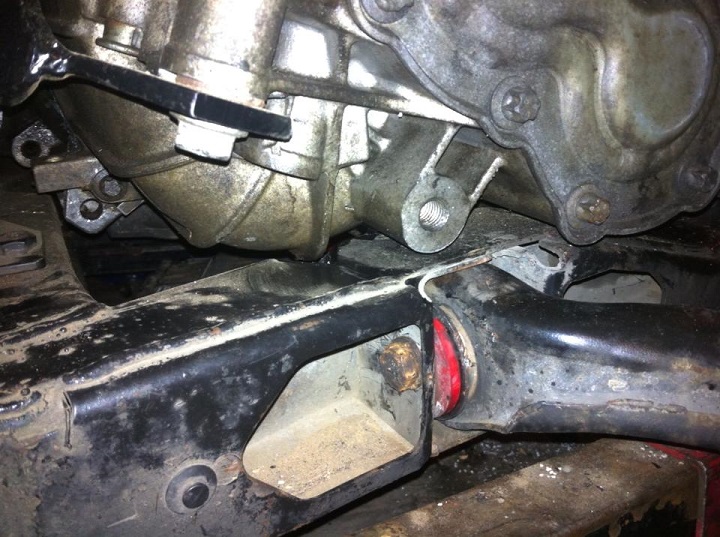
Ready to go in the car 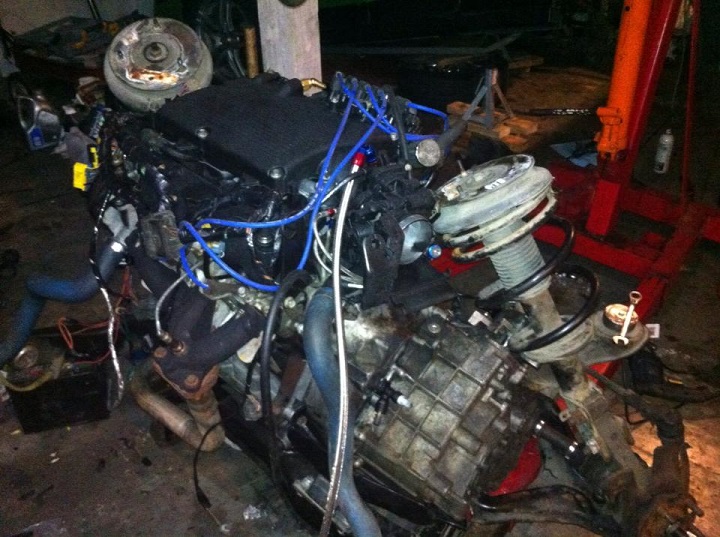
Once in the car, I relocated the coolant filler to the other heater core line to make for a cleaner look. Also, the heater core line that comes from the front side of the engine, and routes all the way to the rear, was cut at the front side right after a weld bead (so that a hose clamp cannot slip off) so that the line has a much shorter route. 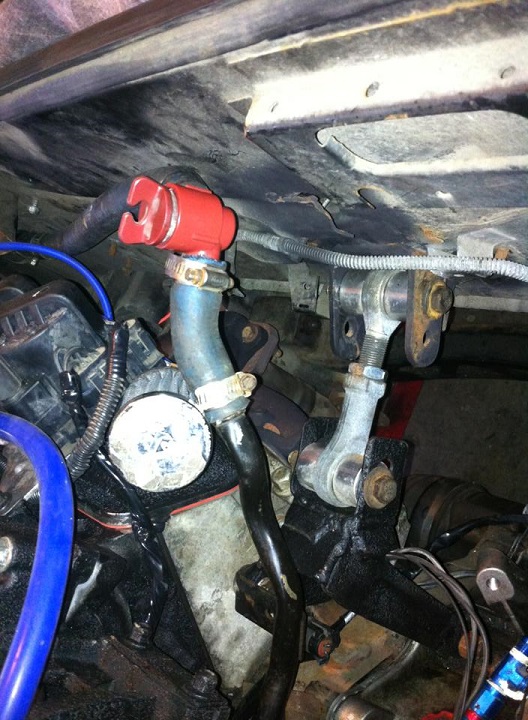
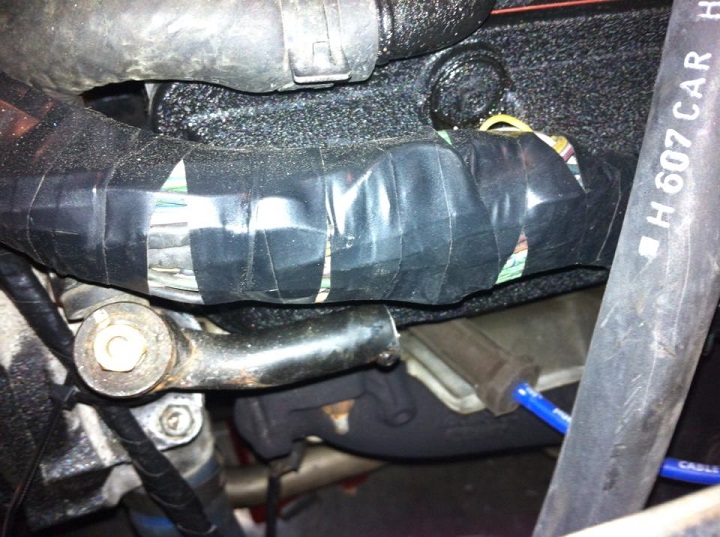
For the F23 clutch line, I had Island Hose silver solder a -4 male AN fitting onto the F23 bleeder, and then I cut the end off the stock braided steel line and installed a -4 Russell Powerflex hose end. The olive in the hose end needed to be slightly drilled out due to the Fiero line being slightly larger than -4 (I'm assuming it's a metric size). Clutch bled very easily compared to stock and clutch is disengaging properly. Pedal has a much lighter feel to it now despite the same pressure plate being used. 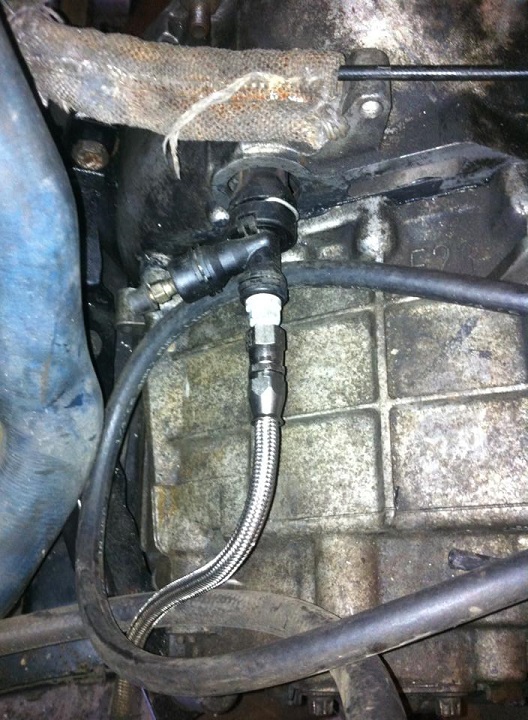 ------------- '86 2m6 F23 5-speed, LSD, 3.5L LX9 '89 Firebird 3500T, T56 |
Posted By: bcampbell
Date Posted: 05 November 2013 at 12:51am
|
So it's probably time to update the build... Drag racing
didn't go as planned :). Had issues with the shifter all weekend and the shift cable ended up breaking on one of the runs. It was actually the best run of the weekend and ran a 15.x with only 1st and 2nd gear :). Which I think is pretty decent considering that was NO nitrous this time and it didn't get a chance to wind out 3rd and 4th gear. Shifting was around 6300 rpm or so as I have the rev limiter set very conservatively right now. Powerband of this cam goes past 7000 but I'm nervous to go that high as the last motor this cam was in left valve marks on the pistons  . That may or may not be . That may or may not be
because the timing chain was old and stretched though. Anyways, after TITV the car mostly sat waiting for parts for a couple months. Ordered a set of new cables from California Push-Pull, front poly a-arm bushings, front poly sway bar end links, front ball joints, and installed rear coilovers as well. I'm also doing a GT conversion to it with the next week and painting it again. This time midnight blue. Front suspension rebuild has been a HUGE pain. 3 Of the 6 control arm bolts were seized to the bushing sleeves and the lower ball joints took hours of pressing, torching, beating, etc... to remove. Oh and two of the steering rack bolts broke when I went to remove them. Fun. After the front suspension rebuild is over with and the body panels go back on, I still have a couple more things to do before I put the car up for sale. Rear struts will be changed out for KYBs, another motor mount will be added (possibly two if that's not enough), a second muffler will be added (current exhaust is LOUD... one of the loudest street cars I've heard... my friend's cammed LM7-swapped S13 isn't even as loud when straight piped with NO muffler), and the starter needs to be replaced since it's pretty much done for. Pic of how it's sitting now 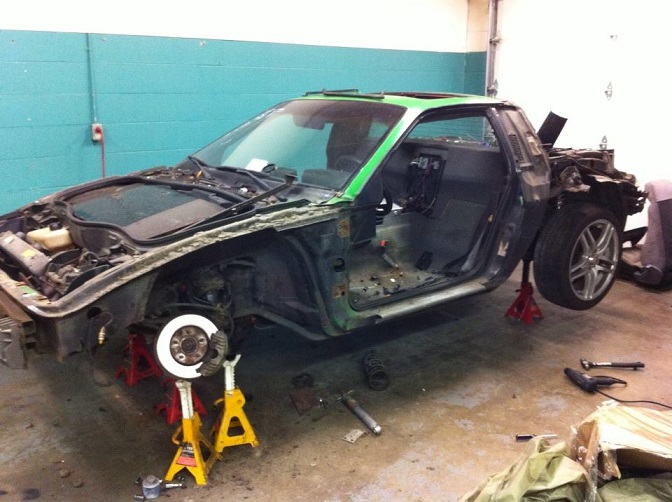
And of course a vid of the glorious cammed V6 noises http://youtu.be/kpztfwp6rNE - Cammed 3500 Fiero It's idling at 1300 right now but with more tuning it should hold 1000 ok. This cam is much more aggressive than the one I have in my Firebird right now. I think I'm going to try to get this back on the dyno before it sells. It should make at least 250 whp if not more based on simple math and the dyno with the stock cam; stock cam made 250 ft-lbs of torque and if this cam torque peaks at over 5252 rpm then it will make 250 hp and likely more. ------------- '86 2m6 F23 5-speed, LSD, 3.5L LX9 '89 Firebird 3500T, T56 |
Posted By: bcampbell
Date Posted: 15 December 2013 at 1:23am
|
So car is finally ready to go back on the road... almost.
Just needs an alignment really. Poly bushed the front end... BTW, I discovered that Moog poly end links actually appear to be MUCH higher quality than anything offered by energy suspension. And I got them for $6/side on rockauto. I would highly recommend them to anyone going to poly end links. I also replaced both lower front ball joints since it was time they be done. 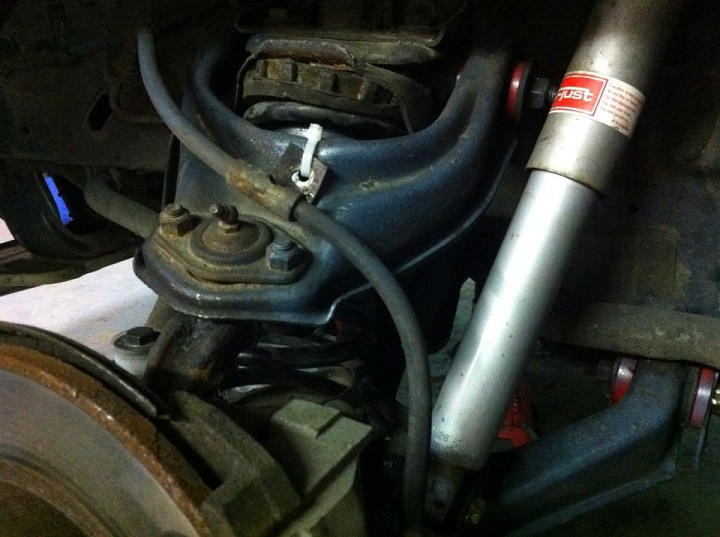
Installed all newly painted body panels 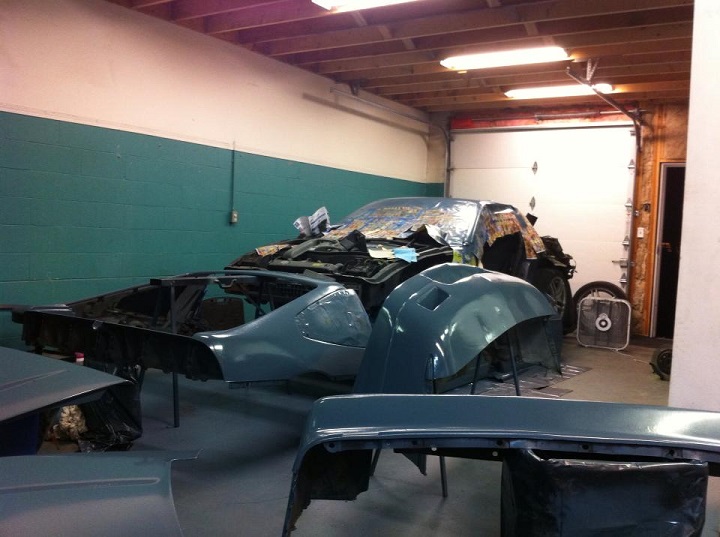
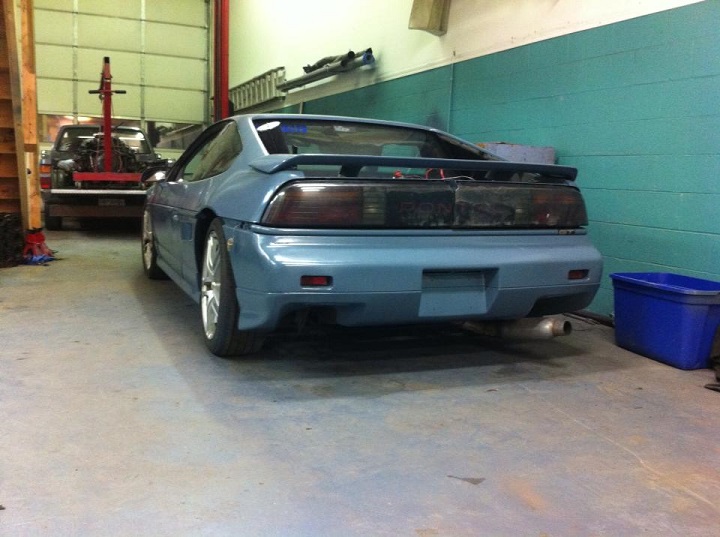
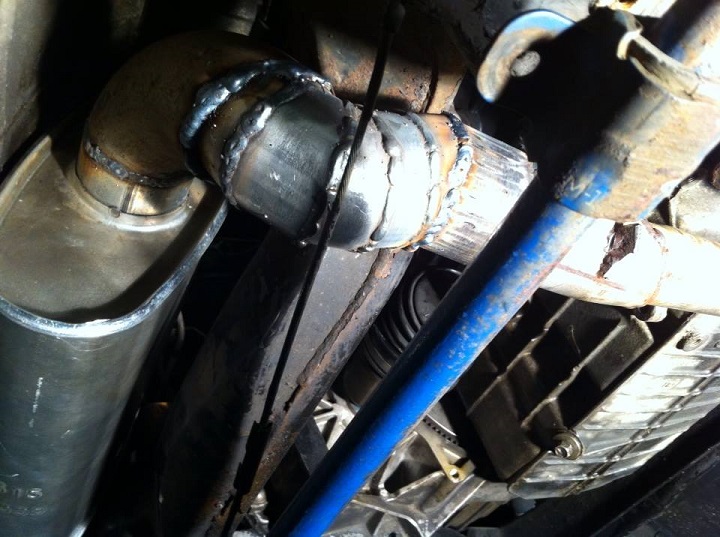
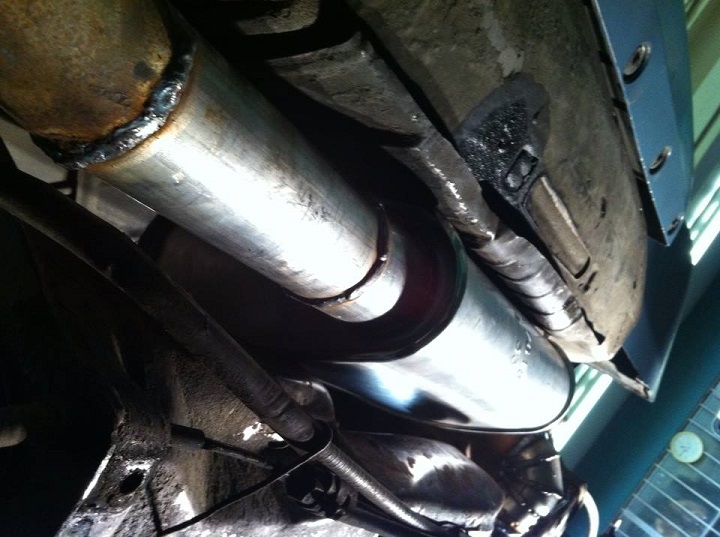
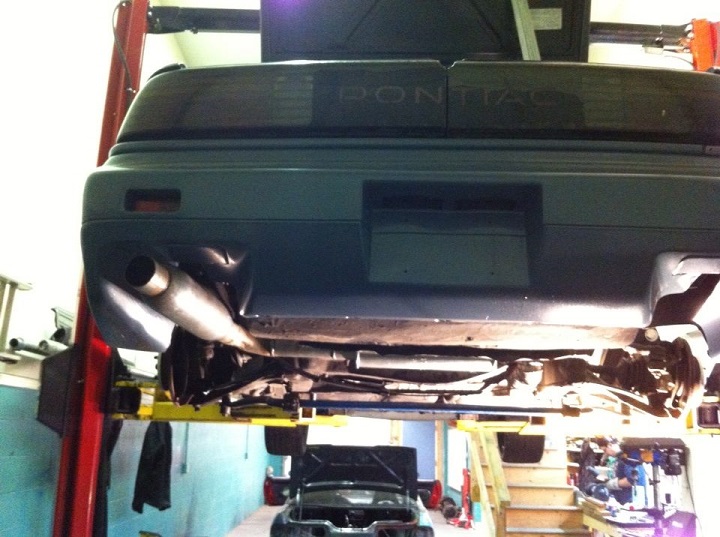
Exhaust has now been re-done and is much nicer than before. I was surprised how quiet it is vs. before but I do effectively have two mufflers now. I bought a Dynomax/Walker turbo muffler from Lordco for $26 and re- used the glasspack as a tip. Had to do a pie-cut to make the connection from y-pipe to muffler as space sure is tight back there. The whole system is effectively one piece but can be removed by removing the sway bar and un- hooking the right side e-brake cable. 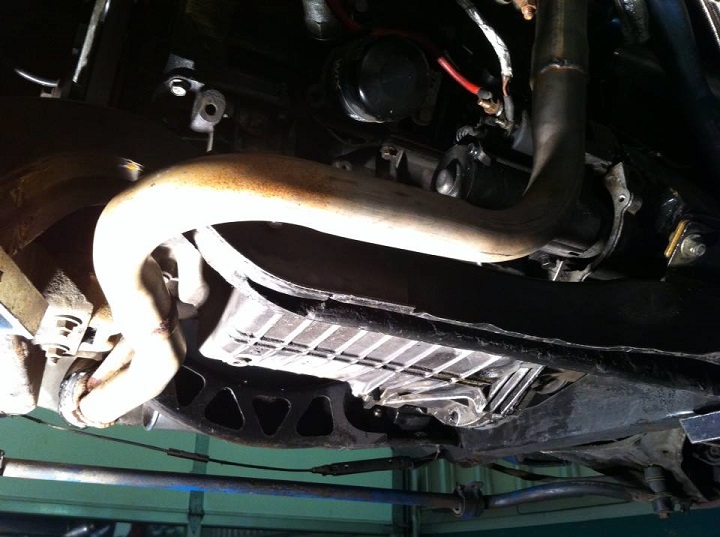
Discovered a broken transmission mount while changing the starter (upgraded to one from an 00+ Sunfire 2.2L engine which is smaller/lighter/faster). That's now the 4th mount I've broken on this car :). Dog-bone twice, rear trans mount bracket once (stock 4-speed metal bracket into 3 pieces), and now this one. 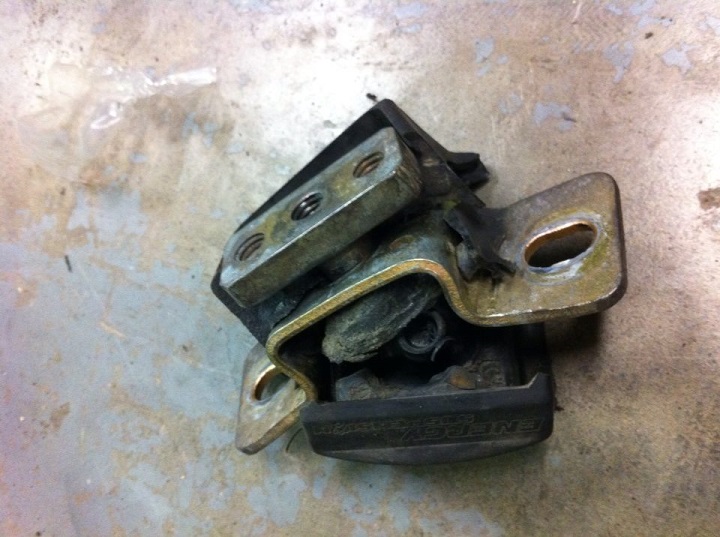
Fortunately Rodney's poly mounts use readily available poly bushings that only cost $20 to replace from Lordco. It was changed relatively painlessly. Other things that were changed include coilovers in the rear using KYBs and 325# 12" springs, new shift cable from California push-pull, Grant steering wheel, and a new cold-air-intake using a K&N filter in front of the wheel well. Tuning has been improving as well. It now idles nicely at 900-950 rpm and has a really nice lope. Here's a video showing the new exhaust. http://youtu.be/kzOW1AEG6qw - Cammed 3500 Fiero Took it out for a quick spin after the video and although the alignment is way off, it seems to handle much nicer than before. Dampening is a bit soft for my liking but is still firm enough for good performance. I think before it goes back on the road it will be getting some solid motor mounts. I'm just not satisfied with the engine movement yet. ------------- '86 2m6 F23 5-speed, LSD, 3.5L LX9 '89 Firebird 3500T, T56 |
Posted By: bcampbell
Date Posted: 18 December 2013 at 1:33pm
|
Alright did up a couple solid mounts last night.
This one is on the front side of the engine, and uses pieces of that shock-type mount that is used with the stock 2.8. It bolts to two holes on the engine block and one on the oil pan. 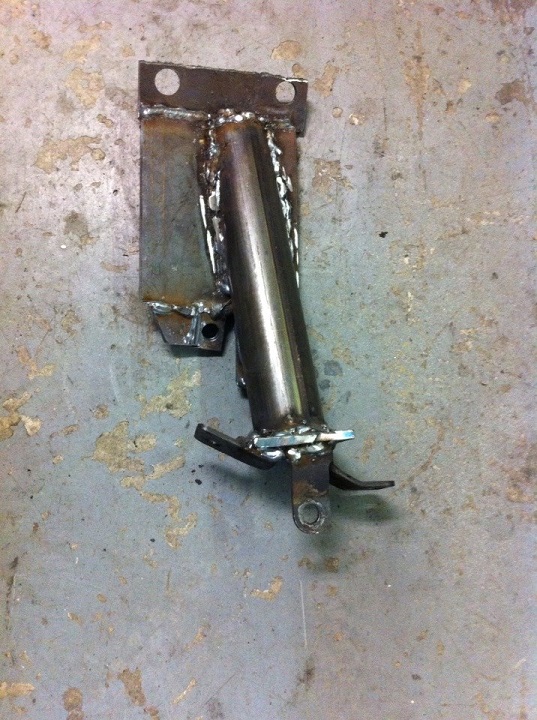
The other one I don't have a picture of but I just went from the alternator bracket to what's left of the stock dog-bone mount location on the trunk side. It's a little tricky to install and less beefy but should compliment the one on the front side and the dog-bone (which is solid). ------------- '86 2m6 F23 5-speed, LSD, 3.5L LX9 '89 Firebird 3500T, T56 |
Posted By: bcampbell
Date Posted: 17 January 2014 at 12:24am
|
Well after getting everything else sorted out, I guess it
was time to focus again on the engine. I had this problem where every time I would run the engine (after filling the coolant), air would get in the cooling system and it would overheat. I thought for sure it was a head gasket problem after doing a compression test and finding one cylinder low, but this is what I found. 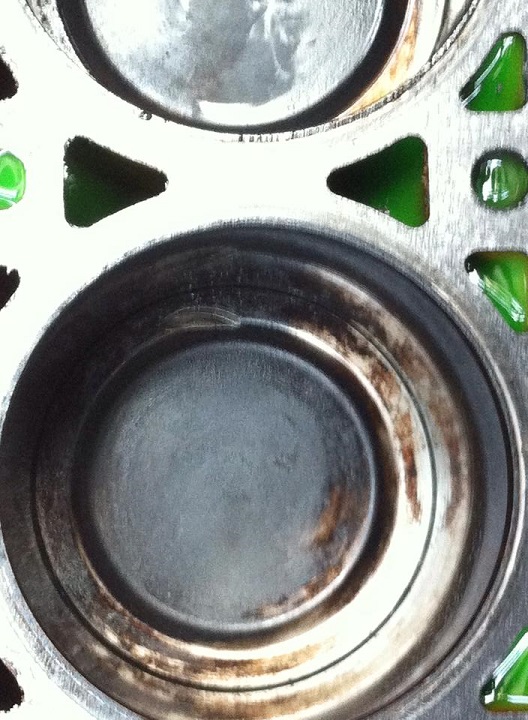
Head gaskets were both fine but the exhaust valves had all been hitting the pistons. Cam is just too big for the stock pistons I guess :). According to the machine shop down the road the coolant issue is most likely being caused by a cracked head. Well, my pistons were already all dented so I decided to go ahead and attempt cutting my own valve reliefs. I finished one side of the block today and it was actually pretty easy. Just put sandpaper on the bottom of the valve, popped it in the head, bolted the head down with two bolts, put the valve in a drill chuck, feeler gauge between the valve seal and chuck to accurately notch the pistons evenly, and drilled until the drill hit the seal. 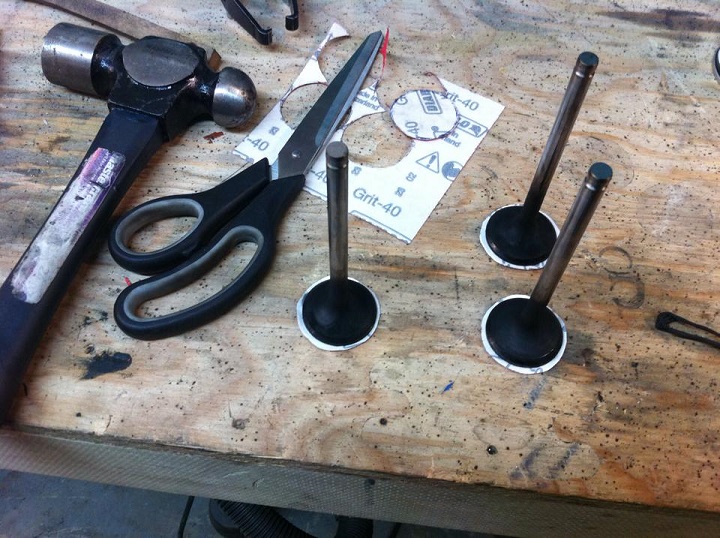
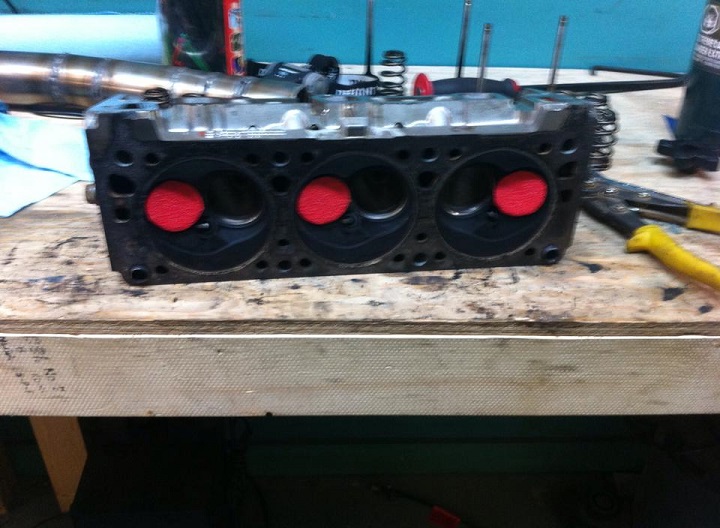
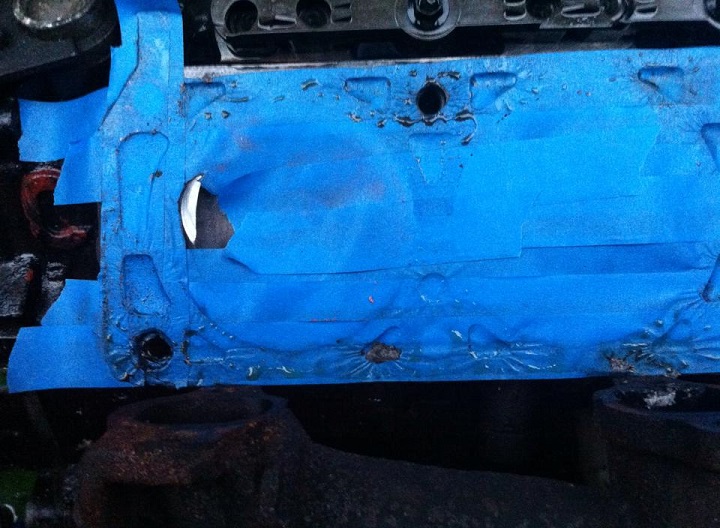
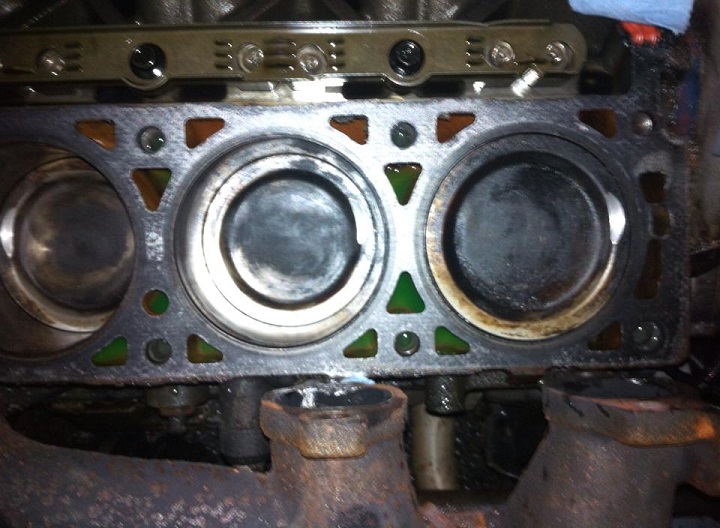
Plan is to finish the other side of the block, put on a new set of heads and see what happens :). If it goes horribly wrong I'll most likely replace the engine and put in a milder cam. ------------- '86 2m6 F23 5-speed, LSD, 3.5L LX9 '89 Firebird 3500T, T56 |
Posted By: bcampbell
Date Posted: 21 January 2014 at 8:30pm
|
BTW here is a pic of the decklid notch to clear the FWD
alternator. Very minor. 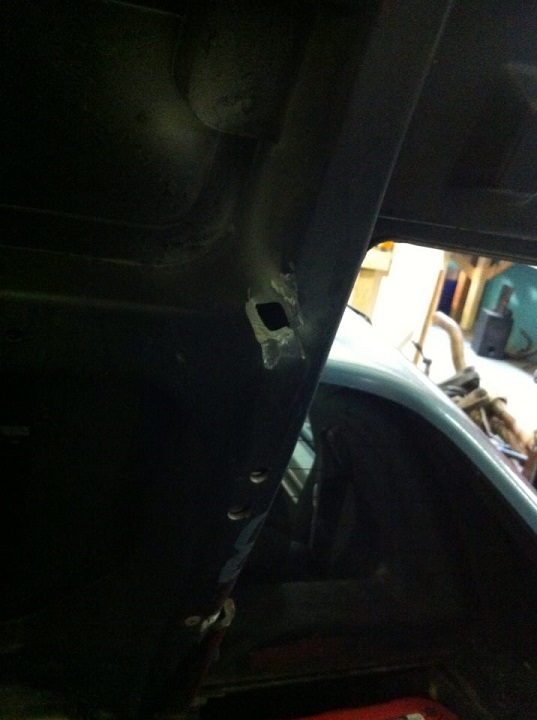 ------------- '86 2m6 F23 5-speed, LSD, 3.5L LX9 '89 Firebird 3500T, T56 |
Posted By: bcampbell
Date Posted: 01 February 2014 at 10:57pm
|
Got the motor back together and it's running well. Turns
out that the overheating problem was most likely a blockage or air lock, since after getting the motor back together it was still wanting to overheat. Flushing the system with a garden hose solved the problem. Pulled the heads off of my Firebird (which blew the head gaskets in October) to use on the Fiero and cleaned them up: 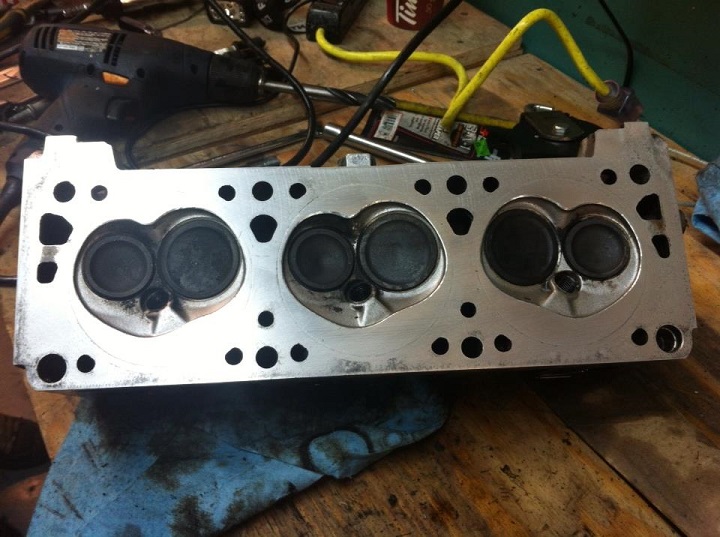
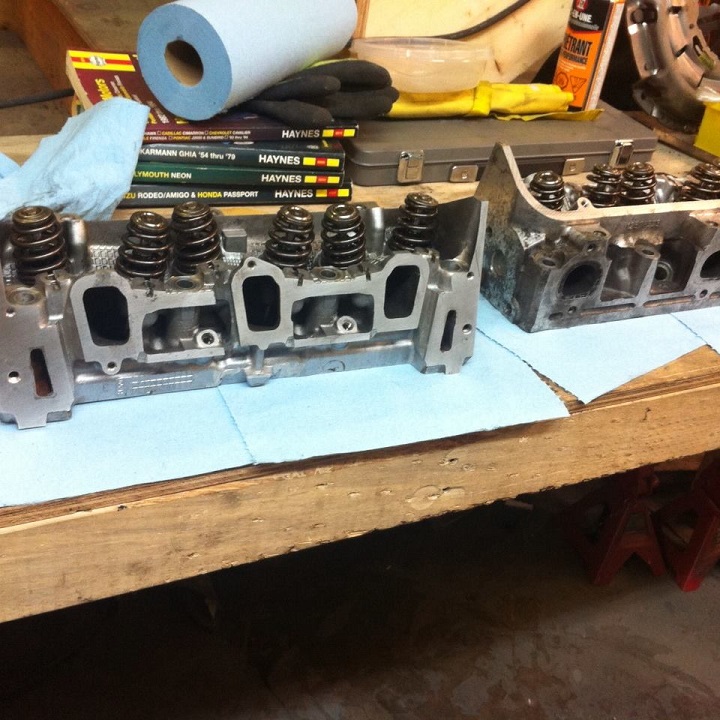
And re-assembled the top end 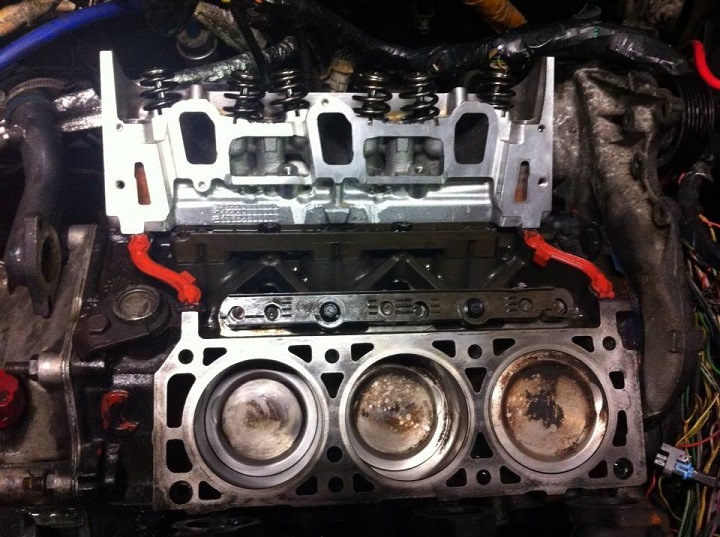
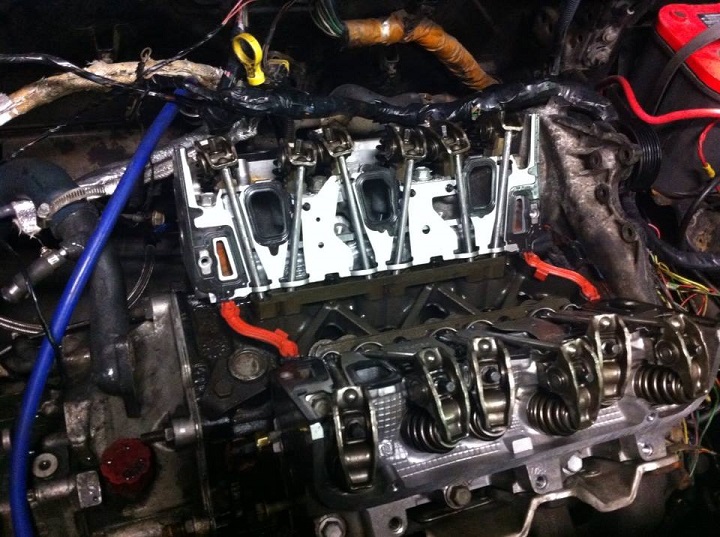
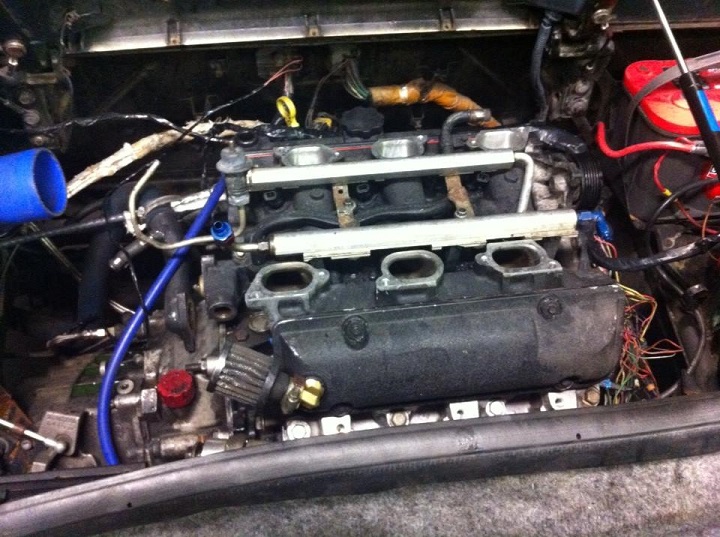
Also installed a surge tank from a G6 to make filling the coolant easier and put a 20 psi cap on the rad 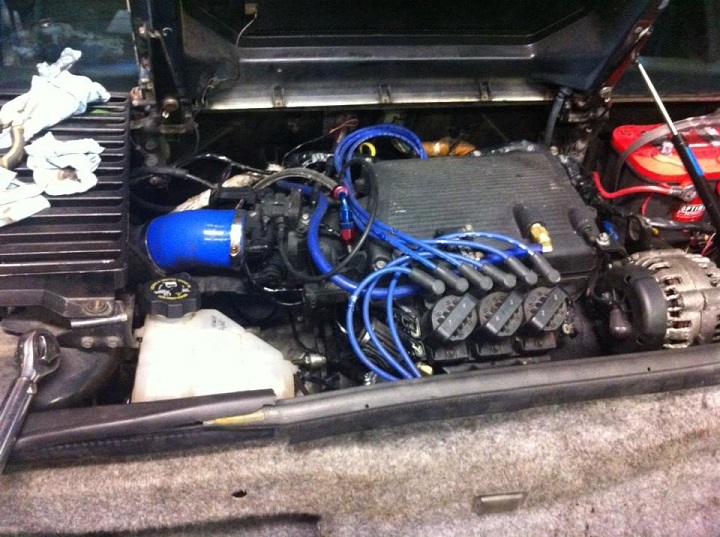
And finally I test fit some STI RA seats 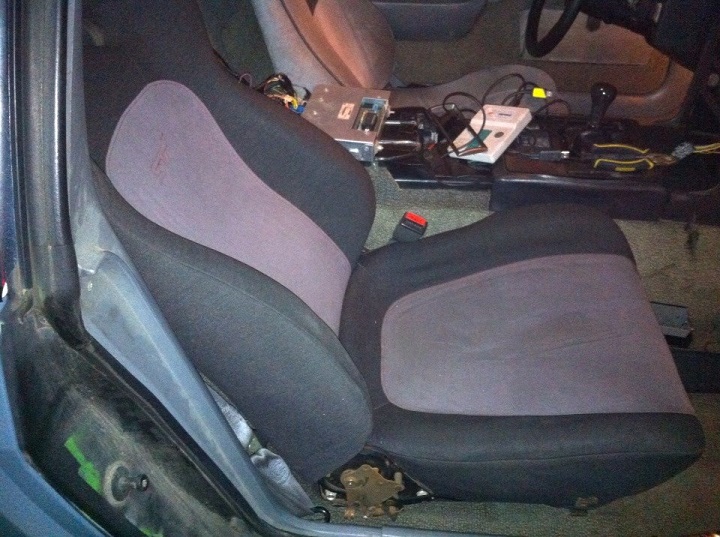
http://www.youtube.com/watch?v=8clDxSawSpE - Startup video ------------- '86 2m6 F23 5-speed, LSD, 3.5L LX9 '89 Firebird 3500T, T56 |
Posted By: Car-2-Lo
Date Posted: 02 February 2014 at 9:13pm
That's a nice wicked sound  ------------- Johnny-B-Good 
|
Posted By: Patrick
Date Posted: 02 February 2014 at 9:37pm
|
I appreciate your ingenuity, but I still would've been afraid that different amounts of metal would've been removed from the top of the six pistons... putting the engine out of balance somewhat. I guess the test will be to see how well the engine runs... and for how long. Sounds good in your latest video clip. |
Posted By: bcampbell
Date Posted: 03 February 2014 at 8:00am
|
Well it was either notch the pistons myself, downgrade the cam, or get
a machine shop to do the work. Machine shop would have cost too much so I chose option #1. Really I didn't take much material off, as the pistons were aleady dented in those locations, and I would be surprised if the balance is sufficiently off to cause issues, although it's a possibility I had considered. Before doing this I read about guys doing it on LS1s and Ford V8s so after that I wasn't as nervous. Worst case scenario I can get another engine for $300 and start over. ------------- '86 2m6 F23 5-speed, LSD, 3.5L LX9 '89 Firebird 3500T, T56 |
 CFoss wrote:
