Build up thread of my "SS10 Blazer"
Printed From: West Coast Fieros
Category: General Car Chat (Not Fiero Specific)
Forum Name: Car Talk thats not a Fiero
Forum Description: If your car is not a Fiero and you are not part of the PPPCC and you need to bring something up, this is the place for it.
URL: http://www.westcoastfieros.com/forum/forum_posts.asp?TID=852
Printed Date: 16 April 2025 at 4:48pm
Software Version: Web Wiz Forums 12.01 - http://www.webwizforums.com
Topic: Build up thread of my "SS10 Blazer"
Posted By: Dr.Fiero
Subject: Build up thread of my "SS10 Blazer"
Date Posted: 07 September 2008 at 2:45pm
Warning! This thread has become SO NOT 56K friendly it's not funny!!!!!  SS10 is a name I've been tossing around anyhow. :)  Started off life as a VERY tired (385K km) 4dr 2 wheel drive Blazer. 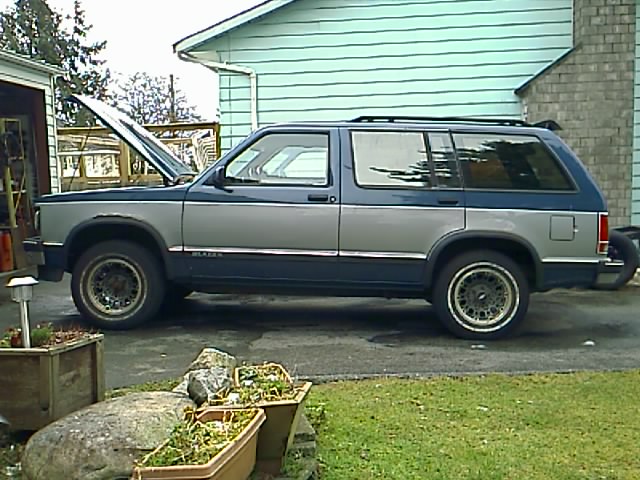 Body up front was really rusty (stick your hand through the hole size!), but they were all replaceable parts (THANKS STU!!!!!) so that wasn't a concern. It was optioned out with all the power toys (digital dash, AC, PW, PM, PDL, rear wiper, etc), so that was good. And with only about 5% of production being a 2WD, I figured I'd scoop it up. After a good deal of time (few months of very cold weather!) I ended up here'ish: Still has the stickers on the brand new rubber as you can see! And it's still too high. So, some blocks in the back, and springs & spindles up front got it about here: 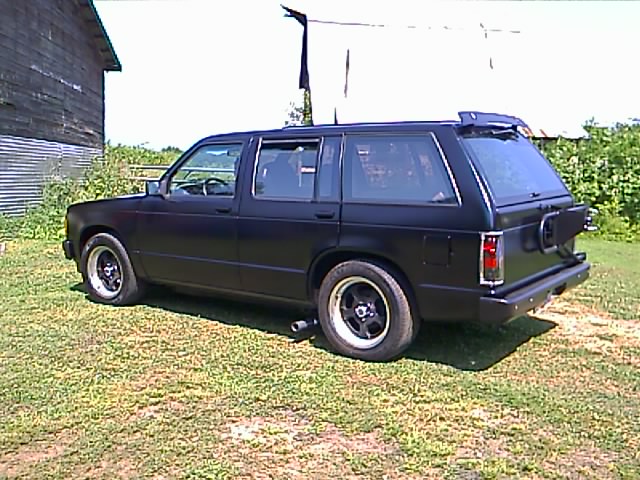 It's a 4spd auto, with a 4.3 that I added long tube headers onto: |
Replies:
Posted By: Dr.Fiero
Date Posted: 07 September 2008 at 2:52pm
|
Anyhow, I've been buzzing around in it for the summer, and it's... well... OK. Has a decent sound to it with the headers, going into a pair of Flowmasters with side pipes. But, it's just not enough.... So, I picked up this! 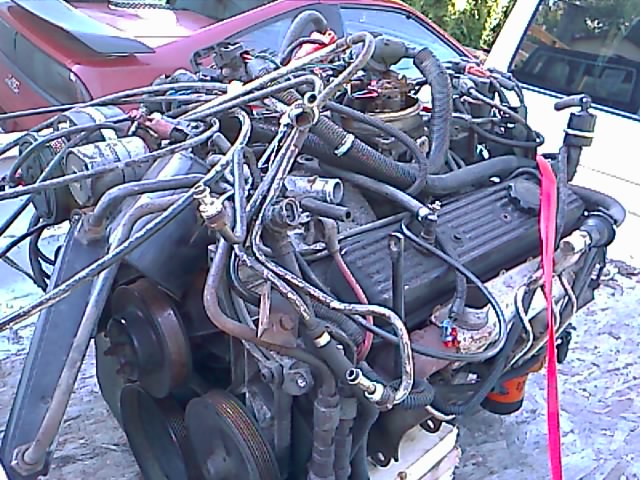 Which, when "peeled back" of all the hoses cables, wires and assorted crud leaves you with: 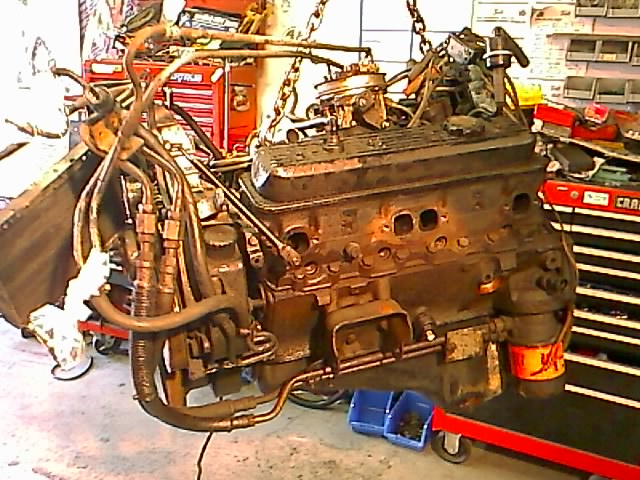 It's a 350/5.7L out of a 1990 Caprice cop car (9C1 package). It's a roller cam engine, and it's been on synthetic it's whole life. Has the external engine oil cooler you can sort of see. I've seen a video of a chase between a helicopter, and a stolen one of these cars - the copter couldn't keep up when the car exceeded 130MPH. That's pushing about a 6000lb car down the road - think how much fun it'll be with me at about 3500 lb's, and low 3.73 gears! :D I'll keep ya'll posted as I move along. |
Posted By: Dr.Fiero
Date Posted: 08 September 2008 at 6:16am
Oh yeah, forgot - for an engine with 'a few' miles on it, I was happy to see this: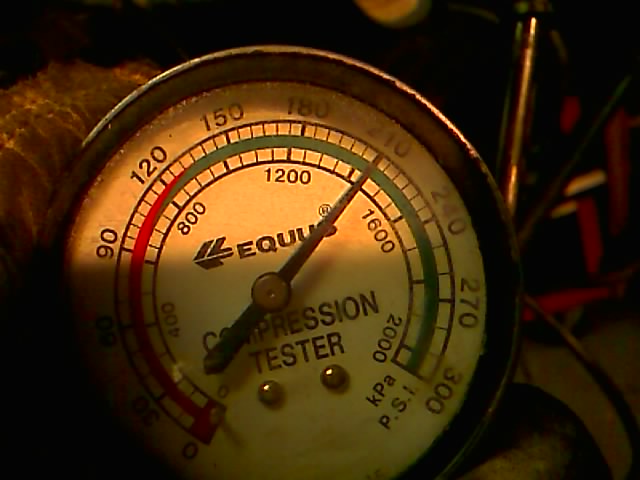 Pretty consistent across the board, with a couple hitting 220. It hasn't been run in a while, so the rings need to settle back in I think. Should be a good squueze for a nice hot cam. Headers (a must in this install) will be there as well. Going to look into an aluminum intake. AFR heads one day (they're like 150HP bolt on!). |
Posted By: Dr.Fiero
Date Posted: 07 January 2009 at 12:36pm
|
Been opening the wallet and pouring it all over the engine the last little bit. I *was* going to just drop it in as-is, but.... I went to drain the oil out of it, and found LOTS of water in there. :( So, started tearing down a few things which turned into a "while I'm in there" mission - and then got even more carried away with recamming it, and all new bearings... which led to new Vortec heads, which of course required a new intake.... bla bla bla.... So, here it is with the covers off showing some of it's sexy bits.... And with some of it's shiny bits sitting on it: That's about it up until tuesday night. I keep working on it every night. Few more days it'll be ready to go in - I'm just not sure if I'M ready for it to go in!! :D |
Posted By: Dr.Fiero
Date Posted: 07 January 2009 at 4:09pm
I've only ever had it up to about 170 - but... It's factory BTW. I think it's more there to keep the crap from building up on the back window (which it does a very good job of). |
Posted By: Dr.Fiero
Date Posted: 08 January 2009 at 7:01am
Yeah, I yanked that off, and filled the holes. |
Posted By: Dr.Fiero
Date Posted: 22 January 2009 at 9:44pm
|
Got some 'visual progress' going on today... Front end torn off, closer to being ready to have the 4.3 yanked... More or less ready to go in... And as I'm sure most of you are aware... if there's a way to make something a little more complicated, and add a touch of cool - I'll do it. :D (yes, that's a water jacket pressure gauge!) |
Posted By: Capt Fiero
Date Posted: 23 January 2009 at 10:06am
|
LOL, I guess that beats my "squeeze" the hose to check for pressure in the cooling system. Hey I just thought of something. That gauge will also let you know if you ever start to have a head gasket failure. Once you have had it on there for a while and know what the "norms" are. You'll be able to tell rather quickly if the cooling system is getting over pressurized.
Damn that is a simply brilliant idea. Now you got me wondering where I could plumb one of those into my 4.9. Hmmnmmmm. ------------- Capt Fiero 88 Fiero GT 5spd V6 Eight Fifty Seven GT V8 5spd. |
Posted By: Dr.Fiero
Date Posted: 25 January 2009 at 7:58pm
|
Just an update - more visual progress. No it's not really "in there", it's hanging in space. Ran out of time and had to go pick up the wife from work. Tomorrow though! It'll at least be bolted in. |
Posted By: Dr.Fiero
Date Posted: 27 January 2009 at 8:25am
|
OK - it's actually IN the hole now - bolted down tight, with a new poly tranny mount (guess the stock '91 unit didn't like being twisted and stretched THAT much! Oops. snap.). Plumbing and wiring today. |
Posted By: Dr.Fiero
Date Posted: 27 January 2009 at 7:01pm
|
Got more done... not as much as I wanted.... Had to stop early to stem the gushing flow of blood from my thumb where I skillfully took a razor knife and jammed it deeply into the tip of said thumb. Figured this was a sign to make it the end of my working day. I'll spare you the shots of my thumb. Distributor is in and eyeball timed. Most of the wiring is done, except the new throttle body uses a different TPS, so I'll have to rewire the connector for it. IAC was the same connector. Have to extend the temp sender lead (engine is longer than the 6cyl, so of course the sender is now further away!). Hoping I can reuse the stock wiring for the alternator by re-routing it. A/C compressor also uses a different plug, so I'll have to splice that as well. Oh well, no biggy. Replaced a bunch of very aging vaccum lines, and replaced almost all the 'turning to dust' convoluted tubing. Sent headers and battery tray off to get ceramic coated. Says they should be done Thursday, maybe Friday. Yay Kool Koat! |
Posted By: Patrick
Date Posted: 27 January 2009 at 9:50pm
|
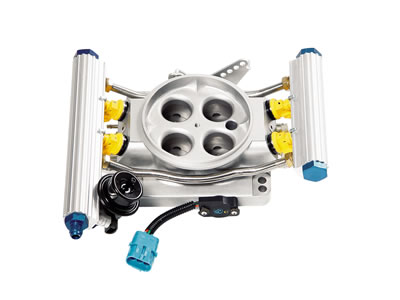
I never took you for being Emo, John. I notice the 2-barrel TBI on the 4-barrel intake manifold. Is there such a thing as a 4-barrel TBI that would sit on there (without the use of an adapter plate)? [EDIT] I guess I can answer my own question...
|
Posted By: Dr.Fiero
Date Posted: 28 January 2009 at 6:10am
|
That's what I'd LIKE TO be running - but with the price tag on it - it's going to have to wait. The TBI unit that's on it is about 500cfm. I've got a 650cfm one that I can use with some modification. I'm going to run an external FPR, so I can kick the pressure up enough to compensate for the 60% increase in HP without leaning out. |
Posted By: Dr.Fiero
Date Posted: 29 January 2009 at 5:51pm
Bling bling day!  Yes - that's my battery tray! I had to get it blasted before it finished rusting away anyhow, so for like $10 or $15 more, I get it powder coated too! WTF - why not. |
Posted By: Capt Fiero
Date Posted: 30 January 2009 at 4:30am
|
Looking really good. ------------- Capt Fiero 88 Fiero GT 5spd V6 Eight Fifty Seven GT V8 5spd. |
Posted By: Dr.Fiero
Date Posted: 31 January 2009 at 6:05am
|
Devils in the detail.... sigh.... Been stabbing at all the small things the last few days, and they're all non-photogenic. I see the changes, but it's not worth taking pics of. Anyhow, I'm off to get plumbing bits today, so I'll get more update shots later on. |
Posted By: Dr.Fiero
Date Posted: 31 January 2009 at 8:56pm
|
Ok - might be hard to see some changes, but... this is all the 'fiddly' stuff that REALLY takes the time!!!! Engine oil collar hoses Belt n' stuff Overall picture Rad support almost ready to go back in for good "Autoloc" billet dipstick w/flexible tube (stocker was WAY too fugly to put in) Formable stainless steel rad hose! Never used it before - should be interesting Exhaust header flange with flex coupling (unwelded yet) Anyhow - that's about the bulk of it for the day. Lots done, just not much visual 'big stuff'! :) |
Posted By: Patrick
Date Posted: 01 February 2009 at 2:46am
|
Very nice!
|
Posted By: Dr.Fiero
Date Posted: 03 February 2009 at 6:59am
|
This was actually yesterday, but... "Nose" aka rad support back on TIGHT! But a big sigh of relief when it actually fit. There's been more wiring etc going on as well - but nothing really visual that anyone would notice. Squishing my electric fans in is evidently going to be a challenge! Oh well. Oh yeah - the bearings in my alternator were pooched. Like, I'm talking REALLY pooched... move the pulley up/down 1/4" kinda pooched? Pulled the rotor and all the balls fell into my hand? Ok, you get the idea... Anyhow, I checked at Lordco, and they wanted like $40 for one, and $26 for the other end (WTF?!?!?!). Plus I'd have to pull/replace of course. Popped by Edmonds starter/alternator in BBY. Handed him the end plate and rotor and said "can you do anything?". Handed it all back to me about 5-10 min's later. Done. $25. Thanks - bye! Boo ya! :D |
Posted By: Dr.Fiero
Date Posted: 03 February 2009 at 9:39pm
|
Short day today, had other stuff to do (groceries, etc). Anyhow, got the efans in: Needless to say they're not wired in. But all the sensors, fuses, relays etc are already in there from yesterday. Just need to pick up a couple pigtail connectors (the fans didn't come with them! Argh!). These things pump air like crazy - yet BOTH of them running draw 1/3 the current of a stock Fiero one. |
Posted By: Dr.Fiero
Date Posted: 05 February 2009 at 8:25pm
|
Ok, fans and front end are now wired: This is what that stainless rad hose a few posts up looks like installed: I couldn't fit it in for the lower hose, so I'm going to have to just use plain rubber now for that.  edit: I think I've figured out a way to use the stainless hose for the lower as well...... edit edit: No dice. I used rubber. |
Posted By: Capt Fiero
Date Posted: 06 February 2009 at 9:39am
|
Ya know whats going to suck, if we ever end up at the Track, where you can get traction on the VHT, I going to have run Nitrous on my 4.9 just to keep up. It would really suck being in a V8 Fiero and get beaten by a Truck :) Its looking Awesome John, I wish my conversion was coming along as nice and quickly as yours. I can't wait to take a ride in it. ------------- Capt Fiero 88 Fiero GT 5spd V6 Eight Fifty Seven GT V8 5spd. |
Posted By: Dr.Fiero
Date Posted: 07 February 2009 at 7:32am
Thanks. Trust me - I can't wait to take MYSELF for a ride in it!!!!  Anyone know somebody who does aluminum polishing? I'm looking at these photos now going "ewwwww, look at that alternator and those brackets!". |
Posted By: Dr.Fiero
Date Posted: 08 February 2009 at 8:50pm
|
Ok, well not much to actually SHOW for what I've been doing. Ugh! Lots of time spent... more figuring out than actually doing stuff. There's that funky dipstick you saw earlier (the rod you see in the bottom is a standoff of stainless ready rod - it goes to the A/C brace. Had to make that since the thickness of the cast manifold isn't there anymore). Test fit of the grill, checking clearance of the fans (they fit BTW). Don't think I showed this before (since I had it shipped up and just got it Saturday!). You can see the "hat", and the pipe, and the faKe&N filter. It's actually for a C1500 p/u, so I'll need to get some flexible pipe (read: glorified dryer ducting!) in there to couple the bits together. I know the stuff I need - it's from Greenline - we use it at work making air intakes. Dave - this is TOTALLY what you need on your 4.9 car. Until it expires from old age, click http://cgi.ebay.com/ebaymotors/ws/eBayISAPI.dll?ViewItem&item=360123573387 - HER E to see the eBay listing. That's it for me for the day... so, until next time... I'm me, and you're you... signing off. |
Posted By: Dr.Fiero
Date Posted: 10 February 2009 at 4:42pm
|
Picked up the tubing to connect all the air filter piping together. Ouch. Don't want to make any mistakes with this stuff at $13/ft! My ECM (1227747) arrived today, which is pretty incredible. The guy shipped it from Ontario mid day yesterday, and it was on my doorstep in under 24hrs! Going to burn a custom PROM for it of course. I've had to abort on the engine oil cooler for the time being as I just can't figure out a good place to mount it (it's original spot became occupied by my R/H rad fan!). So I've put a loop back in it's place. 3 wire heated O2 sensor is now wired in, so that will give me more consistent readings. It's still a narrow band. If anyone else wants to do the same mod, it's really easy. It's about a $68 O2 sensor, a $6 Pico plug, and a couple extra wires. Nothing photo-worthy happened anyhow, so you're stuck reading some boring text.  ps: I looked up the price on that 4bbl TBI a bunch of posts up. Accell must REALLY be on crack. They want $700 for just the TBI and rails with NO electronics or injectors!!!!! I'd have a custom plate milled up to take on 2 GM TBI 220's (what I've got now) with a linear linkage between them (ala dual quads) and make my own 2nd injector driver before I went the Accell route! Sheeeesh!!! |
Posted By: Dr.Fiero
Date Posted: 12 February 2009 at 5:37pm
|
Been a while, but.... http://www.youtube.com/watch?v=8fwabCZmACw - http://www.youtube.com/watch?v=8fwabCZmACw |
Posted By: Dr.Fiero
Date Posted: 20 February 2009 at 7:33am
|
Ok - time for a brief update. Have a full exhaust system on it (had a shop build up some pipes that tied into the system I'd made for it before), and now have dual O2 bungs in there as well. Been having 'issues' with drivability. That's a nice way to say it's been running like total sh*t.  I knew I'd need to do some tuning, but.... it seemed like it was getting WORSE day by day! Well, the other night I was running it with my scan tool on it. The IAC count had gone to zero (means the pintle is driven all the way in - that should stall it!). Yet, it was still 'idling' at over 900! It's getting air, and lots of it, from somewhere. Further reading online says that a LOT of people were having trouble with FelPro 1255 intake gaskets (gee, guess which ones I got!!) leaking. They actually leak so bad that they're pulling a full vaccum in the crankcase when you block off the PCV and breather ports!  So, one rather expensive set of composite aluminum/rubber gaskets later (FelPro MS98000T)... I'm hoping for better results. I've just torqued down the intake last night, but still have an hour or so of bits to go back on. I'll repost back tonight on how it runs. Again. Sigh... |
Posted By: Dr.Fiero
Date Posted: 20 February 2009 at 9:25pm
|
Well - It drives! Took it for a boot around the block tonight. Wholey snappers it's rich though! Hold a Bic by the tailpipes I bet it'd light off. My integrator was reading like 108? I don't think it can read anymore than that!  Anyhow, so I pulled the ECM out and modified it so it's got a 'normal' PROM socket it in. Now I can hook my ROMulator up, and do some real time tuning on my laptop. Oh yeah, hooked up a fuel pressure gauge as well (pics tomorrow - too tired now - Flu bug got me). |
Posted By: Dr.Fiero
Date Posted: 07 March 2009 at 10:24am
|
*cough* *cough* -- damn I hate being sick. Above mentioned bug knocked me flat on my ass for a week, then dragged me around and kicked me for another 2. Anyhow, I've since installed my Wide band O2, and been doing a bit more tuning when time permits. It's still really rich at times. Then, at times (steady state cruise) it'll be dead on 14.7:1! Acceleration Enrichment (AE) needs MUCH more tweaking. At first, I'd boot it a bit, it's just die, and AFR would go to 21:1 (ummm, it might have been leaner, that's just as lean as the WB can read!). I'm looking at an add-on board for the ECM. Amongst a zillion other things, it goes from the ALDL only taking a reading every 1.2 seconds to taking a reading about 14 times per second. Makes data logs actually meaningful. Wouldn't fit a Fiero ECM directly, but one of the listed ECM's I'm pretty sure could be modded to fit a Fiero. http://www.dynamicefi.com/EBL_Flash.php - See it here |
Posted By: Dr.Fiero
Date Posted: 08 March 2009 at 11:15am
|
Well, I ordered up the above ECM add-on. Been chatting with the builder, and from everything he said it's just the only way to go. Looks like it'll even accept the output from my WB O2, and re-write the VE tables (sort of an 'auto learn' function). Other thing is though... just HOW hot does it have to get to actually take a high temp silicone boot and plug wire.... and BURN it to a crisp. Like, we're talking, on fire here. Anyhow, luckily I got the fire out before it spread.  Now to figure out what went wrong. Very wrong. |
Posted By: Dr.Fiero
Date Posted: 09 March 2009 at 8:41pm
|
Got it yanked apart tonight. Still not dead sure why those two wires caught fire (well, one the boot melted, the other one... flame city...). They might have just been that extra 1/4" closer to the header than the others so up they went. Looks like all the header pipes got REALLY hot. The ceramic coating is all dull now. Did a compression test, and they're all 200-230psi (cold, cranking). Thats 15% from high to low, so right at the edge of 'within spec'. Here's the plug wire and the other boot: Anyhow.... that SEEMS to be the extent of the damage. PHEW!!! I thought for sure I'd melted a piston/valve/other. Guess I'm off to go see if I can buy two new plug wires from Taylor. |
Posted By: Dr.Fiero
Date Posted: 27 March 2009 at 9:18am
|
Hey ya'll. Nope - not dead here. Just feel that way some days. :) Anyhow, I've long since replaced the bbq'd wires, added some DEI boots (ack! the boots were more than the wires!), changed a few other things.... like the wide band O2 sensor that burned down along with the other stuff. :( Added the EBL ECM add-on board as noted in the other message. Added an IAT sensor (the one Fiero's have in the filter housing). With virtually NO tuning it runs like 10* better! And I grabbed a BIN from another guy who's got a very similar engine and vehicle who's been tweaking it for like a year - so that should save me HUGE amounts of time & effort. I dropped my fuel tank last night to replace my pump though. It'd idle at about 23psi, but a hard blip on the throttle with no load would drop it about 10lbs. NOT a good thing!!! Anyhow, so I'll replace that with a much higher flow unit tonight. Then it's off to do VE learn driving around! I tell ya... I've learned SOOOOOO much about tuning from all this that I can pass along to the Fiero crowd. |
Posted By: Dr.Fiero
Date Posted: 27 March 2009 at 4:53pm
|
'89 Vette, Delco EP375 fuel pump ordered up.... let's see how that improves things! :) Should be in tonight if all goes well. |
Posted By: Dr.Fiero
Date Posted: 05 April 2009 at 8:19am
|
Usual story... much done, nothing to actually see! Fuel pump solved my dipping pressure. Can nail it now, and it holds steady at 28psi (which is correct for this TBI pod - most run ~11psi). One of the biggest fixes was finding that the distro wasn't totally tight, and had slipped to about 6* ATDC! Yeah, I was like 16* out (supposed to be 10* BTDC). After that, a few more timing curve tweaks, and ongoing VE (fueling), and AE (pump shot in carb terms) corrections, and it's all starting to fall into place. Next is going to be some tranny upgrades or I'm afraid I'm going to rip this one to shreds. It's definitely pulling hard though. Totally embarrassed some "N" in a beamer with his g/f in the car last night.... hahahaha.... I'll try to get some video today if I can. |
Posted By: DaCoupe
Date Posted: 09 April 2009 at 3:13pm
|
Wow project is comming along very nice..... I take it the 4.3L wasn't cutting it eh?
------------- Built not Bought!!!! |
Posted By: Dr.Fiero
Date Posted: 09 April 2009 at 4:36pm
Back of my head I knew it'd never cut it. I've got a couple hundred pretty much problem free miles on it now. Just the usual debugging and fine tuning now. Need to move my IAT sensor to a cooler place for starters (the radiated heat off the engine is soaking into it I think, and making it read that I've got like 110F air going in - kills the power way off). Next issue will be when (if?!?!?!) the weather perks up and it gets hot out. I'm not sure how much heat I can pull out of this (brand new) radiator. Going to do a custom cowl hood for sure though to help with that. |
Posted By: nfswift
Date Posted: 15 April 2009 at 4:05pm
|
Much much nicer than mine John! I'll be interested to see any results if you dyno it with headers and a Vortec top end. I've got a K1500 with a recently installed stock-ish 5.7 TBI, very interested in discussing the improvements (if any) to be had in re-tuning or even going with a 7730 and tune if you've looked into that any? |
Posted By: Dr.Fiero
Date Posted: 15 April 2009 at 6:32pm
|
According to Desktop Dyno, if I can get enough air into it (meaning I have to get my 7.4L TBI unit on it instead of the 5.7L one) it should be about 380HP & something like 400ft/lbs. I'm running the EBL ECM in it (see page 1 near the bottom) so I've never looked into the 7730. If you rev over 3500, you'll find your heads are the biggest bottleneck. The stock manifolds suck as well. Look at the Edelbrock TES for help there. The bump stick can be improved a lot too. Really depends where you want your power. If you're serious about tuning - you have to overcome those areas first, then get a wideband and see where you're lagging. Oh yeah, the stock injectors are only good to about 225HP. After that you have to crank up the pressure (hence the flow), or go into larger ones (pickings are VERY slim). |
Posted By: nfswift
Date Posted: 17 April 2009 at 7:16pm
|
Already have my hands on an Innovate LC-1 and am eagre to see what improvements can be made. Being a 4x4 I honestly am looking for a strong strong mid range more than anything, it's not a dedicated rock crawler, and most driving on the Island is all highway. I'll be looking into cams to bolster torque in the bottom to mid end of the power band (I'm hoping I'm a roller block but not verified yet, are most TBI blocks set up for roller?) and eventually I'll splurge on a iron vortec top end like you. So you figure tuning the stock injection system with a modified single or dual throttle body is the way to go? I've seen aftermarket multiport style manifolds as well as conversions to TPI (but this has been proven to be a huge chore). |
Posted By: nfswift
Date Posted: 17 April 2009 at 7:21pm
| Also noticed you didn't go with a GMPP vortec intake manifold to match the heads, is that an Edelbrock? Better than the GMPP? |
Posted By: Dr.Fiero
Date Posted: 17 April 2009 at 9:07pm
|
Lots of different cams to be had. Pick your fav'! I can't say for sure exactly which is/isn't a roller setup. Seems the later the year, the more likely though. Mine's a '90, but out of a cop car (L05). http://www.thirdgen.org/techboard/tbi/391406-budget-tbi-buildup.html - Here's a link to ThirdGen.org where a guy shows ALL you'll ever need to know about building up a 350TBI engine. I read it about 20X. Then of course only did half of it. ;) A stock 350TBI in your case will probably be fine since you're shooting for more low/mid range power. With very minor tweaking you'll get about 500cfm so that's plenty for lower end RPM. I went with the Edelbrock mostly on price, but also on versatility. It's actually a 4bbl meant for Vortec heads, then I added a TBI to 4bbl adapter plate. I've got to make a new one though, to clear the huge 2" butterflys of the 7.4L TBI (it hits the sides of the intake). |
Posted By: Dr.Fiero
Date Posted: 23 April 2009 at 10:22pm
|
With the weather warming up (yay!!!!) I'm starting to wonder if I'll now run into cooling issues. Not sure if I can get all the hot air out from under the hood fast enough, so... it was time to start making the cowl hood I wanted to do anyhow. Here it is after about 2hrs of cutting up a stock spare one, ungluing the support ribs from it, cutting up some filler panels, and welding them in place. I've still got to finish the cut edges of course, and then do the filler, smooth it all out and paint it. So ya know... another couple hours. :) I'll post back when it's done. |
Posted By: Dr.Fiero
Date Posted: 13 September 2009 at 10:25am
|
Hmmm... me thinks I forgot to post a follow up (from, ya know, 5 months ago!!). Hood got roughed into shape, installed, then promptly ignored.  Went through the summer with no overheat issues (save the the time my e-fan decided to no longer turn on under ECM control) even with the stock 4.3L rad in it. As a matter of fact, I'm going to change the T-stat out since it's heating up too SLOWLY! I drilled a couple of holes in it to prevent air traps... and I think I made them too big. Oops. Did a few other things over the last 6 month, but nothing major. Made up the console gauge panel that a few of you have seen installed - but I'm going to pull it out and re-do it since the angle is too steep (near flat!) and I can't see the gauges clearly unless I lean forward and look down on them.  Added a phenolic spacer under the throttle body adapter to reduce the temps of the TBI unit from so hot I couldn't touch it (really!) down to it feeling like it's a refrigerator unit! It's bizarre. It's actually almost ice cold! Guess rushing air and the cooling effect of the fuel does that. Anyhow, that's about all I can think of.... |
Posted By: Patrick
Date Posted: 13 September 2009 at 11:10am
|
Yeah, under certain cool humid conditions, ice can actually be seen to form on the outside of carburetors (as well as the inside where it's a bit harder to see!). Of course, young guys like Tristan have probably never seen a functioning carburetor.
|
 Matt wrote:
