Capt Fiero's new 87GT Project Car |
Post Reply 
|
Page <1 45678 19> |
| Author | ||
Capt Fiero 
Admin Group 

Founding Member Joined: 12 February 2007 Location: Canada Status: Offline Points: 4039 |
 Post Options Post Options
 Quote Reply Quote Reply
 Posted: 25 February 2009 at 10:52am Posted: 25 February 2009 at 10:52am |
|
|
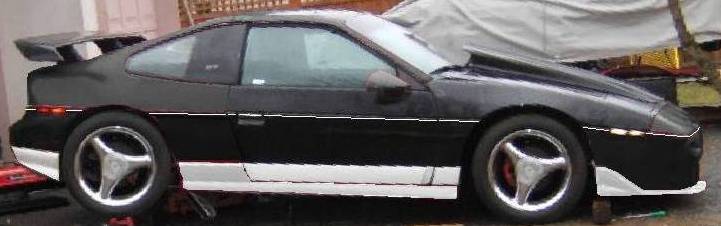
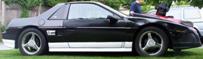
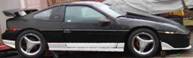
Well thanks to 85SENotchie, here is what the car should look like when done. My car as it was 85GT. (I had to invert the pic as I could not find a dead on side profile) Then my car as it will be once it's repainted. |
||
|
Capt Fiero
88 Fiero GT 5spd V6 Eight Fifty Seven GT V8 5spd. |
||
 |
||
|
Fiero308
Senior Member 

Joined: 01 July 2007 Location: Canada Status: Offline Points: 107 |
Post Options
Quote Reply
Posted: 25 February 2009 at 5:00pm |
|
|
That is going to look awesome. I love the 2 tone paint scheme
Hugh |
||
|
||
|
Capt Fiero
Admin Group
Founding Member Joined: 12 February 2007 Location: Canada Status: Offline Points: 4039 |
Post Options
Quote Reply
Posted: 25 February 2009 at 5:20pm |
|
|
Thank You Hugh. I spoke to Dr.Fiero and with some advice I am going to buy an automotive paint gun, and at the very least do my own sanding and first coat of paint myself. I know it won't be professional quality, but for me and this car, as long all the panels match in shade and quality, I'll be happy. I can't stand the look of a car with miss matching body panels. |
||
|
Capt Fiero
88 Fiero GT 5spd V6 Eight Fifty Seven GT V8 5spd. |
||
|
||
|
Capt Fiero
Admin Group
Founding Member Joined: 12 February 2007 Location: Canada Status: Offline Points: 4039 |
Post Options
Quote Reply
Posted: 28 February 2009 at 5:43pm |
|
|
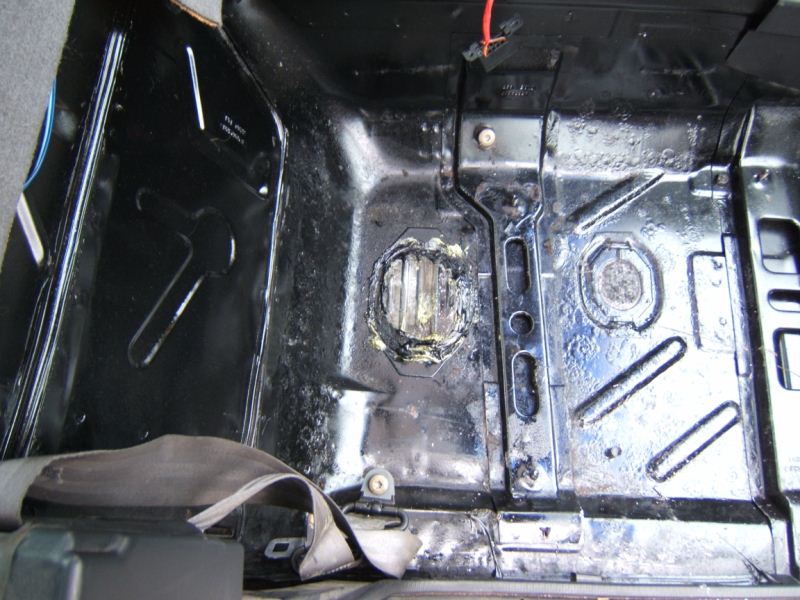
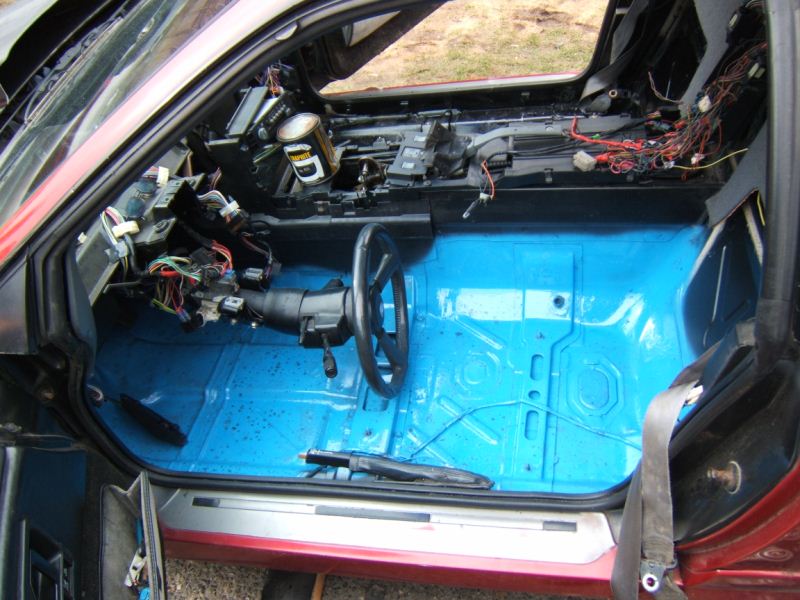
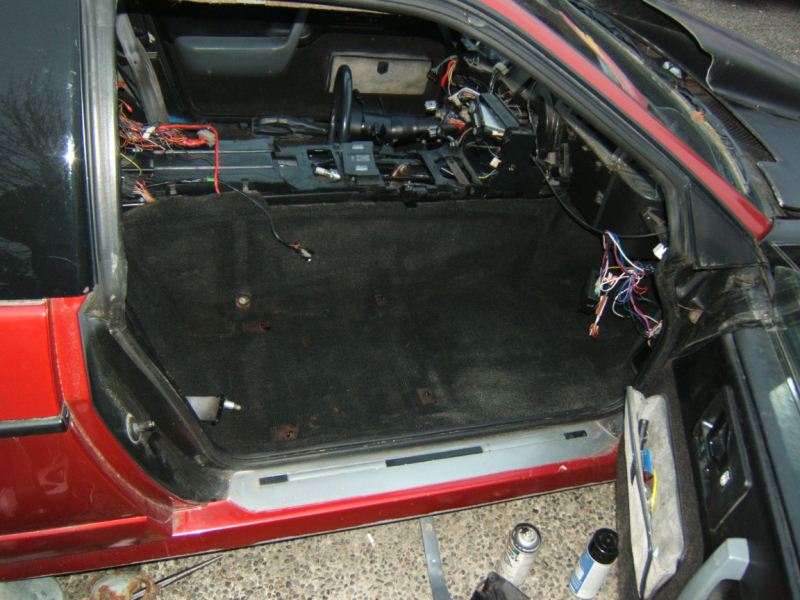
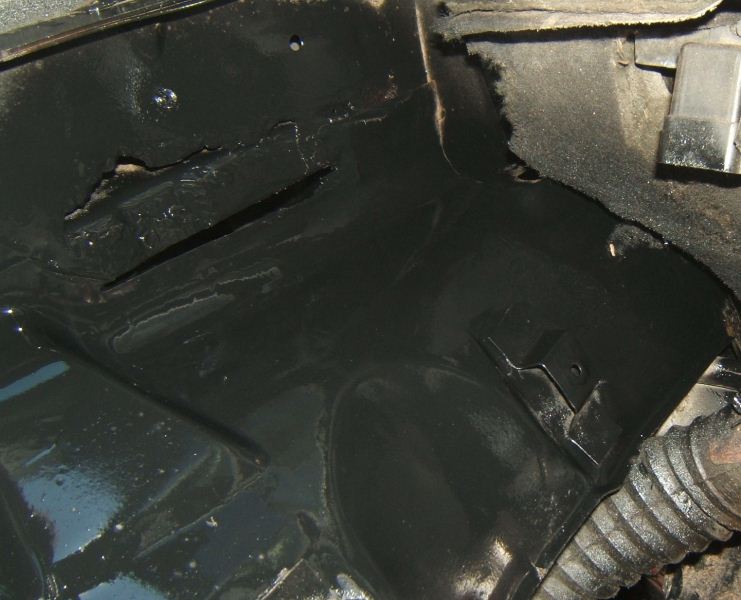
So progress has slowed down a bit. Running out of time to work on it, and it snowed a couple days ago. It just melted off enough yesterday that I could go back to work on it this afternoon. I almost did not post these as nothing got "finished" today. I ran out of dye for the carpets, but decided to get them in the car regardless and do the final dye with them installed. I LOST my good tail lights so I had to install the not so good ones. Passenger side door lock is still acting up. I am banging my head over it and can't figure out what the issue is. I am still trying to decide how to route the coolant hoses, another bang my head on the wall moment. About the only thing that went good today was the floor pan plugs in the 85GT are the same as the 87GT, so I was able to pop them out of the 85 and install them in the 87 then with a little bit of expanding foam and some black silicone locked them in place with no chance of leaking. Well here are the pics from today. Patch job on floor pan plug Blue anti rust paint to prevent the floor pan from ever rusting. I was out of black and am using blue in the places that won't be seen later. Passenger carpet re-installed Drivers carpet installed. Rear lights installed. ------------------ |
||
|
Capt Fiero
88 Fiero GT 5spd V6 Eight Fifty Seven GT V8 5spd. |
||
|
||
|
Capt Fiero
Admin Group
Founding Member Joined: 12 February 2007 Location: Canada Status: Offline Points: 4039 |
Post Options
Quote Reply
Posted: 01 March 2009 at 5:52pm |
|
|
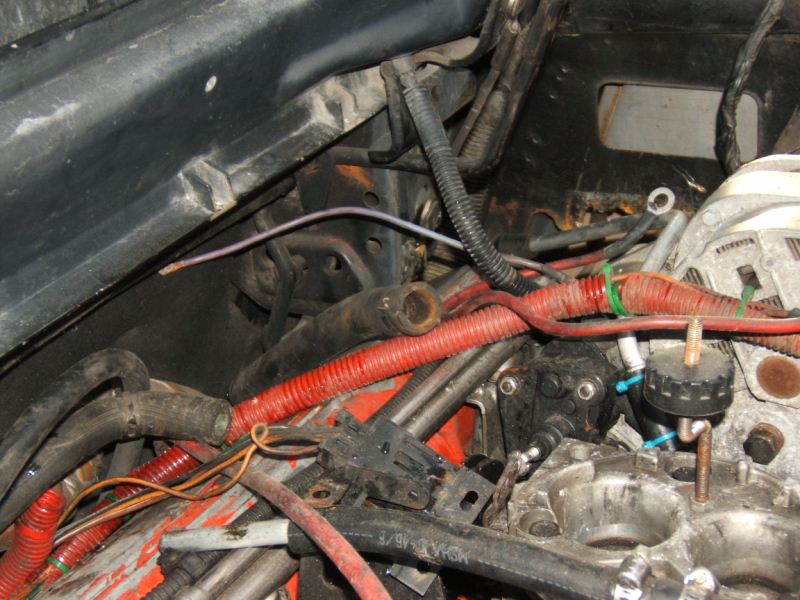
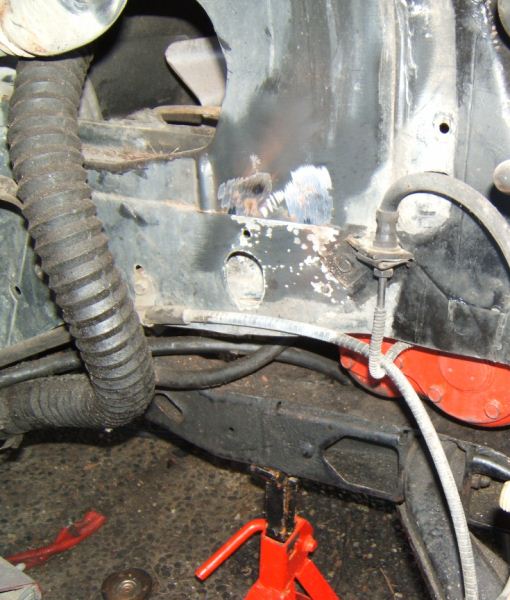
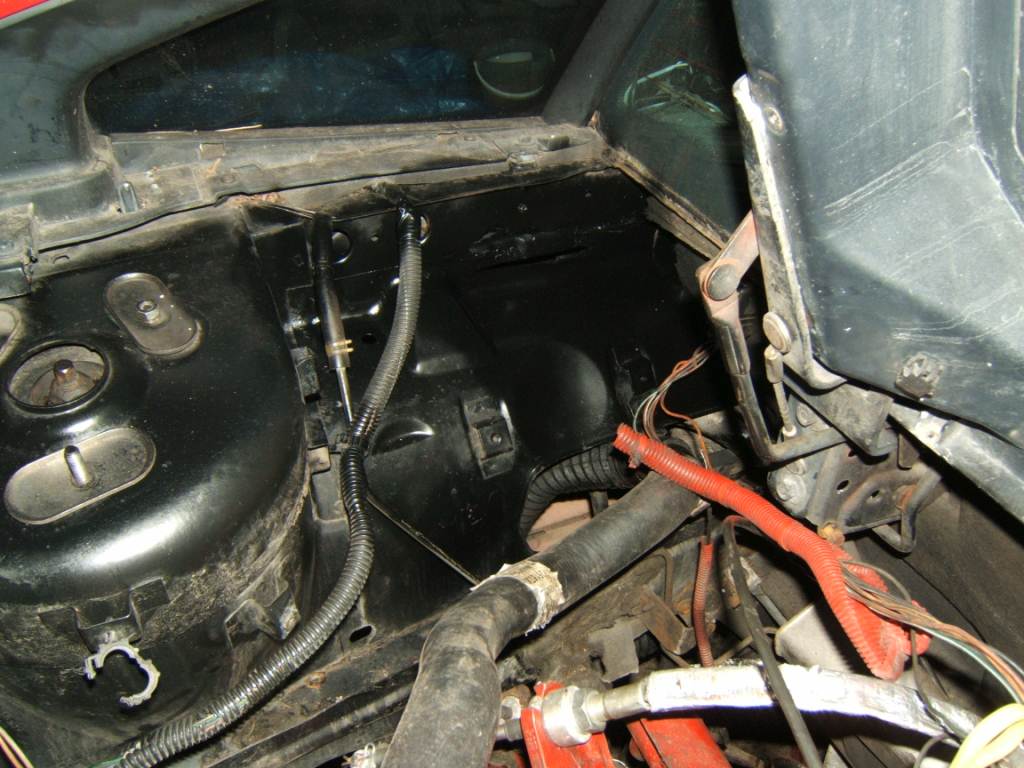
I got PISSED. I was just trying to do some small stuff today. Install the left rear suspension, CV shaft, sort out some power wires, was going to be a simple day. Until I got to Removal of the battery box. Sounds simple, its just tack welded in place. Should be a little grinding maybe a little wedge to pop the welds. YA RIGHT. I had a 5lb sledge hammer, 2 chisels, an Air Chisel, with nibbler attachment and punch attachment. A 4" angle grinder with a Zip Disk on it. That Bastard was not going to come out. IT was ripping out the metal on the car before it was going to come out. It was a nice looking battery box, but I needed it GONE. I needed the space for other things so it had to come out. The removed battery tray. The mess I left pulling it out See lots of room now
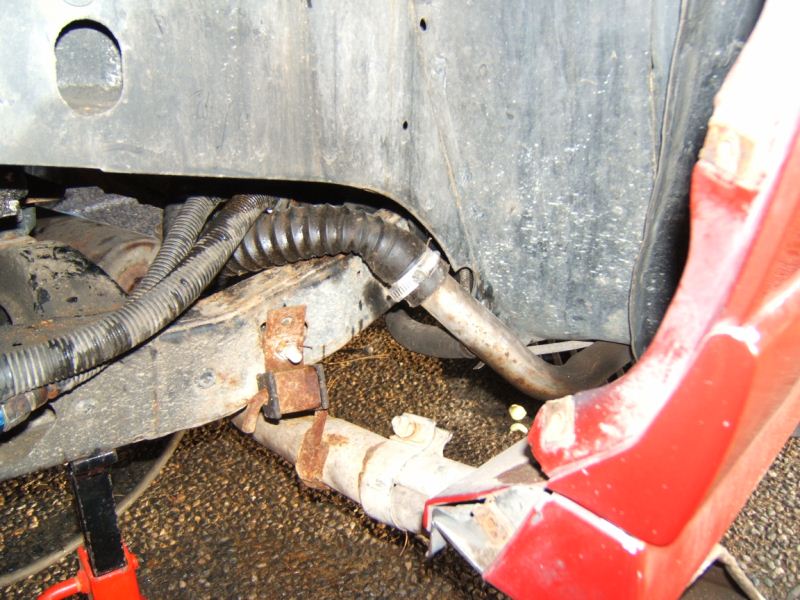
fuel lines with fittings laying in place. This crazy long pipe is actually from my 85GT and is my answer to getting the heater line from the trunk wall, all the way around the engine bay and back to the heater core line near the fuel tank.
|
||
|
Capt Fiero
88 Fiero GT 5spd V6 Eight Fifty Seven GT V8 5spd. |
||
|
||
|
Car-2-Lo
Senior Post God

Joined: 14 February 2007 Location: Canada Status: Offline Points: 1266 |
Post Options
Quote Reply
Posted: 02 March 2009 at 2:39pm |
|
|
Hey Dave, very wicked profile (nice balance) ! 

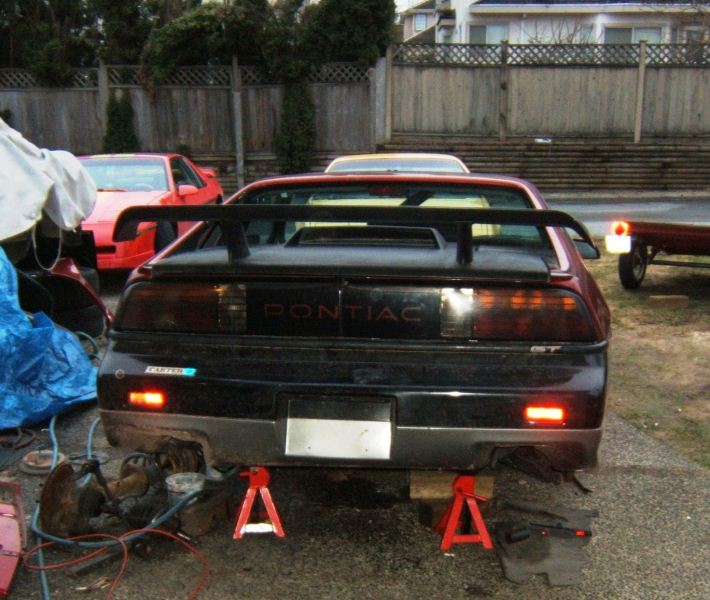
Mean looking rear too! 
|
||
|
Johnny-B-Good

|
||
|
||
|
Capt Fiero
Admin Group
Founding Member Joined: 12 February 2007 Location: Canada Status: Offline Points: 4039 |
Post Options
Quote Reply
Posted: 03 March 2009 at 11:01pm |
|
|
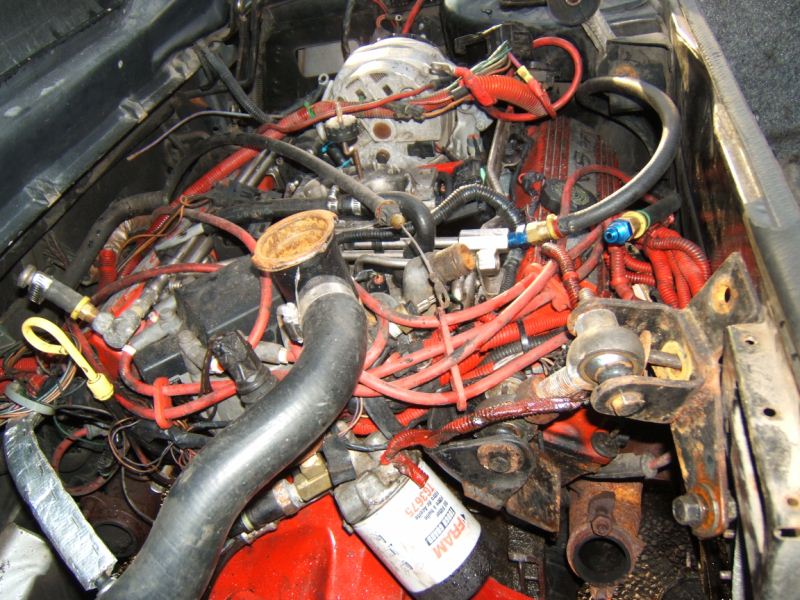
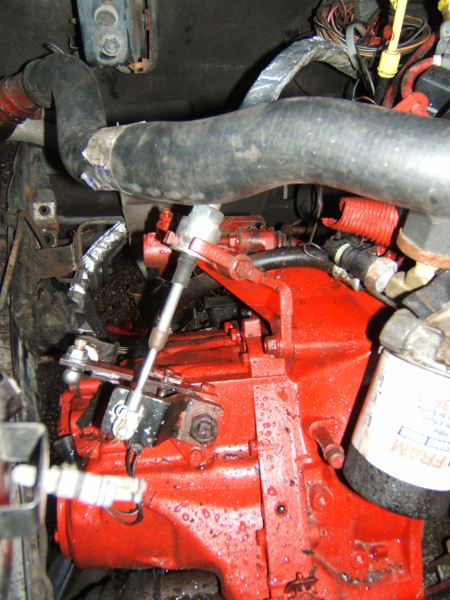
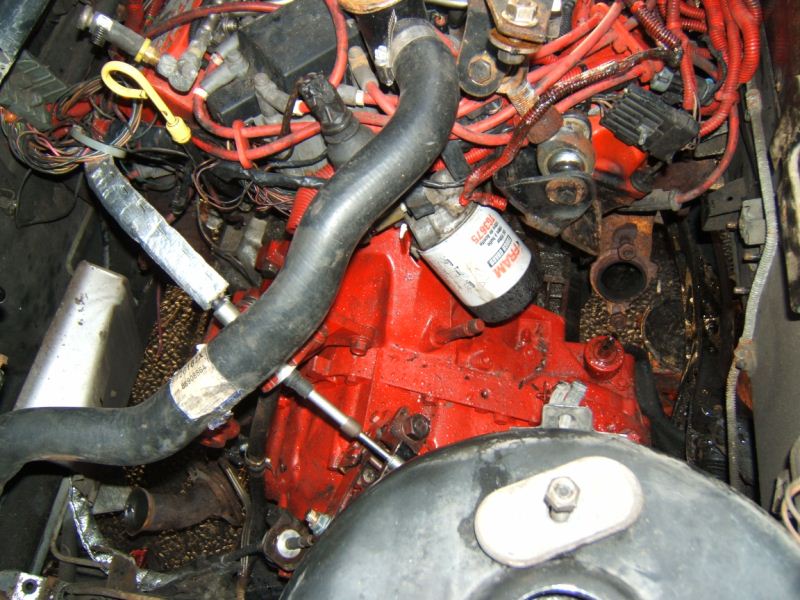
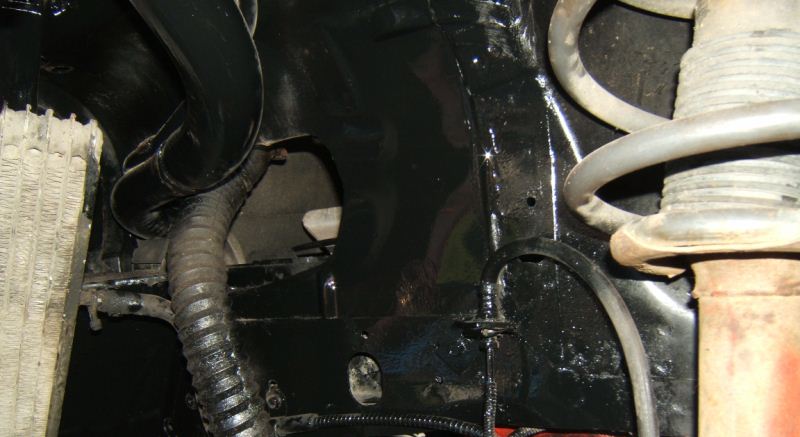
OK so I got a bit more done today to the car. Really messy, but still made some progress. Lower passenger side rad hose re-routed and attached.
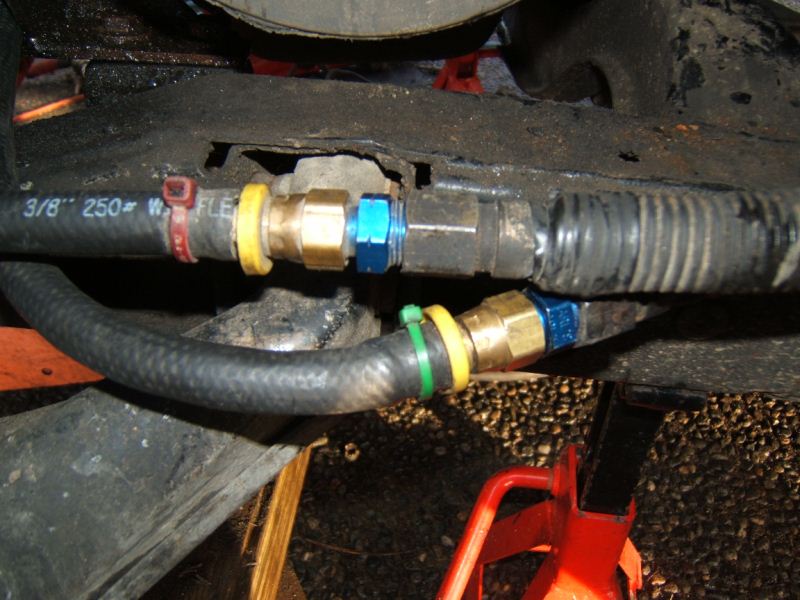
Fuel line adapters installed. The coloured zip ties are there to identify the feed vs return line for the fuel What a frickin mess. However the fuel lines are in place now. Drivers side coolant pipe attached, and oil cooler placed into position. I have to make a bracket and clean everything before final install. Hmm, kinda like a puzzle, which heater hoses and adapters are going to make the shortest and cleanest to get from the coolant neck to the heater core pressure side line There is the heater hose sticking up on the back of the engine. It has to be connected all the way around to the thermostat housing. Getrag Cables installed and tightened down The exhaust guy is going to hate me, need to connect both of those exhaust manifolds together and and go straight down. Gonna have to be some crazy bends. See that black hose looking thing, its just shy of 3/4" outside diameter. Thats actually 3 ought welding cable and will be the supply line for my front mounted battery. I had been racking my brain all day trying to think how am I going to keep that safe from under car debri. The insulation is too soft to just leave it tied up. Hmm what to do, what to do.
------------------ |
||
|
Capt Fiero
88 Fiero GT 5spd V6 Eight Fifty Seven GT V8 5spd. |
||
|
||
|
Capt Fiero
Admin Group
Founding Member Joined: 12 February 2007 Location: Canada Status: Offline Points: 4039 |
Post Options
Quote Reply
Posted: 05 March 2009 at 4:25pm |
|
|
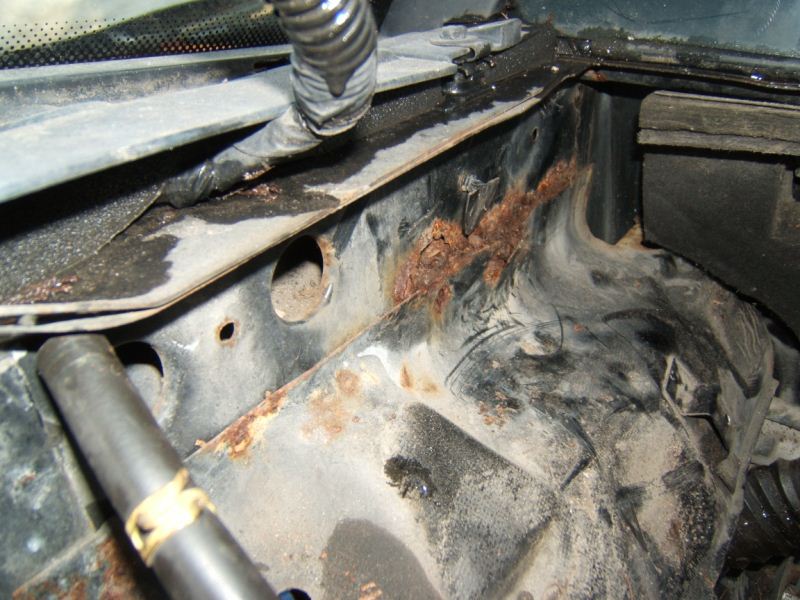
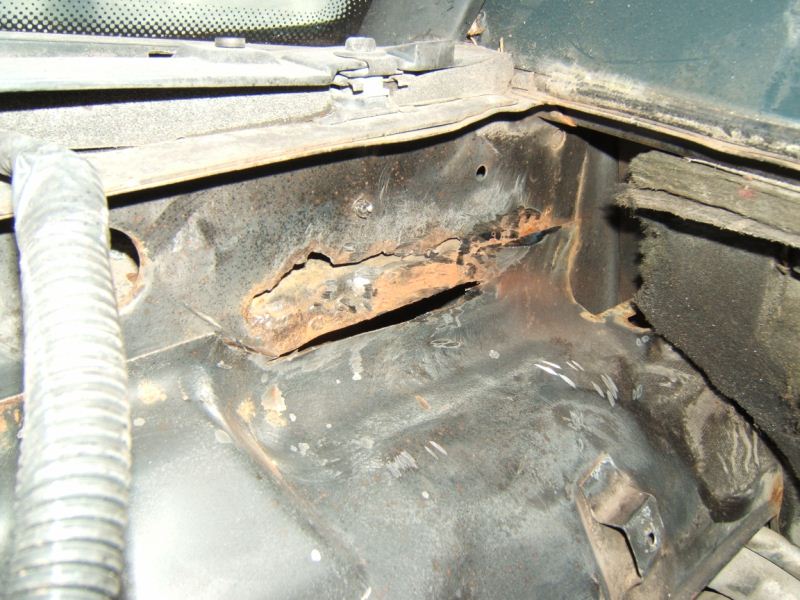
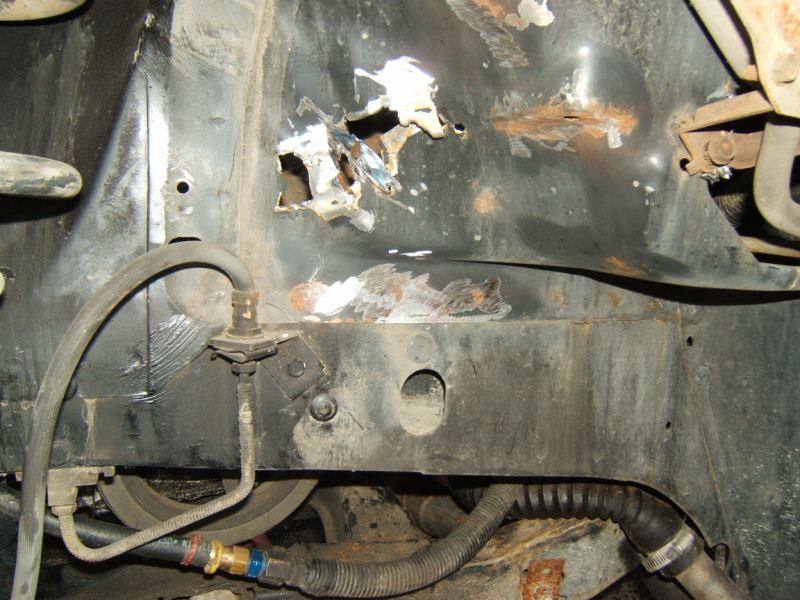
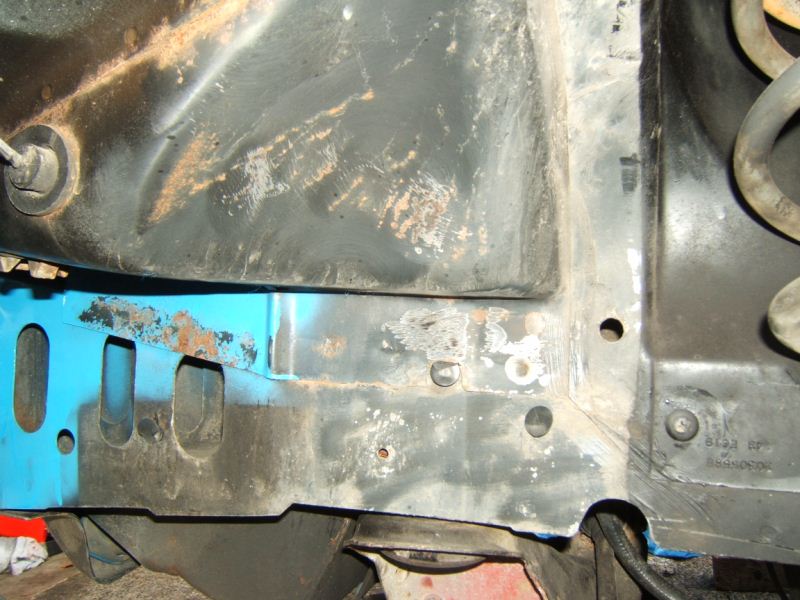
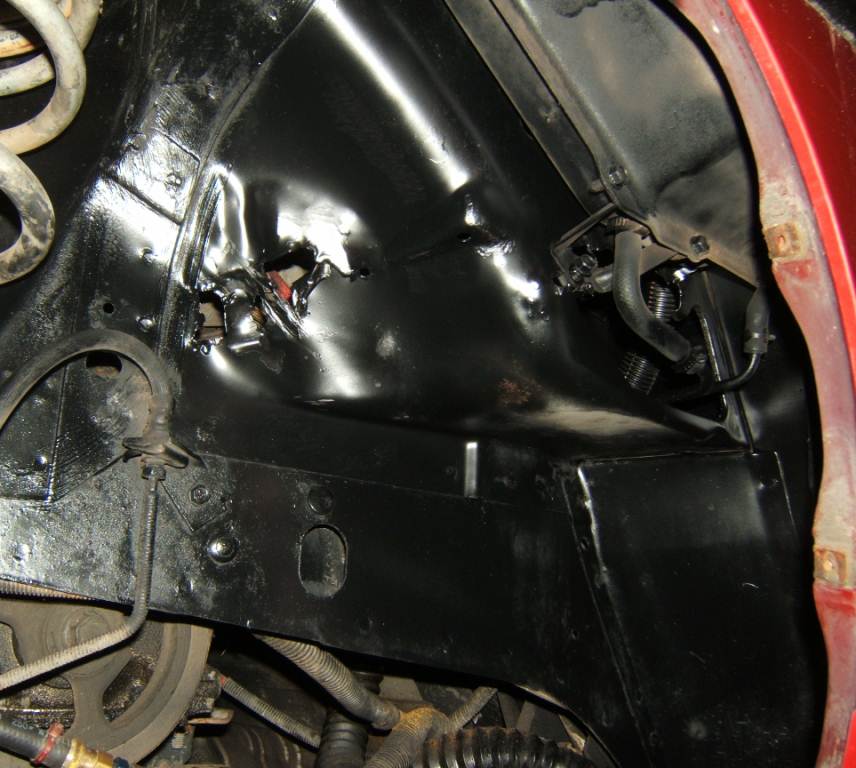
Ok so last pic in the last post was this NASTY A$$ Rust Spot. I HATE RUST of any kind. So my very next project was remove and start prepping for anti rust coating. (TremClad) So I tried my wire wheel and couldn't get what I wanted, so I grabbed the angle grinder and a zip disk, then angle grinder with a grinding wheel, then finally back to the assorted wire wheels on my air die grinder. (Funny story with video on that later. After grinding and cutting, I end up with this. In all these pics, I only have one coat of paint, I'll do a 2nd coat tomorrow.
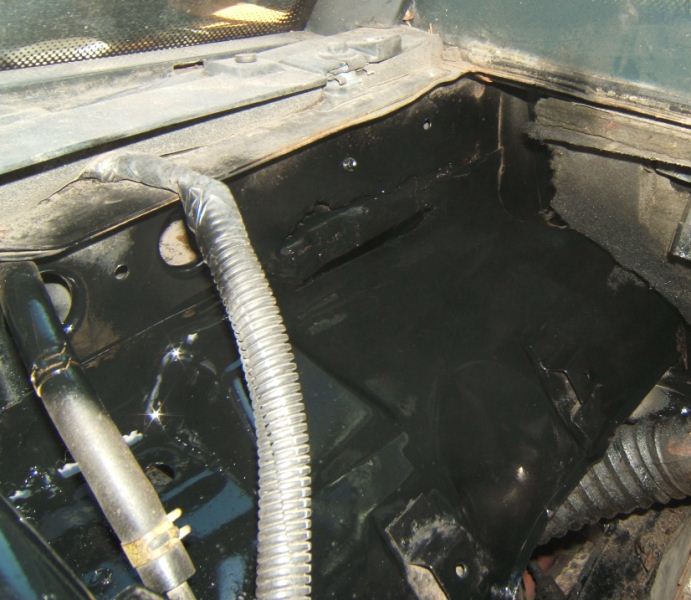
Ah Thats Better This is where I destroyed the metal removing the battery box. I plan to get a proper piece of sheet metal and make a proper patch, but for now, lets not let it rust. Well its not pretty, but it wont RUST. I had hit part of this area with the blue TremClad but I went in there with a grinder today and touched up some really rough areas, then gave it another shot of TremClad Hey Thats not too bad.
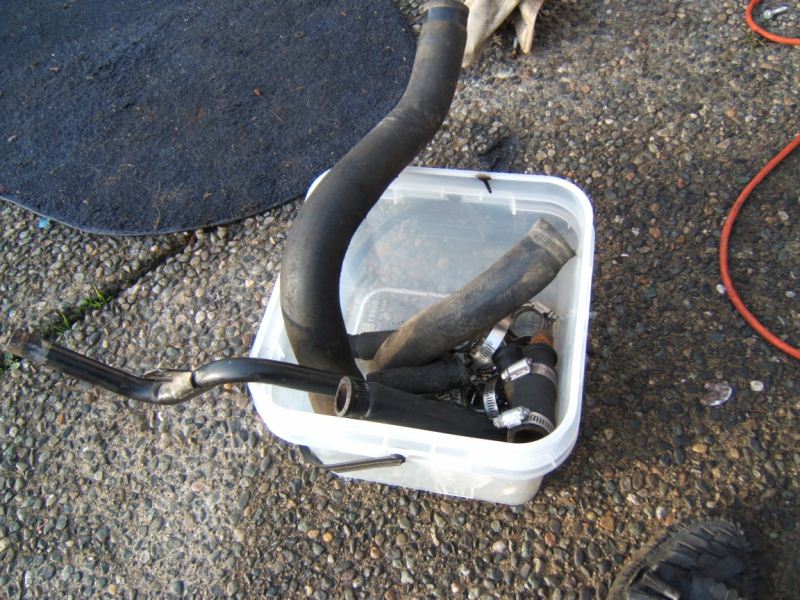
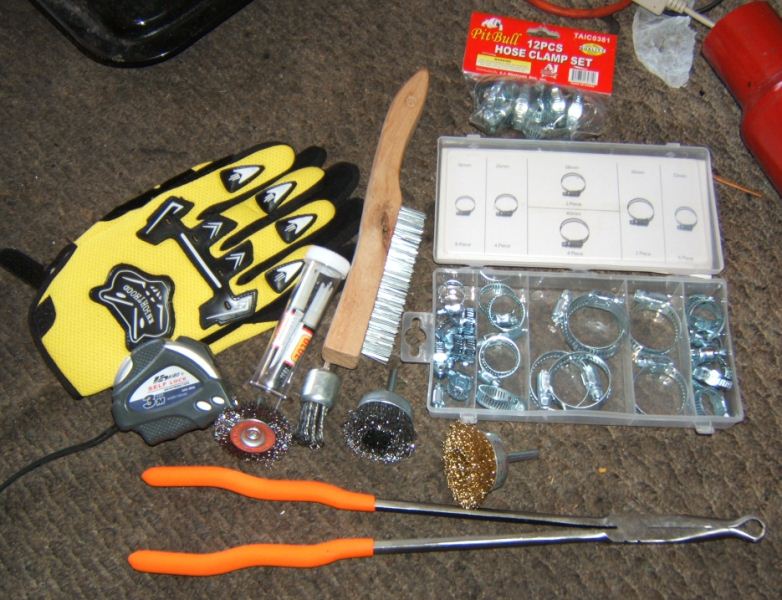
Well this is what I came out with. That entire pile Gloves and needle nose pliers included came to a grand total of $21 bucks.
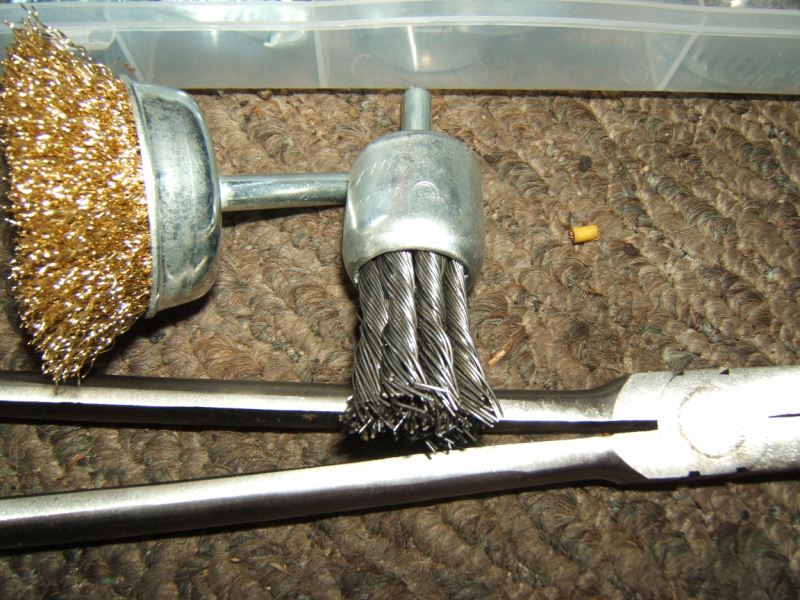
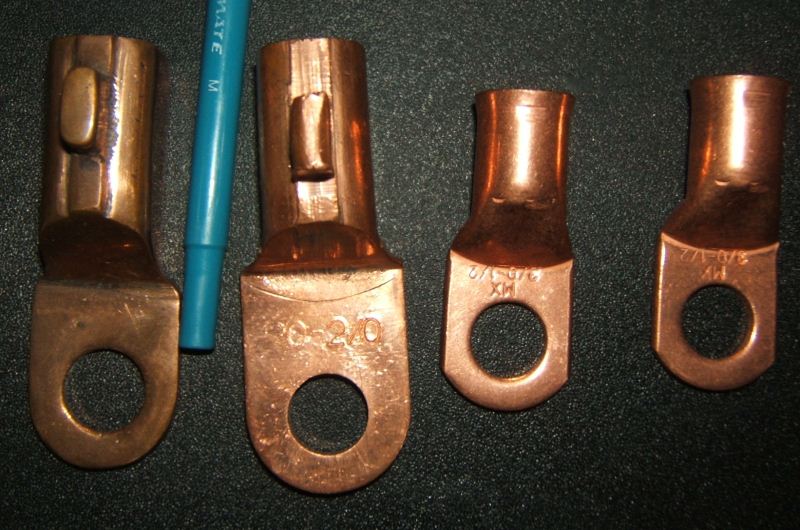
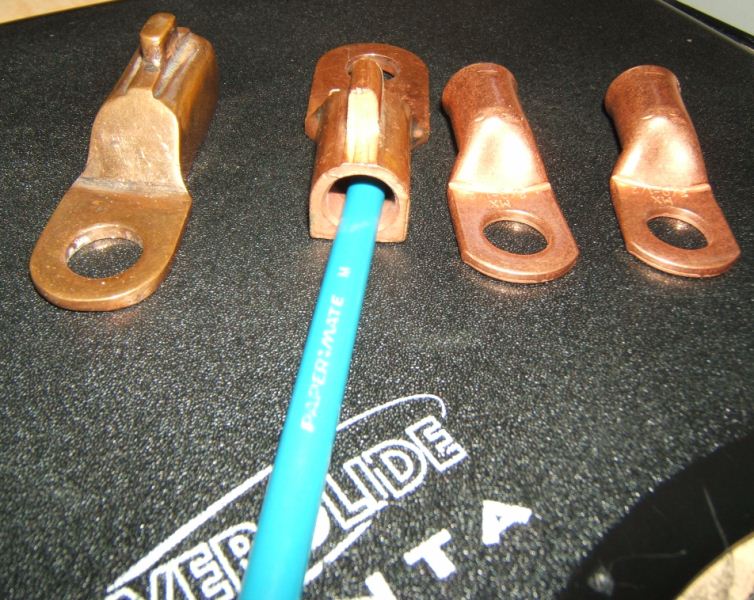
Gloves $5 I had some serious fun with that. Its stamped Max Speed 4500 rpms. I figure whats the worst that will happen, it might fly apart and explode the wires. So I chuck it into a 20,000 RPM Air Die Grinder. (Insert Tim Taylor Power Grunt) Now I needed Lugs for the remote battery kit. I bought these nice 3 ought lugs. They looked pretty good.
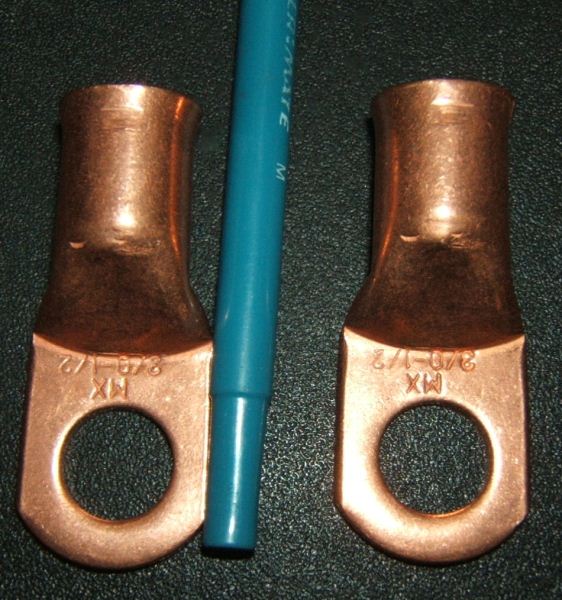
Then I found these Bad Boys. I used a standard pen, to give a size reference. When heat that, crimp it and drill a pilot hole anchor a set screw then fill with solder, that baby is never going to break or come loose.
------------------ |
||
|
Capt Fiero
88 Fiero GT 5spd V6 Eight Fifty Seven GT V8 5spd. |
||
|
||
|
Capt Fiero
Admin Group
Founding Member Joined: 12 February 2007 Location: Canada Status: Offline Points: 4039 |
Post Options
Quote Reply
Posted: 06 March 2009 at 9:03pm |
|
|
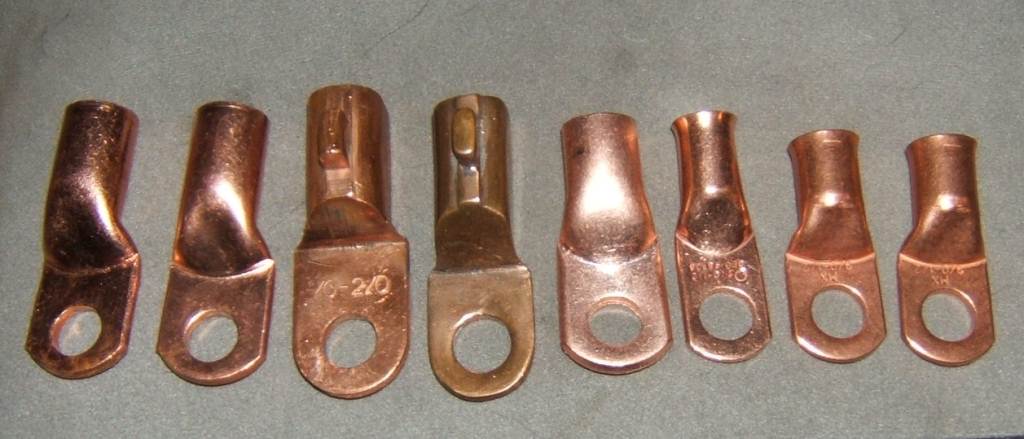
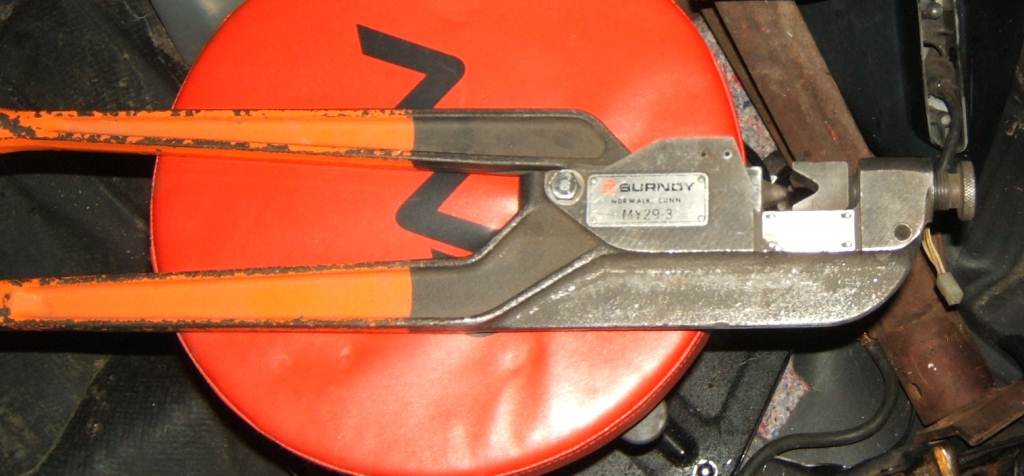
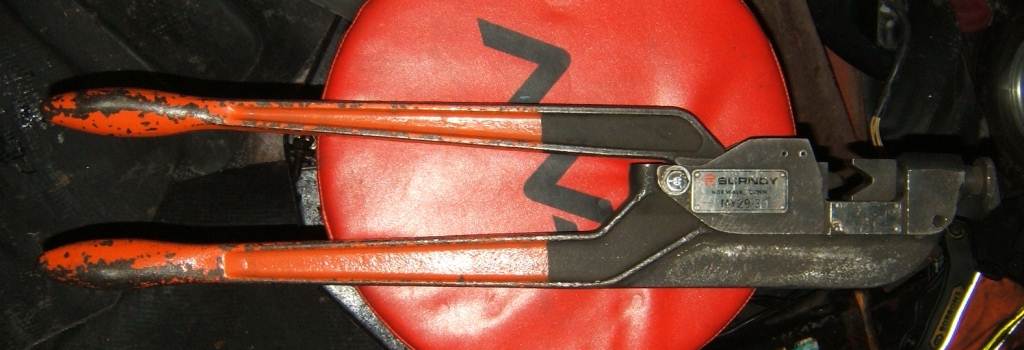
Well today was Wiring Day with a little paint here and there. I got in the last of the Copper Lugs for the power and ground cables today. I however did not get time to install them today for reasons you'll see below. New Copper Lugs Very specialized Crimper's for these Giant Terminals. You can't really tell in the pics, but they are the size of medium bolt cutters.
Another coat of TremClad the metal is starting to look good.
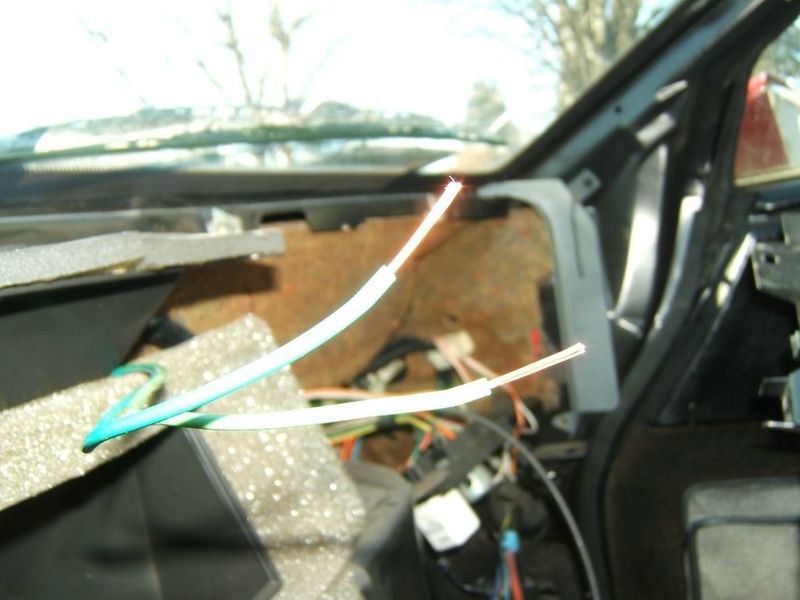
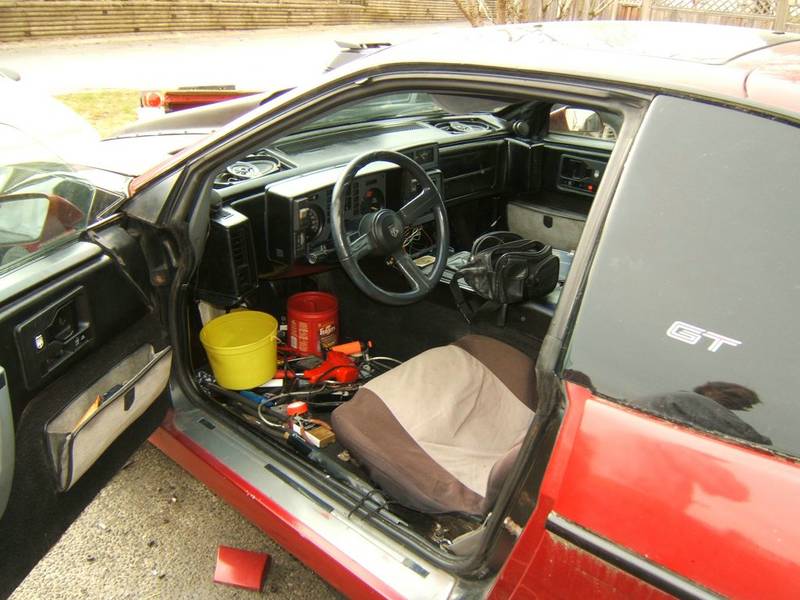
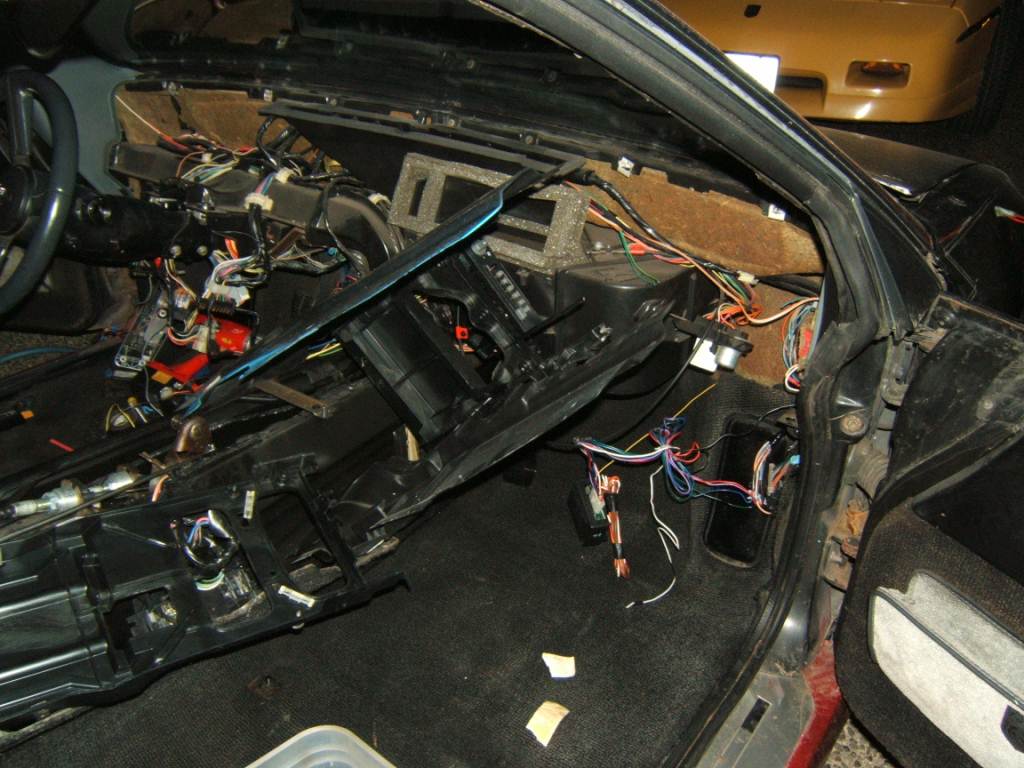
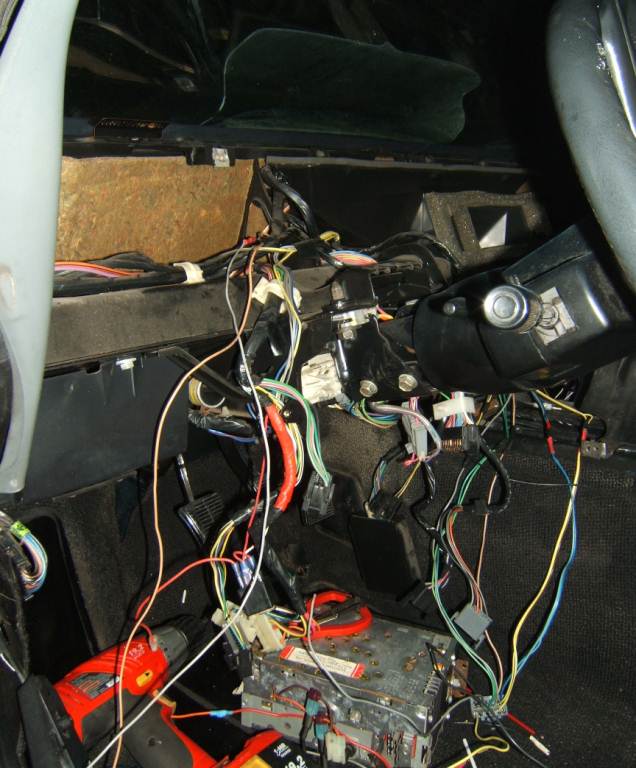
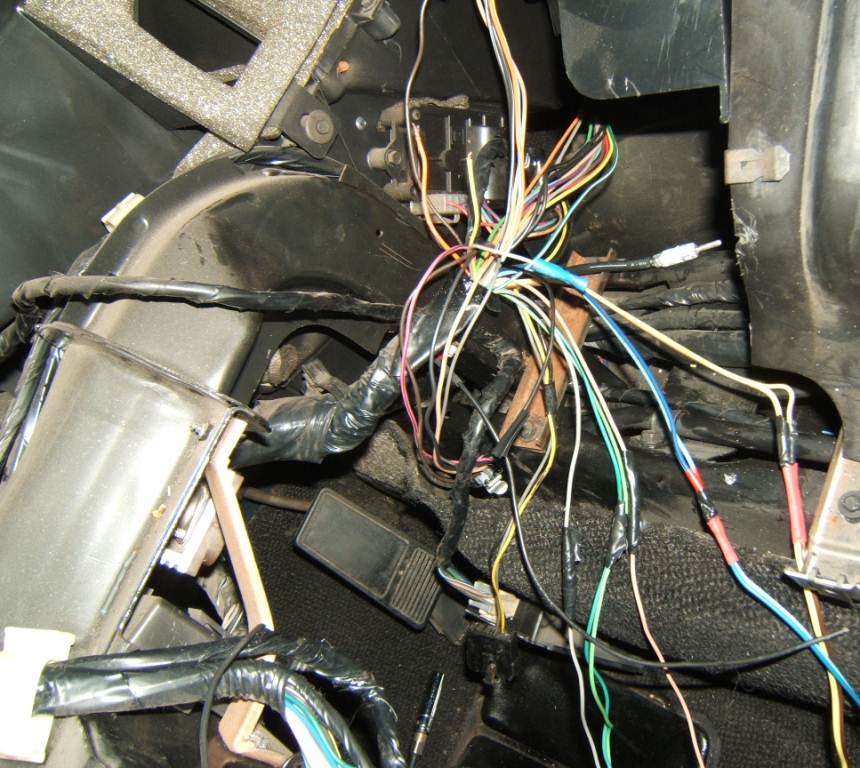
I still missed those damn back seams. So I had to gut the center console to change the throttle cable. The V8 uses a different cable and end than the V6. So out it came. I have diced up hands now from reaching in there to run the cable. I also found out, "dry graphite powder" is not a good cable lubricant. Now I had not really payed much attention to the cabin wiring during the tear down. I knew the stereo wires had been cut when it was supposedly stolen. Well I think the thief did me a favor by removing some of the crap that had been done in there. I found tons of wires just cut, some had butt connectors over them to keep them from shorting, some had tape, all the OEM plugs had been cut. Looks like the aftermarket deck was installed by cutting all the stock wires instead of using a proper adapter harness. So I went back to my 85 and started carefully removing the proper harness connectors leaving about 12" of wire off of each plug then brought them over to the 87GT and carefully started splicing in the new parts. I know in the pics, it looks like I am doing it ghetto style, but that is far from what you see. Each wire is stripped clean, then using an AT&T style twist attached together, then heated with a pocket torch and soldered. Then shrink tube put around the solder joint and shrunk. Then after all that, I put a layer of black tape over the shrink tube to keep any chance of a sharp solder drop from breaking through the shrink tube and causing any issues later.
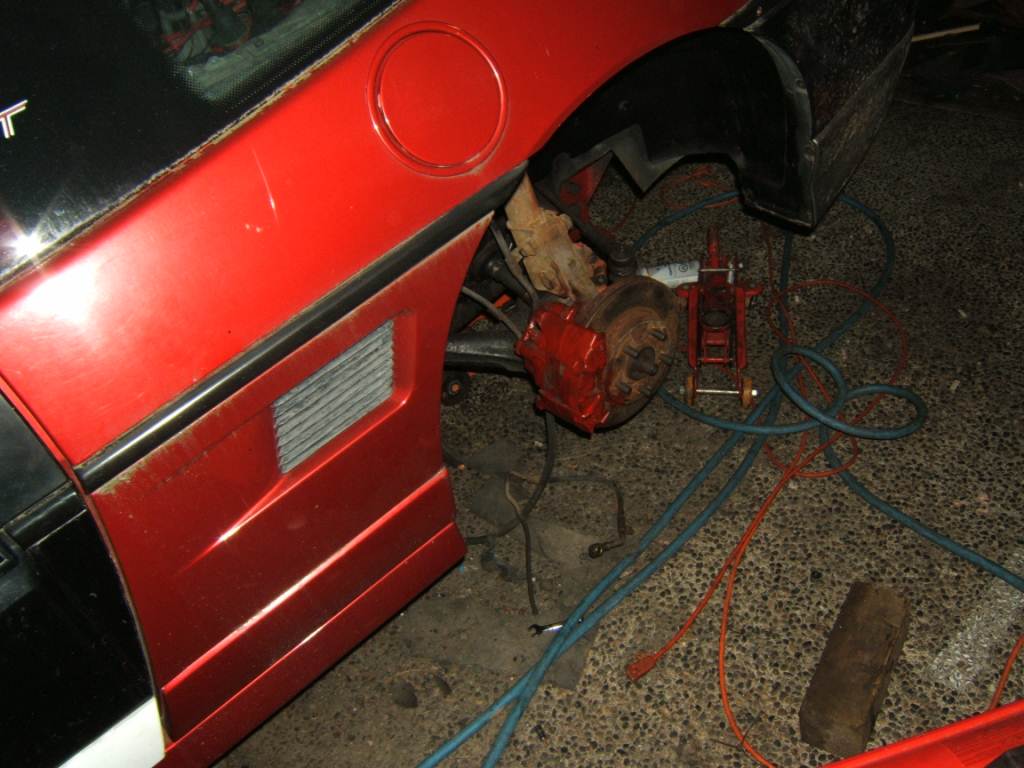
I am going to have to tear more of the harness apart, to find out what wires have been changed and why there are 3 black wires and 2 yellow wires and 2 gray wires coming through the harness. As crazy and nasty as this mess looks. All the wires are sorted and either marked or installed in in the ECM Plugs. I just unwrapped the loom to remove it from the 85 and transport it to the 87GT. Never leave me alone with spray paint. I just couldn't keep in the mood to fight the wiring, I was irritated that I had spent the better part of the day working on crap that I shouldn't have to be fixing. I was kinda standing there is a burnt out stopper, and saw the ugly rear caliper and the can of left over red TremClad from the Trans painting. I decided ah what the hell, it can't look any worse than it was. From 20ft away or driving it'll look decent, just don't get too close or you'll see the fish eyes. ------------------ |
||
|
Capt Fiero
88 Fiero GT 5spd V6 Eight Fifty Seven GT V8 5spd. |
||
|
||
|
Capt Fiero
Admin Group
Founding Member Joined: 12 February 2007 Location: Canada Status: Offline Points: 4039 |
Post Options
Quote Reply
Posted: 08 March 2009 at 7:49pm |
|
|
When you get done reading this post, make sure you read the last line. Its pretty important. Ok the Dash is done, yaa. The cleaning and paint/dye turned out great, its a nice high gloss black finish.
The screws holding the dash must have been hammered in, as there was no way they got a standard socket to fit between the speaker frame and the plastic surround, so I took an old cheap junk 7mm socket ground it down on my bench grinder into a super thin wall socket and it worked perfect.
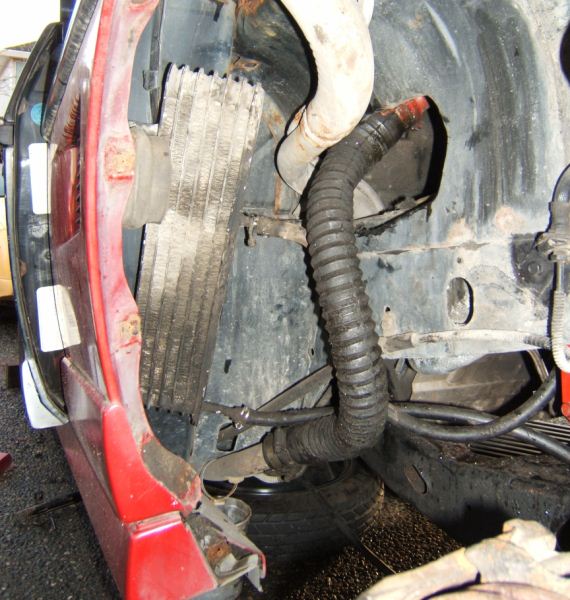
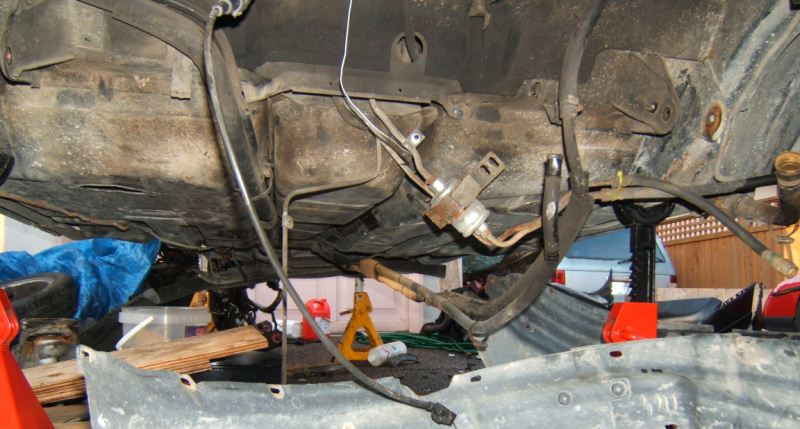
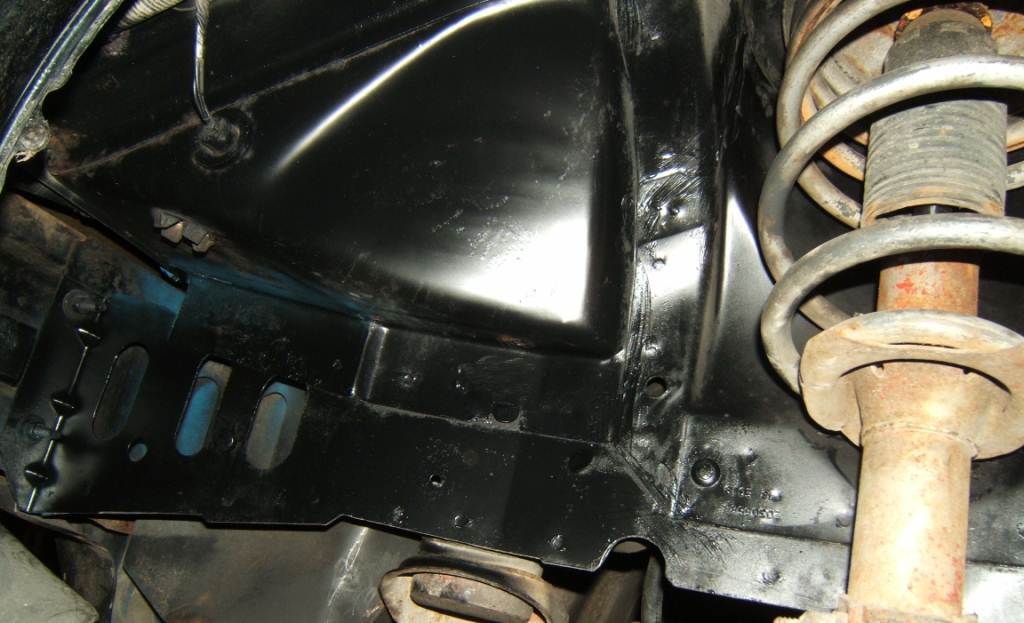
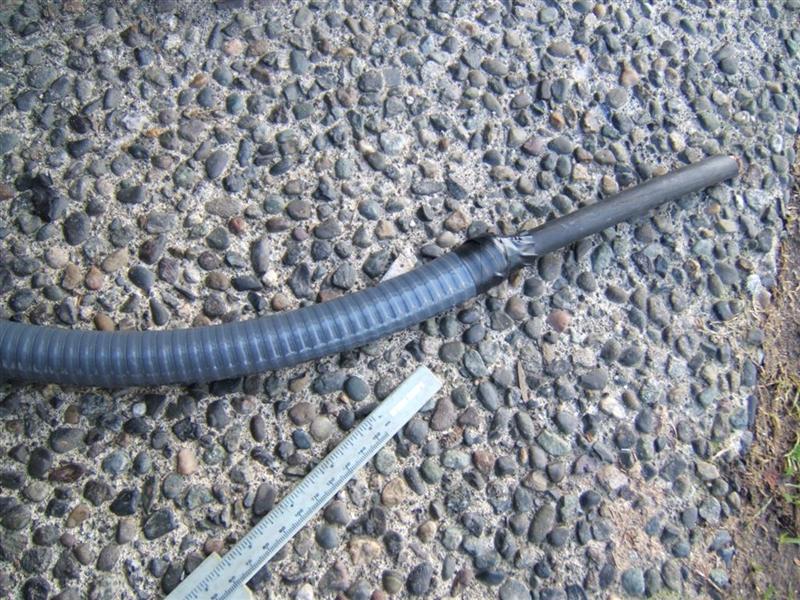
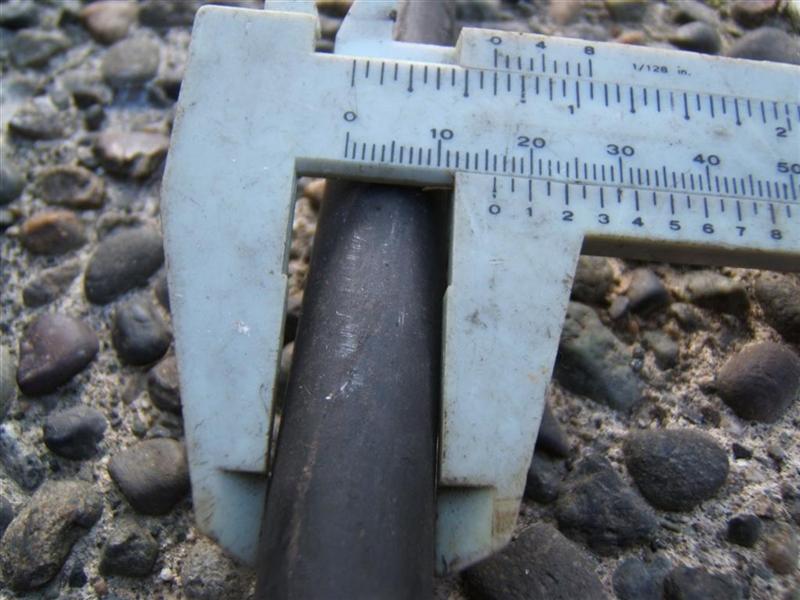
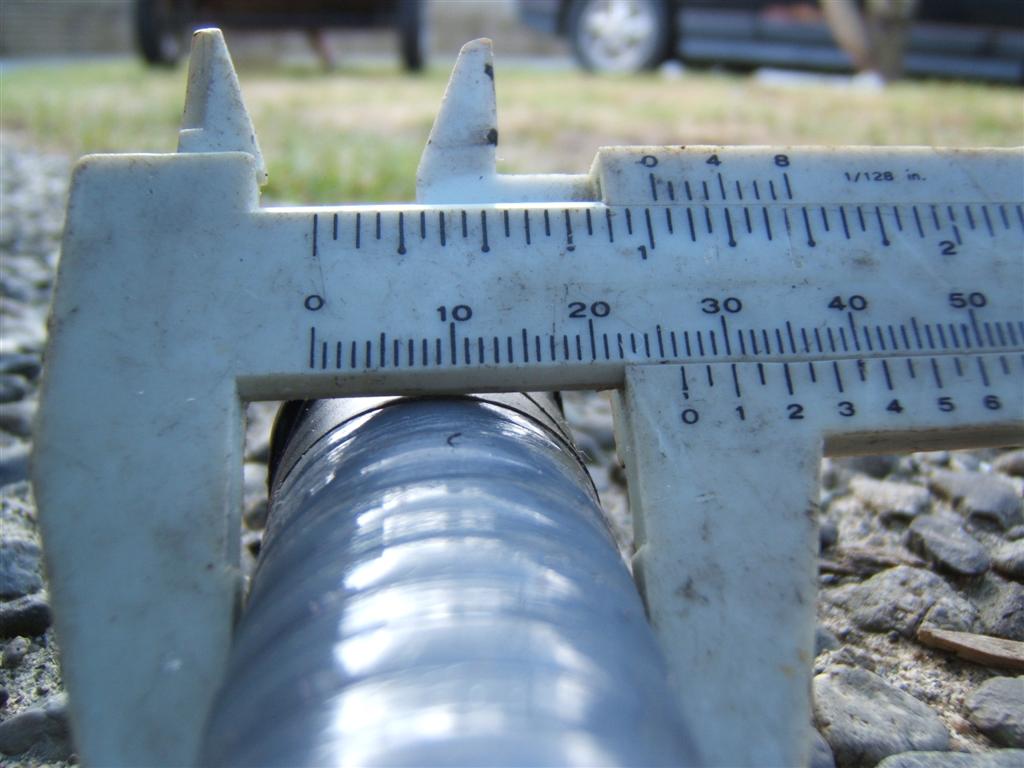
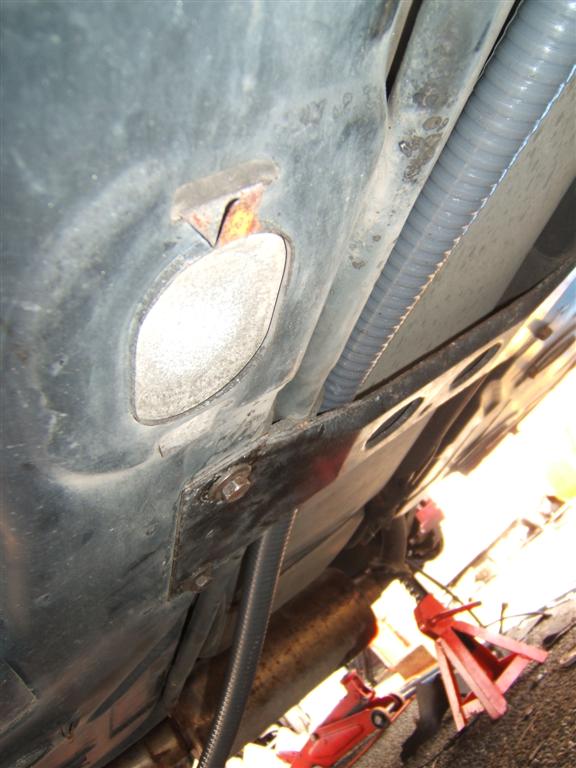
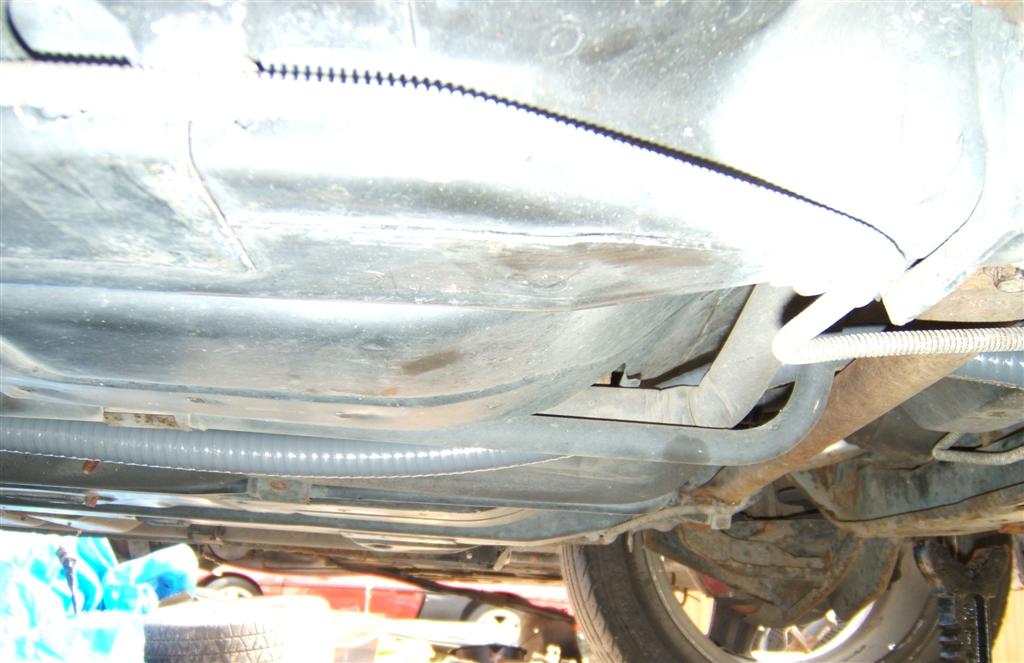
We went to the local Home Depot to scout out some sort of conduit for the battery cable. I looked at different metal pipes, soft rubber / PVC pipes and nothing really seemed like a good fit for under the car, then I found this stuff. I honestly don't remember what it was called. Its extremely hard stuff, and took a floor jack to make it flex enough to get the cross beam back into place. However its also got enough give that you can bend it past a 90 degree ark over an 8" span and with zero signs of damage. It has an outside diameter of 1" and an inside diameter of 3/4" My 3/0 cable is just a tic over 5/8 outside diameter so this 3/4" was almost perfect.
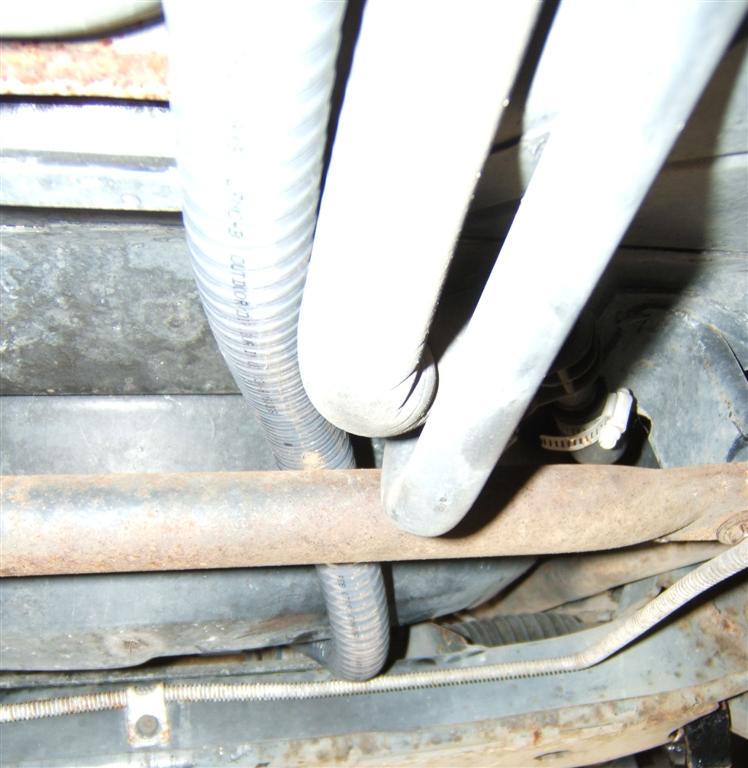
I have not added any clamps at all yet to keep it up, its almost perfect and the only thing holding it up at the moment is the fuel tank belly pan and the front round cross brace. I am going to add a clamp about every 1ft to keep it above the heater line. I have also taped off each end of the housing to keep moisture from getting in. I may even get some large shrink tube and put over the ends.
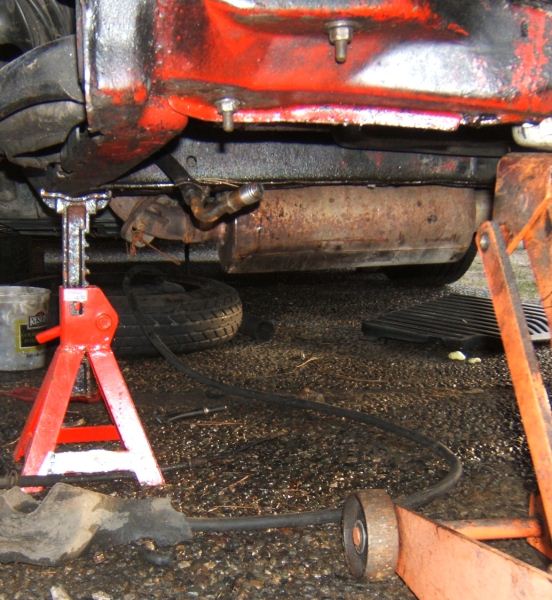
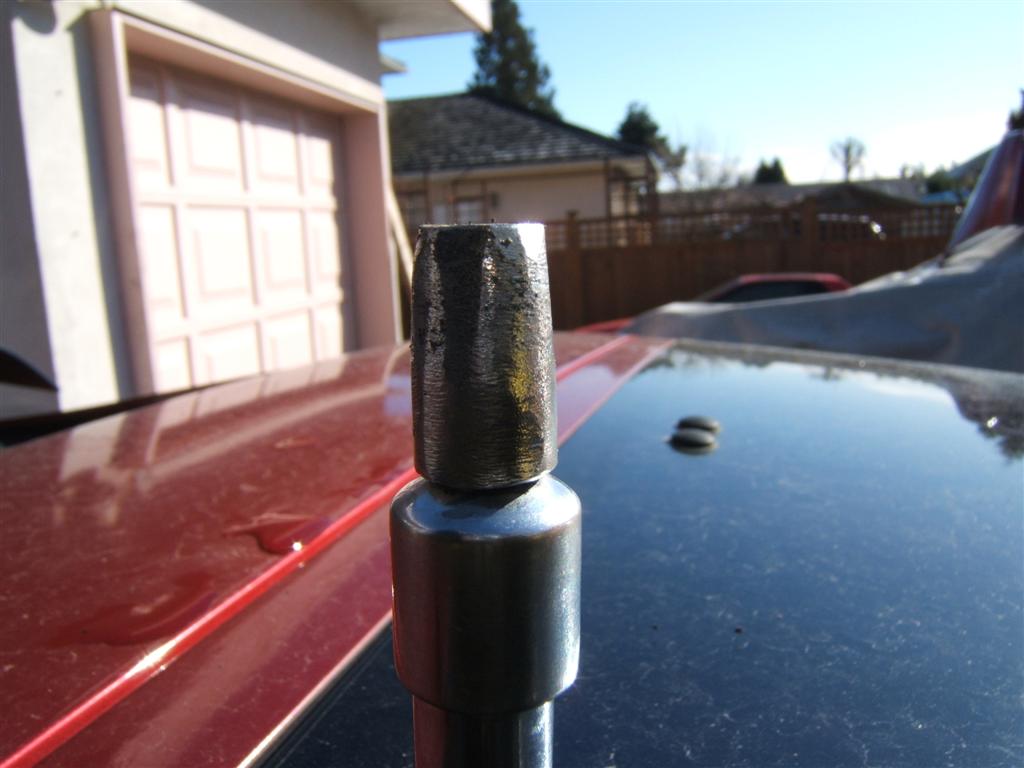
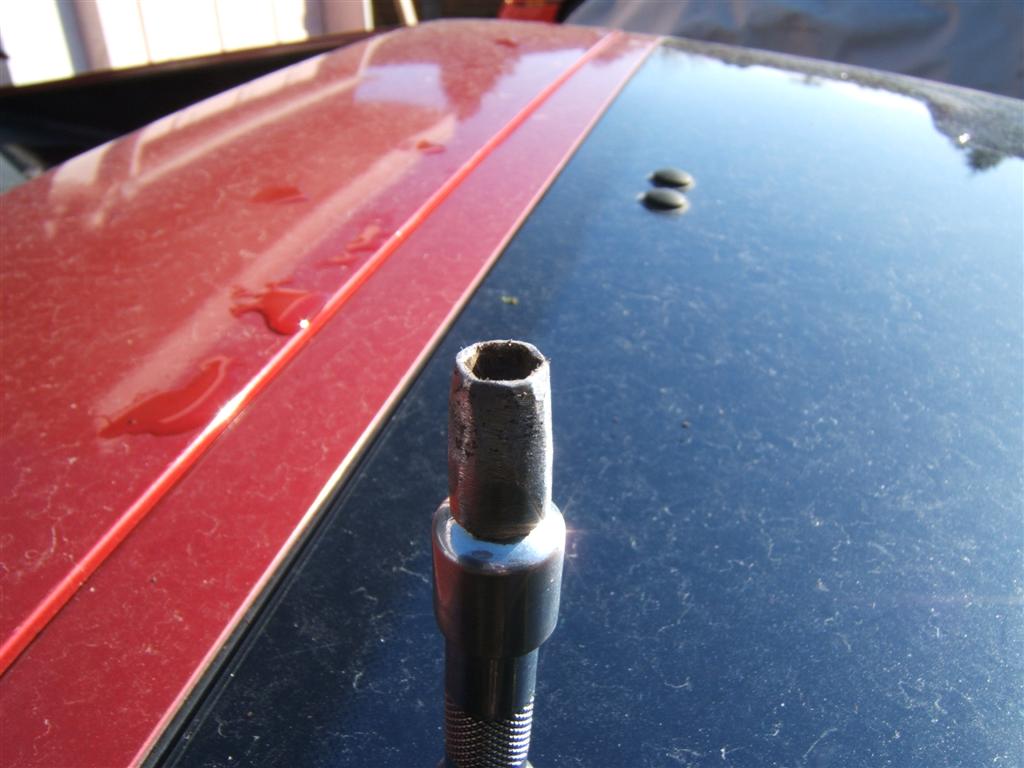
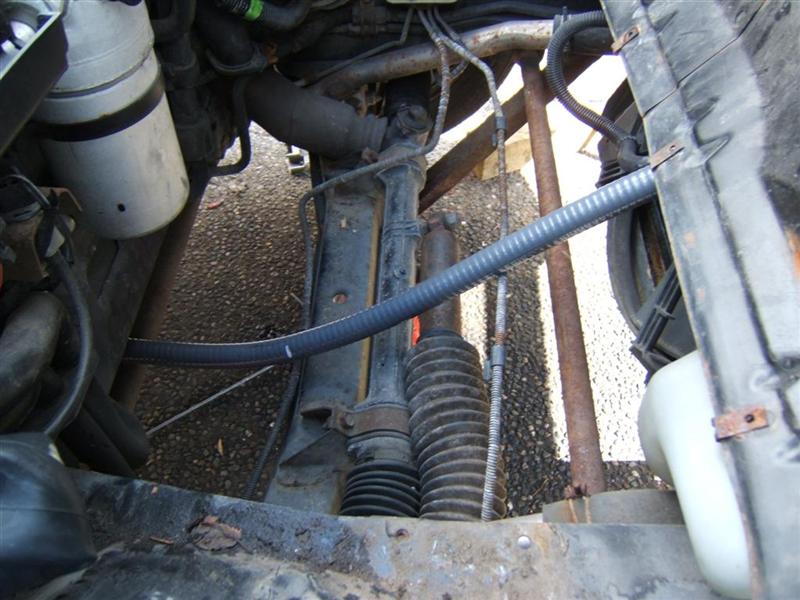
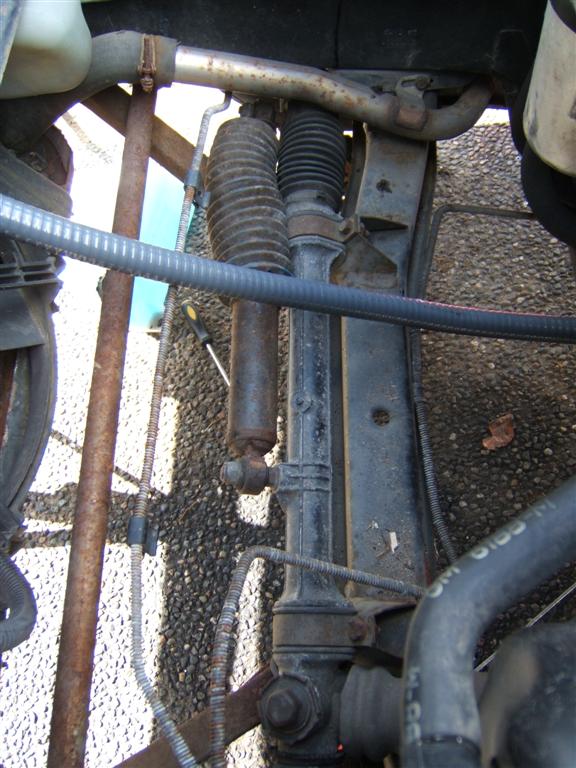
Now only a Die Hard Fiero Nut is going to look at this and go WHAT THE FU&(& The Steering Dampener is Bigger than the RACK.
Yep looks like they put a damn car shock absorber on the rack. I have seen it done on big jacked up trucks, but on a sports car? I may leave it on there just to see what it feels like. Probably going to make the steering really sluggish around tight corners.
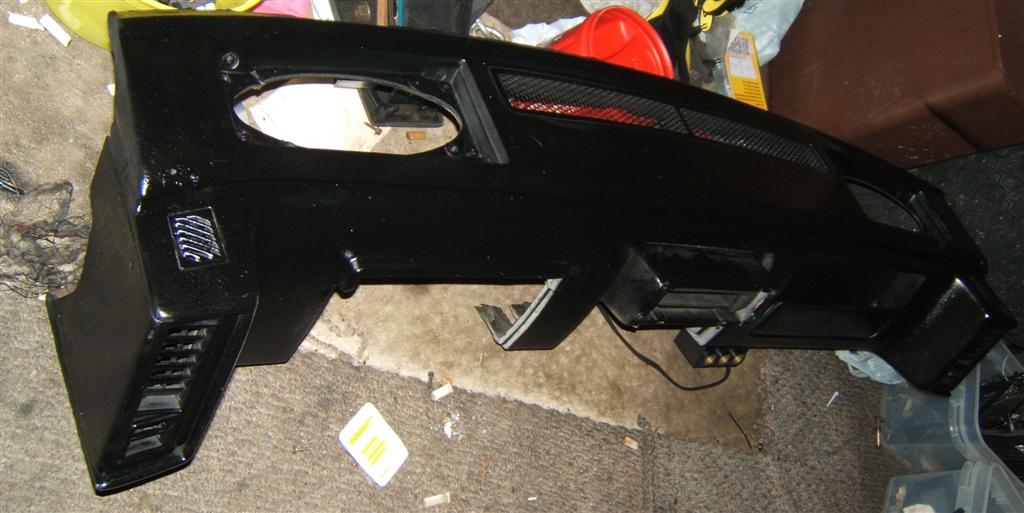
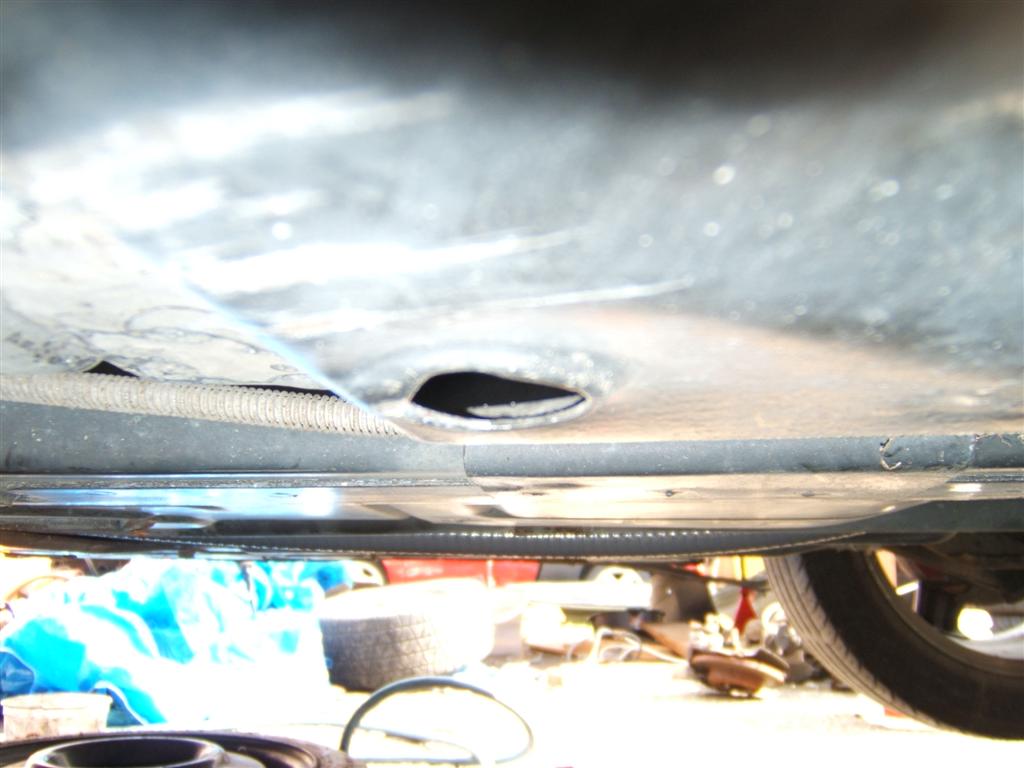
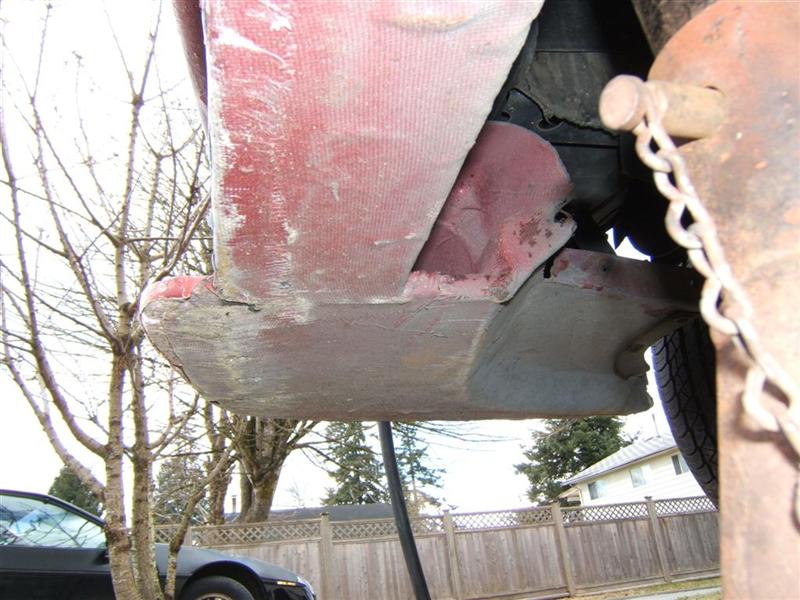
While I was under there today, I snapped a quick shot of the underside of the fiberglass work and the odd shape that the nose is from under the car. Really is not what I was expecting. It does kinda louver up towards the radiator nicely though. I'll bet it helps getting airflow to the rad.
|
||
|
Capt Fiero
88 Fiero GT 5spd V6 Eight Fifty Seven GT V8 5spd. |
||
|
||
|
Patrick
Newbie 
Joined: 19 April 2008 Location: Vancouver Status: Offline Points: 5 |
Post Options
Quote Reply
Posted: 08 March 2009 at 11:18pm |
|
Uh-oh, there go the Fieros and the club. Next up is West Coast SUVs of BC. Congrats to you and Lisa!
|
||
|
||
|
Matt
Senior Member

Joined: 09 February 2008 Location: Canada Status: Offline Points: 448 |
Post Options
Quote Reply
Posted: 09 March 2009 at 12:55am |
|
|
Congratulations on the news of your child.
|
||
|
I wanna go fast.
|
||
|
||
|
Fiero308
Senior Member
Joined: 01 July 2007 Location: Canada Status: Offline Points: 107 |
Post Options
Quote Reply
Posted: 09 March 2009 at 8:54pm |
|
|
Congratulations and welcome to the parent "hood". Your world will never be the same. But you will have to remember your priorities. My daughters regularly ask me " Daddy who do you love more us or your car?" and I always answer "Which is cleaner my garage or your room?" Again congratulations
Hugh |
||
|
||
|
Capt Fiero
Admin Group
Founding Member Joined: 12 February 2007 Location: Canada Status: Offline Points: 4039 |
Post Options
Quote Reply
Posted: 09 March 2009 at 11:20pm |
|
|
Thank you guys This is one hell of a change for the both of us. |
||
|
Capt Fiero
88 Fiero GT 5spd V6 Eight Fifty Seven GT V8 5spd. |
||
|
||
|
fourpoint9
Member 
Joined: 27 April 2007 Location: United States Status: Offline Points: 50 |
Post Options
Quote Reply
Posted: 10 March 2009 at 12:37pm |
|
|
CONGRATS DAVE & LISA !!! Maybe a stretched four door Fiero with a Simpson Racing Baby seat?   |
||
|
||
|
Capt Fiero
Admin Group
Founding Member Joined: 12 February 2007 Location: Canada Status: Offline Points: 4039 |
Post Options
Quote Reply
Posted: 10 March 2009 at 7:45pm |
|
|
Hey Steve don't give me any idea's. I am still trying to find out how to make a Fiero a legal 3 seater. Ya know I am going to have to mod the baby seat. It'll get at least a few racing stripes and some flames, regardless of what I end up getting.
Hmm motorized stroller, I think I would have to skip the gas motor, but I could see, electric drive, then add a small platform for the adults to stand on. Hmm. I'm thinking styled after one of those stand up law mowers. Probably have to keep the speed less than 10mph to be safe. Hmmmmmmm. Now ya got me thinking. |
||
|
Capt Fiero
88 Fiero GT 5spd V6 Eight Fifty Seven GT V8 5spd. |
||
|
||
|
Capt Fiero
Admin Group
Founding Member Joined: 12 February 2007 Location: Canada Status: Offline Points: 4039 |
Post Options
Quote Reply
Posted: 10 March 2009 at 10:23pm |
|
|
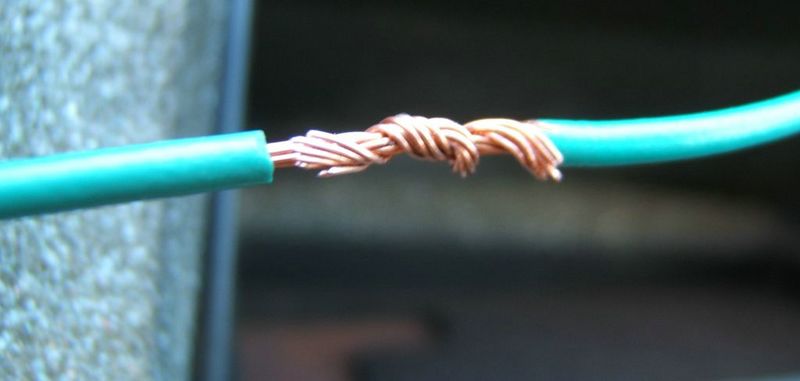
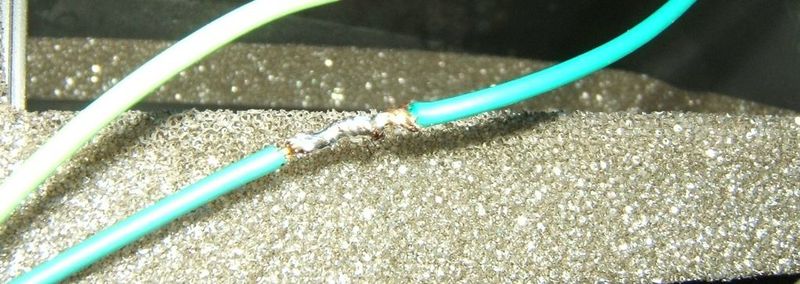
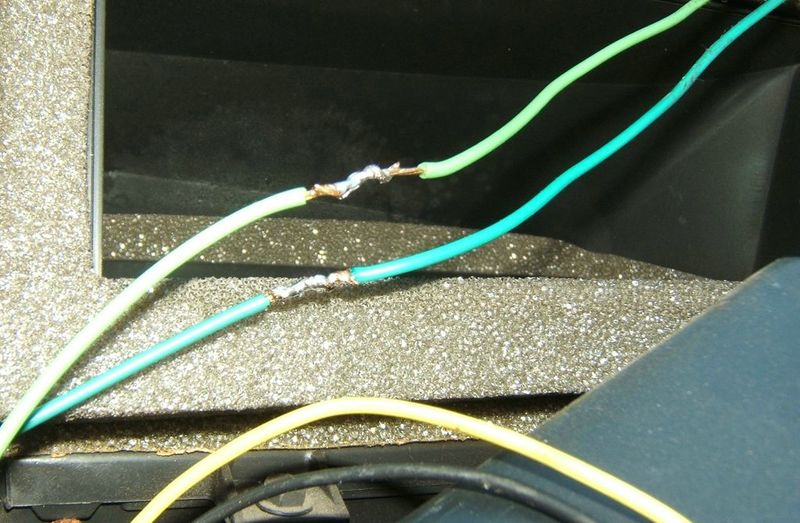
Ya know I was working on it thinking "damn I use to be better at this, 15 years ago (high school) I was able to solder cap's onto a PCB. I even knew the colour code for resistors. So I put down my butane torch, grabbed a proper soldering gun and gave myself a quick refresher on the AT&T style wire connector. So here is my feeble, feeble way of soldering. 1st start with nice clean bare shiny wire.
The Fancy Twist. This way you have no bent over wire to deal with, in the end the solder joint is virtually no bigger than the raw wire with housing.
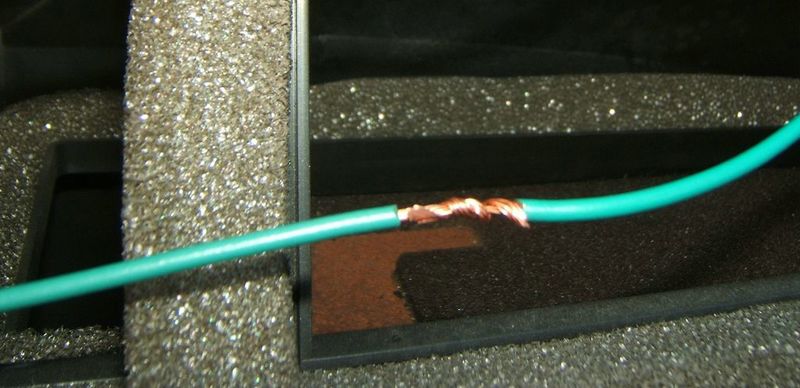
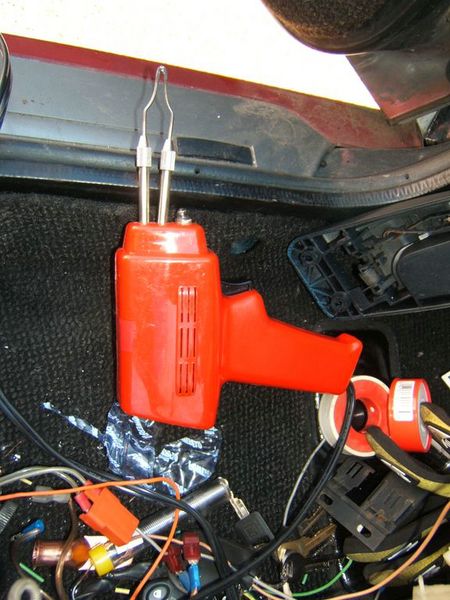
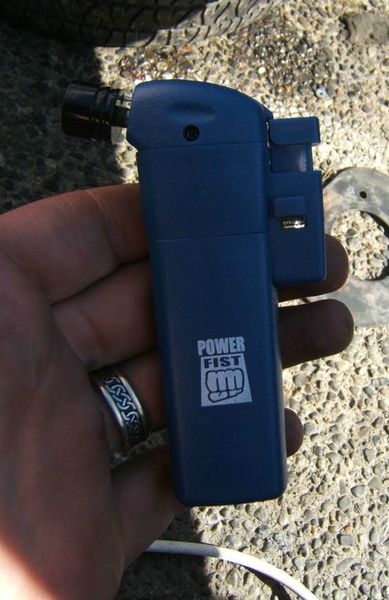
Using a Gun rather than an Iron, or a Torch. My Handy Butane Power Fist Pocket Torch Soldered
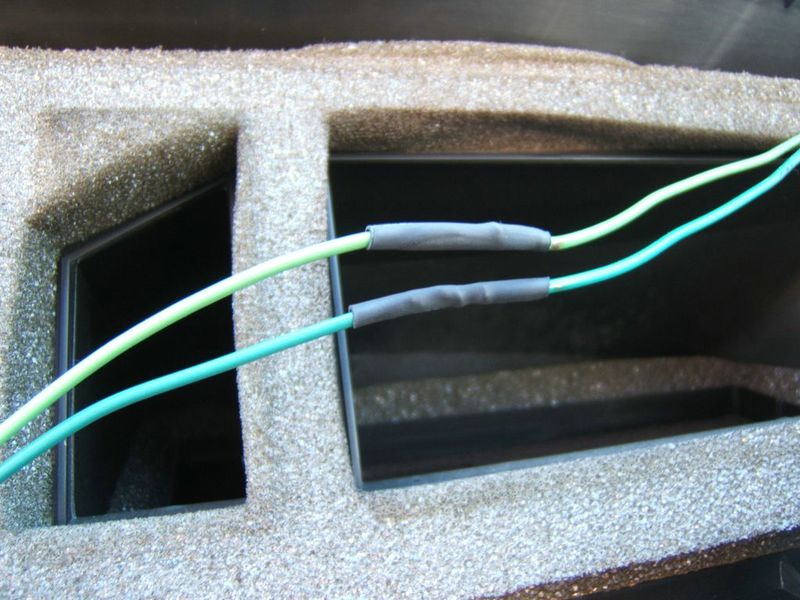
First 2 pieces of shrink tube installed Larger piece of tube over the small tube, to make the entire thing a nice tight dry package. Kenwood Sail Speakers
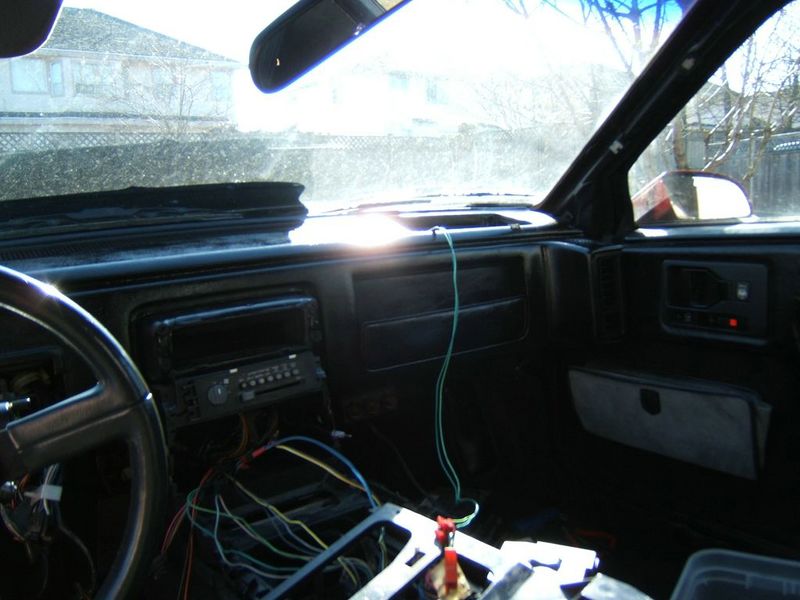
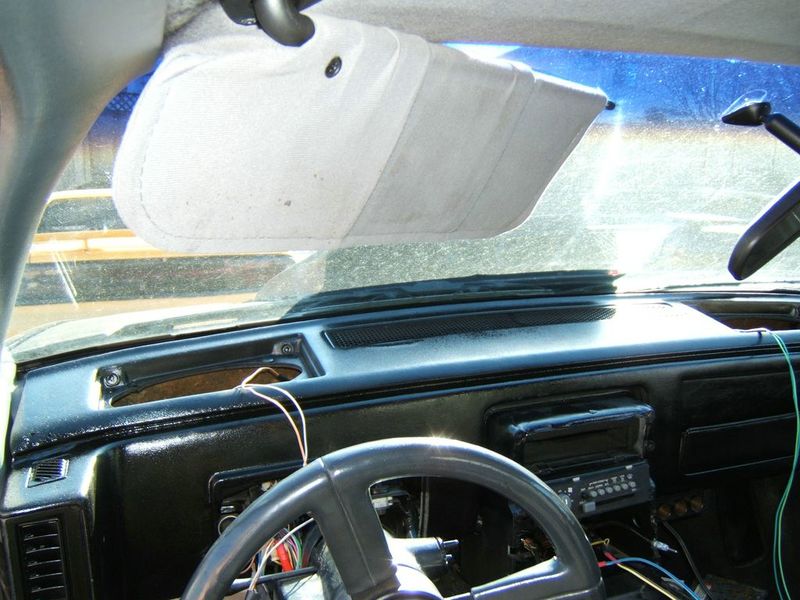
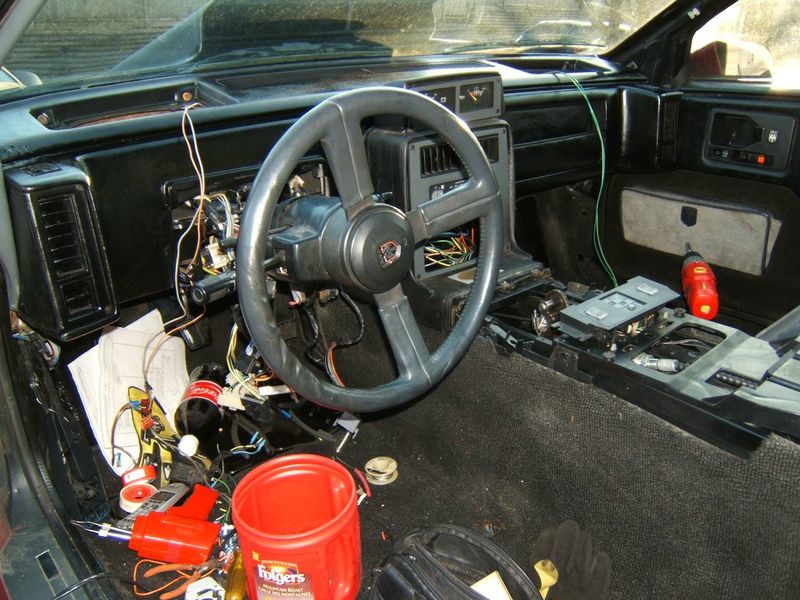
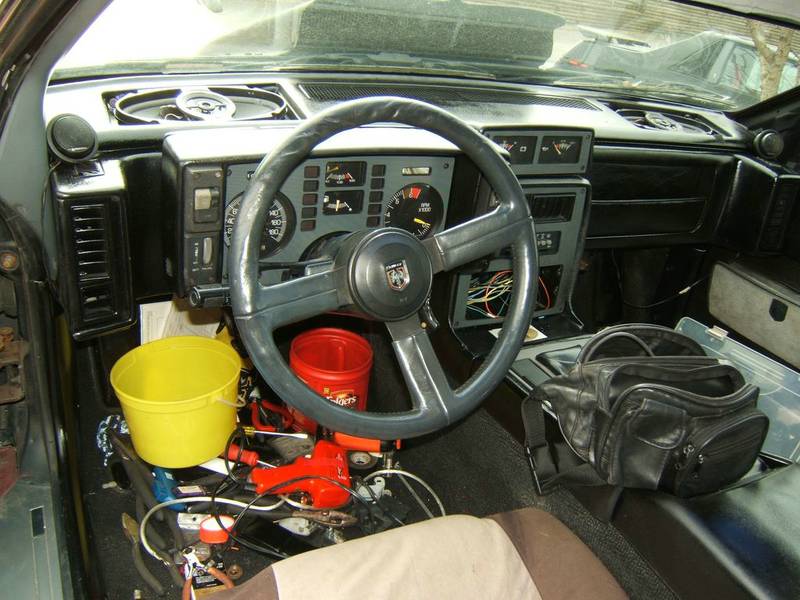
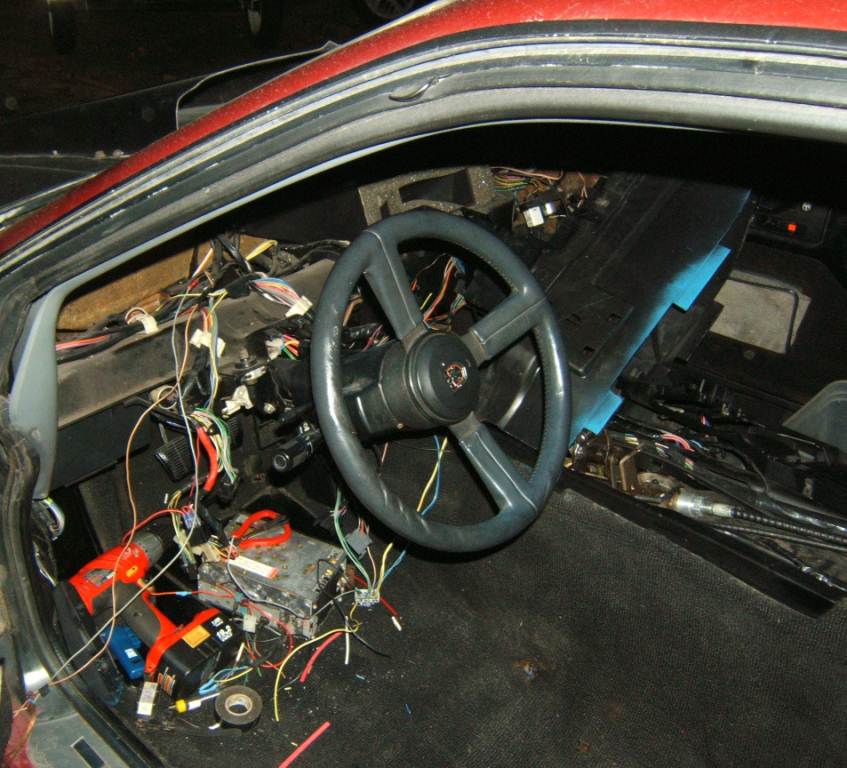
Something that just makes the car seem real, A Dashboard. It actually seems more like a car today than a major project.
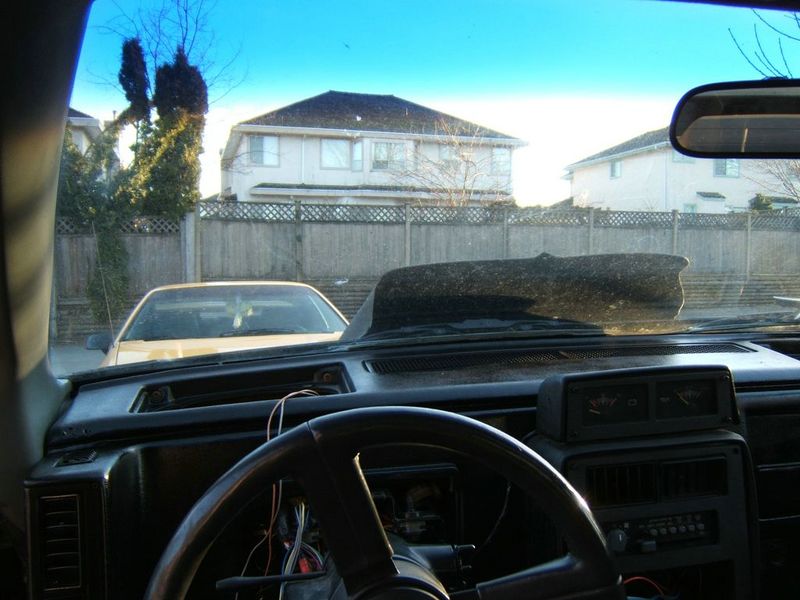
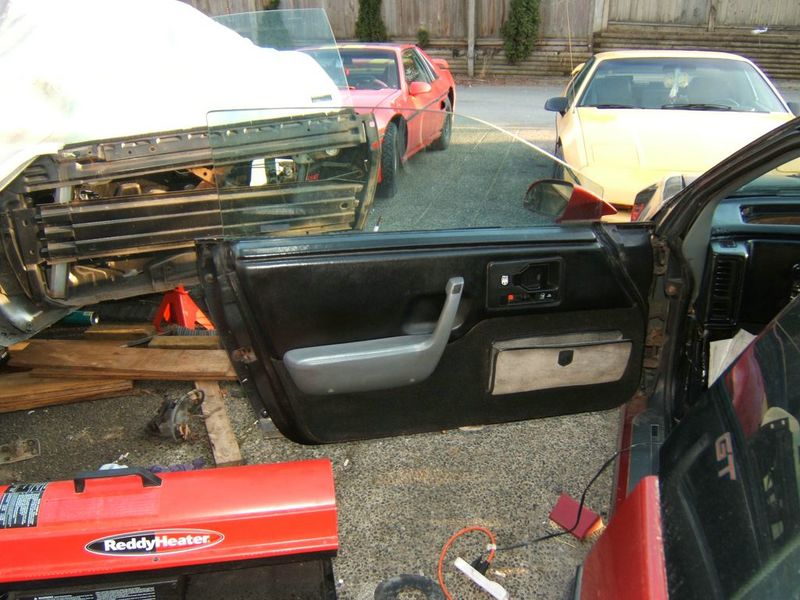
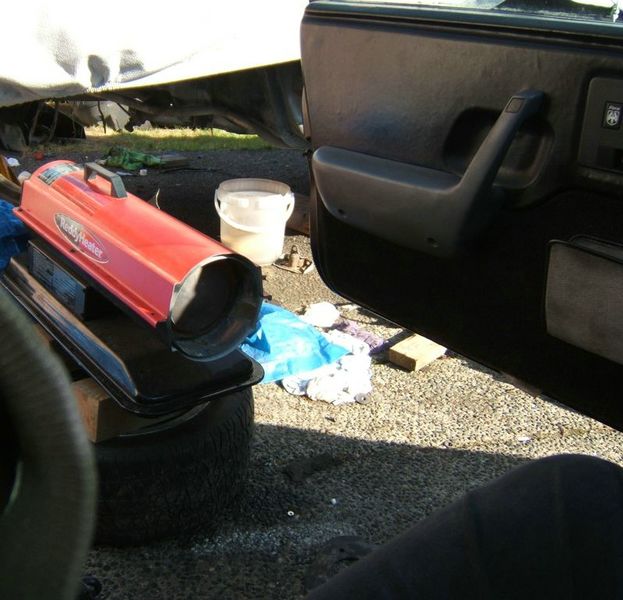
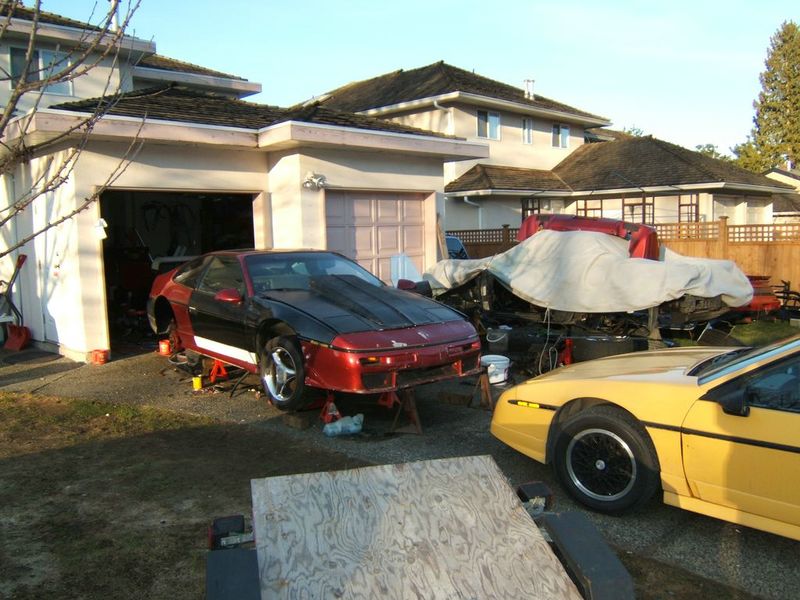
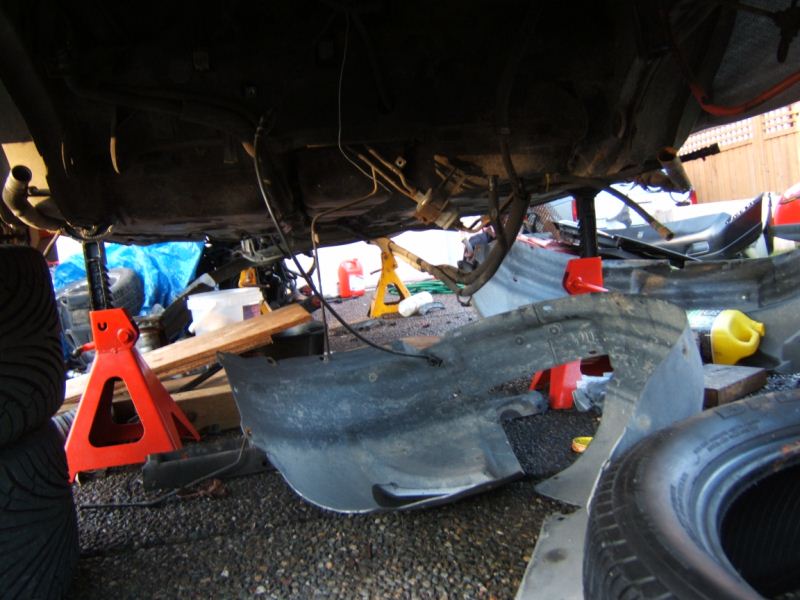
Then I look back at the steering wheel and see, all the wires that still have to be attached. With any luck, all that will be back together tomorrow. View from the Drivers Seat showing tha massive cowl hood. I know the doors are stock design and not some WILD CRAZY Custom door. But the Grey on Black just looks so good to me. I really think GM should have offered this stock. Heat, I gotta have heat. It was -2 Below this morning here, and was +3C (about 38F) most of the day, but the windchill dropped that number a lot. When I had the heater, on the ground pointing at the door, the wind would catch the exhaust and not much of the heat was making it into the car. If I pointed it straight at the side of the car and then moved it close enough, it go the lower ground skirts way too hot. So I put it on a spare Lace Wheel, then put 2 4x4 blocks on top of the wheel. This put the heater right at waist level of me sitting in the car. I kept the passenger door closed and it worked perfect. It kept the cabin a nice steady +25C (75-80F) This is how the car sits as it is now. It has 5 Jack Stands. 2 under the rear cradle, 2 under the front cross member and a 5th for safety under the front impact beam. (no its not under the nose), I put it on a nice sold steal beam. |
||
|
Capt Fiero
88 Fiero GT 5spd V6 Eight Fifty Seven GT V8 5spd. |
||
|
||
|
Capt Fiero
Admin Group
Founding Member Joined: 12 February 2007 Location: Canada Status: Offline Points: 4039 |
Post Options
Quote Reply
Posted: 11 March 2009 at 11:21pm |
|
|
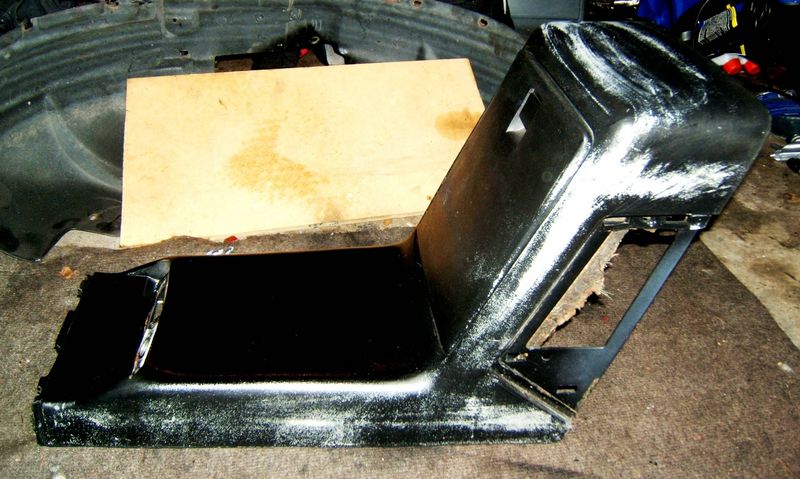
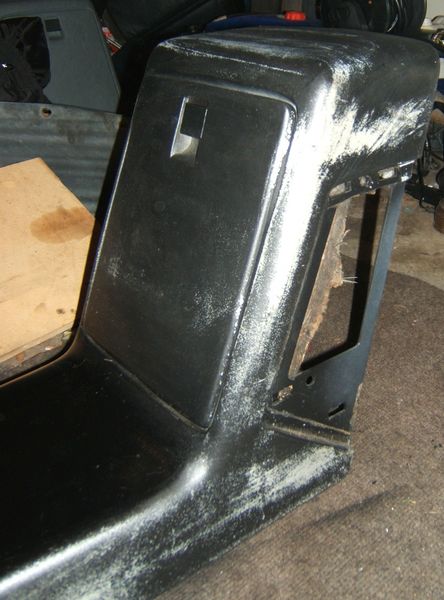
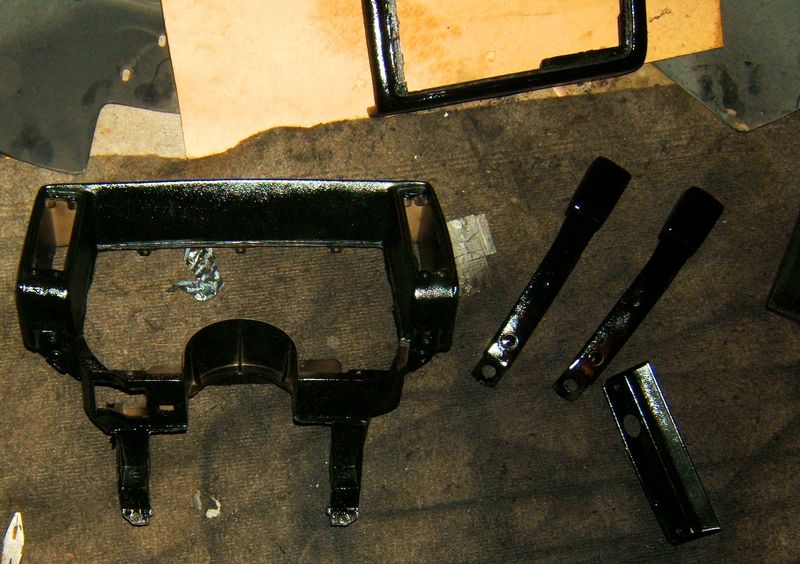
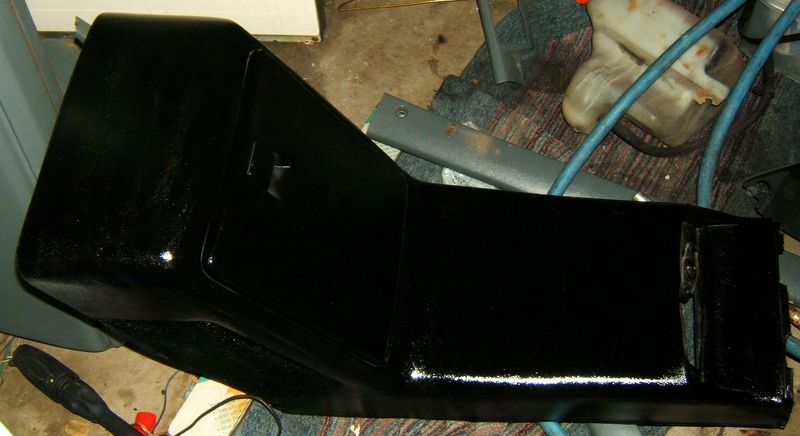
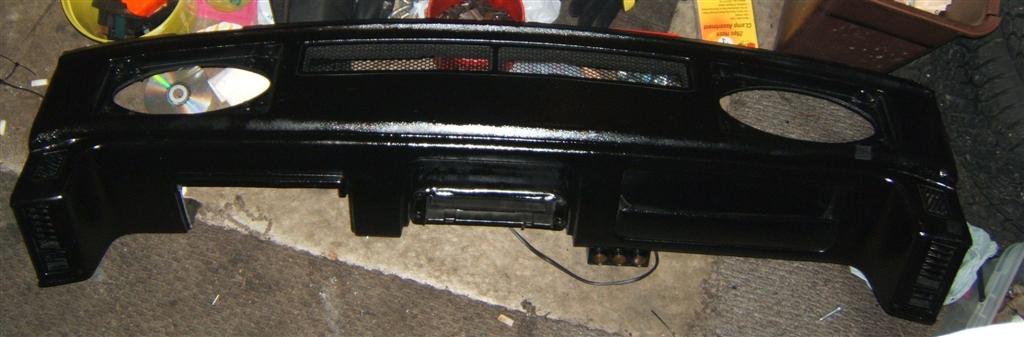
Well I almost didn't post these. The dash came out great, so I didn't think I would have any problems with the rest of the panels. I sprayed with grease and paint remover. Wiped them all down, gave em a light scuff and proceeded to shoot them. So here is after the stripping and cleaning its a Urethane / Plastic safe paint and grease remover.
Everything got cleaned the same way as the center console.
Honestly it looks like I put it in a dip tank, I had to shoot, clean and shoot again, I tried heating the paint, heating the parts, I tried different cleaners and no matter what I did, none of the interior panels would come out with a decent finish. The only part that I got a good finish on was an un-touched stock plastic panel from under the instrument panel.
------------------ |
||
|
Capt Fiero
88 Fiero GT 5spd V6 Eight Fifty Seven GT V8 5spd. |
||
|
||
|
Patrick
Newbie
Joined: 19 April 2008 Location: Vancouver Status: Offline Points: 5 |
Post Options
Quote Reply
Posted: 12 March 2009 at 12:39am |
|
Hey Dave, the solution has already been posted.
|
||
|
||
|
Capt Fiero
Admin Group
Founding Member Joined: 12 February 2007 Location: Canada Status: Offline Points: 4039 |
Post Options
Quote Reply
Posted: 13 March 2009 at 6:32pm |
|
|
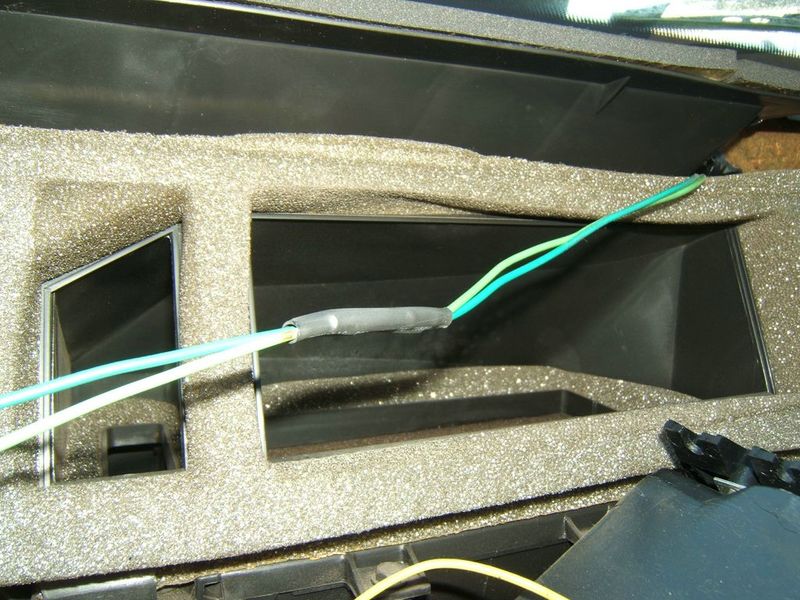
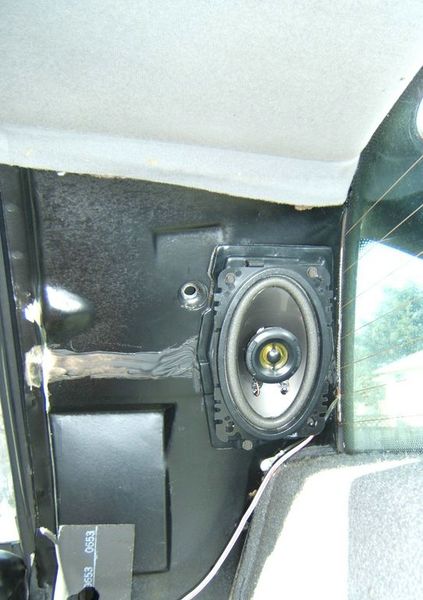
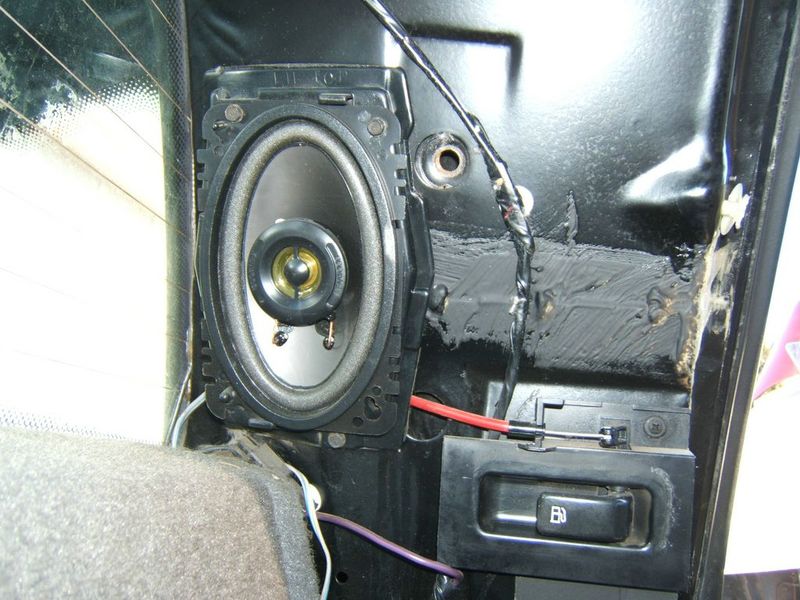
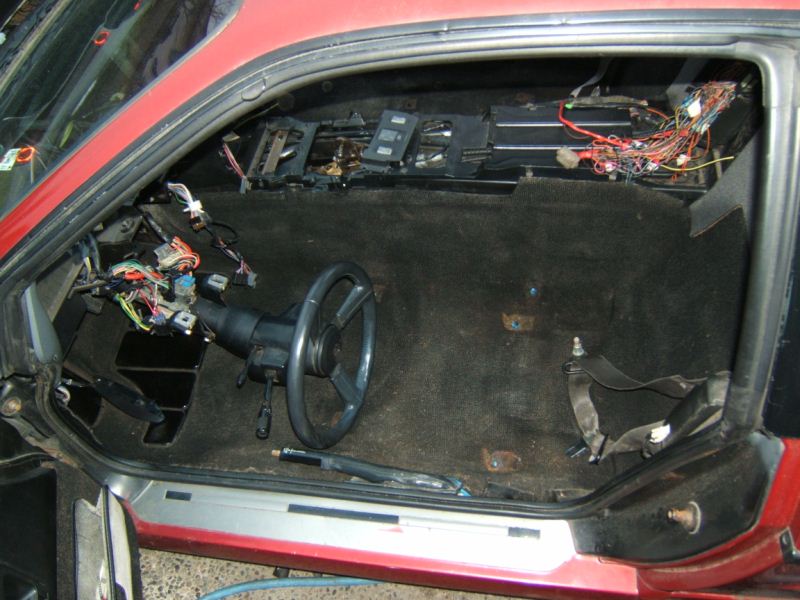
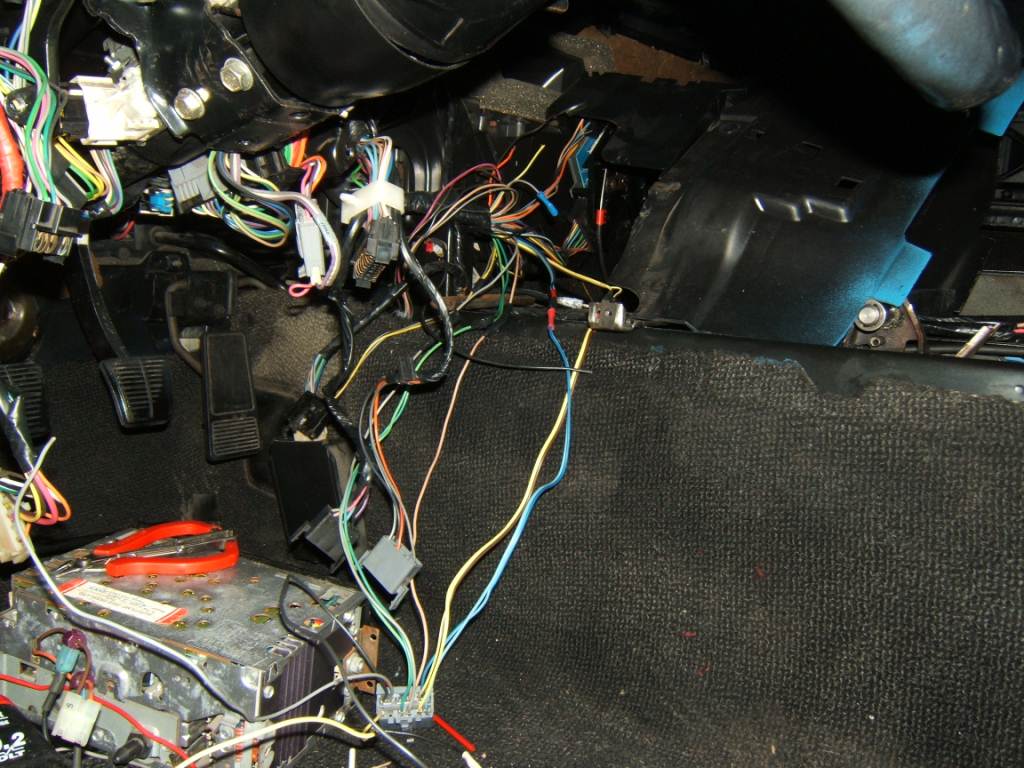
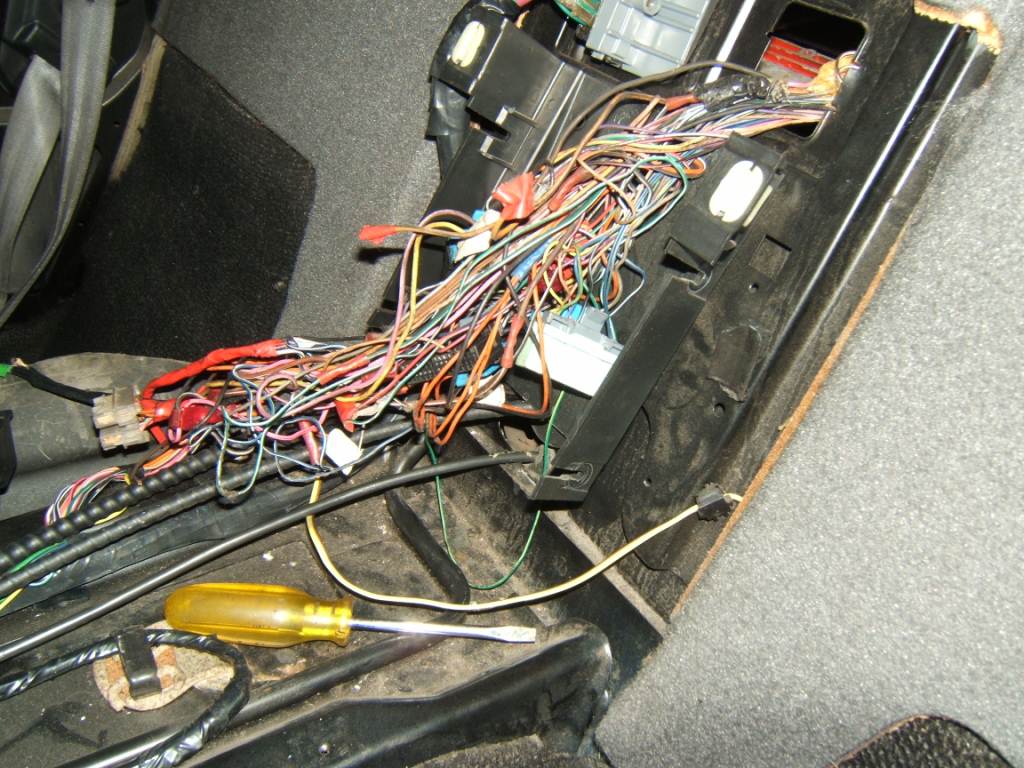
Speaker Wiring WooHoo, we have Interior. I spent the better part of yesterday and today running all the wiring for all the speakers. I was able to remove the entire seat speaker harness from the 85 and trans plant it into the 87 so I was able to even keep all the factory plugs and loom. I spent literally hours soldering and shrink wrapping all the wires that the previous owner had cut.
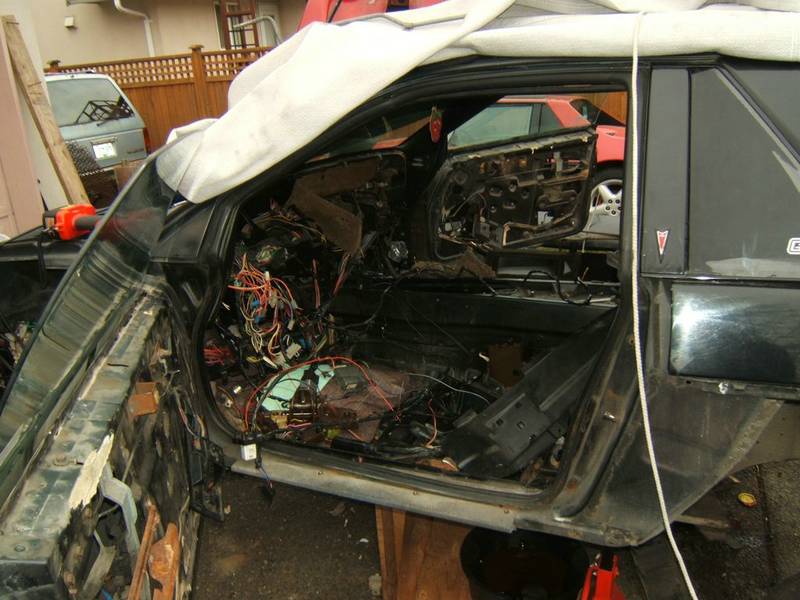
This is the current state of the 85 Interior. there is nothing left in there aside from the main cabin harness which I will be removing Saturday.
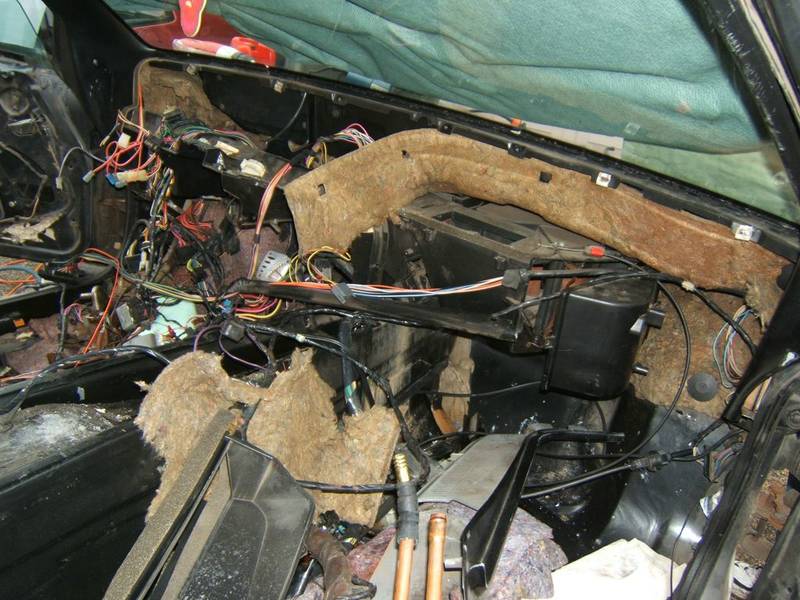
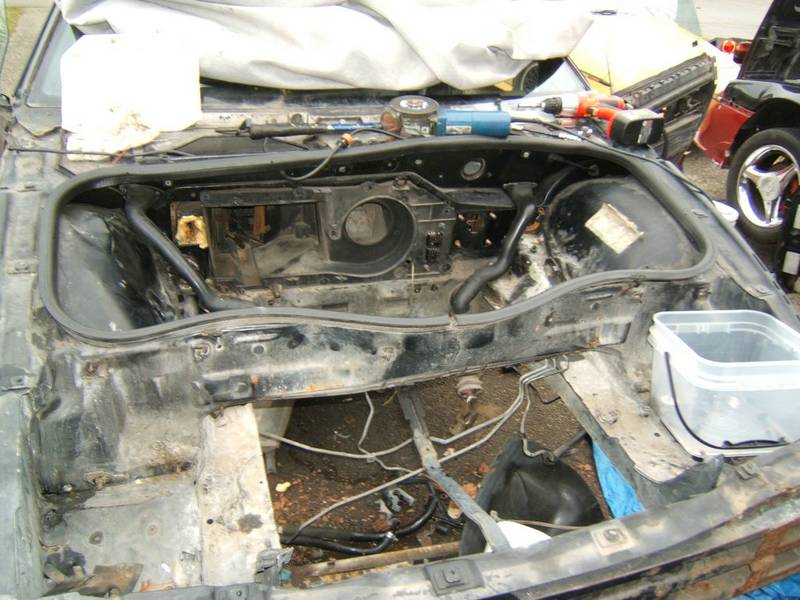
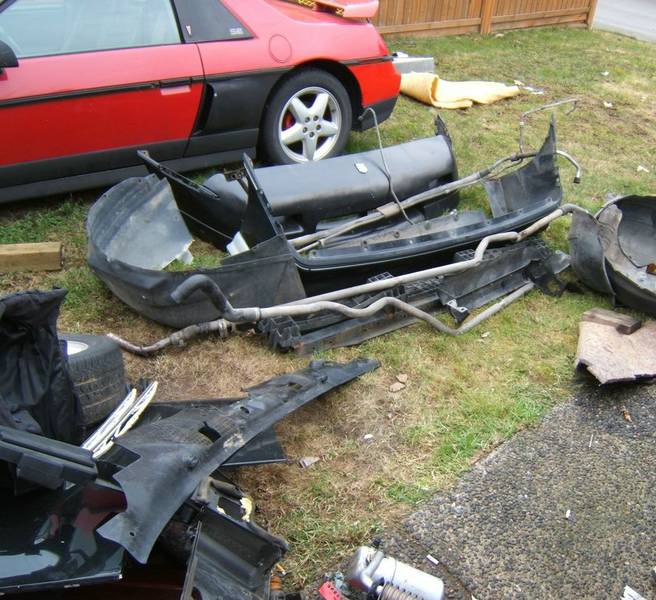
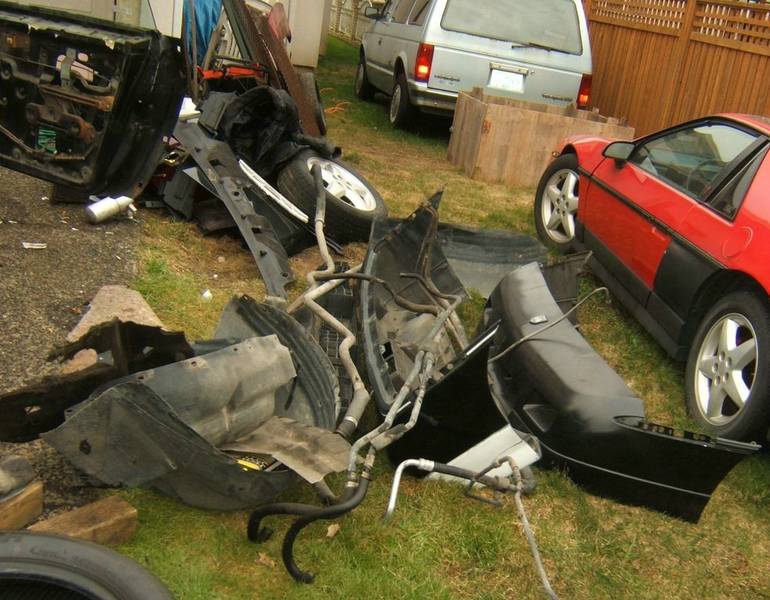
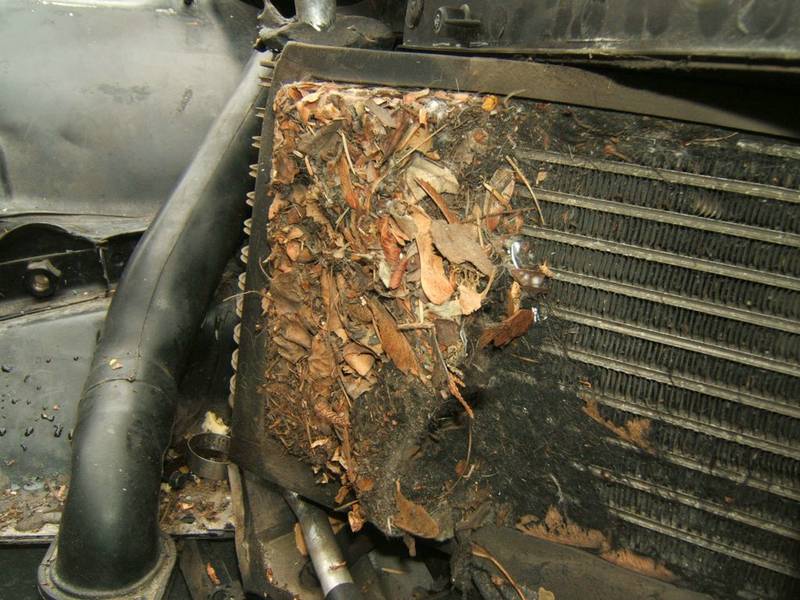
We gutted the entire front compartment on the 85 today as well. Even found a crazy mess in the A/C area. More on that later. Lots of coolant pipes, heater pipes, A/C lines.
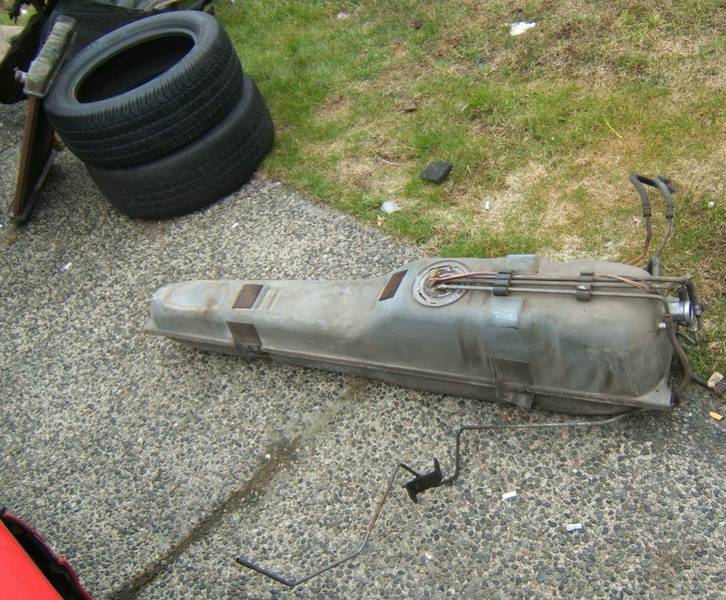
Gas Tank To be honest, I have never ever pulled a Fiero A/C system out. The core was OEM so it has not been out in 25 years. For the record that is NOT the heater core. It was over 2 inches thick in leaves, and what looked like fine hair of some sort.
|
||
|
Capt Fiero
88 Fiero GT 5spd V6 Eight Fifty Seven GT V8 5spd. |
||
|
||
|
Post Reply
|
Page <1 45678 19> |
 Tweet
Tweet
|
| Forum Jump | Forum Permissions You cannot post new topics in this forum You cannot reply to topics in this forum You cannot delete your posts in this forum You cannot edit your posts in this forum You cannot create polls in this forum You cannot vote in polls in this forum |


 Topic Options
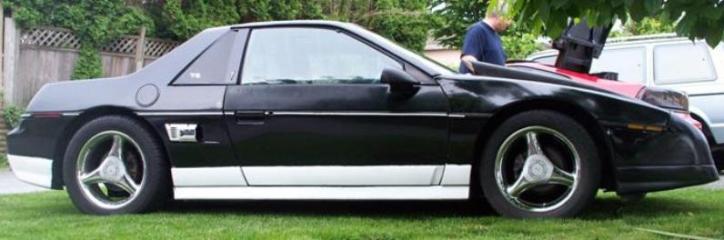


 Capt Fiero wrote: