Capt Fiero's new 87GT Project Car |
Post Reply 
|
Page <1 56789 19> |
| Author | |
Patrick 
Newbie 
Joined: 19 April 2008 Location: Vancouver Status: Offline Points: 5 |
 Post Options Post Options
 Quote Reply Quote Reply
 Posted: 13 March 2009 at 11:29pm Posted: 13 March 2009 at 11:29pm |
|
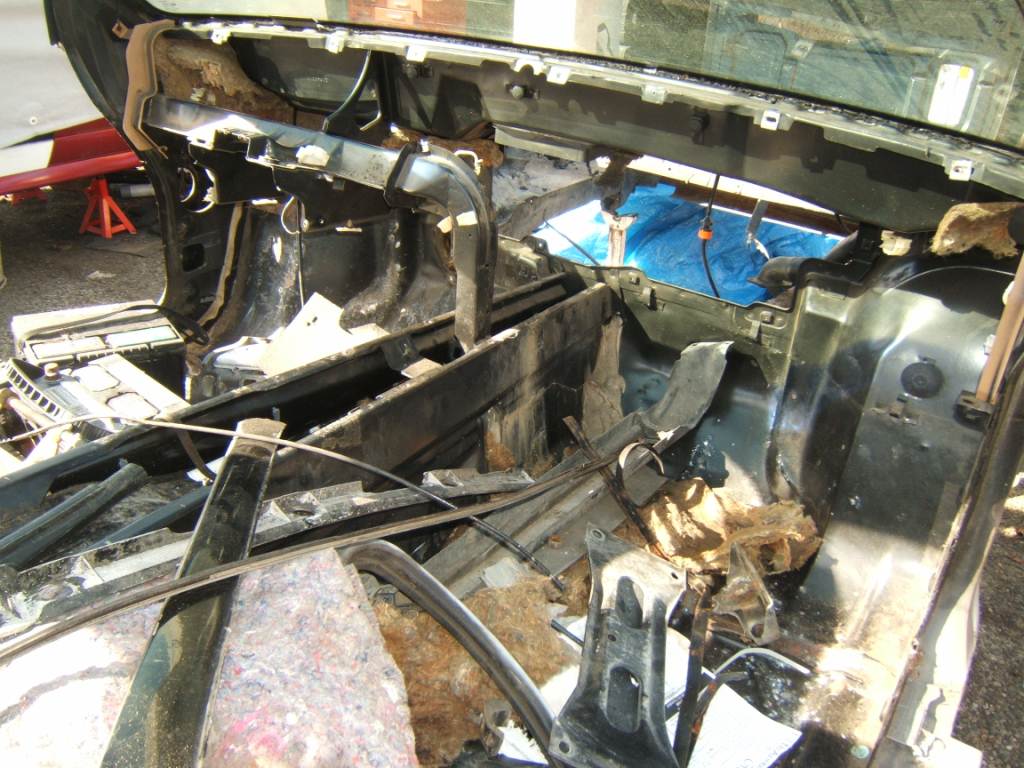
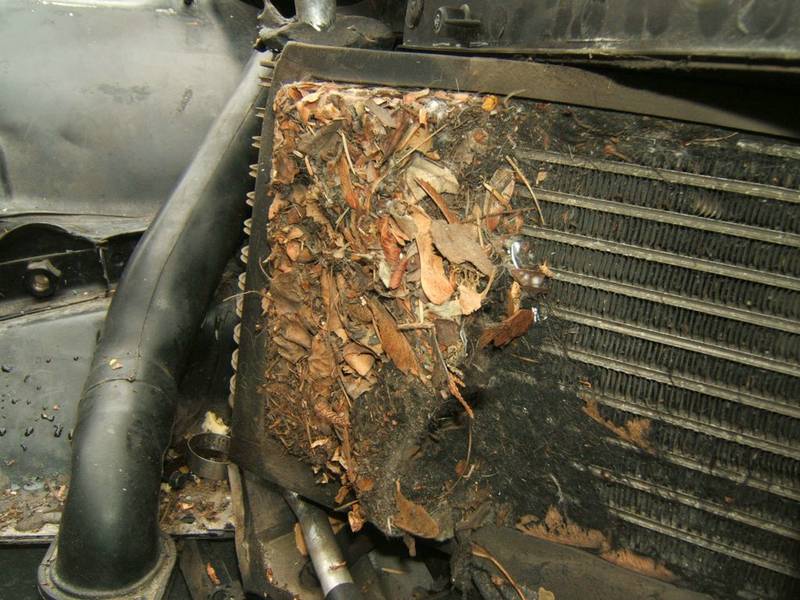
Ewwwwww !!!!! Tell us again how many years you were breathing the air that was being filtered through that dead animal? Might be a good idea for ALL of us to be checking (and cleaning!) that area in our Fieros. I'm certainly going to be having a good look at mine after seeing this!
|
|
 |
|
|
Dr.Fiero
Senior Post God 
Joined: 12 February 2007 Location: Canada Status: Offline Points: 1726 |
Post Options
Quote Reply
Posted: 14 March 2009 at 8:10am |
|
Anybody wonder in the least WHY they have been putting cabin air filters in cars the last decade or so?
Where's that 'barf' emoticon when you need it.  |
|
|
|
|
Capt Fiero
Admin Group

Founding Member Joined: 12 February 2007 Location: Canada Status: Offline Points: 4039 |
Post Options
Quote Reply
Posted: 14 March 2009 at 10:56am |
|
Well that part is only in Fiero's with A/C and I am guessing the only time air would move through it is when you had the A/C on MAX which is suppose to re-circulate cabin air through the A/C system. Getting to it and cleaning it is not an easy task. As you have to remove the A/C lines to get the panel off. Which would mean draining your A/C system if it works. It is defiantly something I will be pulling apart on my 88Gt and cleaning before I get the A/C line repaired though. (blew an A/C line last summer) |
|
|
Capt Fiero
88 Fiero GT 5spd V6 Eight Fifty Seven GT V8 5spd. |
|
|
|
|
Capt Fiero
Admin Group
Founding Member Joined: 12 February 2007 Location: Canada Status: Offline Points: 4039 |
Post Options
Quote Reply
Posted: 15 March 2009 at 12:17am |
|
Yep I may pull apart a small section on my 87GT to find out if there is any buildup in there.
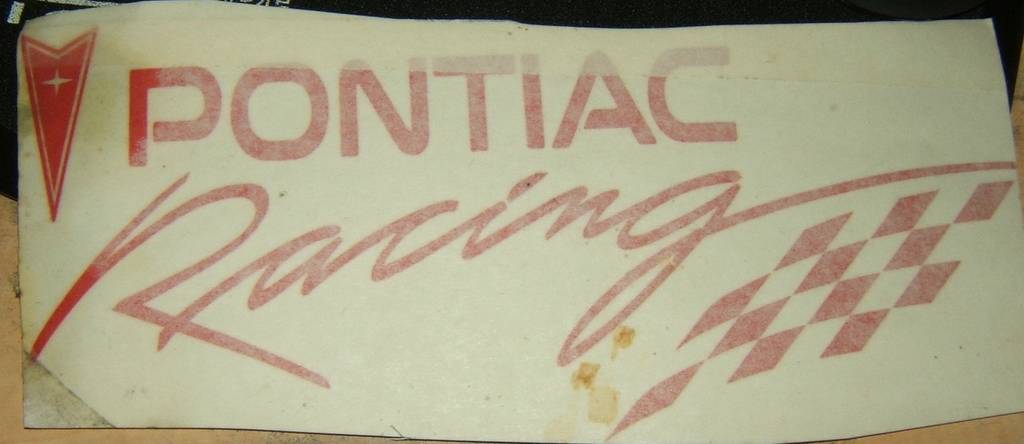
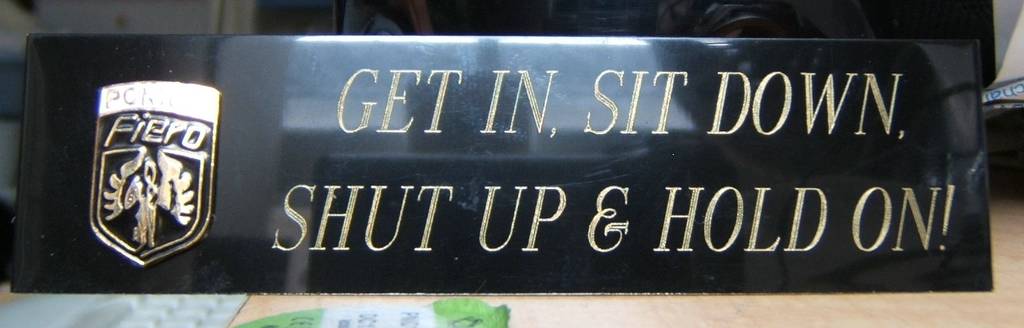
It was near freezing cold and raining, they are forecasting 4-8 cms of snow over night, So we took the day off and went shopping. I picked up a really nice degreasing gun. Think paint gun but for solvent. Hooks to my air compressor and has a 2nd feed like that it pulls solvent through to clean parts. Sorry I did not think about getting pics of that until just now. I'll try to snap some pics when I am down in the garage tomorrow. Well here are the little things that I have picked up over the years and never put on a car as they just didn't seem to fit the style of my car. First is a sick on chrome V8 this will go either on the Deck lid or on the Trunk Skin next to the GT emblem on the rear skin.
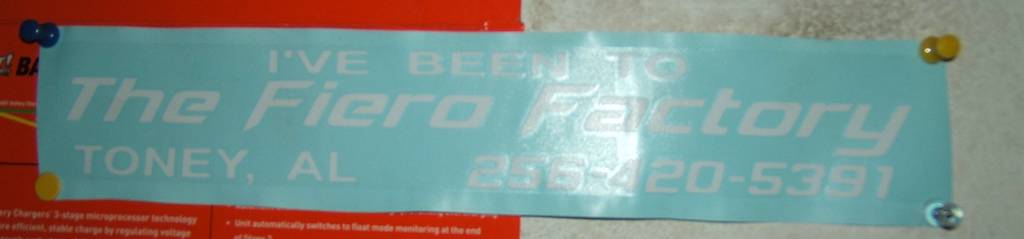
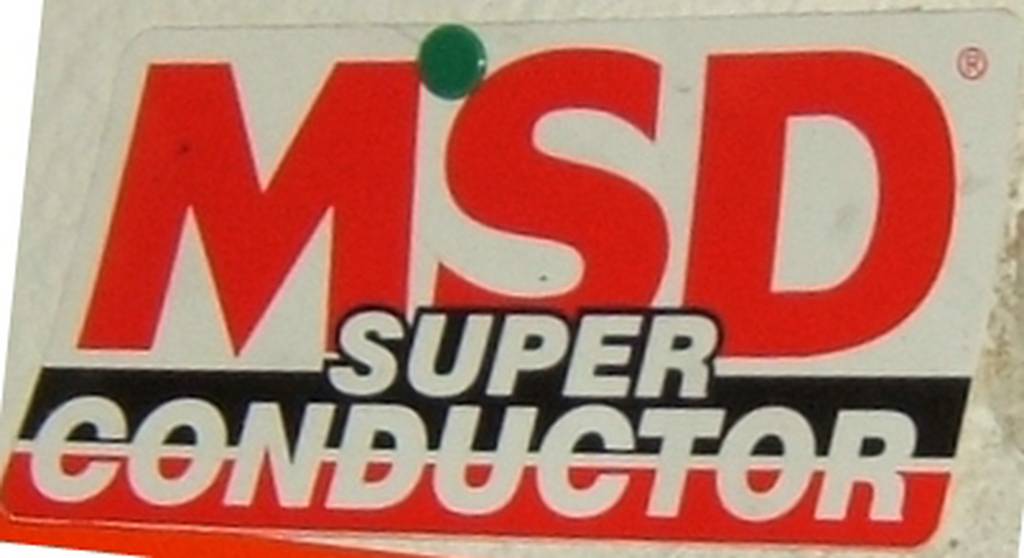
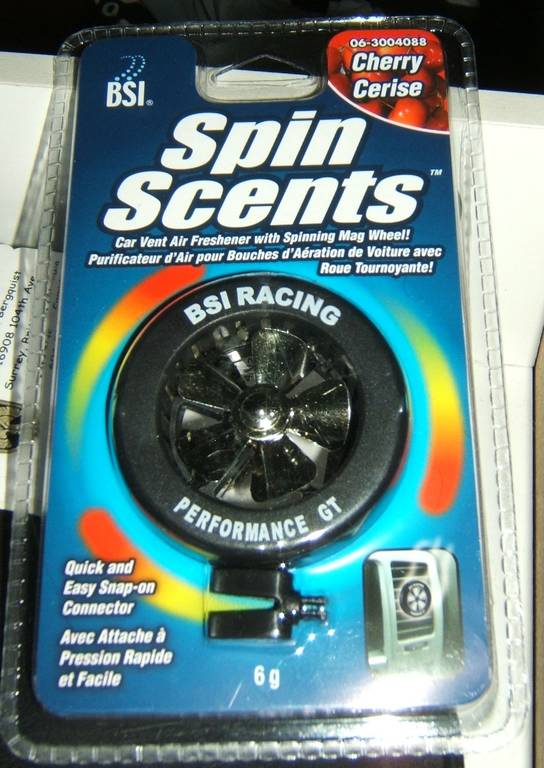
I bought this years ago and never installed it on my V8 as it just didn't suit the "Rat Rod" style of the car. With the semi Bling Bling of the car. It will be put on it. Lisa bought this for me for one of out anniversary's, it really does fit my driving style. This is the Replace the Fiero Factory decal that has been on my 85 for over 10 years. Its not the exact same one, but Ed has helped with so many questions, I almost feel like I have been there. MSD Superconductor wires. I have used them on every build on every engine and to this day, never had a failure. When I damaged one , (wire caught lowering the cradle) I was able to go to the parts store, buy a new end for 5 bucks. re-crimp it on and I was good to go. One of our Club cards will go on the dash over the Vin Plate. Not that it really matters, but I'd just prefer to not have strangers able to see the vin on my car. However I do want, Fiero enthusiasts to see the card and join the local club. Another thing Lisa bought me. I normally buy the little Tree shaped ones that hang from my mirror, but this was kinda car guy ish, so it'll end up in the car. I need to find a current club decal and post up what that looks like. I also need to find out whoever is selling the PFF Window decals as I want to pick up one of those. ------------------ |
|
|
Capt Fiero
88 Fiero GT 5spd V6 Eight Fifty Seven GT V8 5spd. |
|
|
|
|
Capt Fiero
Admin Group
Founding Member Joined: 12 February 2007 Location: Canada Status: Offline Points: 4039 |
Post Options
Quote Reply
Posted: 17 March 2009 at 6:42pm |
|
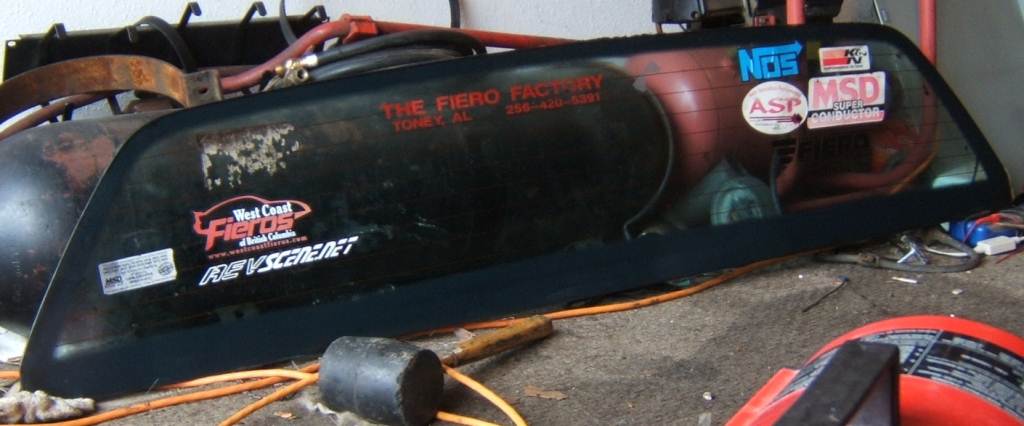
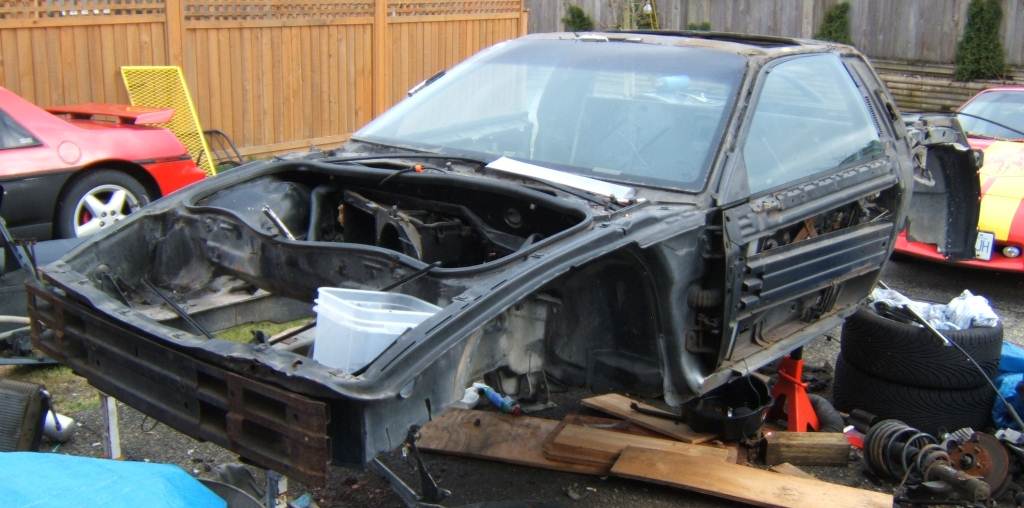
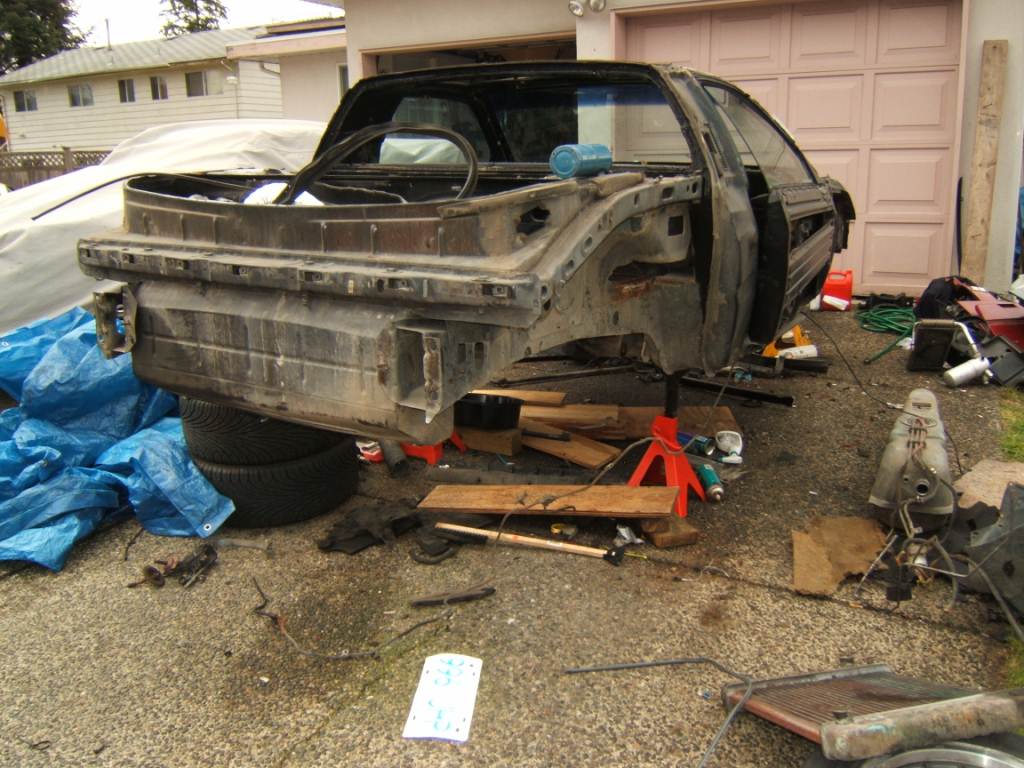
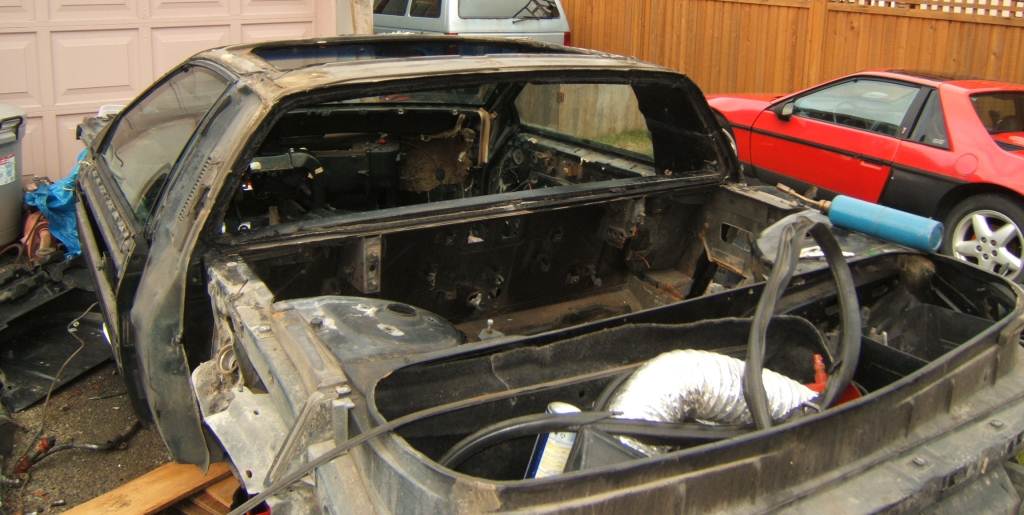
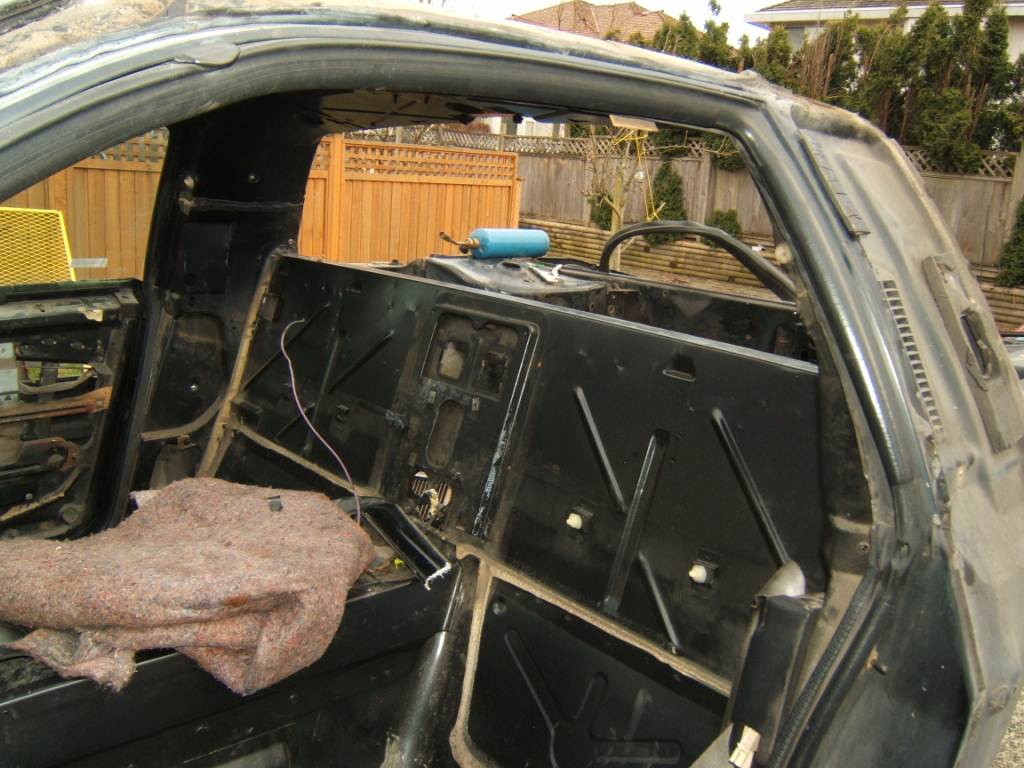
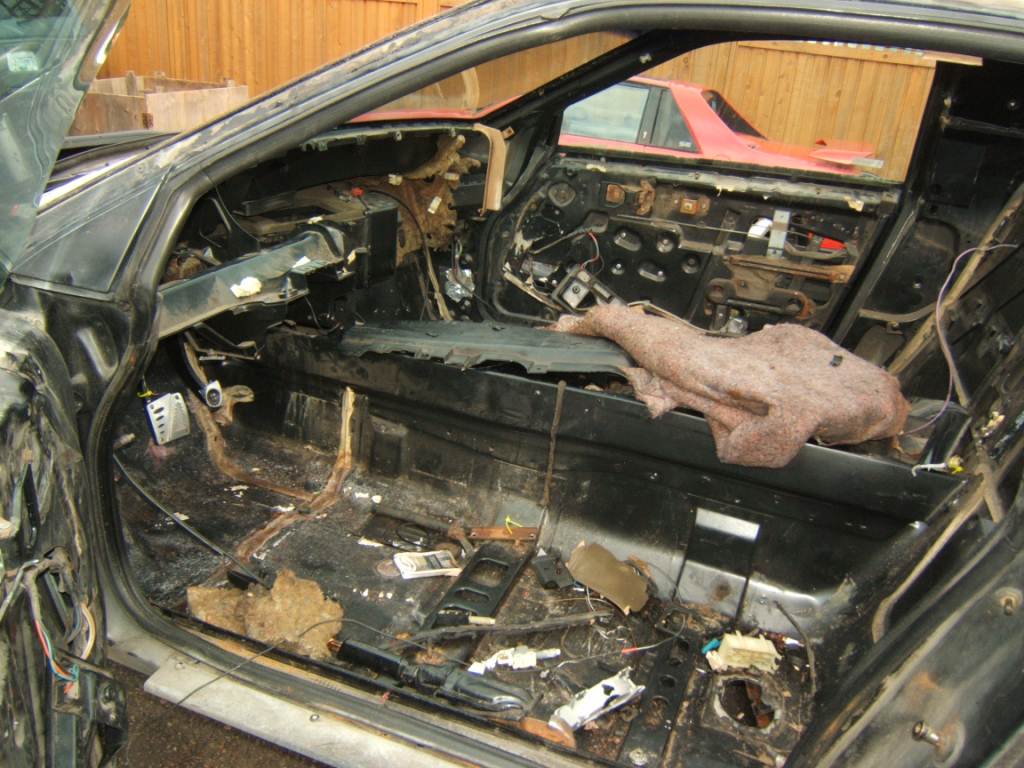
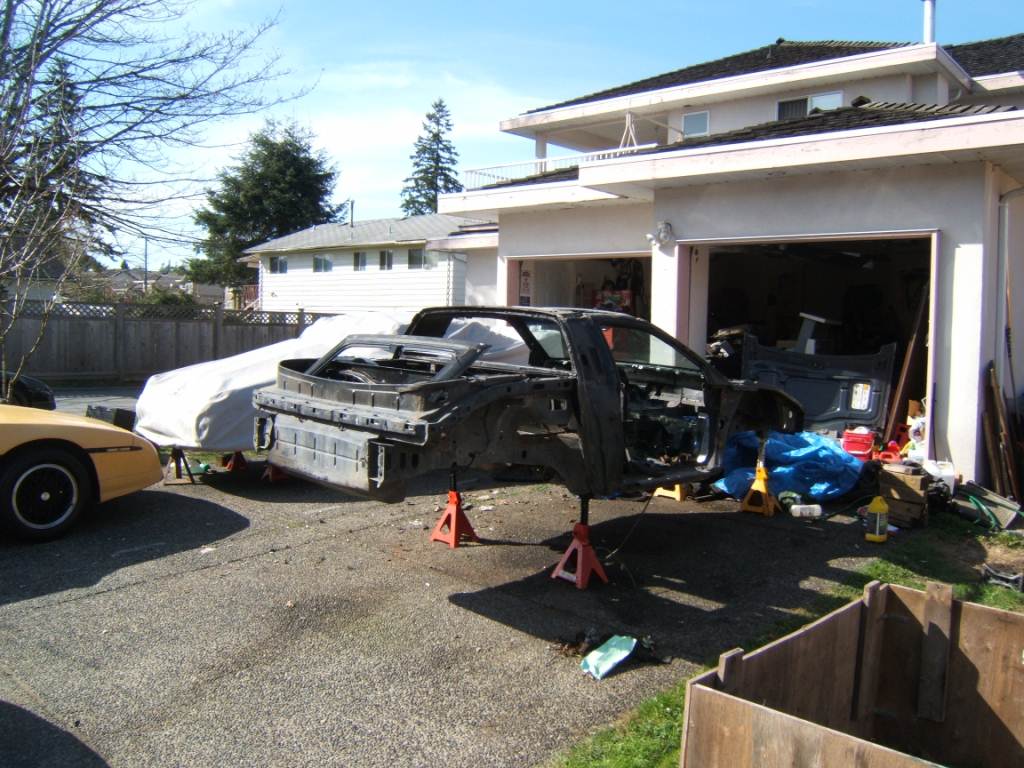
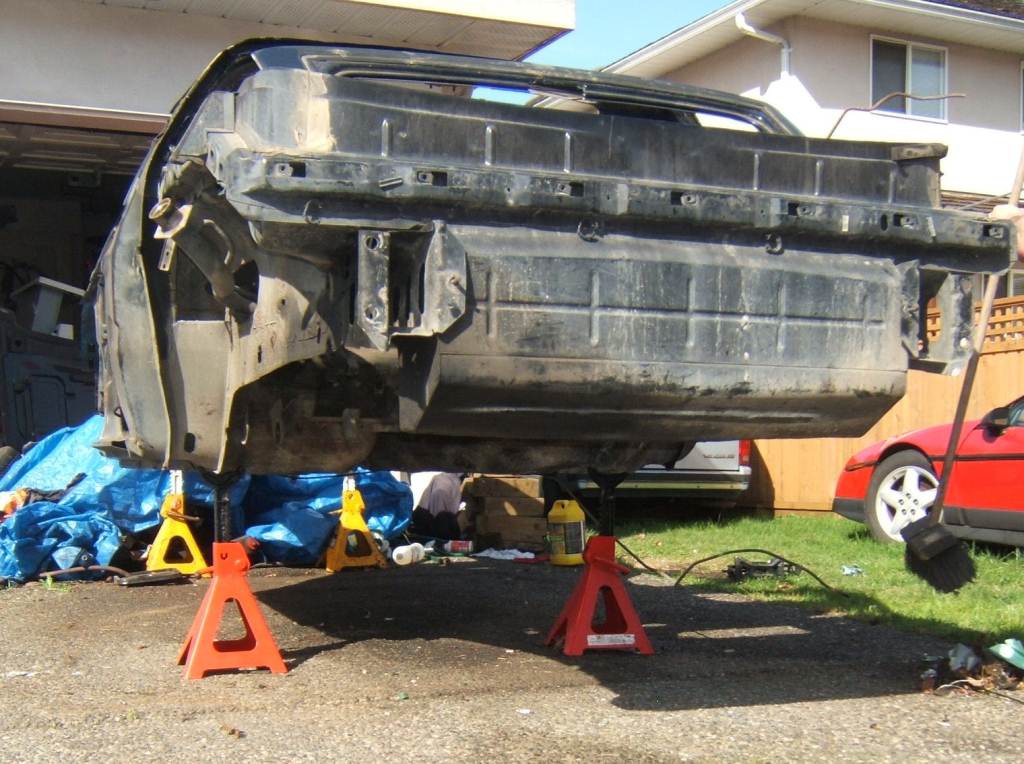
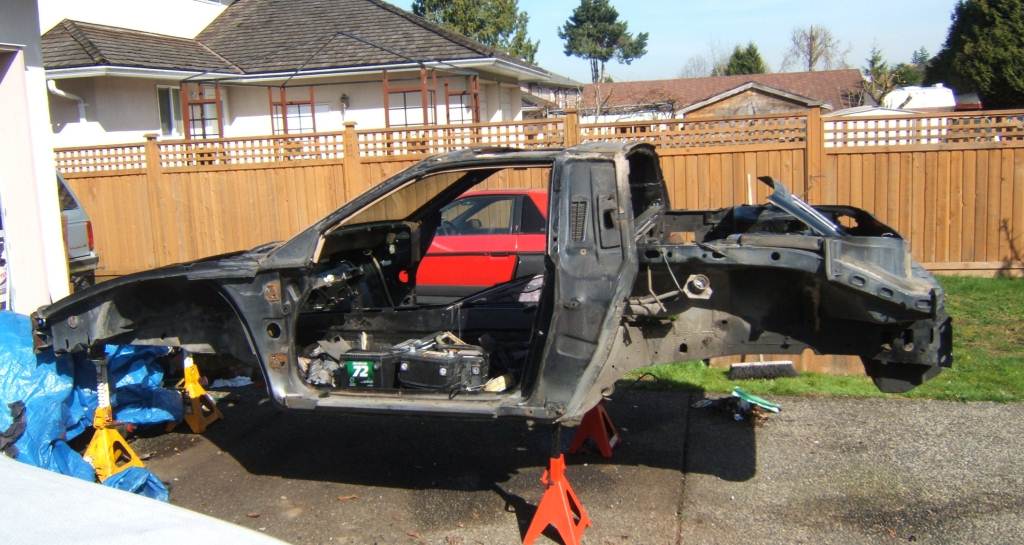
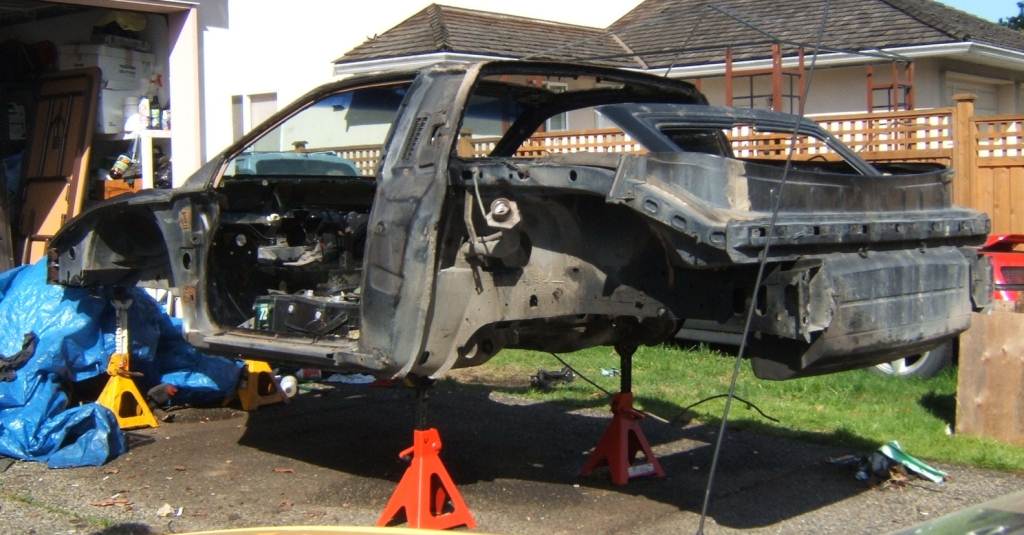
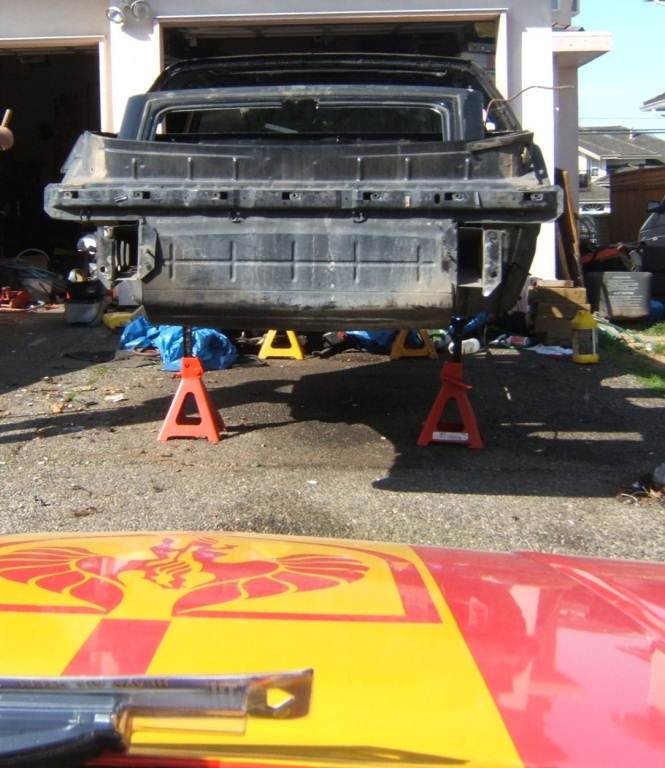
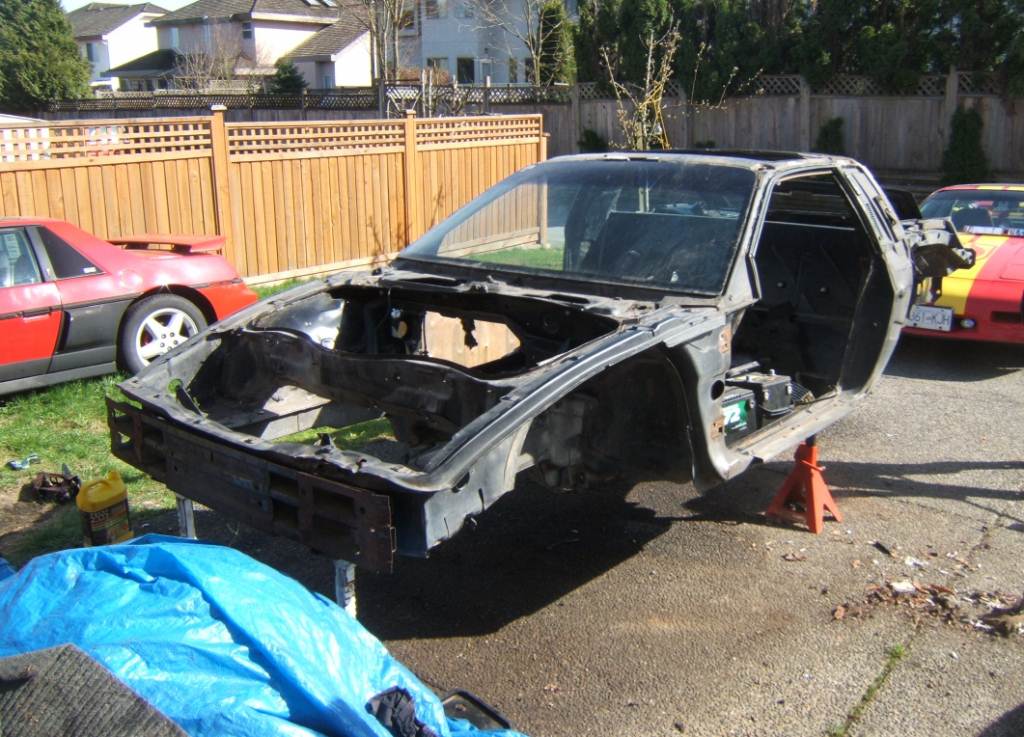
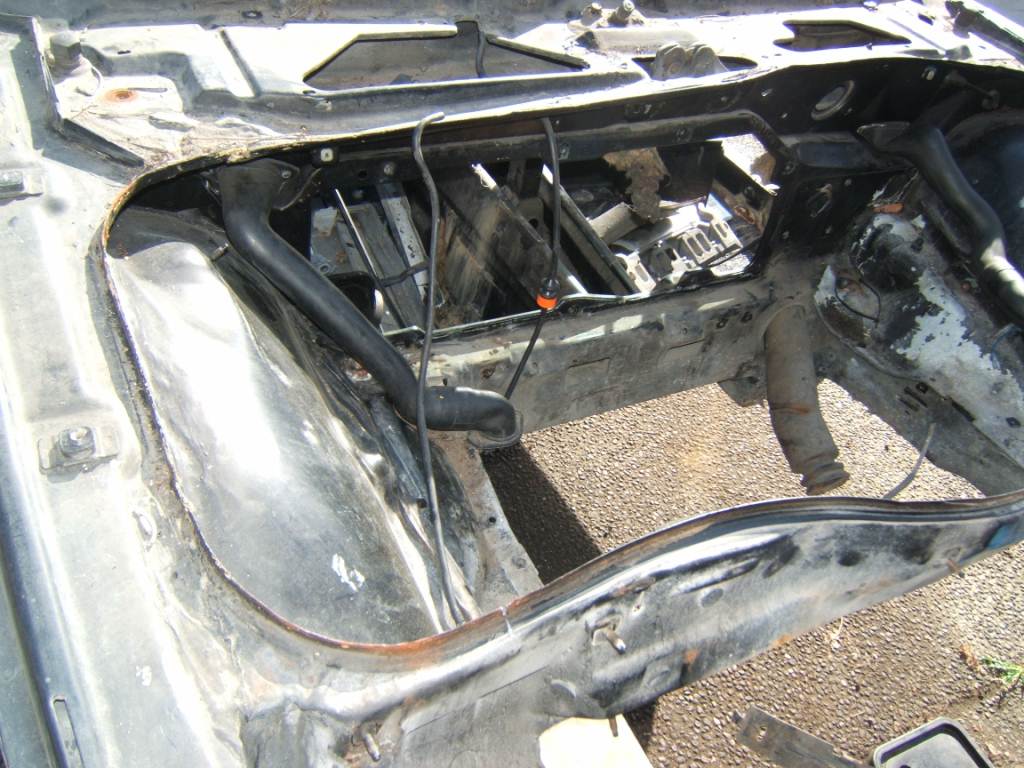
Well in between running bags and tools out to the 88 and loading the trailer and even taking the time to do some quick anti rust touch up paint to the trailer a friend of mine helped to strip the 85 today. There are still a few more things to come off. But the one big one that I really really really wanted to save. (I plan to have it framed and hang it in my garage) The rear window. We were able to get it out in one piece. Between using the fuel tank popper cable, and the Hood Popper cable and lots of work and using a torch to heat the glue, and several gentle pulls with a pry bar. It all finally came out. The doors still need to come off, and the windshield has been offered up to any in the local group for $25. Doors complete with power windows and glass $10 each. The nominal fee was just to keep the "Freebie" hunter's from grabbing it just because its free and not because they really need it. Well here are the pics. It'll be the last pics of the projects until we get back from Vacation in 2 or 3 weeks. Window Out
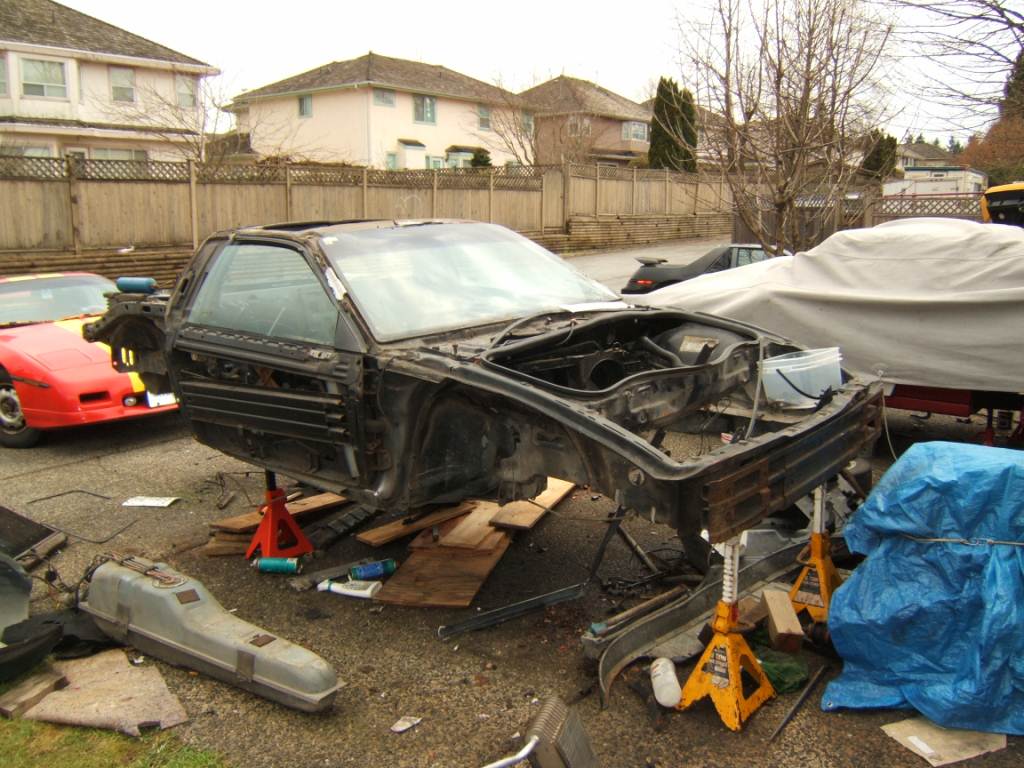
Hmm not much left
Really not much left
The entire cabin wiring harness and hell the entire everything harness, was removed. The only wire still left in the car is the power lead for the AMP and I'll be taking that too. |
|
|
Capt Fiero
88 Fiero GT 5spd V6 Eight Fifty Seven GT V8 5spd. |
|
|
|
|
exoticse
Member 
Joined: 21 June 2007 Status: Offline Points: 74 |
Post Options
Quote Reply
Posted: 17 March 2009 at 9:15pm |
|
That looks like an excellent candidate for a choptop ! Car-looooooooooooooo ! hehehe |
|
|
|
|
Capt Fiero
Admin Group
Founding Member Joined: 12 February 2007 Location: Canada Status: Offline Points: 4039 |
Post Options
Quote Reply
Posted: 08 April 2009 at 12:33pm |
|
I am going to do a separate thread later, but they took the last of my 85GT away today. I vowed to not let any Usable part remain on the car. The windshield was pulled out yesterday so it did not go either. Its an end of an Era.
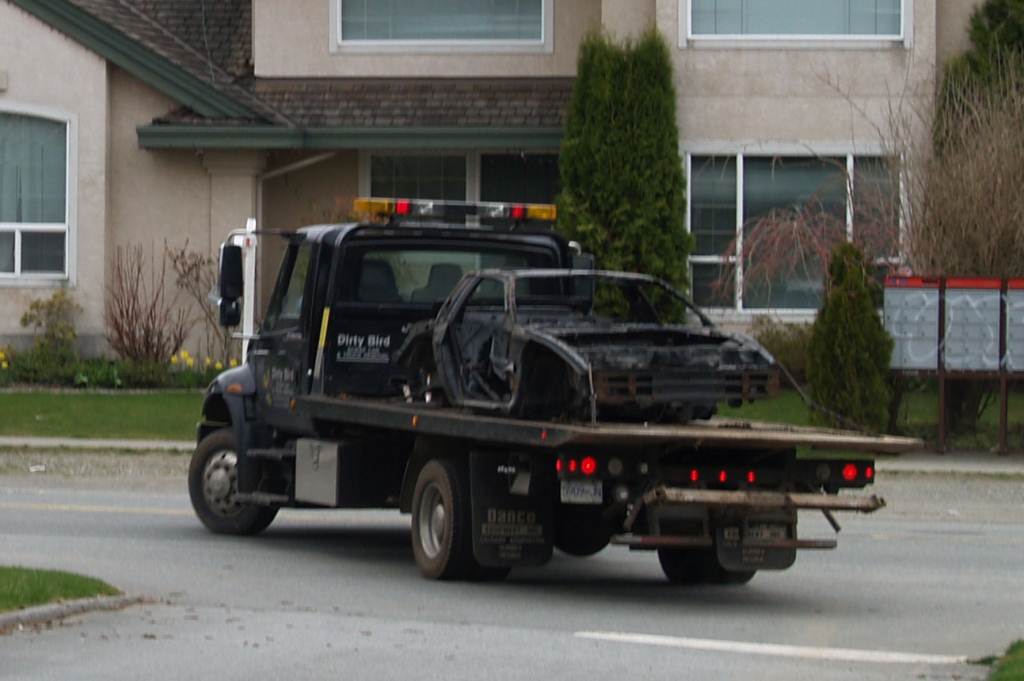
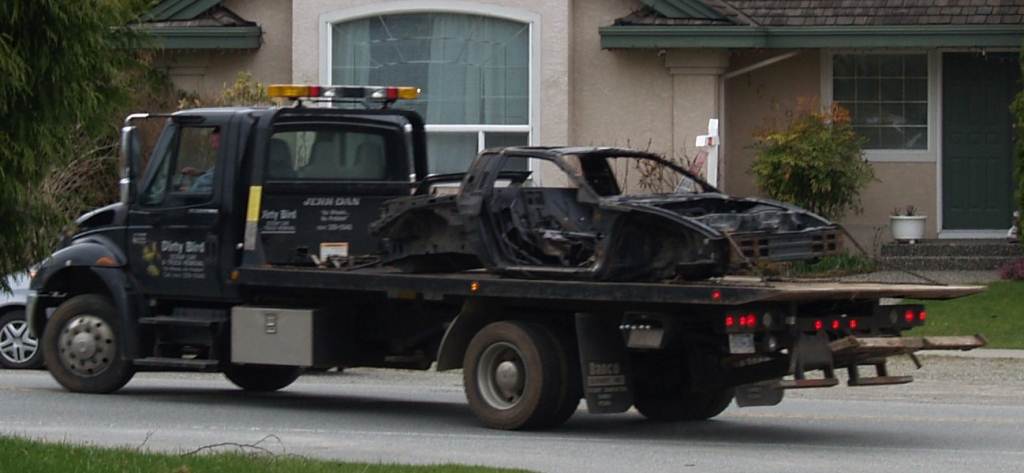
------------------ 85GT Soon to be 87GT,93 Eldorado 4.9, 5spd Dual O2 Custom Chip, Custom Exhaust. MSD Everything Capt Fiero --- My Over View Cadero Pics Yellow 88GT 5spd Full Poly Suspension, Lowered 1/2" in front, Corner Carver. 
|
|
|
Capt Fiero
88 Fiero GT 5spd V6 Eight Fifty Seven GT V8 5spd. |
|
|
|
|
DaCoupe
Member
Joined: 17 March 2007 Location: Canada Status: Offline Points: 37 |
Post Options
Quote Reply
Posted: 09 April 2009 at 3:08pm |
|
Wow Dave I am very impressed that you are finally moving on man! The New project is looking pretty good! Cant wait to see it on the ground rolling down the street in one color!!!!
One problem with your battery cut off..... It won't pass tech a mission if you do decide to run it. I found out the hard way as it has to be a all metal one as plastic can brake :(
|
|
|
Built not Bought!!!!
|
|
|
|
|
Capt Fiero
Admin Group
Founding Member Joined: 12 February 2007 Location: Canada Status: Offline Points: 4039 |
Post Options
Quote Reply
Posted: 09 April 2009 at 5:23pm |
|
Ya it kinda put a knot in my stomach and a tear to my eye to see it leave, it all happened so quick I didn't have time to feel it. The guy got here, and in less than 10mins backed the flat deck up to the car, winched it onto the deck and left.
Thanks for the tip on the cut off. I'll go ahead and wire it up with this one for now, as I really like the fact that it can be turned off and then the key removed for a little added security. I'll probably put a 12 or 16 gauge jumper wire on there so when off it will still feed enough to keep the ECM happy, but not enough to fire the starter. Maybe an in line fuse instead of a wire, much easier to replace a burnt fuse than a burnt wire if I forgot myself and try to start it. I don't think I will ever be going fast enough to warrant the kill switch, but if I do, I can just replace it with a metal one since it will already be wired up. Question though, will they care that I have the plastic one on there if I don't go fast enough to even need it? If they are going to bitch, I'll just make a plastic box to cover it so no one can see it. Hmm that might be a good idea to do regardless, to hide the switch from a car thief. If they don't know to look for a cut off switch and its not blatantly obvious, they'll probably never find it and just give up when they can't start it. Thanks Stu for the good ideas!! |
|
|
Capt Fiero
88 Fiero GT 5spd V6 Eight Fifty Seven GT V8 5spd. |
|
|
|
|
Capt Fiero
Admin Group
Founding Member Joined: 12 February 2007 Location: Canada Status: Offline Points: 4039 |
Post Options
Quote Reply
Posted: 13 April 2009 at 8:40pm |
|
Well I wasn't sure if I should start another thread for this, or just make a blurb in my build thread. So you guessed it, here it is, I AM IN LOVE WITH POP RIVETS. I didn't do a darn thing to my car as I have been spending all my time sorting and moving parts around between the storage and here, and in general getting things organized before I make the final stretch long haul to get the 4.9 done. In all my time playing with cars I never once owned a pop rivet gun and don't think I ever even installed a pop rivet. Well my father sent me up with a pop rivet gun and 1500 pop rivets as well as a nut-sert gun. I haven't played wit the nut-sert Yet, but I found you can pop rivet first loves two Vin tags together, then drill a tiny hole in the Vin tag, then drill a tiny hole in your tool box and rivet the Vin tags to your tool box. I was so happy with the result, I started thinking of what else I could fix. Well for the last 6 months my big garage heater would make a kinda metal vibration noise. I tried tightening up the screws and nothing would get tight enough, so I had just started putting a torque wrench, steel pipe, brick wheel chalk anything heavy on top of the heater to keep it from vibrating and driving me nuts. I damn near ran to the heater with the rivet gun eager to try my new toy out, and after some experimenting to get the right size and length rivet, I popped in 2 rivets where the front screws would normally go and SILENCE, only noise you hear is the whoosh from the burn and fan forcing the heated air out like a jet. The only problem I had was after the first one, I squeezed it till it went POP and then I spent a good 15 mins trying to find out how to get the left over rivet shaft out. I tried pulling, twisting, opening the jaw more, tried pushing on what might have been a release and no mater what I did that damn thing would not pull back out. Then in frustration I pushed on it and it went in, so I grabbed a second rivet and used the 2nd rivet to push the first rivet through and it merely popped out the other end of the gun, not sure if that is the way you are suppose to do it or not, but it worked for me. I am going to be laying in bed tonight, thinking of all the things I can rivet together tomorrow. All the stupid things that for the last 20 years I was buying small nuts and bolts for when I could have just been Happily riveting along for 1/10 the cost. Well good night all, I am off to watch House and then catch some Zee's. |
|
|
Capt Fiero
88 Fiero GT 5spd V6 Eight Fifty Seven GT V8 5spd. |
|
|
|
|
garrym
Member

Joined: 09 December 2007 Location: Canada Status: Offline Points: 53 |
Post Options
Quote Reply
Posted: 13 April 2009 at 9:08pm |
|
YAY! i love pop rivets :) although after you pop it its supposed to cut the left over off after. one process if i remember from my d-tech days in highschool :) think of all the clips you can pop rivit on instead of those dumb push in plastic tabs :)
|
|
|
|
|
Capt Fiero
Admin Group
Founding Member Joined: 12 February 2007 Location: Canada Status: Offline Points: 4039 |
Post Options
Quote Reply
Posted: 14 April 2009 at 10:29am |
|
It did cut the excess off, just the excess that it cut off, stayed in the gun and won't Pull out, it had to be pushed through.
|
|
|
Capt Fiero
88 Fiero GT 5spd V6 Eight Fifty Seven GT V8 5spd. |
|
|
|
|
Capt Fiero
Admin Group
Founding Member Joined: 12 February 2007 Location: Canada Status: Offline Points: 4039 |
Post Options
Quote Reply
Posted: 23 April 2009 at 10:54am |
|
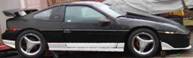
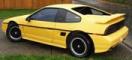
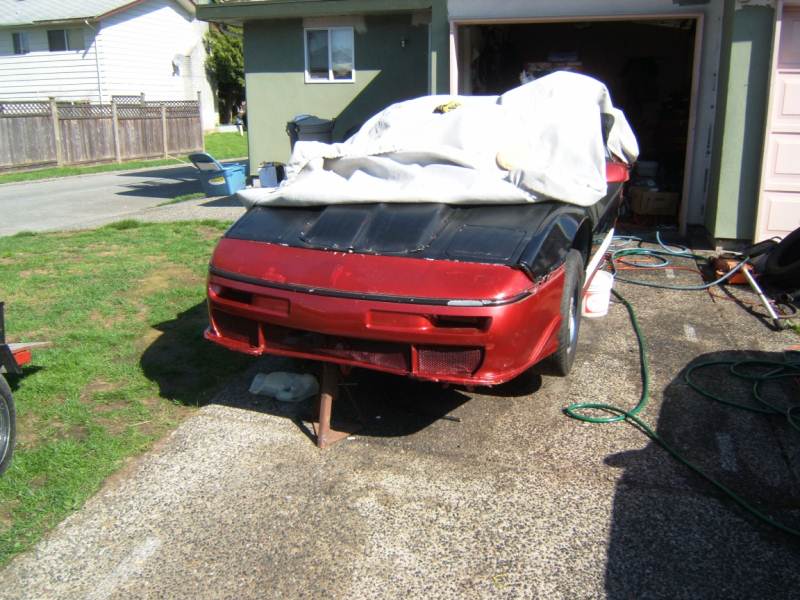
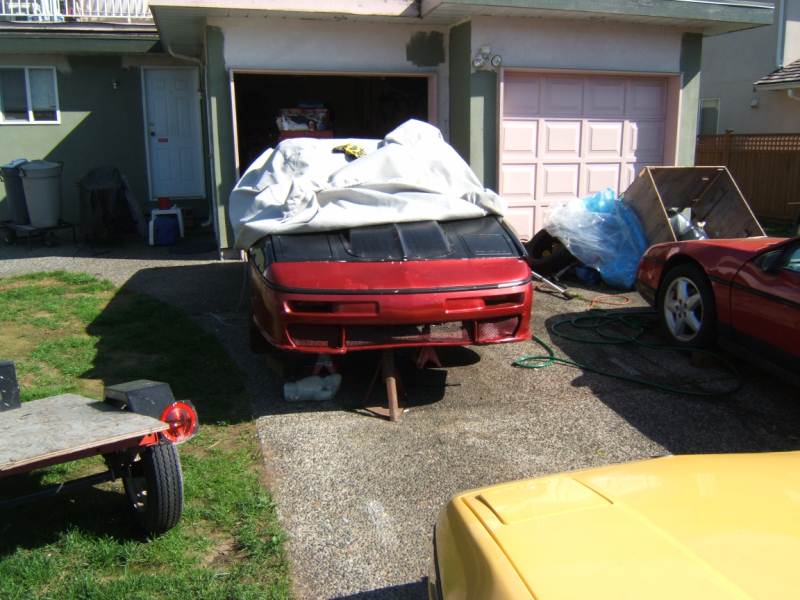
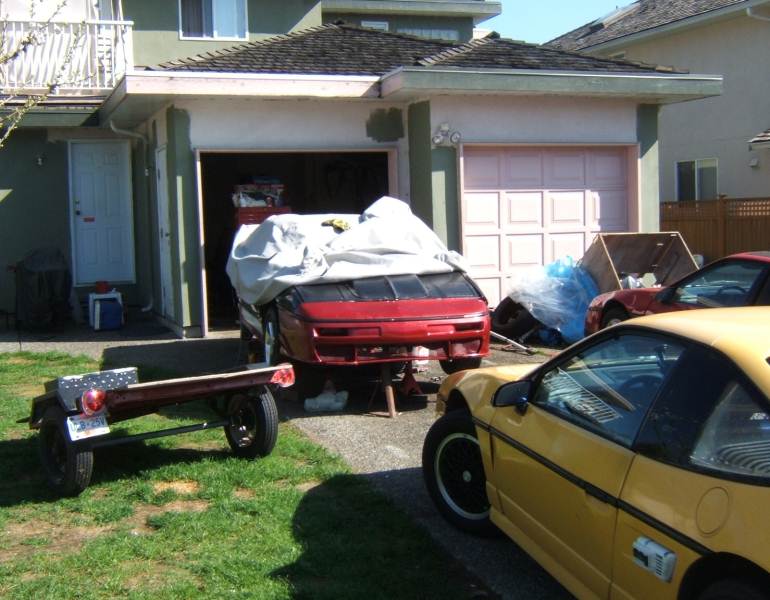
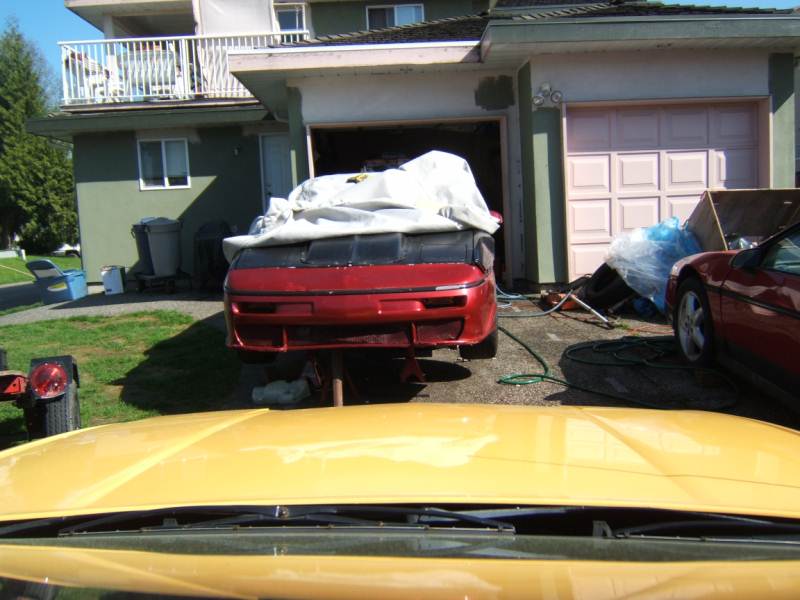
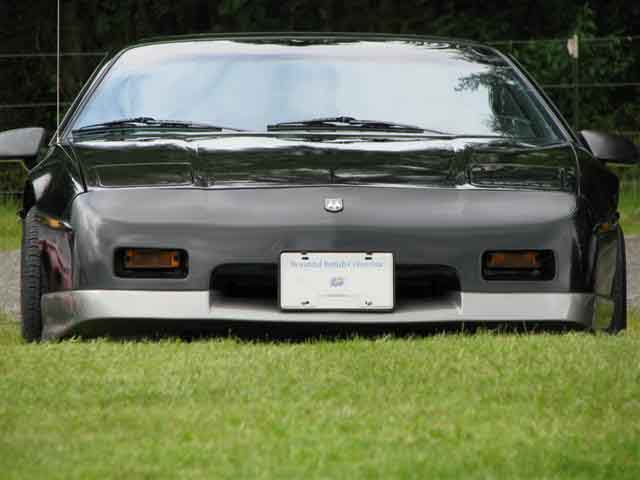
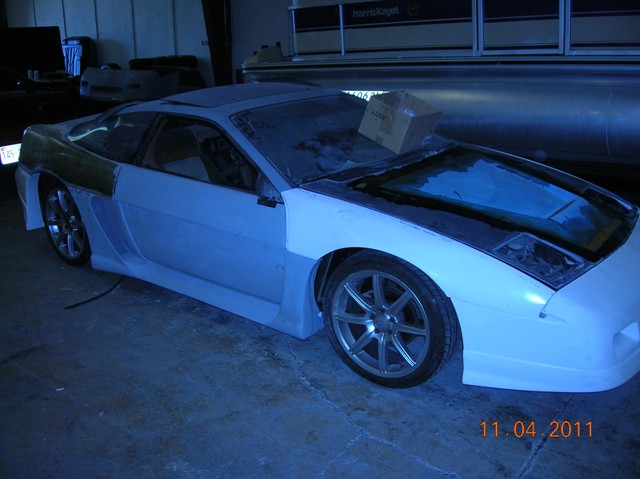
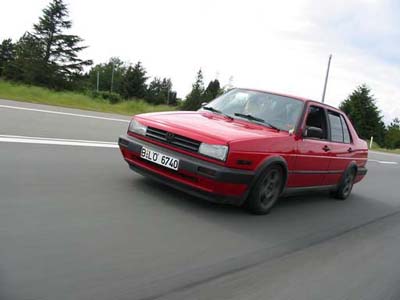
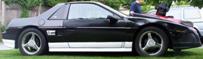
Ok I have spent the past week, cleaning the garage and have done very little to the project. I was at the point that I could spend 15 mins working on the car, then 45mins looking for the next part to go on the car. So I decided it was time to stop, clean up and gather the last of the needed parts. However in the bottom of one of my long forgotten boxes I found 2 cans of 87 Fiero Medium Metallic Red paint.. These were mixed a long time ago and are a direct match for the OEM Paint. I know this is counter productive as I am going to have to sand and repaint the nose Black, but I was curious to see it would look like in one proper colour. These are not photo shopped retouches. I am really pleased with how it is coming together.
|
|
|
Capt Fiero
88 Fiero GT 5spd V6 Eight Fifty Seven GT V8 5spd. |
|
|
|
|
Austin
Senior Member 

Joined: 17 June 2008 Location: Canada Status: Offline Points: 195 |
Post Options
Quote Reply
Posted: 12 May 2009 at 9:55am |
|
BUMP! I think a lot of us want to see this on the road soon, Arlington??????? |
|
1986 Fiero GT 3.4L V6 DIS, 5 spd, Full Polyurethane Suspension, Rear Coil-overs |
|
|
|
|
Capt Fiero
Admin Group
Founding Member Joined: 12 February 2007 Location: Canada Status: Offline Points: 4039 |
Post Options
Quote Reply
Posted: 12 May 2009 at 3:44pm |
|
Everything on the V8 is kinda on hold, Turned into one of those projects, that when I have disposable cash, I have not time, and when I have time, I don't risk spending the cash. Lisa and I just found a Family Hauler thanks to Marcel. I would love to have the V8 done for Arlington. I just don't know if its going to happen. |
|
|
Capt Fiero
88 Fiero GT 5spd V6 Eight Fifty Seven GT V8 5spd. |
|
|
|
|
Romeo
Senior Post God

Joined: 16 November 2008 Location: Canada Status: Offline Points: 3033 |
Post Options
Quote Reply
Posted: 13 May 2009 at 3:57pm |
|
Well Davie-boy, if you want a pair of hands some weekend, just let me know, I owe you quite a bit for all the parts.

|
|
|
Never shift into reverse without a back-up plan.
|
|
|
|
|
Capt Fiero
Admin Group
Founding Member Joined: 12 February 2007 Location: Canada Status: Offline Points: 4039 |
Post Options
Quote Reply
Posted: 18 May 2009 at 3:58am |
|
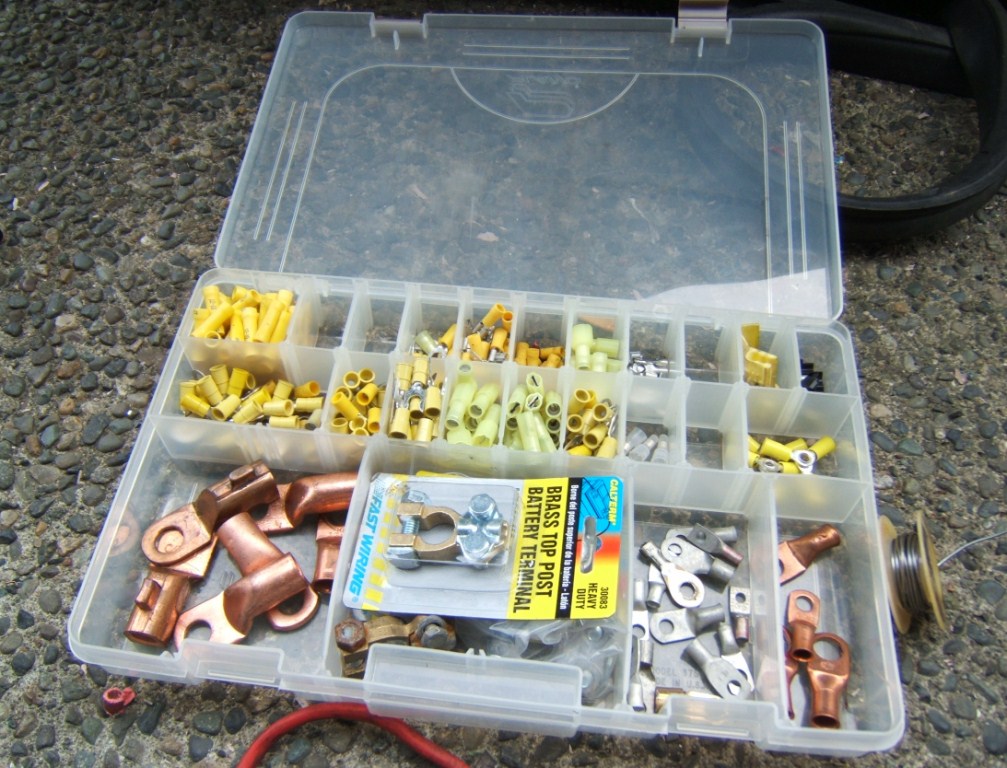
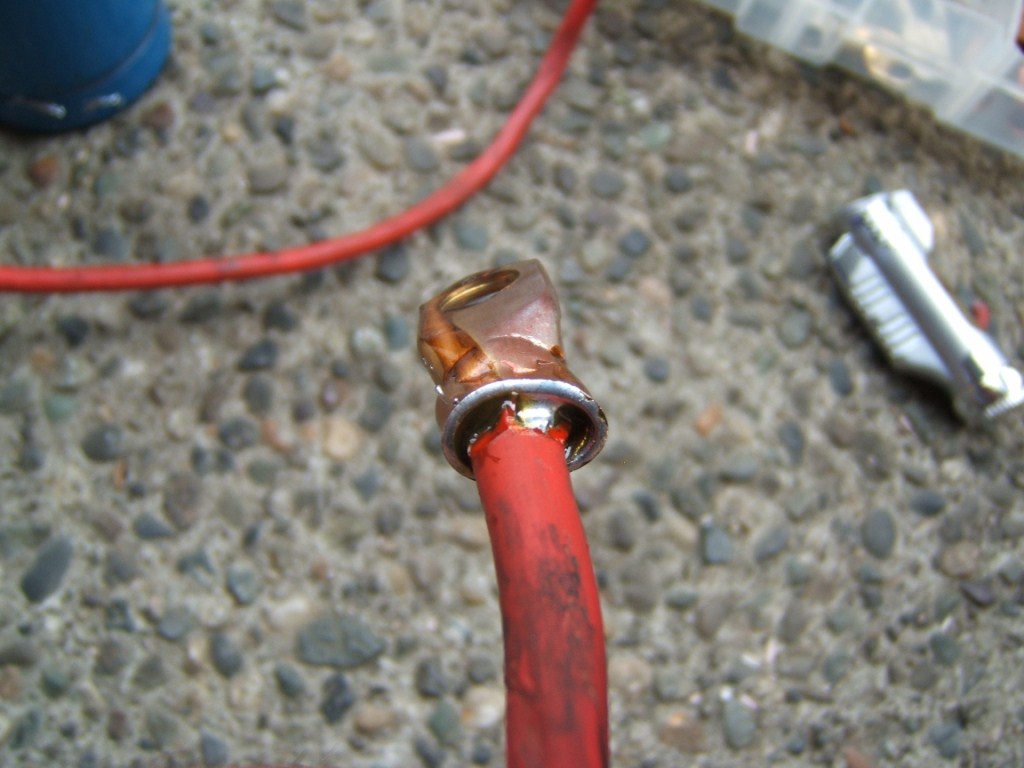
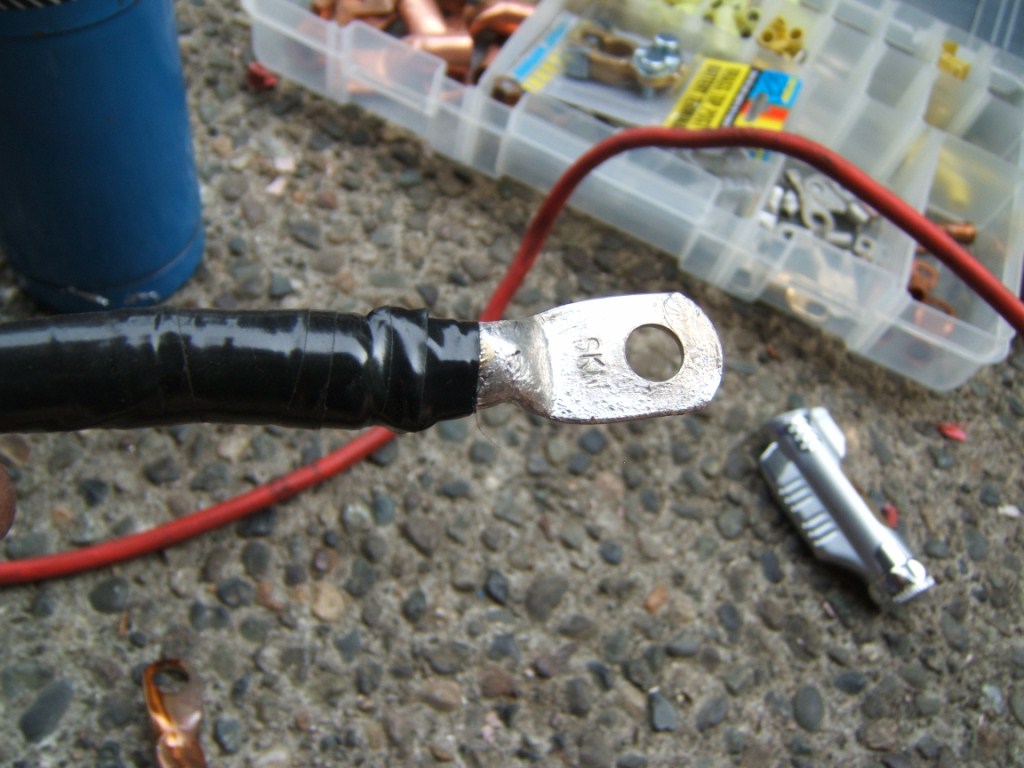
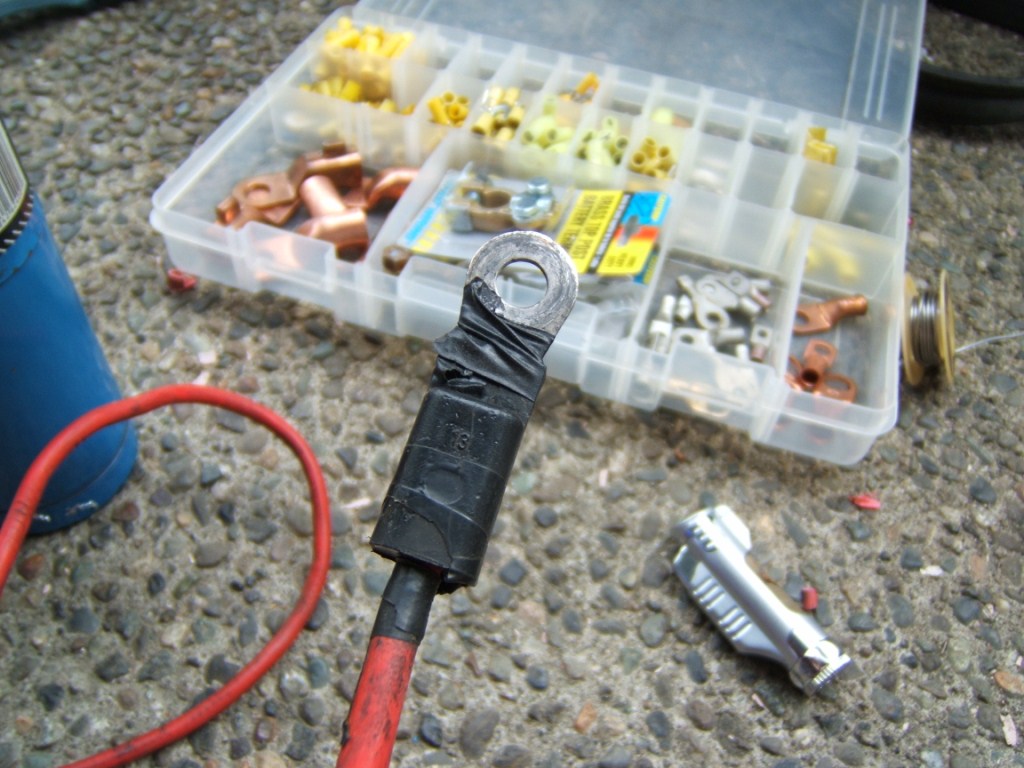
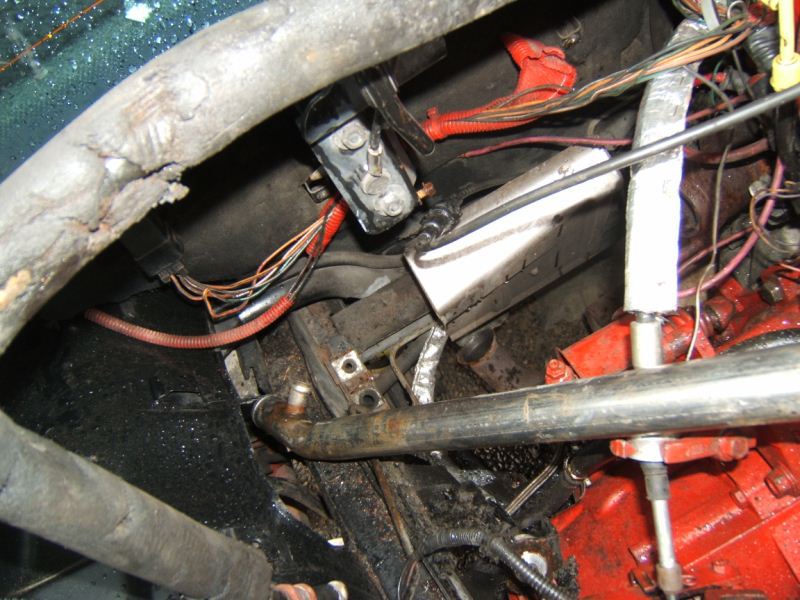
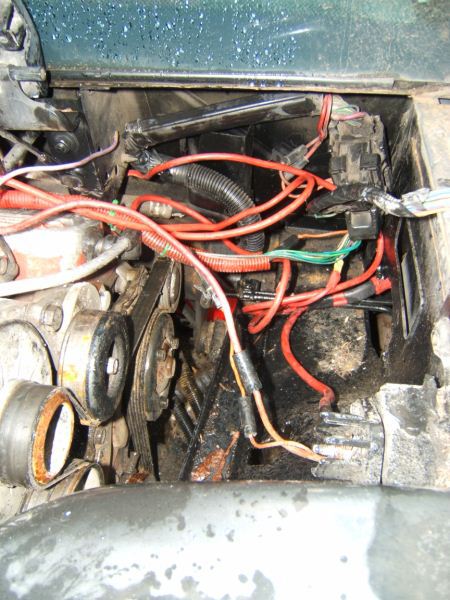
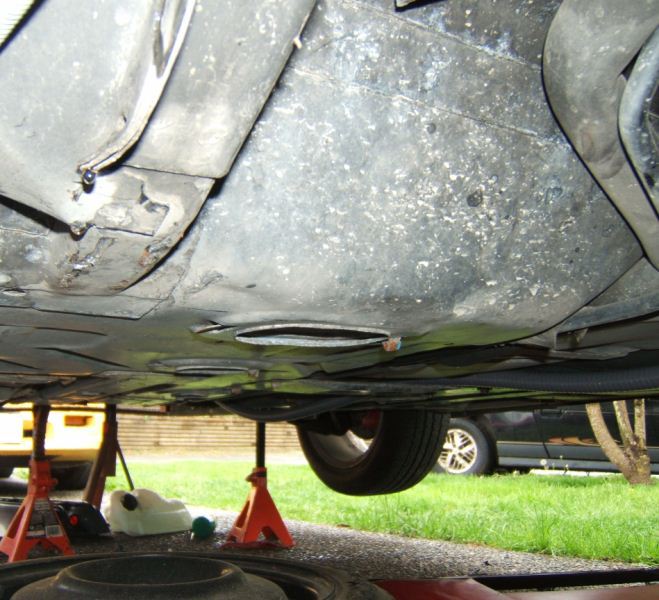
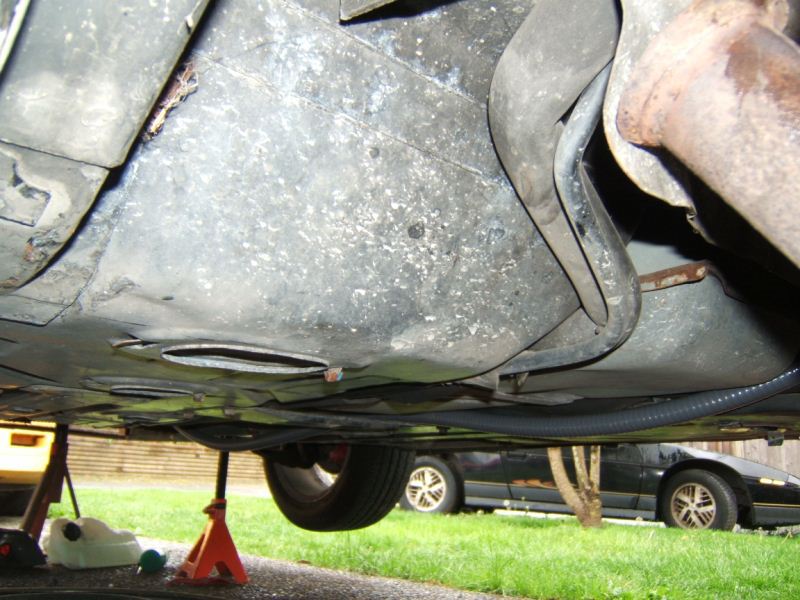
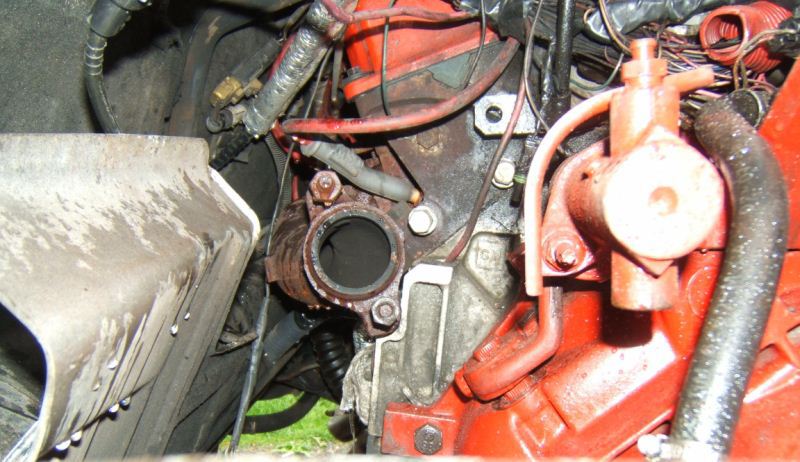
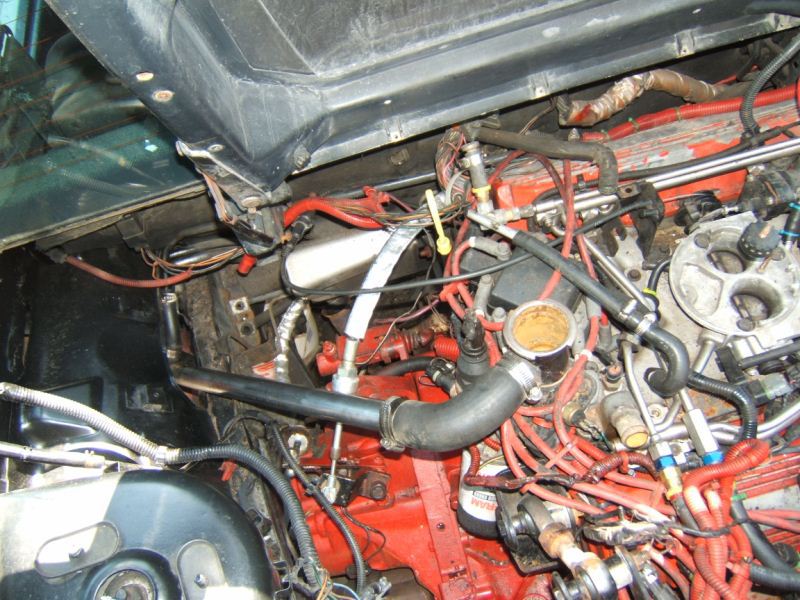
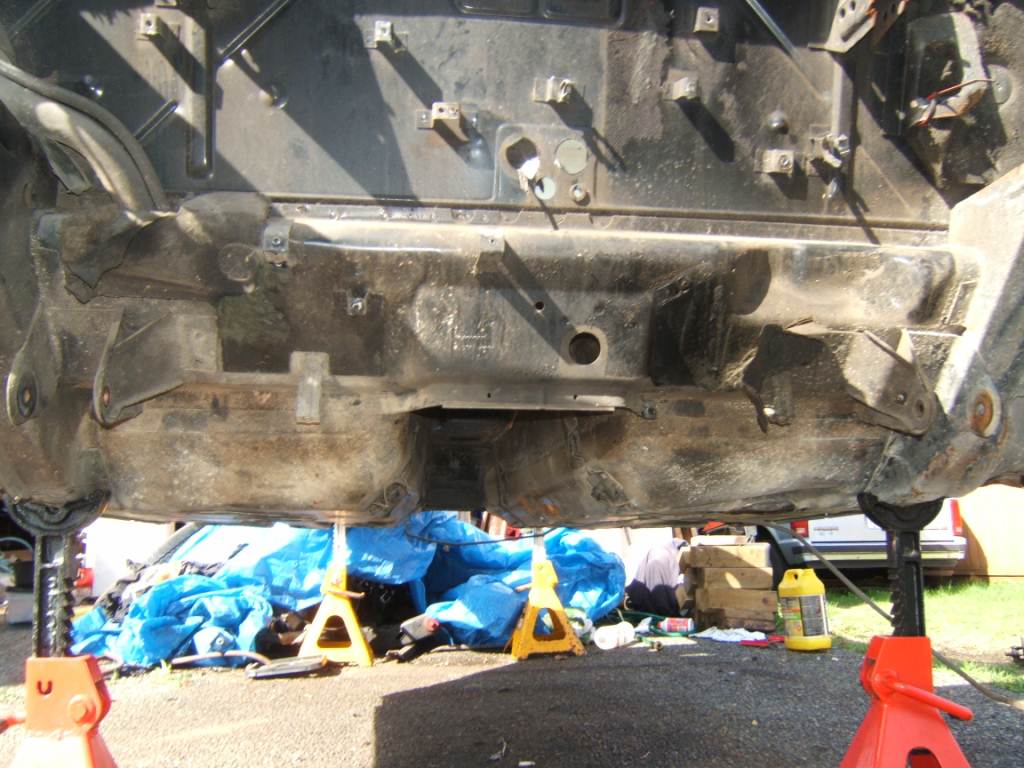
Well the weather was so nice today, Tim decided he wanted to work on his car. I got him started and explained what need to be removed. &nbs p; OK fast forward a few hours of helping them, I decided to get off my a$$ and do some work to the new 857GT. I got on my creeper and went under it, had Nigel hand me tools and such as I went, I finally got the under car battery cable lined up, I had to remove the belly pan for the fuel tank, in order to slide the cable up some more, however its not attached to the starter via a long cable to the front of the car. Then I had to make a decision on how to get power from the main cable at the starter up to the top of the engine bay to the power distribution studs and connect that stud also to the alternator and other related parts. It just so happened that I still had the Cadillac positive cable, which is a gorgeous pre fab 3 wire battery cable, 1, 4 gage battery cable, which was perfect to go the distribution stud. 1, 6 gage wire with a diode in it that goes to the alternator, and one 6 gage wire that is long enough to run all the way down to the starters main power wire. So I ran and grabbed the "large connector" drawer from my electrical kit. Grabbed the heavy gage cable cutter, the heavy duty crimper, a propane bottle torch and a roll of solder. I had Nigel and Tim at the top of the car feeding the cables down to me so I could find the best route to keep all the wires away from pulleys and exhaust parts. Once I got the lengths right I added about 6" extra for movement and flex, then cut the wire. I sat down and found the best possible ends. The one for the alternator was already done and frankly I did not want to cut it to shorten it, as that would leave a joint in the cable that could cause problems later on. I did have a nice 4gauge eyelet for the main cable that went to the distribution block, so I cut a clean section on the 4g wire, then stuffed the connector over it, then grabbed the torch and heated the end up, when it got hot enough I started melting hot solder into it. One it was filled right up, with hot solder I stopped let it cool, then wrapped it in tape to keep any debris out of it. I did not have a correct 6g copper eyelet so I made due with what I had, I stripped a little extra wire so I could fold over the tips of the wire and forced them in really solid into the 4g connector, then crimped the hell out of it. I actually used a hammer at times. Once I felt it was solid, I heated it up, and slowly started melting solder into the connector until it was full. Sorry I did not get a final pic of it being full, but you get the idea from the pics. I climbed back under the car hooked up the wires, then came up top and started running the leads around. When I am done, I will have a positive battery cable stud at the back that I can use for easy access to power. I might even mount the 1.5kw inverter back there under a cover, then run a standard 3 prong extension cable into the cabin behind the passenger seat. Will be nice to have a place to charge laptops / GMRS Radios, camera gear and such right at hand all the time. About the time that I got all the cables ran, I got called Pizza and Ice Cream. I think I got too much sun or dehydrated, as shortly after I came inside I got pounding headache and called it a night. Its 4am now and still have not really gone to bed. I may just say to heck with sleep, wait till dawn and get back at it. Aside from the Exhaust the car is damn near ready to fire, just have to run one major heater hose, and then decide how I am going to re-route the coolant feed line. I grabbed a spare piece of stainless coolant pipe from the Dr's place on Saturday, which will make a nice clean pipe rather than the rad hose I have been using.
Well here are the pics. I think I will start a new thread for Tims work today. So here are mine.
|
|
|
Capt Fiero
88 Fiero GT 5spd V6 Eight Fifty Seven GT V8 5spd. |
|
|
|
|
Capt Fiero
Admin Group
Founding Member Joined: 12 February 2007 Location: Canada Status: Offline Points: 4039 |
Post Options
Quote Reply
Posted: 24 May 2009 at 12:10am |
|
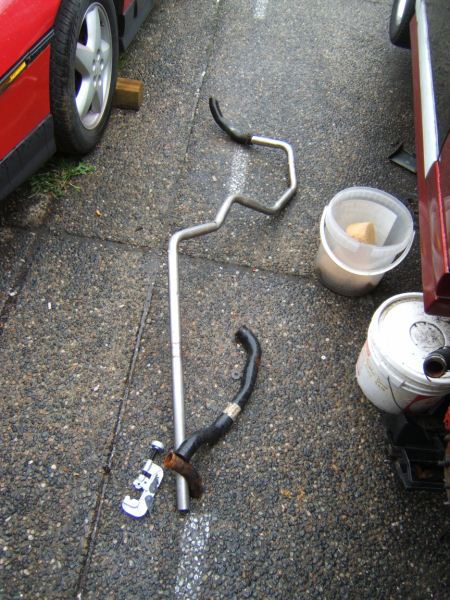
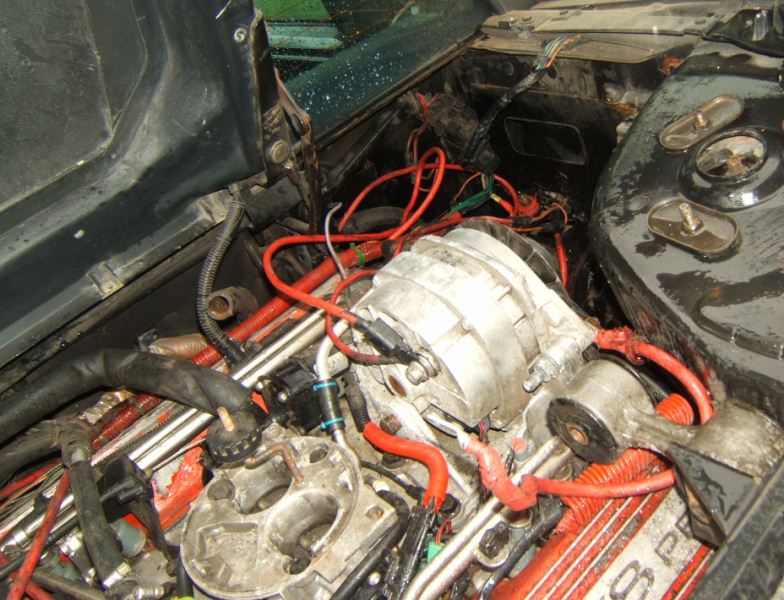
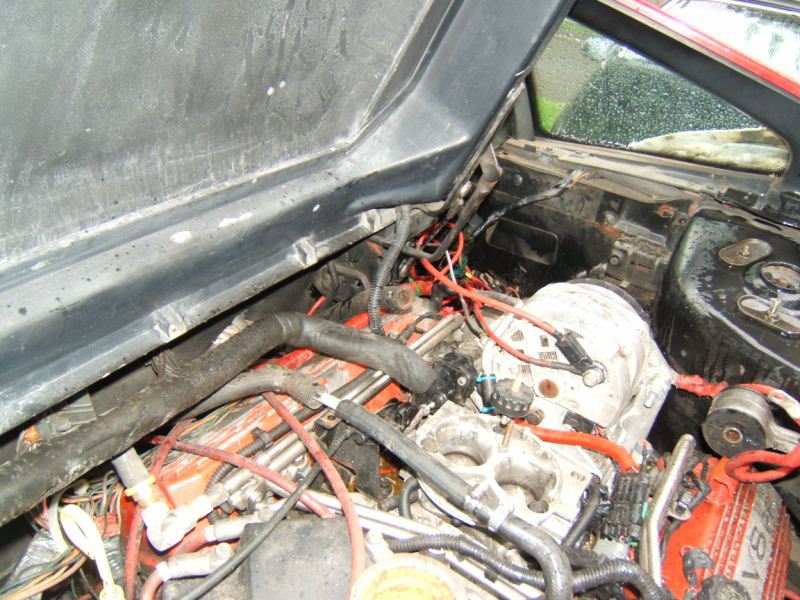
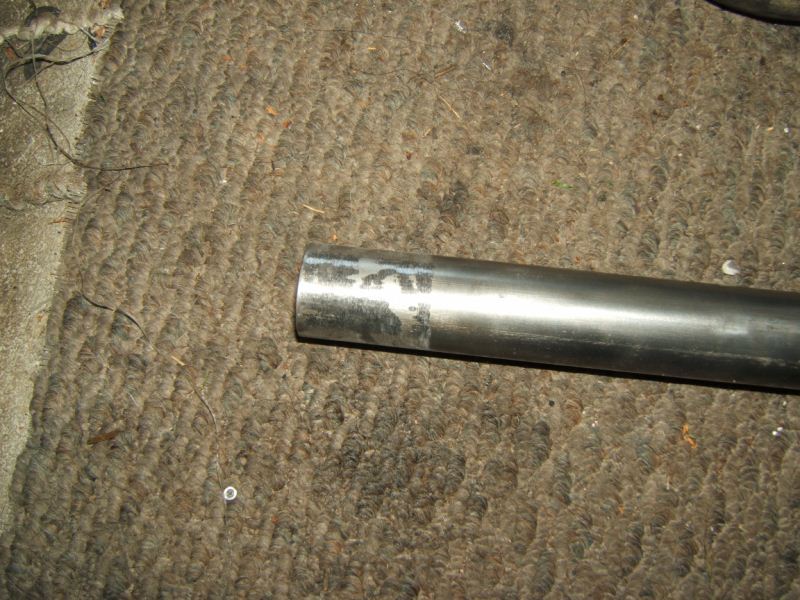
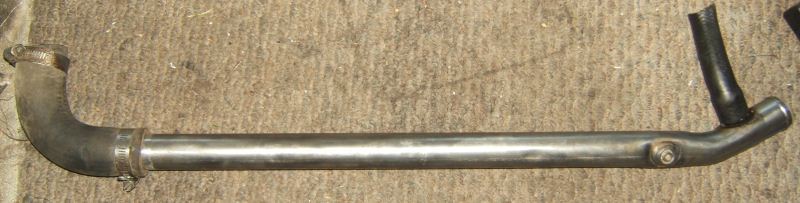
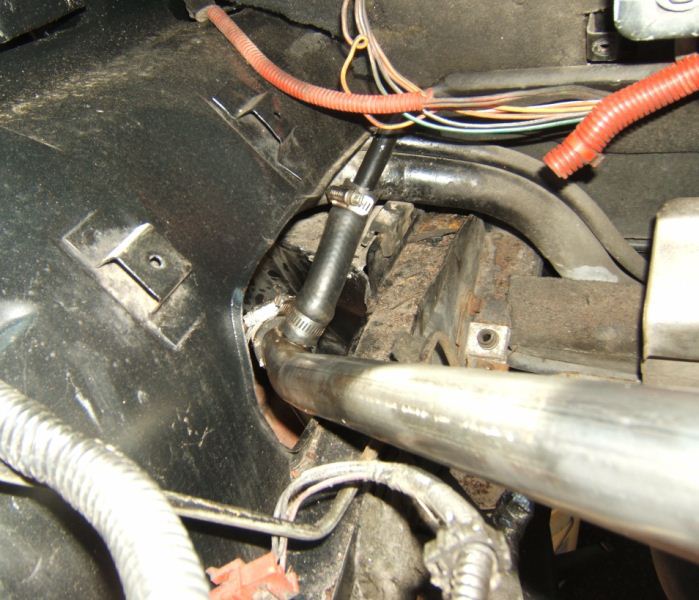
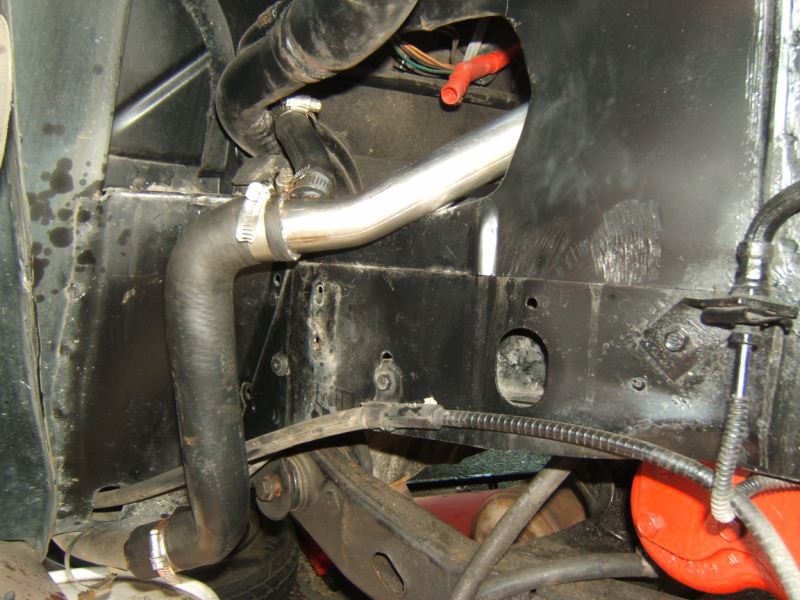
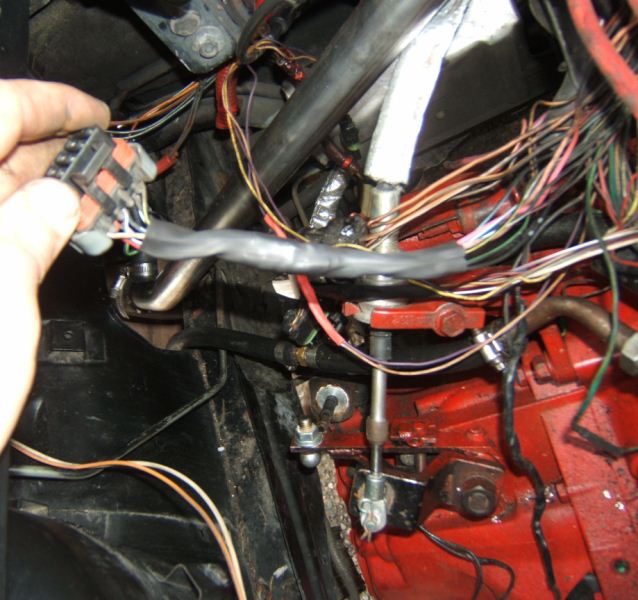
Ok so it�s been a few days since I updated this thread. Today was so suppose to be my big push to getting the car on the ground. Just one thing turned into another, then when I really through I had all the little things done and I could get working on the car, my compressor died. So I spent 2hrs trying to get that working, finally at 9:30 tonight I got it up and running. One of the big things that always bothered me was the crappy way I had the upper rad hose in my V8, it was darn near 3ft of rubber hose and joints and just looked bad. So I went to Dr.Fiero�s place and got an 87 or 88 coolant pipe, and started measuring and cutting. Here is the raw pipe.
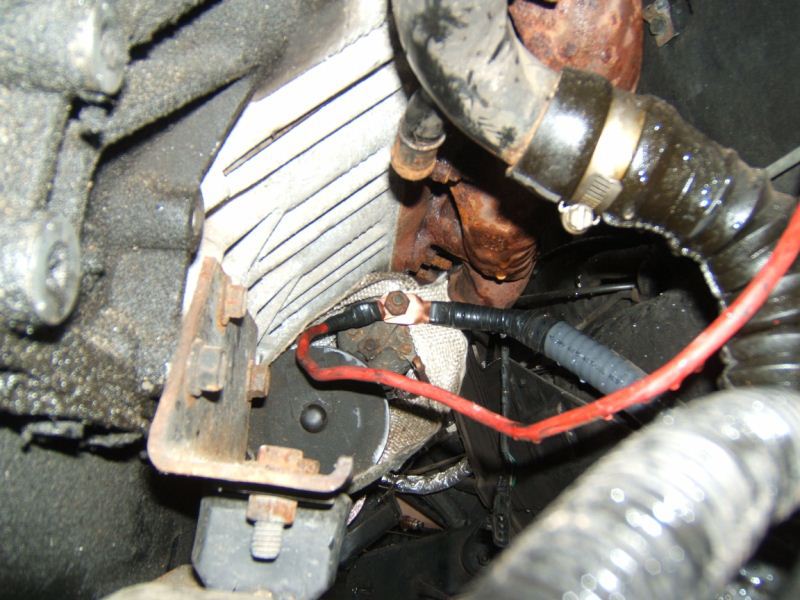
Starter hook up.
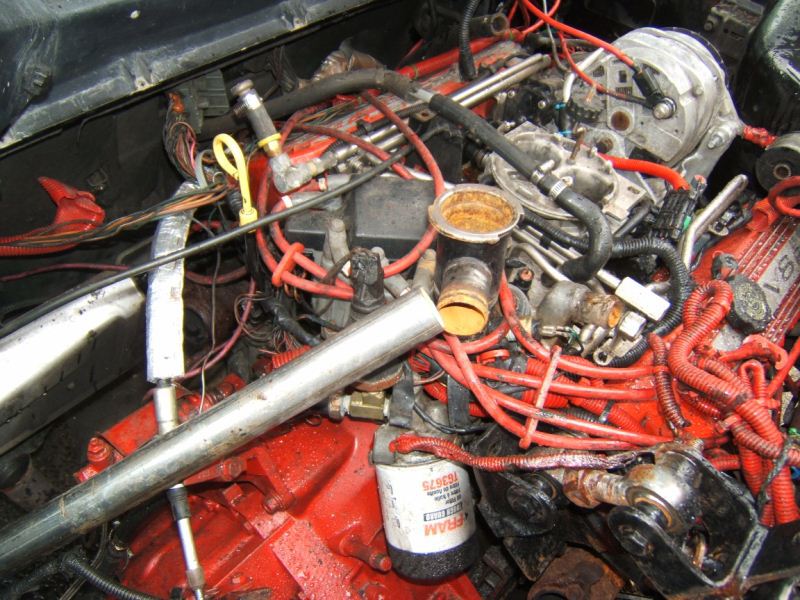
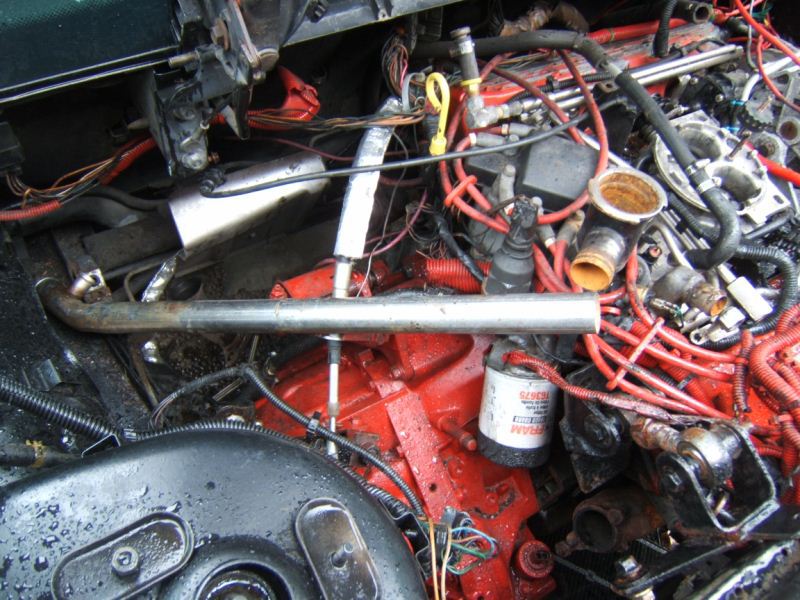
The caddy has a similar Heater Hose fitting on the coolant fill cap as the Fiero, only problem is that the coolant fill cap is on the driver�s side rather than the passenger side, so many people have a heater hose running all the way around the front of the engine, or over top of the motor to connect, that is the way I had it done as well. Then I started thinking seeing as I had to re-do most of my coolant hoses and get this to work on the new 87 car. I started looking at that pipe I got from the Doctor, and realized hey wait a min. I can run a small 1� steel pipe along the firewall, and have it hook to the driver�s side pipe and not need any upper heater host at all. I started with the pipe cutter, doing a light flair on the end, then scuffing up the pipe so the rubber hose could grab it nicely.
|
|
|
Capt Fiero
88 Fiero GT 5spd V6 Eight Fifty Seven GT V8 5spd. |
|
|
|
|
Capt Fiero
Admin Group
Founding Member Joined: 12 February 2007 Location: Canada Status: Offline Points: 4039 |
Post Options
Quote Reply
Posted: 24 May 2009 at 9:46pm |
|
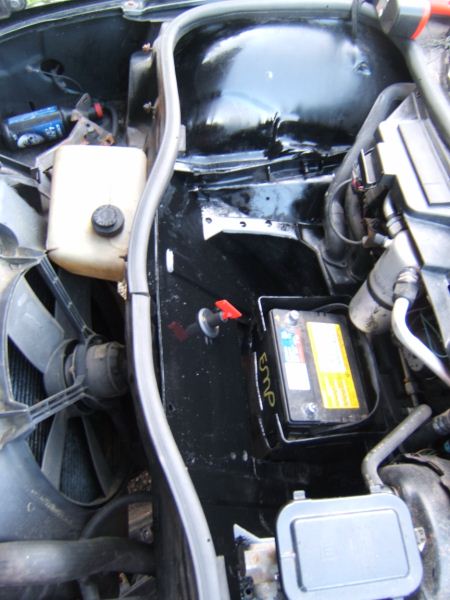
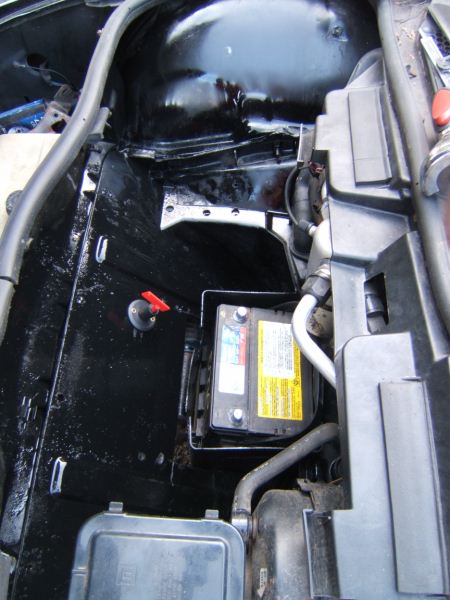
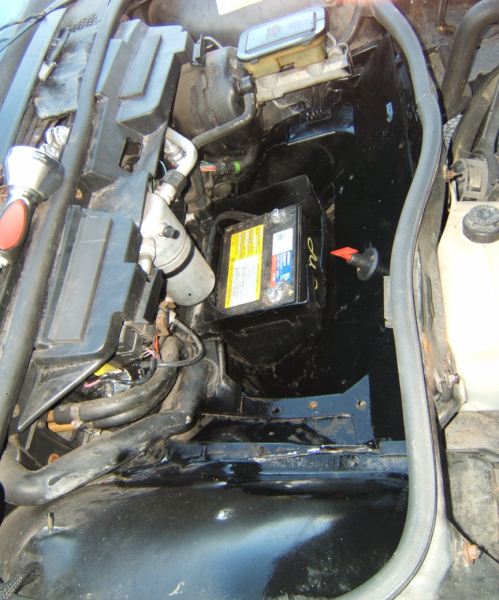
So the battery is now installed.
|
|
|
Capt Fiero
88 Fiero GT 5spd V6 Eight Fifty Seven GT V8 5spd. |
|
|
|
|
Capt Fiero
Admin Group
Founding Member Joined: 12 February 2007 Location: Canada Status: Offline Points: 4039 |
Post Options
Quote Reply
Posted: 25 May 2009 at 11:01pm |
|
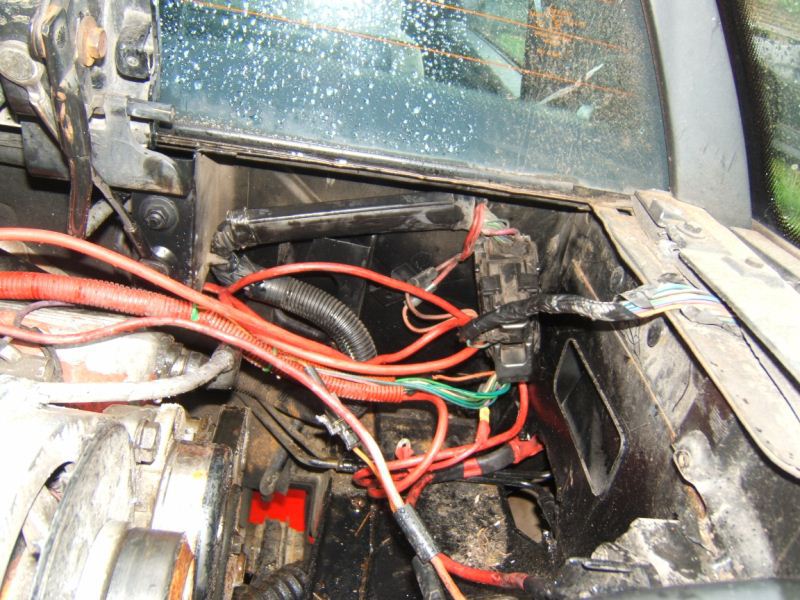
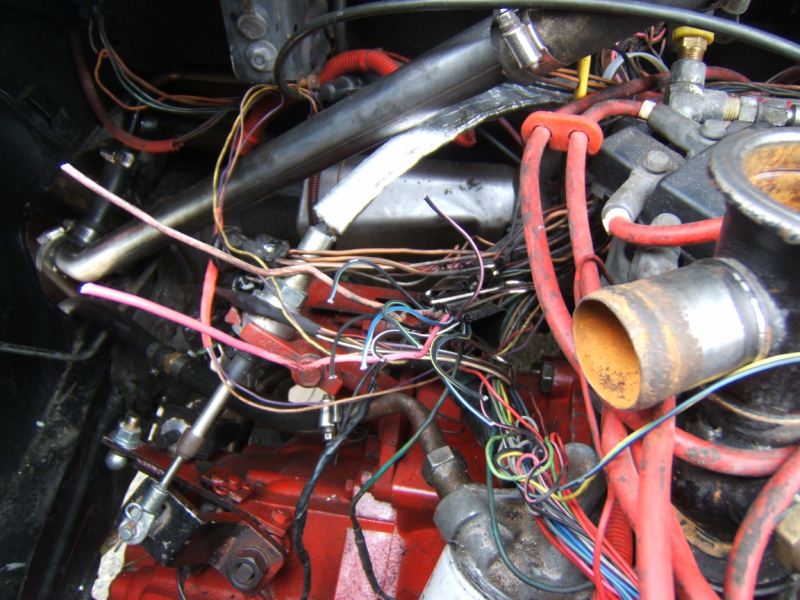
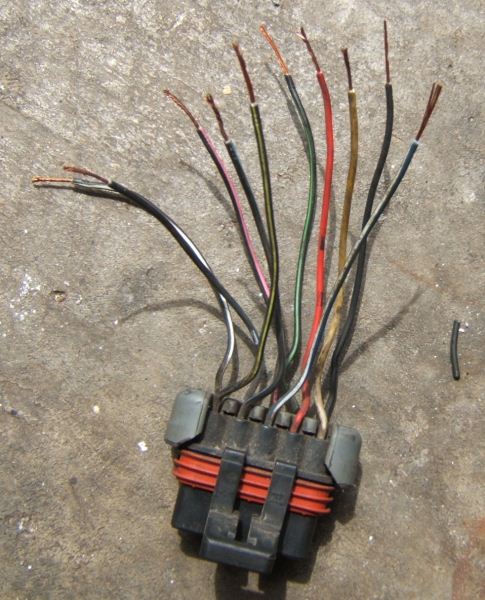
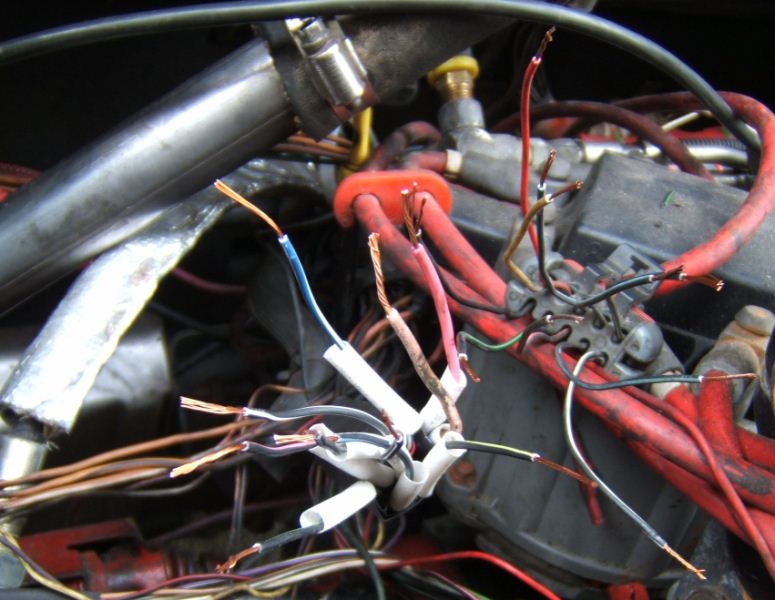
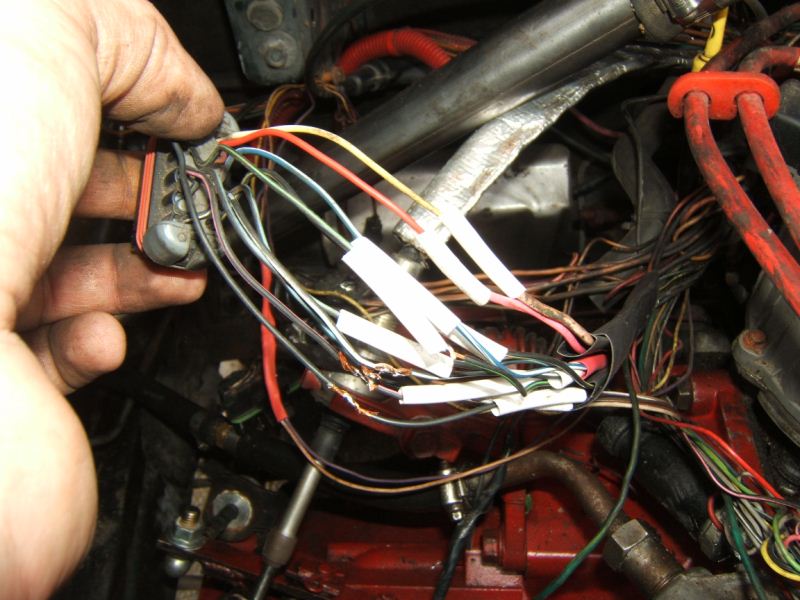
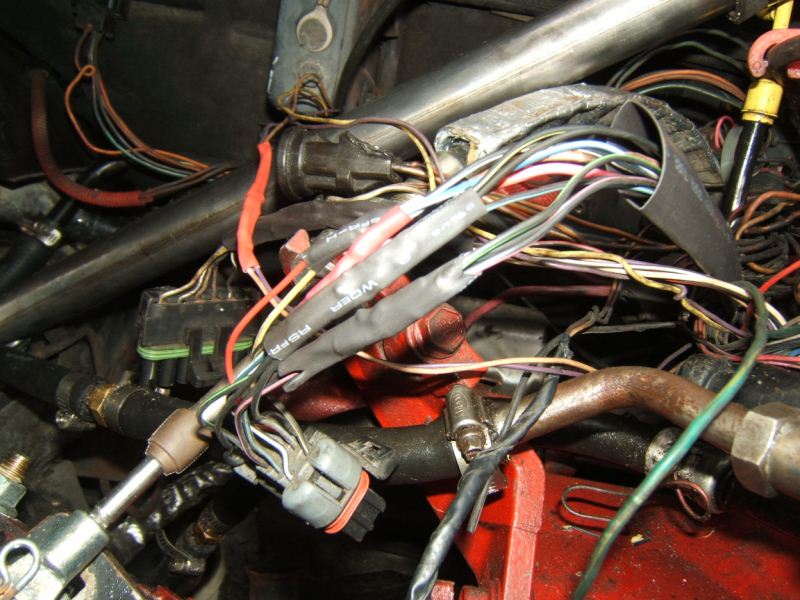
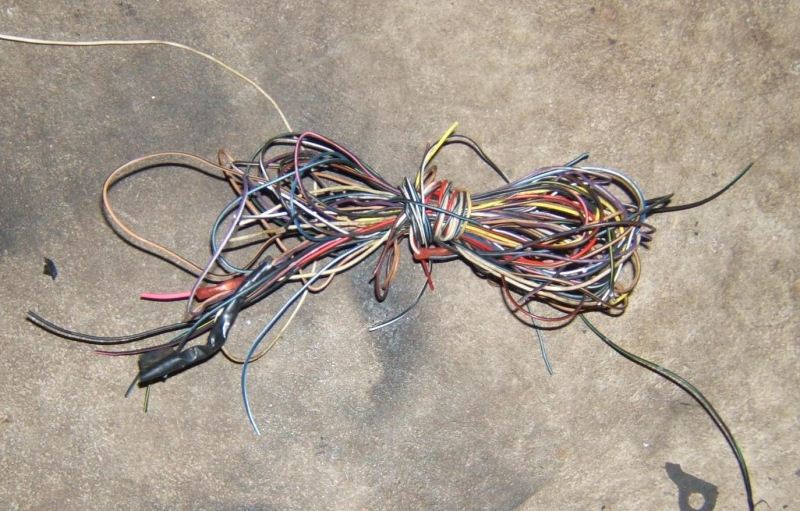
So today was another wiring day. WOW, and I am still not done. I removed an amazing (well amazing to me) 60ft yes Sixty Feet of wiring from the harness today. One by one, I cut, shortened then soldered, then shrink tube over each wire, then shrink tube each set of wires into a group. I had to cut out sections from the intake temp sensor, both the O2 sensors, and the injector harness. In the case of the larger connector below, each wire got a shrink tube over it, then into batches of 3 with the exception of the 2 larger wires that got there own group, then a really big shrink tube to cover them all into one solid harness. I am going to have to read over the schematics a few more times to decide on how to re-wire the oil pressure sending unit. I have been running dual oil pressure sending units. (one for the Fiero gauge and one for the Caddy ECM) I just picked up an 88 oil pressure sending unit so I can eliminate the Caddy sender and just use the 88 Fiero sender to supply the signal to the Caddy ECM. I can't wait till I can fire this engine again, oh I so miss driving it. I know I could have taken a bunch of short cuts and been driving it by now, but I really want to do it right this time. I have a nearly bullet proof clutch and trans. Perfect suspension, and with the re-design on the mounts the motor should stay put. Only last things I have to install is the rear sway bar, to keep wheel hop to a minimum, and once its all together, sort out the exhaust changes. Its so close I can almost smell the burnt rubber and tire smoke bellows. Well here are the pics. After I unloomed a few of the harness bits Main injector harness with 10 wires. I took out 48"s if wire from EACH wire. All the harness side wires cut and stripped and all 3 levels shrink tube stuck over it all.
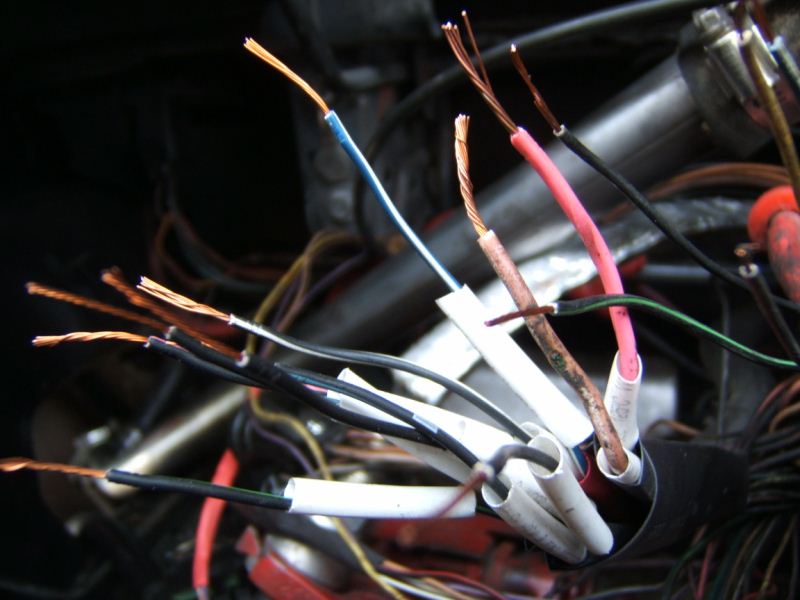
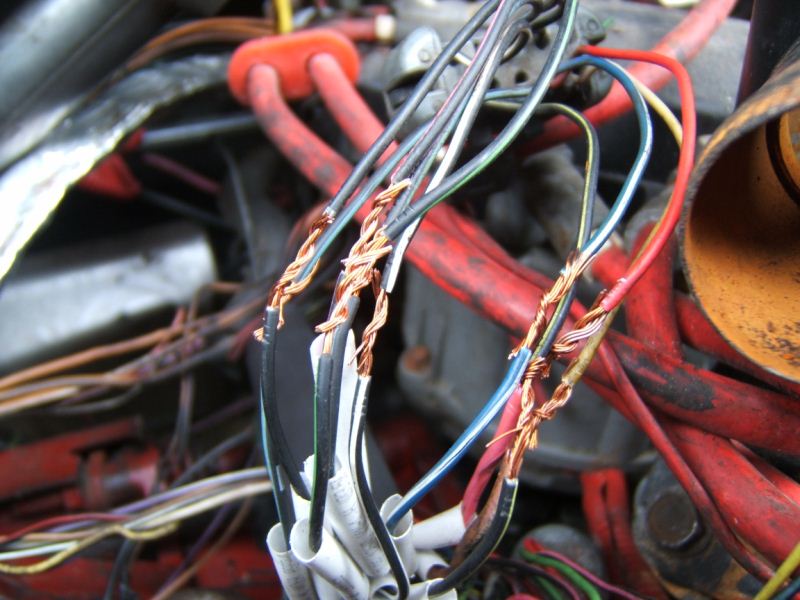
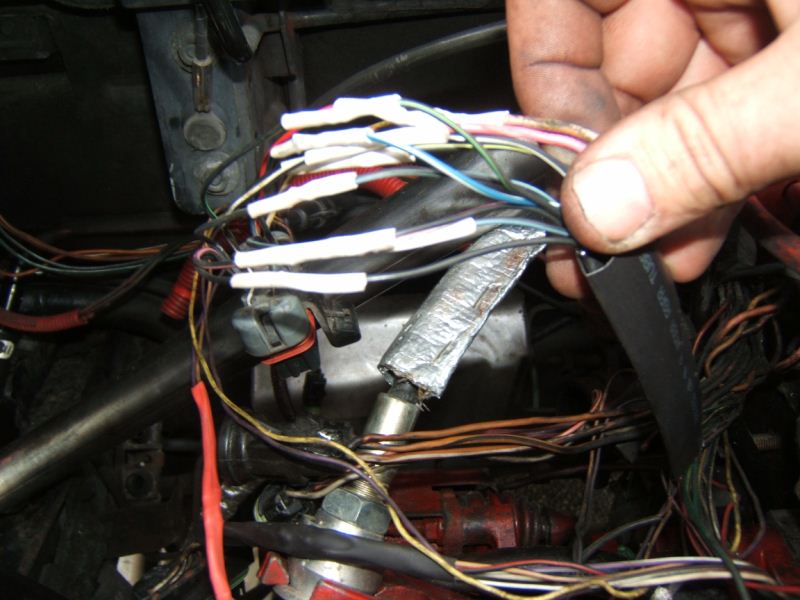
Twisted up, the pic did not show it very well, but yes they are all separate and nothing is touching Soldered and first layer of shrink tube on.
Second layer of shrink tube. Third and final layer on. Nice and neat tight harness that with any luck won't get any corrosion or water in it EVER! The 60ft of wire that I cut out, and I still have more to remove. ------------------ |
|
|
Capt Fiero
88 Fiero GT 5spd V6 Eight Fifty Seven GT V8 5spd. |
|
|
|
|
Post Reply
|
Page <1 56789 19> |
 Tweet
Tweet
|
| Forum Jump | Forum Permissions You cannot post new topics in this forum You cannot reply to topics in this forum You cannot delete your posts in this forum You cannot edit your posts in this forum You cannot create polls in this forum You cannot vote in polls in this forum |


 Topic Options
 Capt Fiero wrote:


 From this << to this >>