3800 TPI 4spd Auto into 86 Coupe |
Post Reply 
|
Page <1 3456> |
| Author | |
D_sensitized 
Admin Group 
Executive Member Joined: 25 March 2008 Location: Canada Status: Offline Points: 601 |
 Post Options Post Options
 Quote Reply Quote Reply
 Posted: 28 October 2010 at 5:20pm Posted: 28 October 2010 at 5:20pm |
|
Me too, looks much better then mine.
You didn't happen to uh, make 2 did you? 
|
|
|
-Harrison
88GT 3800 SC1 F23 5-speed Chilliwack |
|
 |
|
|
Blair
Senior Member 
Joined: 12 February 2007 Location: Canada Status: Offline Points: 250 |
Post Options
Quote Reply
Posted: 30 October 2010 at 6:29pm |
|
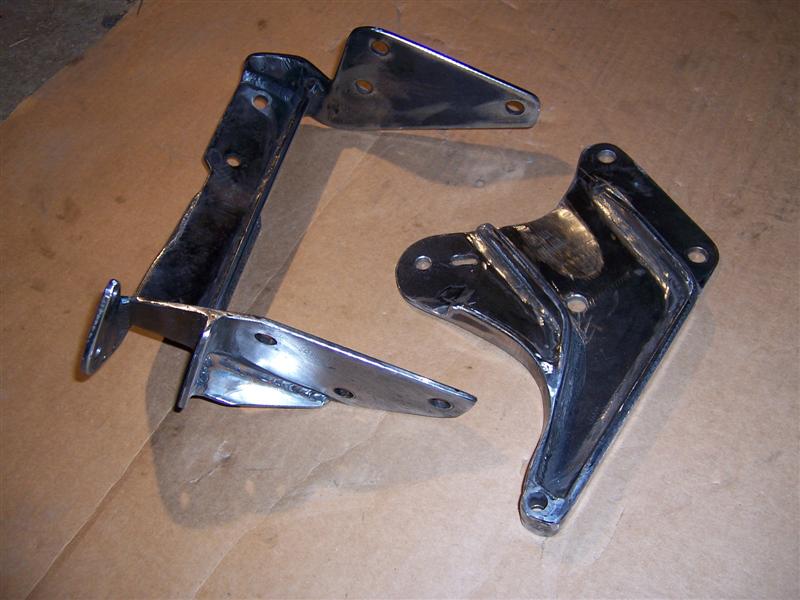
Thanks for the kind words. Here's a pic of the just finished brackets ready for the glass beader and paint.
The upper bracket is made from 3/16" plate with 1/4"x3/4" ribs. The lower engine/ alternator mount is made from 1/4"x2" flat bar and 3/6" ears. This is the limit for my mig and as thin as I would go. I should mention to anyone that wonts to make there own brackets that all I use is a 110v gas mig, 5"grinder, and a $15. home depot drill. |
|
|
|
|
Blair
Senior Member
Joined: 12 February 2007 Location: Canada Status: Offline Points: 250 |
Post Options
Quote Reply
Posted: 09 November 2010 at 12:54pm |
|
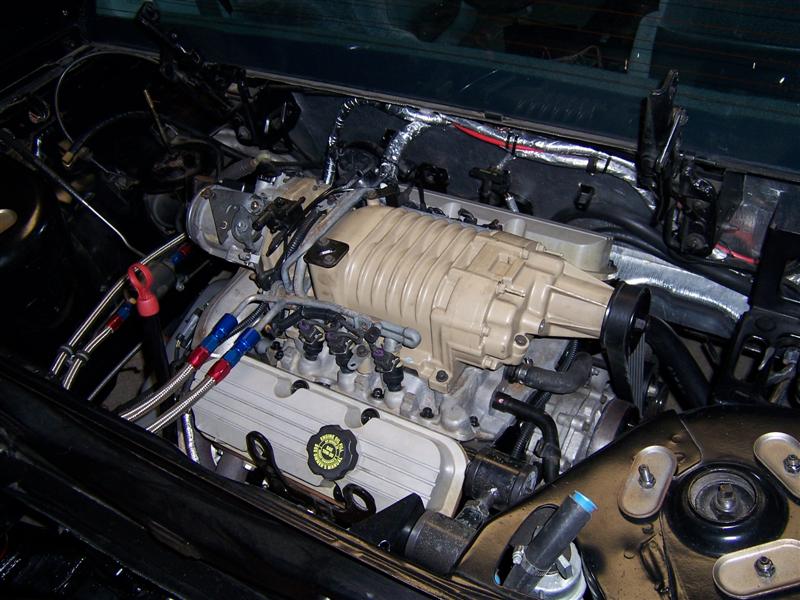
So fare the swap is going well. In the last two weeks I managed to reassemble the engine bits and mount the engine to the cradle. Although there was already a 3800 in the car I had to start the wiring harness from scratch. This allowed me to improve on how I built the first harness by using high temp looming and self bonding rubber tape. I now have the engine and cradle in the car and have started hooking it up.
It will take another 20 hours of harness building to connect the computer and car to the engine harness. As well I will have to make mounts for the dog bones and coil pack.
I hope to get the car running before it gets real cold in my shop but this will be hard. There are a couple of thing I am looking for, can you help? I am in need of a - 87,88 coupe rear bumper in good shape. - Dickman v6 poly dog bone ( will likely order from D.) - left and right fast back drip rails. if you think you can help give me a p.m. Thanks... |
|
|
|
|
Dawg
Senior Member

Joined: 15 August 2009 Location: Canada Status: Offline Points: 988 |
Post Options
Quote Reply
Posted: 09 November 2010 at 4:19pm |
|
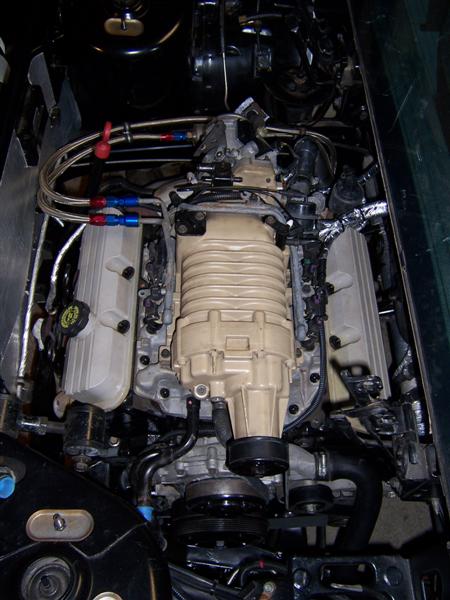
Ummmm....that doesn't look like we're in 60 deg. land anymore. That over head shot shows it all. Pretty darn tight I bet. Width wise I mean.
The Dawg |
|
|
You dream it up....I'll make it
|
|
|
|
|
Romeo
Senior Post God

Joined: 16 November 2008 Location: Canada Status: Offline Points: 3033 |
Post Options
Quote Reply
Posted: 09 November 2010 at 4:41pm |
|
The 3800 has always been a ninety degree V6, Damien... And the Northstar, 350/383, 4.9 and LS7 are all ninety degrees too. It'll all work out, don't worry.

|
|
|
Never shift into reverse without a back-up plan.
|
|
|
|
|
D_sensitized
Admin Group
Executive Member Joined: 25 March 2008 Location: Canada Status: Offline Points: 601 |
Post Options
Quote Reply
Posted: 09 November 2010 at 7:02pm |
|
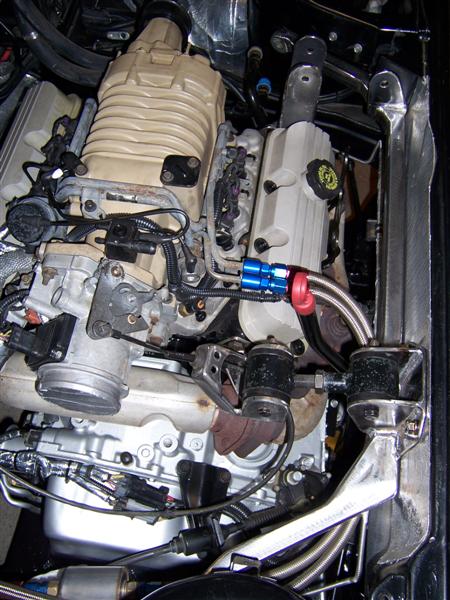
I don't think it's THAT tight, I find it to be much cleaner then the stock V6 with a lot less vacuum lines running around as well as mounting the alt way down too. A fair amount of room to work around things. Although I really didn't do much work in there at all with the stock engine installed.
I'd like to see how you do the dogbone mount, since I never put one of those in my swap... |
|
|
-Harrison
88GT 3800 SC1 F23 5-speed Chilliwack |
|
|
|
|
Dawg
Senior Member
Joined: 15 August 2009 Location: Canada Status: Offline Points: 988 |
Post Options
Quote Reply
Posted: 09 November 2010 at 7:59pm |
|
Romeo.....hehehehehe
The Dawg |
|
|
You dream it up....I'll make it
|
|
|
|
|
Blair
Senior Member
Joined: 12 February 2007 Location: Canada Status: Offline Points: 250 |
Post Options
Quote Reply
Posted: 23 November 2010 at 6:22pm |
|
Well after 2 weeks on the injured and heavily medicated list from a past shoulder injury I finally got back in the shop only to catch a cold with a shop temp of -10c. However I did get some work done.
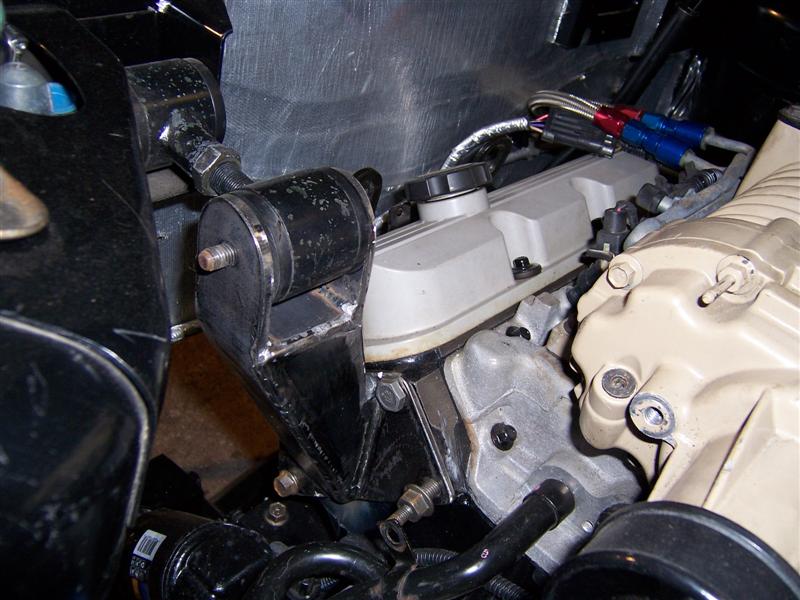
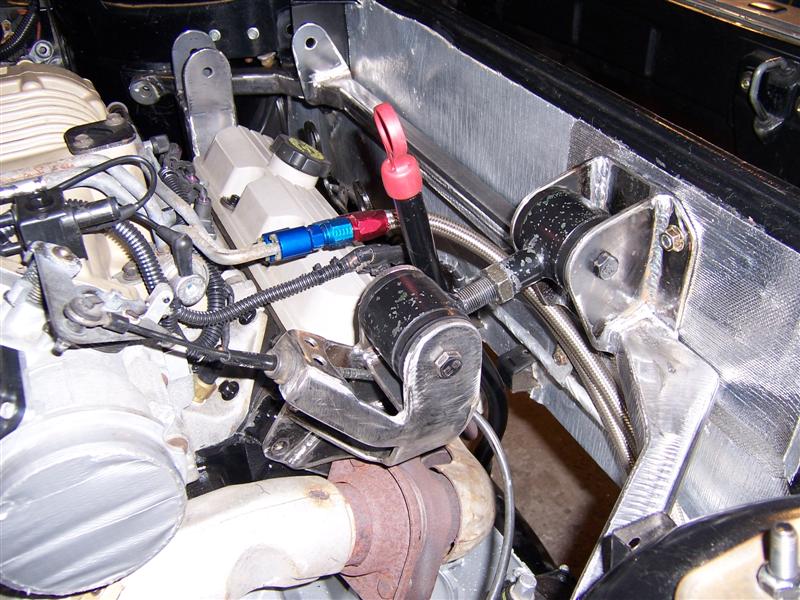
Here is what my upper engine mount on the right turned out like.
As soon as I am over this cold I will be working on the left upper engine mount. The second mount is optional but I plan on some engine mods in the future that will require it. I also feel that there is too much engine movement with all the extra torque when only one top mount is used. |
|
|
|
|
Capt Fiero
Admin Group

Founding Member Joined: 12 February 2007 Location: Canada Status: Offline Points: 4039 |
Post Options
Quote Reply
Posted: 23 November 2010 at 9:03pm |
|
Looking amazing Blair.
|
|
|
Capt Fiero
88 Fiero GT 5spd V6 Eight Fifty Seven GT V8 5spd. |
|
|
|
|
Blair
Senior Member
Joined: 12 February 2007 Location: Canada Status: Offline Points: 250 |
Post Options
Quote Reply
Posted: 07 December 2010 at 6:08pm |
|
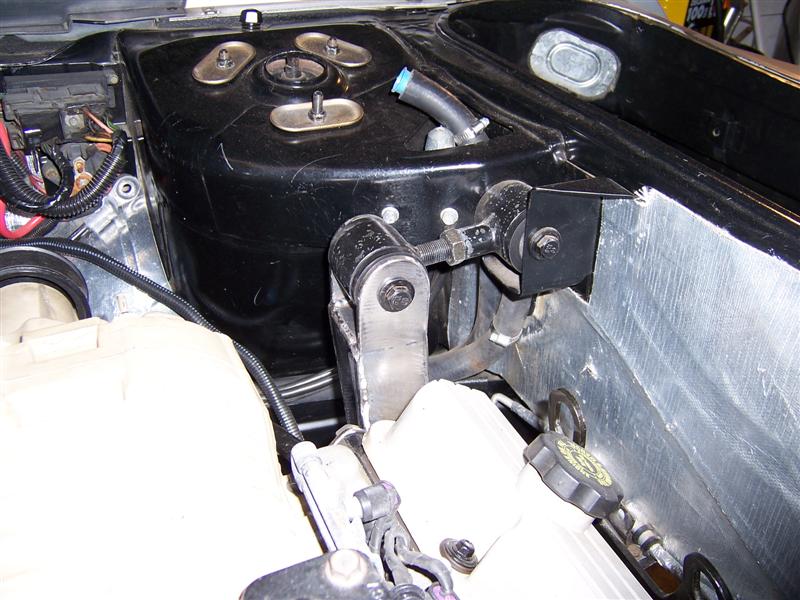
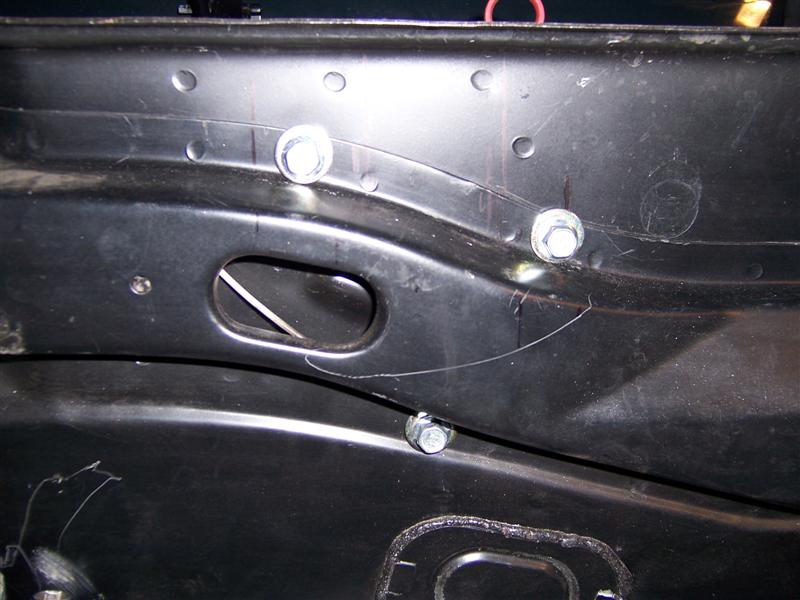
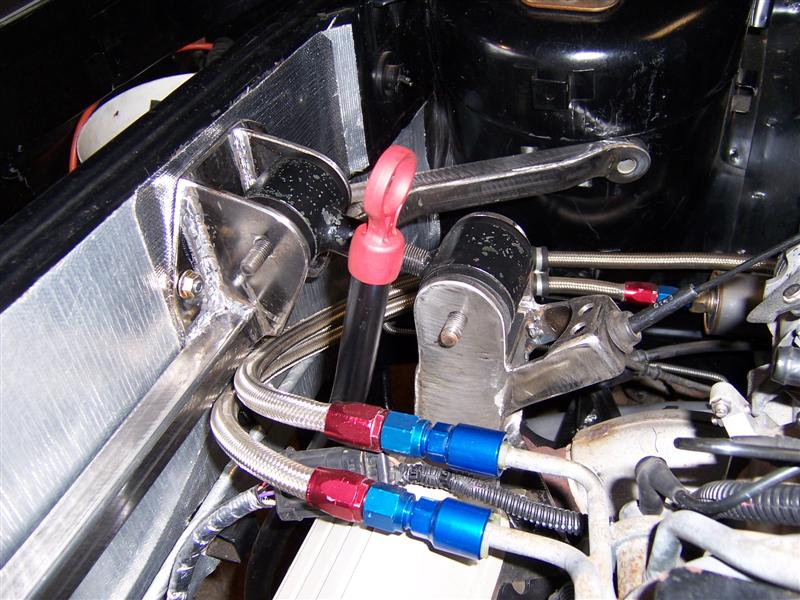
I finished the upper left engine mount and brace. I went with a overkill approach to it's design. ( I plan on boosting engine output in the future.)
The brace is mounted to the rear engine bulkhead were the bolts can catch the brace. It also ties into the shock towers and upper right engine mount. The brace triangulates the rear engine bulkhead increasing strength and providing ridged mounts for the upper dogbone. Without this brace you will pull the bulkhead off its welds if you use a left mount.
The left engine mount was hard to make. The exhaust flange is right there under the dogbone mount and bracing for the movement of the engine took some thought. The left and right engine dogbone mounts are parallel to each other to keep engine movement equal and without twisting action. This should increase traction lessoning wheel hop.
|
|
|
|
|
Patrick
Newbie 
Joined: 19 April 2008 Location: Vancouver Status: Offline Points: 5 |
Post Options
Quote Reply
Posted: 07 December 2010 at 8:05pm |
|
Looks like the kind of support I need with my Duke! Great job as usual, Blair.
|
|
|
|
|
Romeo
Senior Post God
Joined: 16 November 2008 Location: Canada Status: Offline Points: 3033 |
Post Options
Quote Reply
Posted: 07 December 2010 at 9:28pm |
'Aye, careful those raging 90 horses don't rip the mounts off. |
|
|
Never shift into reverse without a back-up plan.
|
|
|
|
|
Blair
Senior Member
Joined: 12 February 2007 Location: Canada Status: Offline Points: 250 |
Post Options
Quote Reply
Posted: 27 April 2011 at 8:00am |
|
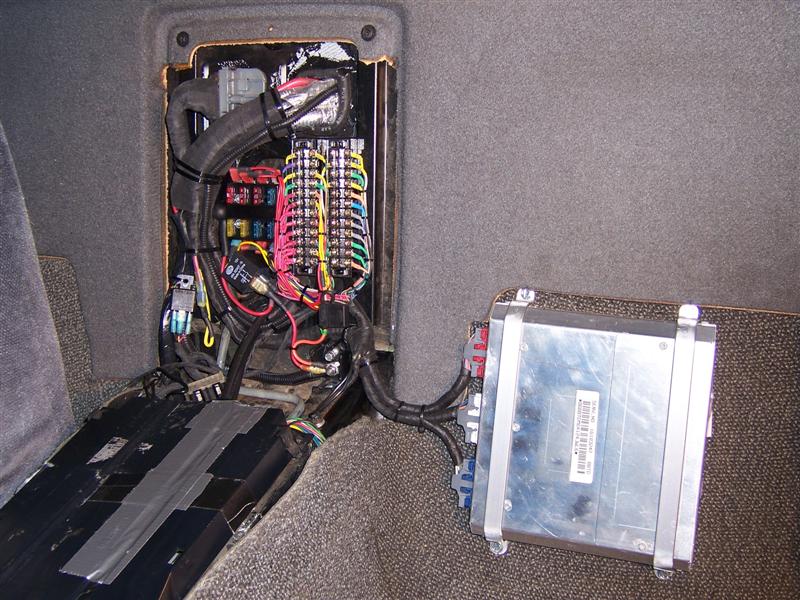
hi again, after a long winter it's finally warm-er in my shop and work have resumed. I spent the last three days working on the electrical and I think it's about 99% done. The console proved to be a big time consumer but the 200 or so wires are all connected and operational.
This wiring layout will allow for quick field testing/trouble shooting. It will be much easier to add new functions as well. I banded the connections to indicate function- Yellow-gouges/ green- coolant/ gray- diagnostics/red- power sup. All wiring for the swap has been documented and is to be kept in a book with the car. No chance I will remember anything about the wiring later and if I try to take a swapped car to a shop they will laugh me out of the shop. Shops can't fix swapped cars. Too hard of a job. I test ran the engine but it doesn't run long. I will have to order the pass-key eliminator and wire it to the blue banded wire on the connection bar. I hope to finish the car by the end of spring but I am in no hurry. Just enjoying the build. |
|
|
|
|
Capt Fiero
Admin Group
Founding Member Joined: 12 February 2007 Location: Canada Status: Offline Points: 4039 |
Post Options
Quote Reply
Posted: 27 April 2011 at 8:18am |
|
WOW Blair as usual with you, that is truly Amazing. I may have to take a tip from your awesomeness and do something similar with my 4.9 ECM. I hate how all the wires are just kinda bundled up and shoved to the side. I am planning on getting my 4.9 on the road this summer, so I may, if you are able/willing get you to weld in my brace for the bulkhead. Clynt made me a real nice triangulated brace that nearly matches the OEM brace on the right side of the strut tower to trunk wall, just this one goes on the left side.
With my new Nitrous kit and M/T slicks I am going to need all the bracing I can get. I am estimating with the nitrous I should be making 500lbs of torque when I launch.
Again, I love your work, it is so clean and perfect. Between you and Craker, I don't think I have ever seen either of you build anything that was sub standard, its always got to be perfect or it won't leave your shop. |
|
|
Capt Fiero
88 Fiero GT 5spd V6 Eight Fifty Seven GT V8 5spd. |
|
|
|
|
Blair
Senior Member
Joined: 12 February 2007 Location: Canada Status: Offline Points: 250 |
Post Options
Quote Reply
Posted: 17 May 2011 at 8:16am |
|
I've been working hard on getting this swap done but there's always something more to do. My intent to make the May meeting with the car fizzled when my pass key module failed to show on time but this gave me time the rework the exhaust and finish the trunk.
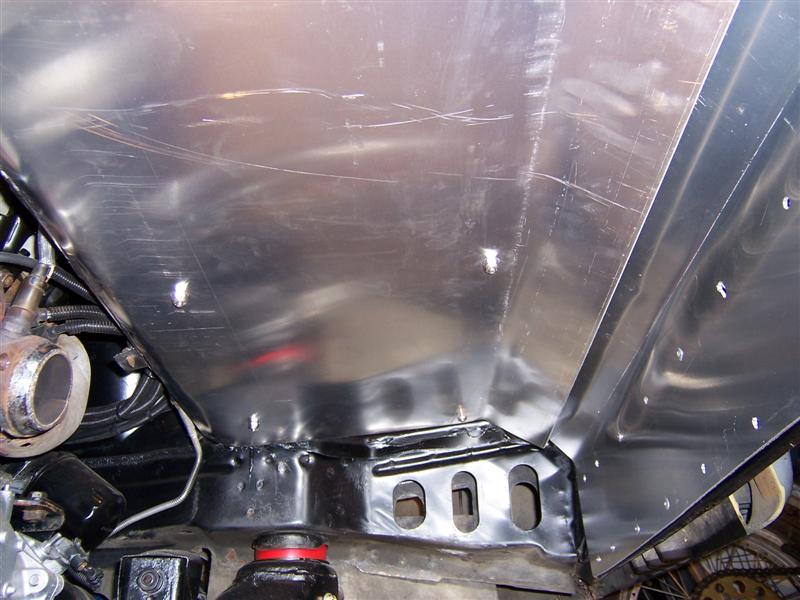
Here's a pic of the underside of the trunk. I cut a aluminum sheet to fit the trunk floor, applied heat shielding to the underside and riveted and sealed it into place. Then I sheeted the rear underside and made a heat shield for the underside of the trunk.
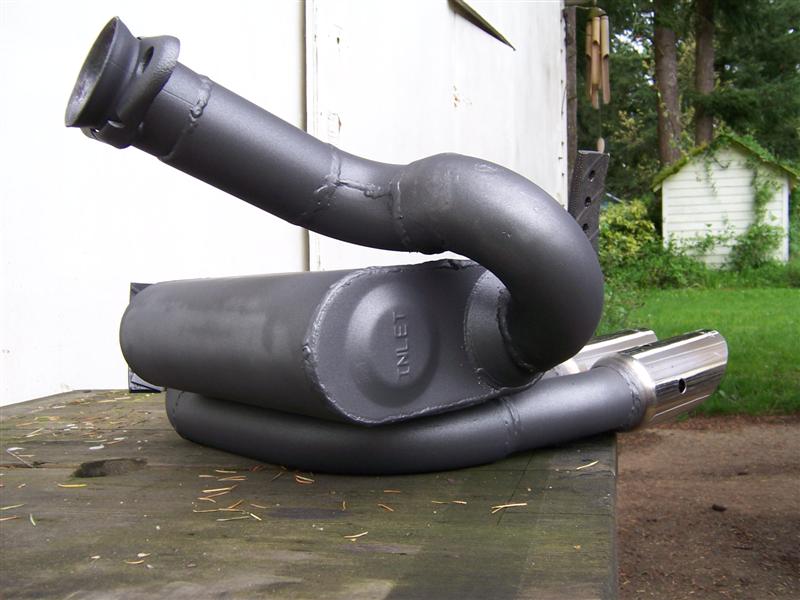
Here is the finished exhaust system. It is a center exit exhaust with flowmaster muffler and 2-1/2" pipe. Flange to tip is 24" with a total length of 60".
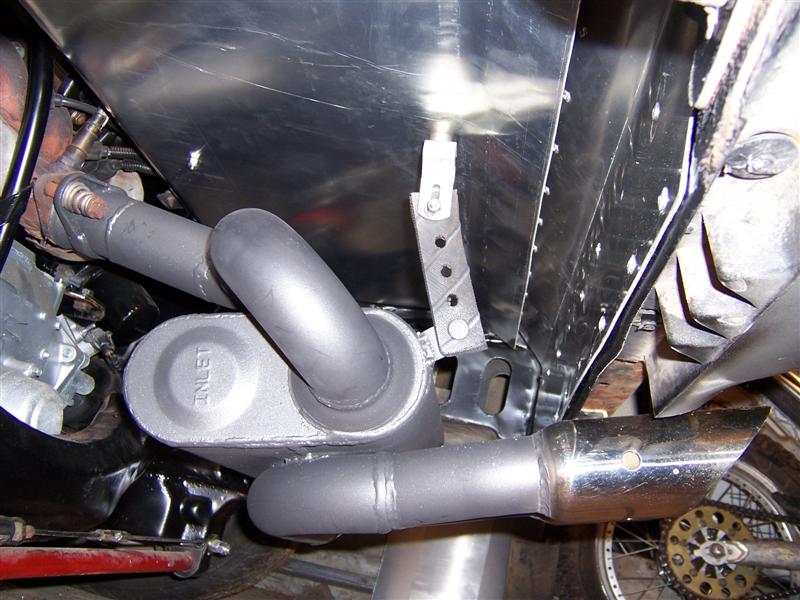
Here's the new exhaust system installed in the car. Lots of heat control, lots of room for exhaust changes. I will build a aircare exhaust system with a cat for testing. |
|
|
|
|
Blair
Senior Member
Joined: 12 February 2007 Location: Canada Status: Offline Points: 250 |
Post Options
Quote Reply
Posted: 18 May 2011 at 8:51pm |
|
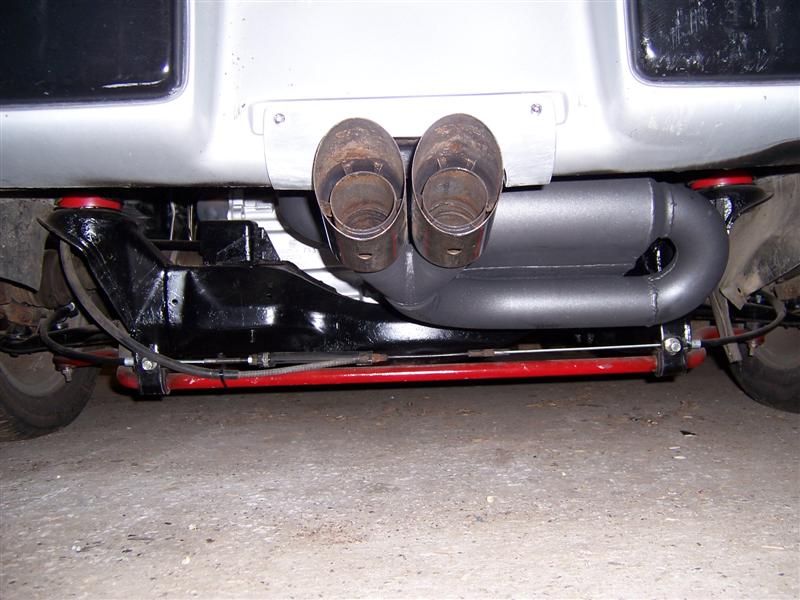
Here's a pic of the finished exhaust system
|
|
|
|
|
Bassman
Senior Post God
Sir Brian Joined: 12 February 2007 Location: Canada Status: Offline Points: 2501 |
Post Options
Quote Reply
Posted: 18 May 2011 at 9:28pm |
|
Ok, I'll be by for a visit:)...looking good, can imagine the sound:) |
|
|
Brian (Bassman)
86 GT Fastback 3.2L 2013 Mazda3 Sport GS SkyActive [IMG]http://i170.photobucket.com/albums/u243/Bassman68/BassmanSignature.png"> |
|
|
|
|
Blair
Senior Member
Joined: 12 February 2007 Location: Canada Status: Offline Points: 250 |
Post Options
Quote Reply
Posted: 12 July 2011 at 2:53am |
|
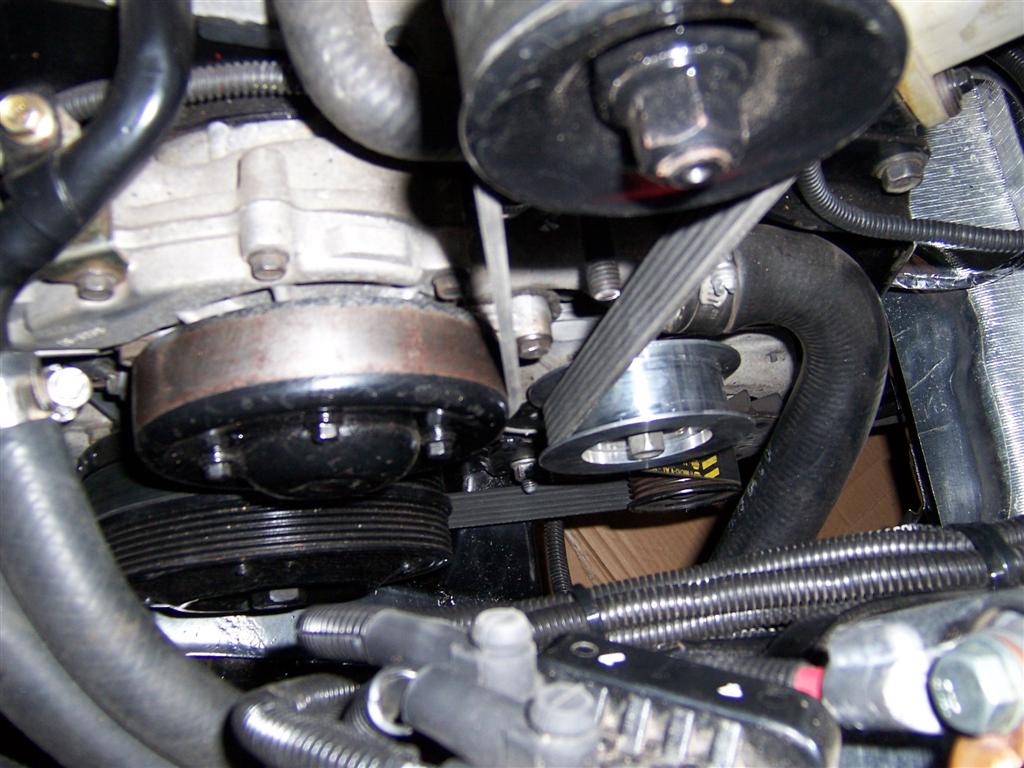
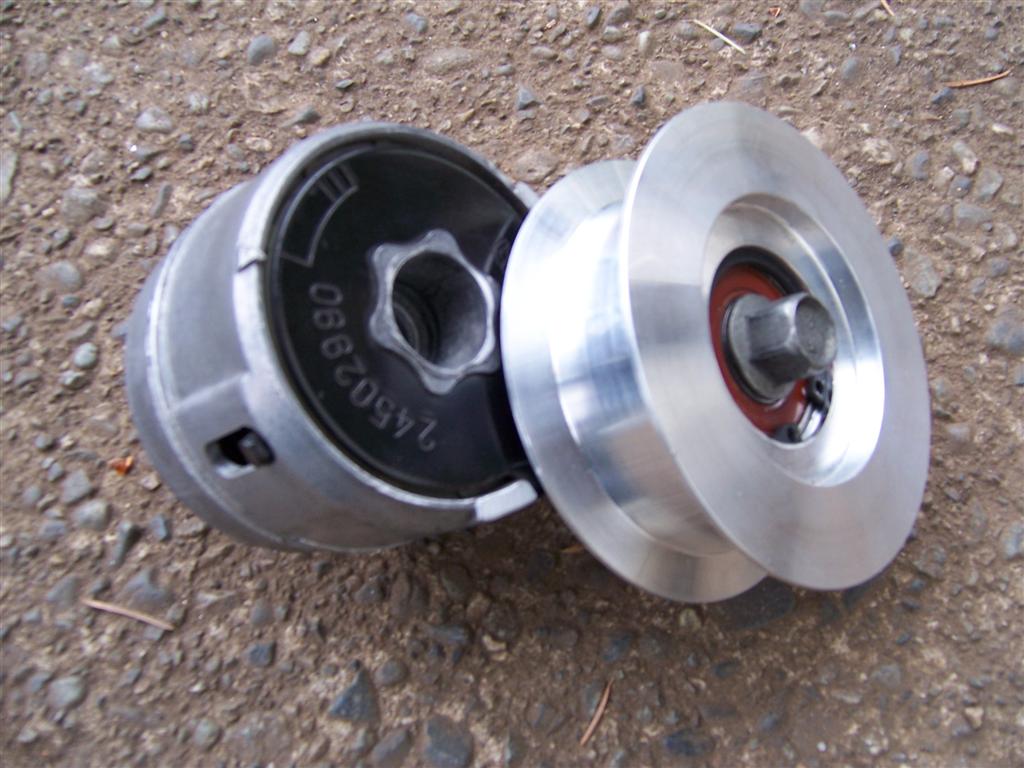
Things are coming along on the motor swap and I,m at the engine runs but do I trust it stage. I have found a couple miner wiring problems but they proved easy to find with the wiring layout I went with. I didn't trust the belt to stay on the pulley so my good friend Tim made a pulley with sides to support the belt and prevent it from walking off.
The pulley was a tight fit but did the trick well with only small mods to the water pump bolts for clearance. Sighting down the new pulley identified a 1/16" miss of the alternator pulley and required a mod to the alt. bracket. Now the alternator can be adjusted up to 1/8" in both directions.
The car is getting close to being ready for road testing but I'm a ways from being ready for aircare. Hope to have it out soon. |
|
|
|
|
Capt Fiero
Admin Group
Founding Member Joined: 12 February 2007 Location: Canada Status: Offline Points: 4039 |
Post Options
Quote Reply
Posted: 12 July 2011 at 6:56am |
|
Blair your soundbite is here, www.captfiero.com/398.wav
|
|
|
Capt Fiero
88 Fiero GT 5spd V6 Eight Fifty Seven GT V8 5spd. |
|
|
|
|
Blair
Senior Member
Joined: 12 February 2007 Location: Canada Status: Offline Points: 250 |
Post Options
Quote Reply
Posted: 12 July 2011 at 7:37am |
|
Thanks Dave. The sound bite is the newly installed 3800sc idling after it's first full temp warm up. What can't be herd is the blower wining and a deep subsonic note from the exhaust. |
|
|
|
|
Post Reply
|
Page <1 3456> |
 Tweet
Tweet
|
| Forum Jump | Forum Permissions You cannot post new topics in this forum You cannot reply to topics in this forum You cannot delete your posts in this forum You cannot edit your posts in this forum You cannot create polls in this forum You cannot vote in polls in this forum |


 Topic Options
 Blair wrote:
 alignment