Dawg’s head gasket chronicles |
Post Reply 
|
Page 123 4> |
| Author | ||
Dawg 
Senior Member 

Joined: 15 August 2009 Location: Canada Status: Offline Points: 988 |
 Post Options Post Options
 Quote Reply Quote Reply
 Topic: Dawg’s head gasket chronicles Topic: Dawg’s head gasket chroniclesPosted: 06 October 2010 at 4:57pm |
|
|
OK.....It's head gasket time. Here we go.
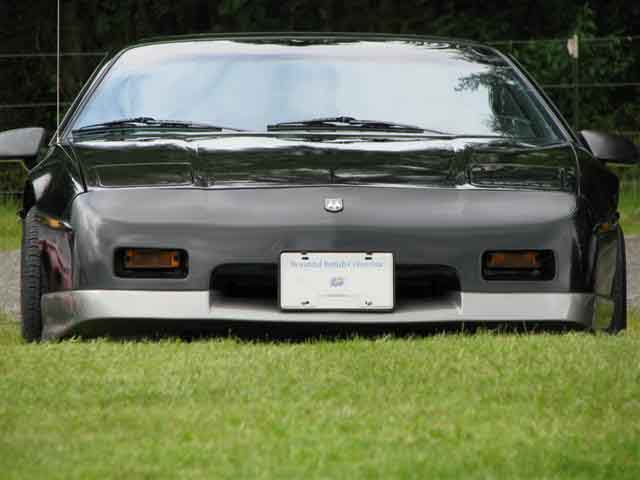
 This is our baby with her top off.....:) 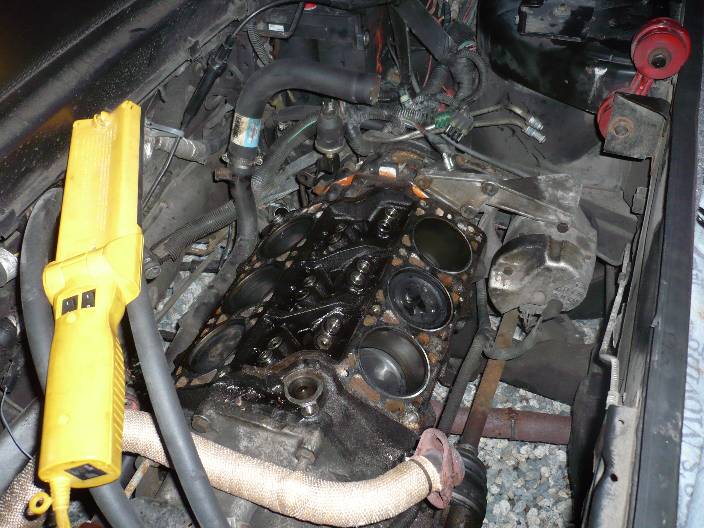 While I'm at it, may as well spiffy things up a bit. I'm trying to stick with our Gold on Black theme. Here's the before. 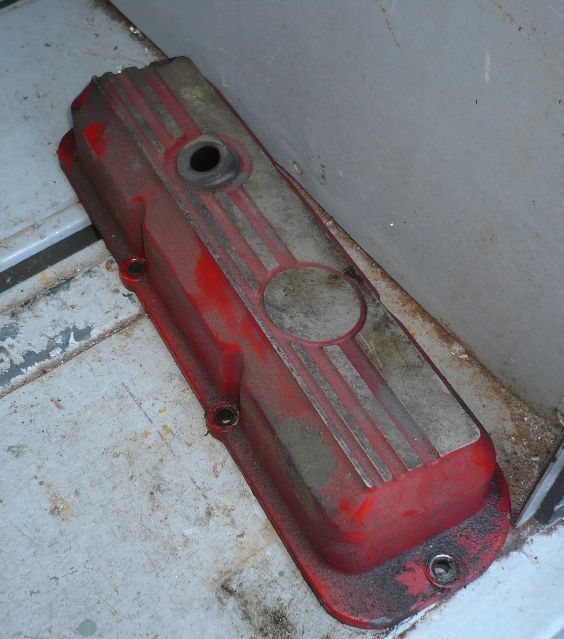 And the after. I like it. 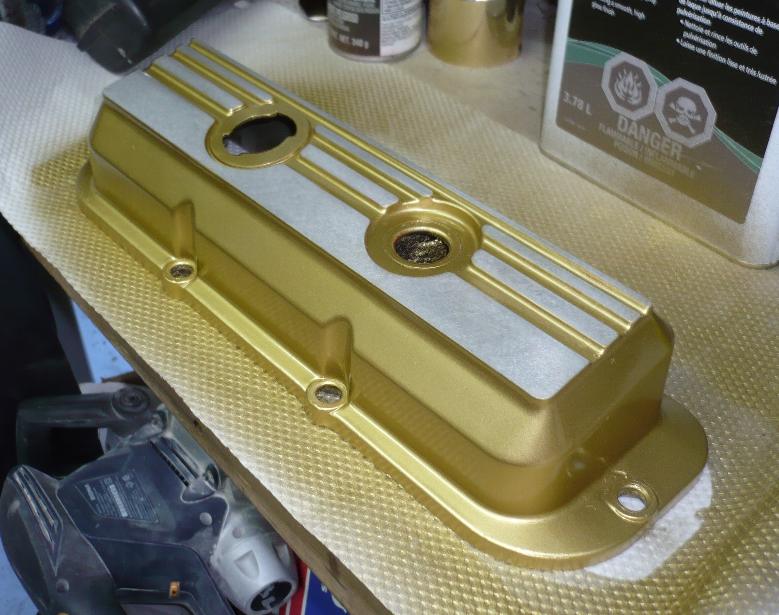 I'm going to do the Upper Plenum in the same color scheme after I give it and the Throttle Body the big bore treatment. Should look grand....eh? The Dawg |
||
|
You dream it up....I'll make it
|
||
 |
||
|
Dawg
Senior Member
Joined: 15 August 2009 Location: Canada Status: Offline Points: 988 |
Post Options
Quote Reply
Posted: 06 October 2010 at 8:00pm |
|
|
Just got the heads back after getting them resurfaced. I still have to lap the valves in and install new stem seals. Then give everything a good cleaning before mounting the heads.
I hope I can find my valve compressor. 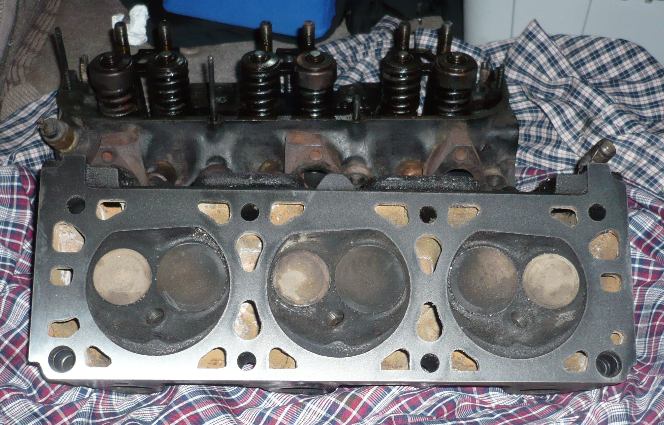 Happy days....... The Dawg |
||
|
You dream it up....I'll make it
|
||
|
||
|
Patrick
Newbie 
Joined: 19 April 2008 Location: Vancouver Status: Offline Points: 6 |
Post Options
Quote Reply
Posted: 06 October 2010 at 8:06pm |
|
|
Damien, since you have the heads off... Have a look Here for some free horsepower and better fuel economy. Seriously, it's worth at least investigating.
|
||
|
||
|
Romeo
Senior Post God 

Joined: 16 November 2008 Location: Canada Status: Offline Points: 3033 |
Post Options
Quote Reply
Posted: 06 October 2010 at 8:24pm |
|
|
Hmm... I don't know about that, will have to investigate further. On the tried and true front, are you going to port and polish (Or swirl-cut) the heads while they're off?
|
||
|
Never shift into reverse without a back-up plan.
|
||
|
||
|
Capt Fiero
Admin Group

Founding Member Joined: 12 February 2007 Location: Canada Status: Offline Points: 4039 |
Post Options
Quote Reply
Posted: 06 October 2010 at 10:12pm |
|
Pat that is one hell of an interesting article. I am definitely going to look into that mod. If it really works, I would be tempted to pull all my Fiero V6 heads even my Caddy heads, do that mod and then save the heads to increase compression and really take advantage of it. |
||
|
Capt Fiero
88 Fiero GT 5spd V6 Eight Fifty Seven GT V8 5spd. |
||
|
||
|
Dawg
Senior Member
Joined: 15 August 2009 Location: Canada Status: Offline Points: 988 |
Post Options
Quote Reply
Posted: 06 October 2010 at 10:40pm |
|
|
The theory seems like it would work. My only concern would be stress risers forming around the sharp edges. i would smooth things over a little more if I was to try it.
Not with this engine however. The Dawg
|
||
|
You dream it up....I'll make it
|
||
|
||
|
Dawg
Senior Member
Joined: 15 August 2009 Location: Canada Status: Offline Points: 988 |
Post Options
Quote Reply
Posted: 06 October 2010 at 10:52pm |
|
|
Nope. I just don't have the time to get fancy. This is a daily driver that needs to get back on the road.
Having said that. I will be modifying the upper plenum quite a bit including some gasket matching between plenums. Also going to big bore the TB while it's out. That should broaden the power curve. I was also going to put a variable fuel regulator and gauge but getting low on cash. I've spent a lot of money on my truck in the last month or so. If I hustle, I could get it going in a day. But I think I'm going to take my time and double check everything as I go. Need to paint too of course. The Dawg
|
||
|
You dream it up....I'll make it
|
||
|
||
|
Patrick
Newbie
Joined: 19 April 2008 Location: Vancouver Status: Offline Points: 6 |
Post Options
Quote Reply
Posted: 06 October 2010 at 11:52pm |
|
|
Thought you guys would find it interesting. Yeah, if I was removing a head for any reason, I think I'd be tempted to try that simple modification out.
|
||
|
||
|
Romeo
Senior Post God
Joined: 16 November 2008 Location: Canada Status: Offline Points: 3033 |
Post Options
Quote Reply
Posted: 07 October 2010 at 12:32am |
|
|
I'd try it on the irons, 'cause if they ever go to hell after, I could switch over to the Brodix heads.

|
||
|
Never shift into reverse without a back-up plan.
|
||
|
||
|
CFoss
Senior Member

Joined: 13 February 2007 Location: Canada Status: Offline Points: 580 |
Post Options
Quote Reply
Posted: 07 October 2010 at 8:28am |
|
|
That is pretty cool. It looks like about a cutting disk width to me! It's tempting to try. Anyting to reduce the likelihood of detonation as I move to the turbo.
The gasket match is pretty easy obviously. When I did my intake, I went further, and removed a large amount of material around the injector entrance. This aparently allows a better spray pattern from the injector, and better airflow. Leave the fin; I'm pretty sure it routes the air around the valve stem and improves performance.
Chay |
||
|
86 SE 3.4
|
||
|
||
|
Romeo
Senior Post God
Joined: 16 November 2008 Location: Canada Status: Offline Points: 3033 |
Post Options
Quote Reply
Posted: 07 October 2010 at 1:26pm |
|
|
Let me know how it goes. I understand the logic in that, but I'm extremely skeptical. Manufacturers dedicate HUGE money into develloping heads (Superceded only by the block and PCM in terms of cost-to-devellop), even going to far as to C'n'C cut aluminum these days. If something so simple made that large a difference, I'd be willing to bet they'd be doing it already.
|
||
|
Never shift into reverse without a back-up plan.
|
||
|
||
|
Dawg
Senior Member
Joined: 15 August 2009 Location: Canada Status: Offline Points: 988 |
Post Options
Quote Reply
Posted: 07 October 2010 at 2:15pm |
|
|
Also, have a good look at the heads I just got done. The flat "shelf" that presumably is shielding fuel from the wave front is very tiny. So at least in this case, it doesn't seem worth doing even if it does work.
On a V8 head however, there can be a much bigger shelf present. Especially high compression varieties. As much as I like to support free thinking and new ideas I agree with Tristan on this one. Seems highly unlikely that hundreds of engineers would miss something like this. I have never seen such grooves on any head before. The Dawg |
||
|
You dream it up....I'll make it
|
||
|
||
|
Dawg
Senior Member
Joined: 15 August 2009 Location: Canada Status: Offline Points: 988 |
Post Options
Quote Reply
Posted: 07 October 2010 at 5:54pm |
|
|
Ok....who wrote these Fiero manuals anyway?
I just looked up the torque specs for the head bolts and they say 65-90 FT-LBS. Huh? Ok.....I choose 90.....what do I win? And does anyone have a valve compressor I can borrow? I looked all over and can't find mine. It's one of those tools that you need every blue moon but are screwed if you don't have one. Thanks, The Dawg |
||
|
You dream it up....I'll make it
|
||
|
||
|
Dr.Fiero
Senior Post God
Joined: 12 February 2007 Location: Canada Status: Offline Points: 1726 |
Post Options
Quote Reply
Posted: 07 October 2010 at 7:31pm |
|
|
^ Yeah, I've got one (a decent one at that)
|
||
|
||
|
Romeo
Senior Post God
Joined: 16 November 2008 Location: Canada Status: Offline Points: 3033 |
Post Options
Quote Reply
Posted: 07 October 2010 at 9:22pm |
|
|
It means torque them in sequence to 65ft-ibs first, then go through and re-torque them all to 90ft-ibs. Realistically, 90ft-ibs off the get go should be fine. |
||
|
Never shift into reverse without a back-up plan.
|
||
|
||
|
Dawg
Senior Member
Joined: 15 August 2009 Location: Canada Status: Offline Points: 988 |
Post Options
Quote Reply
Posted: 07 October 2010 at 9:39pm |
|
|
Great, I'll phone ya tomorrow morning.
Thank you. The Dawg |
||
|
You dream it up....I'll make it
|
||
|
||
|
Capt Fiero
Admin Group
Founding Member Joined: 12 February 2007 Location: Canada Status: Offline Points: 4039 |
Post Options
Quote Reply
Posted: 10 October 2010 at 11:29pm |
|
|
I usually start at 40lbs, or even just hand spin them in / use a drill on tow torque setting. Then go to 40lbs, 60lb, 90lbs, then a final 95 or 100lbs. to finish up. I have not had a head gasket fail yet. Also not that your engine is not a Fiero motor, and you should double check the specs with a book for your exact engine, it may have a higher torque spec, also make sure to use loads of head bolt sealant, The white goopy stuff.
|
||
|
Capt Fiero
88 Fiero GT 5spd V6 Eight Fifty Seven GT V8 5spd. |
||
|
||
|
Dawg
Senior Member
Joined: 15 August 2009 Location: Canada Status: Offline Points: 988 |
Post Options
Quote Reply
Posted: 11 October 2010 at 12:31am |
|
|
I'm sure the Fiero specs will work just fine. The heads are the same and I bought "Fiero" bolts. I did go 40 60 90 BTW.
I put the thread sealant on all the bolts whether they needed it or not. Only half the head bolts go into the water jacket. I did this to keep the torque even across the head. Even pressure is WAY more important than the actual torque rating itself. Obviously too low is bad but too high can cause problems also. Things are slowly progressing. With all the painting and repairs as I go, it should be a few more days before she's running. The Dawg |
||
|
You dream it up....I'll make it
|
||
|
||
|
Dawg
Senior Member
Joined: 15 August 2009 Location: Canada Status: Offline Points: 988 |
Post Options
Quote Reply
Posted: 11 October 2010 at 4:59pm |
|
|
More progress. The intake is on.
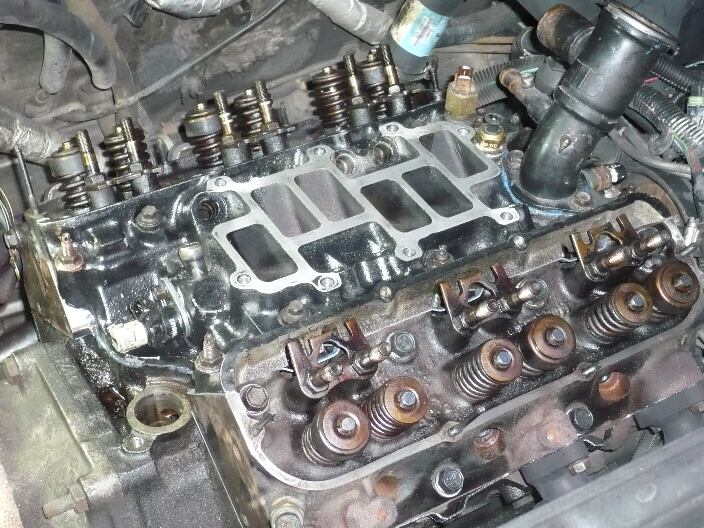 Disabling the cold start injector is a mod that many do to their engines while they're in there. This is what it looks like. Notice I cut the metal fuel line and crimped it over. At the other end is the fuel rail opening. You have to plug that up too. 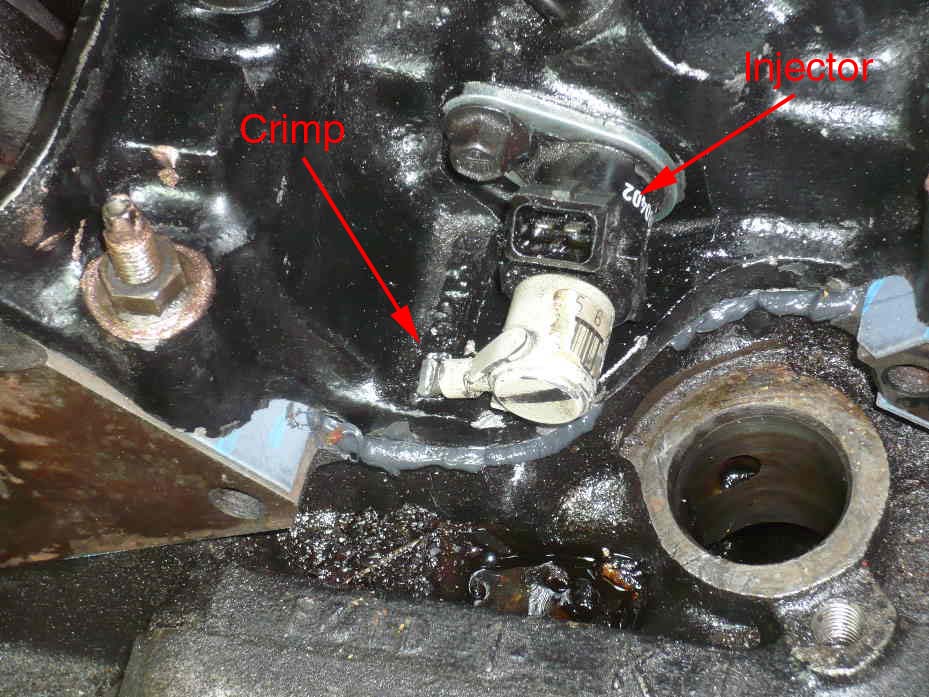 Here is a sh*tty picture of the tool I made to clean out the head bolt threads. The threads on this motor are M11X1.5. Rare thread, not easy to find this tap. So rather than do that I made a clean out tool from an old head bolt. I ground a couple flutes along the threads so capture any gunk as I ran the tool in and out of the threaded holes. Worked perfectly and cost nothing....except a new set of head bolts which I had decided to buy anyway. 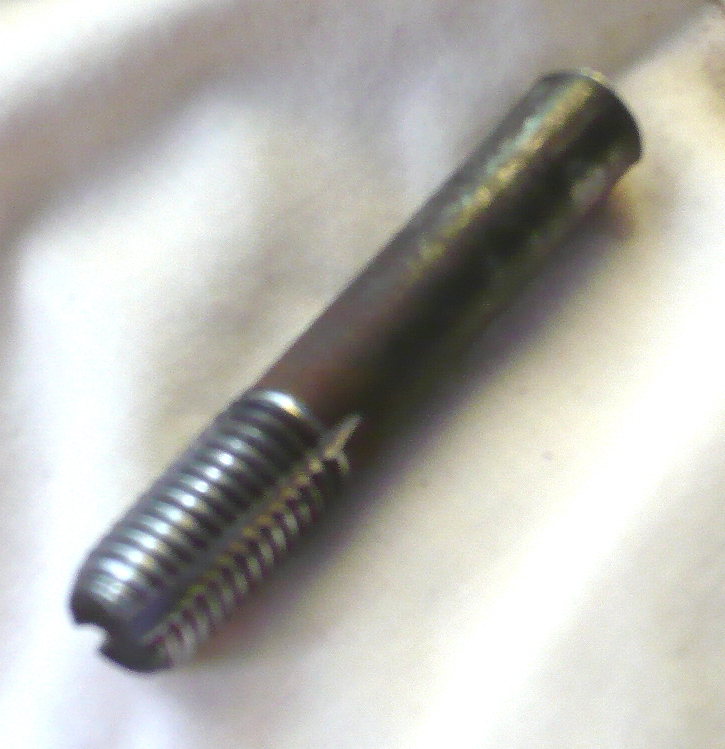 Now it's time to install the push rods and adjust the rockers. 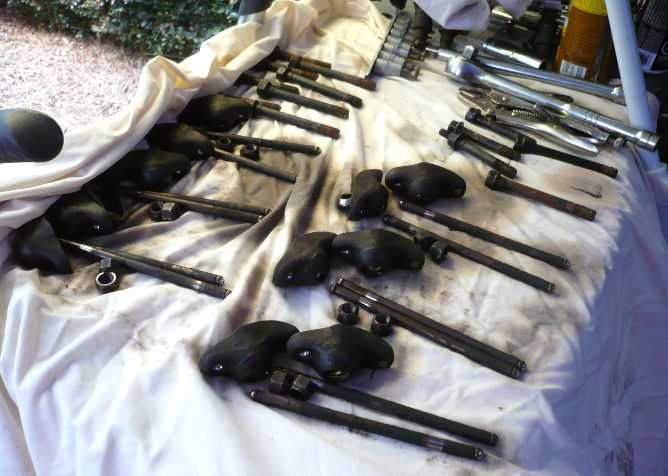 Hopefully I'll be modifying the upper plenum tonight if all goes well. The Dawg |
||
|
You dream it up....I'll make it
|
||
|
||
|
Dr.Fiero
Senior Post God
Joined: 12 February 2007 Location: Canada Status: Offline Points: 1726 |
Post Options
Quote Reply
Posted: 11 October 2010 at 9:51pm |
|
|
The fitting in the fuel rail for the cold start - it's the same as a japanese car's oil drain plug. I can never remember which one, but... pull it out, and take it to Lordco. Look at the Papco rack of drain plugs and you'll be able to match it up.
|
||
|
||
|
Post Reply
|
Page 123 4> |
 Tweet
Tweet
|
| Forum Jump | Forum Permissions You cannot post new topics in this forum You cannot reply to topics in this forum You cannot delete your posts in this forum You cannot edit your posts in this forum You cannot create polls in this forum You cannot vote in polls in this forum |


 Topic Options
 Patrick wrote: