87 GT- Inside and out
Printed From: West Coast Fieros
Category: Technical Topics Forum
Forum Name: Build Threads
Forum Description: A Place to post step by step build threads.
URL: http://www.westcoastfieros.com/forum/forum_posts.asp?TID=2860
Printed Date: 15 April 2025 at 6:39am
Software Version: Web Wiz Forums 12.01 - http://www.webwizforums.com
Topic: 87 GT- Inside and out
Posted By: Stevenr
Subject: 87 GT- Inside and out
Date Posted: 11 March 2012 at 5:57pm
|
Since I officially started to do some work on my car, I
figured I might as well post it up with progress as it happens. Rough outline of my plans( may take 10 years, who knows) EXTERIOR: -Chin spoiler -Lowered w/ 17" rims -V8 Archie Rocker Panels -Body work to fix fitment issues -Paintjob, undecided colour INTERIOR: -Mr. Mikes Leather seats/arm rest/ebrake and shifter boot in Black/grey -Paint door panel carpet black with grey accents -Paint Dash/console black -Full sound system w/ custom 8" sub box in place of center console glovebox I'll be updating this thread as I finish projects, but as this is a long term project, It may be a while between posts. |
Replies:
Posted By: Stevenr
Date Posted: 11 March 2012 at 6:00pm
|
Using Vinyl/Fabric paint, I refinished the door panel and
handle to match the incoming interior. See below for pictures, apparently I can't figure this out 
|
Posted By: D_sensitized
Date Posted: 11 March 2012 at 6:15pm
|
add [IMG ] before and [/IMG ] after the link (without the spaces)
Or, since your using photobucket, copy the IMG tags from the picture on photobucket and paste those Before: 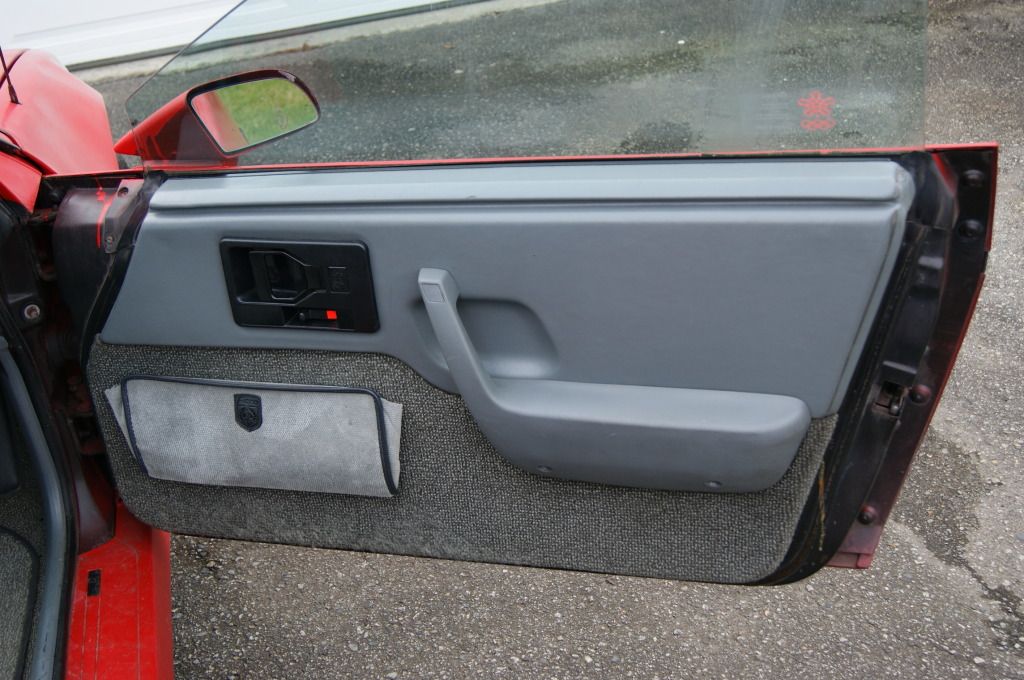
After: 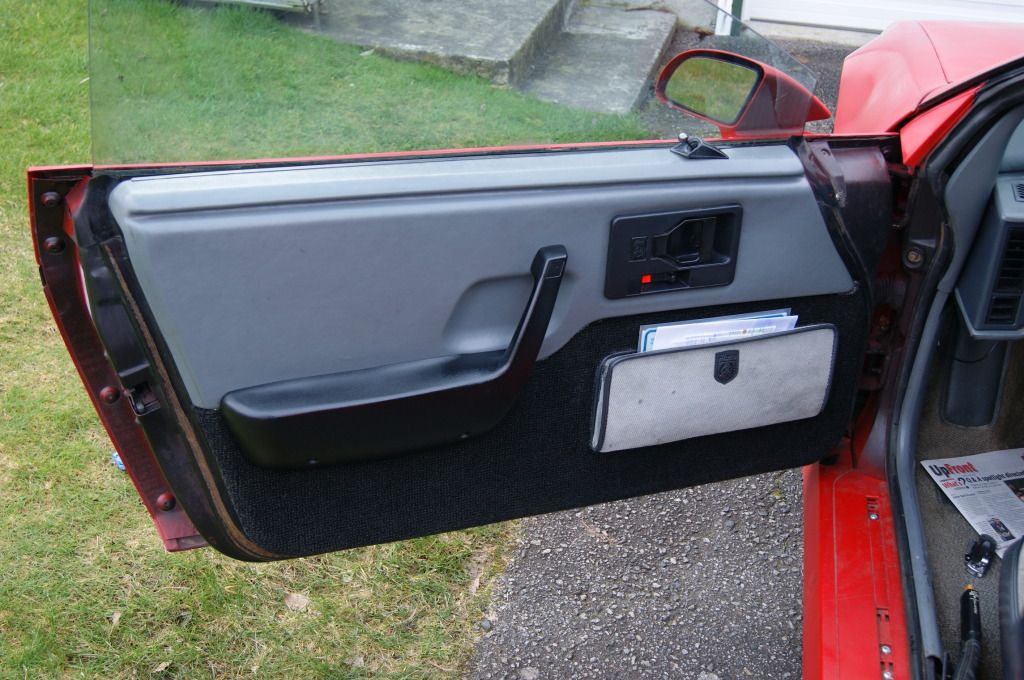
Looks good ------------- -Harrison 88GT 3800 SC1 F23 5-speed Chilliwack |
Posted By: Stevenr
Date Posted: 11 March 2012 at 6:25pm
|
I'll do the other door tomorrow, and perhaps pick up a grey
that's a bit closer to the door for the map pockets. |
Posted By: Stevenr
Date Posted: 13 March 2012 at 8:53pm
|
Second door done, might do the map pockets with the darker grey
tommorrow. Audio is all going in this weekend. |
Posted By: Romeo
Date Posted: 14 March 2012 at 1:16am
The doors look awesome! Like a factory option! Here's hoping everything comes together with no hiccups for you.  ------------- Never shift into reverse without a back-up plan. |
Posted By: Stevenr
Date Posted: 14 March 2012 at 5:18am
|
Thanks Romeo, but the more I read, the more I don't think
that will happen 
Also changing plans, will be going V8 archie Rocker panels instead of the Side scoops. |
Posted By: Stevenr
Date Posted: 19 March 2012 at 3:10pm
|
Deck was installed after about 5 hours of failure. Lots of
small things wrong with old cars! 
SubWoofer and Amp will be going in this coming weekend hopefully. |
Posted By: Stevenr
Date Posted: 21 March 2012 at 5:21pm
|
Made some progress, cleaned up the center console, made some
touch ups, and painted the passenger floor mat to match the door. Pics will be uploaded tonight. Also mocked up the sub in the center console, but im worried with the sub magnet being so close to the ECM, so im going to buy an already made one that mounts further forward, also will probably look better 
|
Posted By: Stevenr
Date Posted: 23 March 2012 at 2:46pm
|
Center Console Subbox ordered, should be here in two
weeks approx. Changed my plans: V8 Archie Hatchback in place of Choptop V8 Archie Rocker Panels in place of 2.1 side scoops Once it get's nice/hot consistently, I'm going to re-do the spray can job properly so it looks decent Also going to go to Pick-apart this weekend and see if that front bumper is still there, and try and get started on the front lip. |
Posted By: Stevenr
Date Posted: 24 March 2012 at 4:59pm
|
Today was a beautiful day, so I decided to try and fix
the sagging rear bumper. Good news, I fixed the rear bumper, also sanded down a bit, and rust-oleum'd the metal bumper behind. Bad news, I'm feeling pretty overwhelmed by the overall shape of the exterior... Might have to add new Fiberglass front and rear bumper to my wishlist. Also the paint is starting to crack, orange peel everywhere, and a large bubble on the hood. When it's time to repaint this thing, do you guys suggest sanding ALL the spray paint down? |
Posted By: Stevenr
Date Posted: 31 March 2012 at 2:32pm
|
Little update, been to rainy to work on the car, but have
been driving it quite a bit. The battery died, so I got a new battery for it, the sub/audio system will need a good battery anyways. Center subbox/console is on it's way, then I'll get the rest of the system installed. Official plans: Fiberglass front bumper with chin spoiler, V8 archie rockers. Once that's all aquired, going to assemble it, sand everything down to original paint or down to plastic, then just use black primer for now. I'm shy'd away from spray-painting it since eventually I'll want to get a real, quality paintjob and spraypaint will significantly increase the cost. |
Posted By: Dawg
Date Posted: 31 March 2012 at 8:23pm
|
To do a quality paint job, they need to sand a fair bit off anyway. I'm
not sure it matters whether you have rattle can paint or not. An old car like this needs to be prepped right either way. You may as well try and make her look as nice as possible till you can afford the full meal deal. We could talk more about bodywork at the tech session if you like. Bring the supplies and we could do a small patch somewhere to show you the way. Dawg ------------- You dream it up....I'll make it |
Posted By: Capt Fiero
Date Posted: 31 March 2012 at 10:43pm
|
Talk to Dr. Fiero, he bought a complete HVLP system that runs off of basically an over rated vacuume cleaner in reverse. Blower, Sprayer and all is only around $200 at Princess Auto, and we used it to shoot my Black 857 GT V8 into primer and it came out really well. Good enough to take 2nd place at the All Pontiac show in the fastback class. P.S. Dawg from what I have been told the chemicle in spray bombs that is used to cure the paint, actully soaks into the eurathane (sp) panels on the Fiero's and makes them really hard to spray correctly later. Which is why I replaced all the panels on my car and sanded the hell out of the rest of them. ------------- Capt Fiero 88 Fiero GT 5spd V6 Eight Fifty Seven GT V8 5spd. |
Posted By: Stevenr
Date Posted: 01 April 2012 at 9:42am
|
Sounds good :)
Yes, I've been reading that something about the spray paint will not bond properly with proper Automotive paint, which will require having it completely sanded down, severely increasing labor. I'll just leave it in a black primer until I'm ready for a "real" paintjob. Question for the electrically inclined folks...( copied from PFF): Hey everyone, I purchased an aftermarket stereo system including: Stock front and rear speakers(for now) Alpine CDE-121 deck Pioneer AMP 8" Kicker sub for the center console Now, after much over broken parts, and general old condition of the HVAC console, we got the deck installed. The AMP and sub will be installed when the center console/subbox arrive. Now for the problem... when we were installing it, (Couldn't find a wiring harness) there was no accesory wire to connect to the decks accessory wire. So temporarily, I've got it routed into the fuse box just to see if it works. The deck works, sounds good, but turns off when you turn off the motor even if the accessory stage is still on,stall, etc. Are there any other options to wire this so it will turn on and stay on with the interior lights, and not actually starting it? |
Posted By: Stevenr
Date Posted: 03 April 2012 at 3:31pm
| Got the head unit fixed, that was actually quite fun :) |
Posted By: Stevenr
Date Posted: 10 April 2012 at 2:59pm
|
SubBox/center console should be arriving within the week.
Going to re-do the firewall and door carpet with some leather-ette or vinyl, get black carpet, and Mr-mikes within the next month hopefully. Then a new steering wheel and pedals will be in order. Body work starts soon, then I'll be trying something I've found... Also going to add a new ground wire, see if that helps windows/gauges and idling. Only question, what color for the the two-tone to match the exterior? I can't decide on a color! |
Posted By: Stevenr
Date Posted: 16 April 2012 at 3:00pm
|
Mr Mikes seats and interior kits ordered!
Subbox/center console is MIA... emailed several times, starting to panic. |
Posted By: Stevenr
Date Posted: 23 April 2012 at 5:39pm
|
Center Console finally arrived after a few emails back
and forth. It arrived, and is now clear that the piece has many issues. - Clear that a mistake was made, piece was glued back into the shifter portion. -Shifter portion positioned/cut wrong, cannot shift into 2nd or 4th. -Power control portion cut wrong, large gap. -Sides of box has 1/2 inch gap between carpet and box. Overall, very dissapointed/angry about this situation, after waiting so long only to have a poorly made product arrive. |
Posted By: Stevenr
Date Posted: 01 May 2012 at 3:15pm
|
Nothing happening with the dealer, so I'm stuck with
it... but I'm making it work. Progress: Subbox has been re-cut to fit the shifter properly, and the power window switches are molded in, rather than being about an inch below. Half way through installing the actual Sub, it's looking good though! Yesterday I got a new front bumper in mint condition from Dr.Fiero, had a nice chat, and the front lip project will now start once I swap bumpers. Mr.Mikes seats, lower door skins, and firewall cover on their way. Also covered all the dash bezels in Carbon Fiber Vinyl/wrap material, looks identical to the 300$ dash kit from fieroshop, but cost me 30$. Will try to get some pictures tonight, I know a build thread is nothing without pictures! |
Posted By: D_sensitized
Date Posted: 01 May 2012 at 7:49pm
|
Sounds good, looking forward to seeing more pictures.
You don't have any of the CF vinyl left do you? ------------- -Harrison 88GT 3800 SC1 F23 5-speed Chilliwack |
Posted By: Stevenr
Date Posted: 01 May 2012 at 8:38pm
|
I've got A tiny bit, though not enough for any of the
bezels. It's similar to this; http://www.canadiantire.ca/AST/browse/4/Auto/AutoCustomPe rformance/Decals/PRD~0410292P/Carbon+Fibre+Pattern+Adhesi ve+Film.jsp?locale=en But comes in larger rolls and is found directly next to the window tint. Spent literally all day today putting on the new bumper which required removing the hood.... BIG mistake. Ended up grinding up the edges into the SMC/fiberglass and after a few hours, finally got it to the point where it would even close! The hood is ridiculous! |
Posted By: Stevenr
Date Posted: 07 May 2012 at 6:34pm
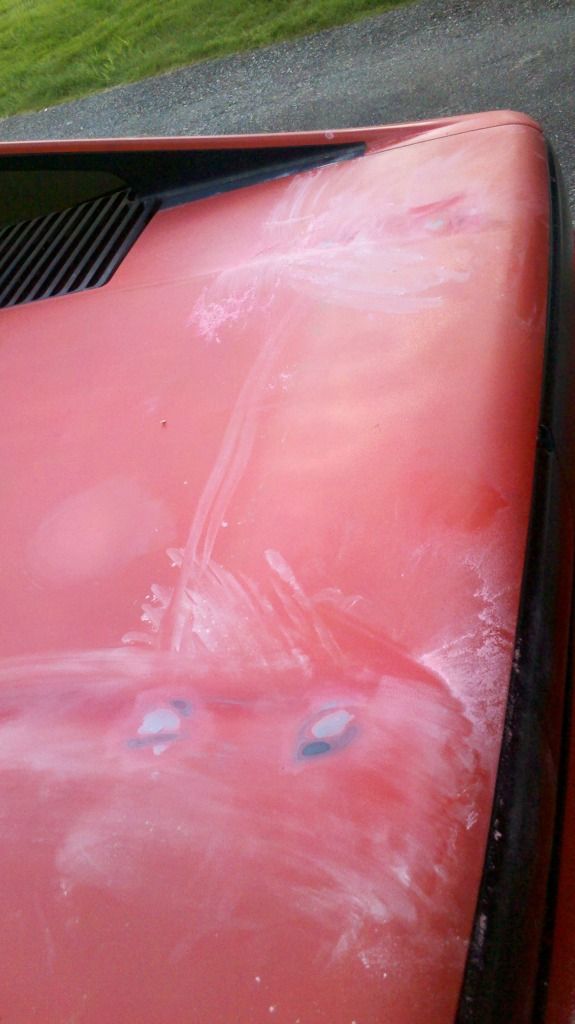 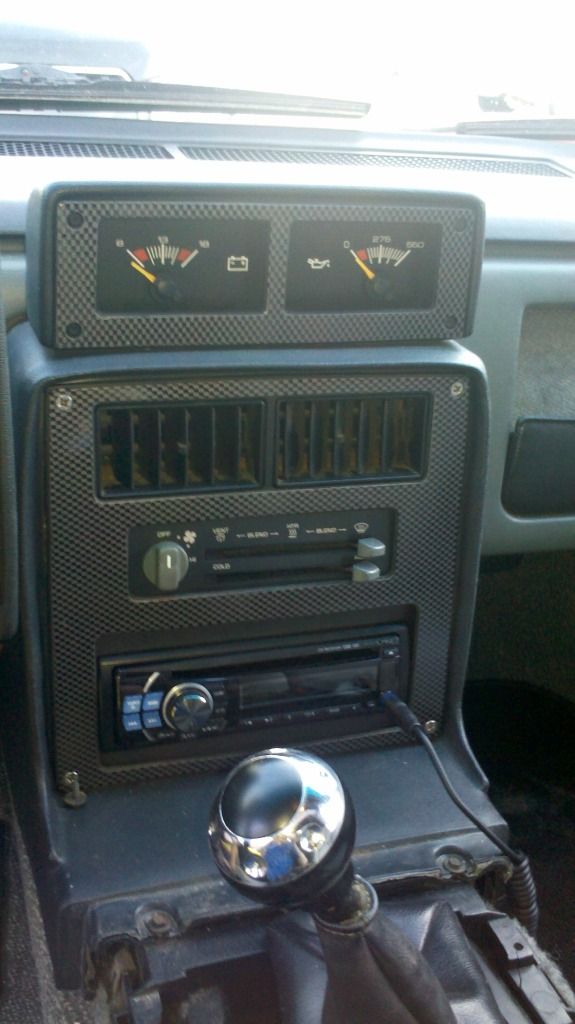 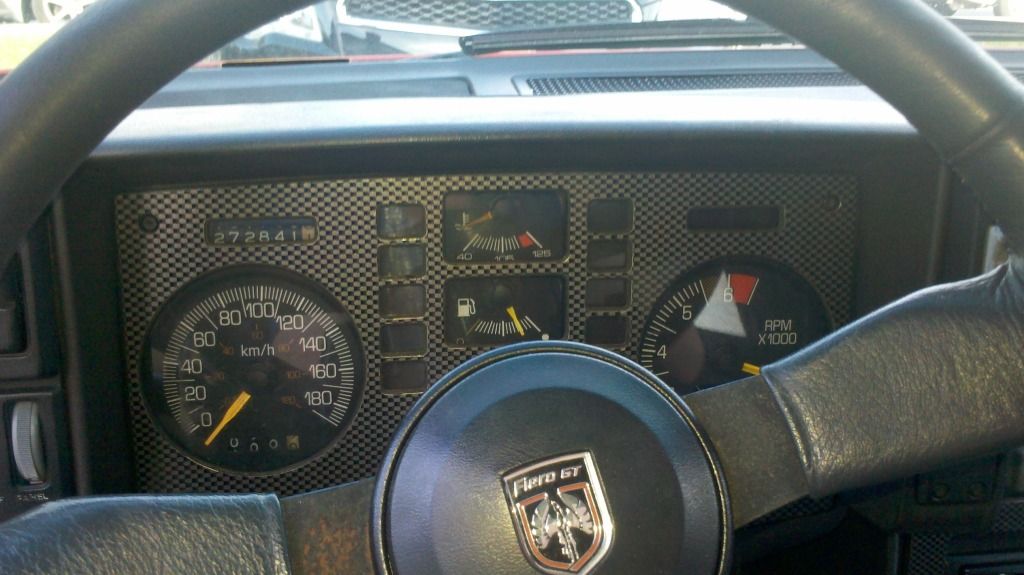 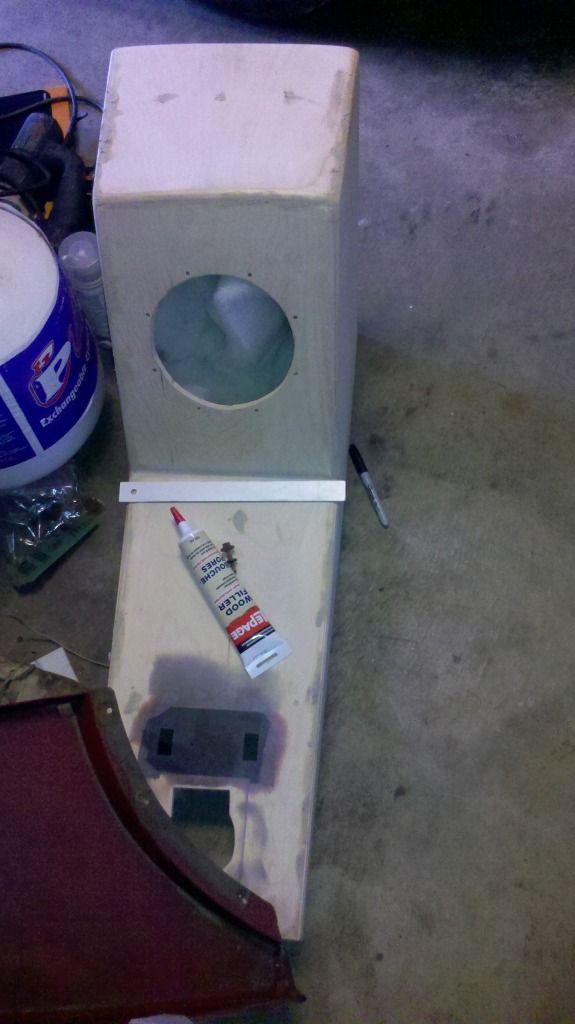  {dr fixed yer' pix} As soon as I figure this out, pictures will be up. (dr. sez: copy & paste what it says beside "IMG Code" on photobucket) After installing the new bumper, I've now started on the front lip, skitime style. Filled the rear wing holes and sanded them down. Pictures of the CF dashes are also there, along with progress on the subbox. Currently waiting on some glue from my fathers work to solidify the inlay-ed mirror switch plate, then I will smooth it out again. Wood filler, sanding, all that good stuff too. |
Posted By: Stevenr
Date Posted: 10 May 2012 at 6:37pm
|
Ordered a mustang scoop and in the process of finding some
epoxy/filler for the rear decklid. Thank-you Dr., I swear I tried the IMG code, but they wouldn't show up. I think I might be crazy, or maybe they take a while to load? Also, Mr.Mikes seats, firewall cover, and lower door skins are almost here! |
Posted By: Dr.Fiero
Date Posted: 10 May 2012 at 6:55pm
|
It's really fussy on format. Just copy and paste the link photobucket
provides. Works fine. |
Posted By: Stevenr
Date Posted: 14 May 2012 at 3:43pm
|
While I can't drive the fiero... I can install the Mr.Mikes
seats that just arrived! Going to hopefully get these done in the next few days, going to do it nice a slow, make sure it's perfect :) |
Posted By: Stevenr
Date Posted: 17 May 2012 at 5:15pm
|
Testing out an idea I had...
|
Posted By: Colby
Date Posted: 17 May 2012 at 5:22pm
|
Try a different web browser. This forum seems to be a bit weird and starts a new line of text after so many characters on some browsers (like Chrome and most cell phone browsers), which breaks your image tags.
------------- 88 Formula 5 speed |
Posted By: Stevenr
Date Posted: 17 May 2012 at 9:34pm
| Maybe thats it, ill try another when I get to the computer! |
Posted By: ARTIC-1
Date Posted: 17 May 2012 at 10:36pm
|
ive found some times i have to change the the file name to somthing a little shorter,like 562.jpg"> just try it an see an then it will except the file,all so have to hit the return bar when posting a pic after text. hope this helps ------------- SNOW MAN 87-GT/AUTO-2.8_ WHITE 88-TTop/ Duke-2.5. RED |
Posted By: Stevenr
Date Posted: 19 May 2012 at 1:08pm
|
There we go! Thanks for the suggestions.
And don't worry, that's not spray paint! |
Posted By: Stevenr
Date Posted: 20 May 2012 at 1:48pm
|
Finishing the rest of the Mr.Mikes lower door skins as we
speak, might wait to fully install until I buy my black carpet though. Pictures when they are done, now that I know how to post them! Also going to get some work done on the sub-box, but I need suggestions on finishing it. Would you get it professionally upholstered( was quoted for almost 200$ ) or go another route? |
Posted By: Stevenr
Date Posted: 29 May 2012 at 9:16pm
|
And so the transformation begins... Grey to black! Ordering some missing trim and parts, as well as some black carpet pretty soon. Once that all comes in, everything goes back together and I'll start on the exterior! The dash was rediculous to get out but....Voila!(see below)
|
Posted By: Stevenr
Date Posted: 10 June 2012 at 9:50pm
|
One step forward, two back!
After removing the headliner after realizing it was still in bad condition and grey, it fell into 7 pieced. After numerous attempts to save it, I had to order a fiberglass replacement from the fieroshop... The shipping was twice the price on the unit, ouch! Looks like it won't be done before I go away for a month at the end of this month, oh well; it'll still be sitting there when I get back! |
Posted By: Stevenr
Date Posted: 18 July 2012 at 6:27pm
|
Alright, home now and will be starting the assembly
tonight/tomorrow. Wish me luck and I hope I didn't lose any screws. |
Posted By: Stevenr
Date Posted: 26 July 2012 at 9:23pm
|
Got the dash in as well as the door panels today. I'm
scrambling, looking for screws... note to self, label EVERYTHING. I'm going to probably end up with extra screws... but as long as everything is tight and it works I won't worry about it. Looking good though, starting to shape up. |
Posted By: Twinn
Date Posted: 27 July 2012 at 12:51pm
| More pics, more pics |
Posted By: Stevenr
Date Posted: 29 July 2012 at 5:34pm
|
I'll snap some once I get the headliner in tomorrow :)
There's one flaw i hadn't noticed though, I glued the black vinyl lower door panel on a little off, and now there's a gap between the concaved ridge and the vinyl... bugging me but not sure how to fix it quite yet. I'm also going to run the wiring for my sub before I install the firewall cover back on; how do I get through the firewall to the battery? Are there any problems with just drilling a small hole straight through? |
Posted By: Dr.Fiero
Date Posted: 29 July 2012 at 5:48pm
Yes! It's double walled for the most part. If you insist, just make it up way high. Best bet is to just pierce a hole by the shifter cable (in the rubber boot) and ram the wire through. Keeps it water and vapour tight. |
Posted By: Capt Fiero
Date Posted: 29 July 2012 at 6:01pm
|
If you drill high up roughly the same height as the battery, you will be fine. I chose to do that rather than run the extra 2 feet of wire to go from my amp's power feed around the amp, down to the shift cable, then back from the cable up to the battery. Just make sure to use a good fuse and a grommet if possible. Fuse is mandatory, grommet is recommended. I ran it like this for years and did not have any issues. However as the good doctor said, if you drill down low, you will find out that you have multiple things in your way and several layers of sheet metal to deal with. ------------- Capt Fiero 88 Fiero GT 5spd V6 Eight Fifty Seven GT V8 5spd. |
Posted By: Stevenr
Date Posted: 30 July 2012 at 4:24pm
|
I'll try the shifter cable idea before going crazy with the
drill and snap some pictures. |
Posted By: Stevenr
Date Posted: 30 July 2012 at 5:50pm
|
Got held back once again... trimmed the headliner fabric
too much and now I'll have to re-do it once I go pick up more... This is taking ten times longer than expected. |
Posted By: Stevenr
Date Posted: 27 August 2012 at 3:03pm
|
Got the headliner in, installing sun shades tonight, then
I'll put in the sub and finish off the with the seats later this week hopefully! |
Posted By: Dawg
Date Posted: 27 August 2012 at 8:27pm
|
Pictures.....must have pictures. Your adoring public demands it.
Dawg ------------- You dream it up....I'll make it |
Posted By: Stevenr
Date Posted: 28 August 2012 at 7:36am
|
Will snap them after work today. Theres a bunch of things
that are bugging me to no end, but with a 20~ year old car you can't expect everything to work out perfectly haha. At this point I really just want to get the interior done and start fooling around on the exterior! |
Posted By: Dawg
Date Posted: 28 August 2012 at 10:11am
|
We like to call that "having character", it sounds more better....:-)
Dawg ------------- You dream it up....I'll make it |
Posted By: Stevenr
Date Posted: 28 August 2012 at 6:13pm
| I like that better haha. Taking pics and will upload soon. |
Posted By: Stevenr
Date Posted: 28 August 2012 at 9:12pm
|
http://i601.photobucket.com/albums/tt91/erennert/Car1.jpg
http://i601.photobucket.com/albums/tt91/erennert/car2.jpg Wierd linking at it again... don't have the willpower to try and figure out how I did it last time; used to think I was good with computers... 
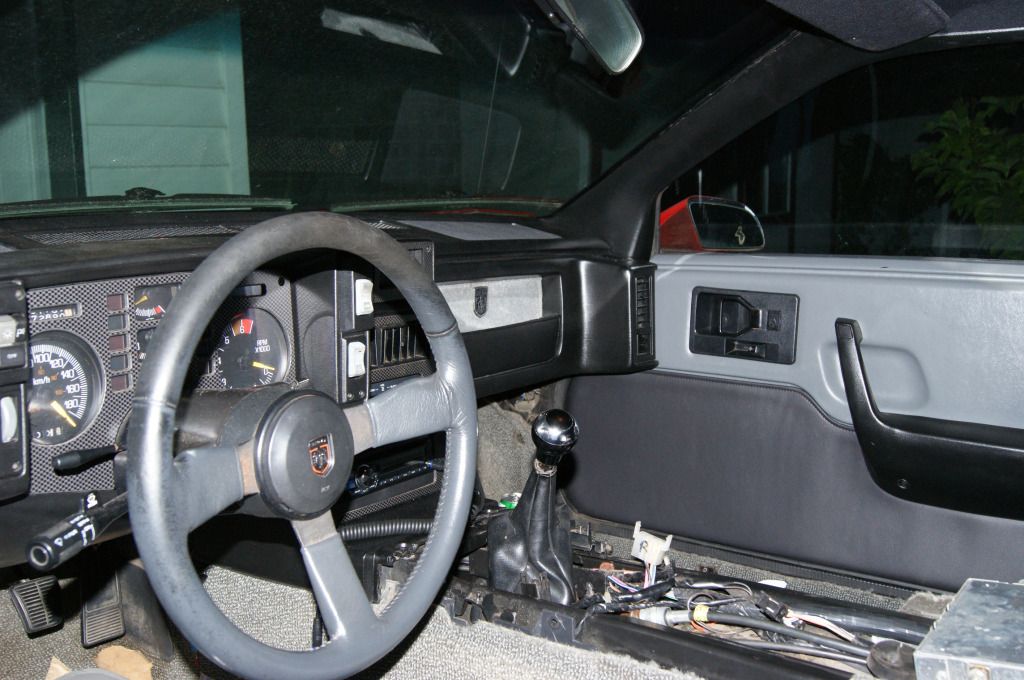
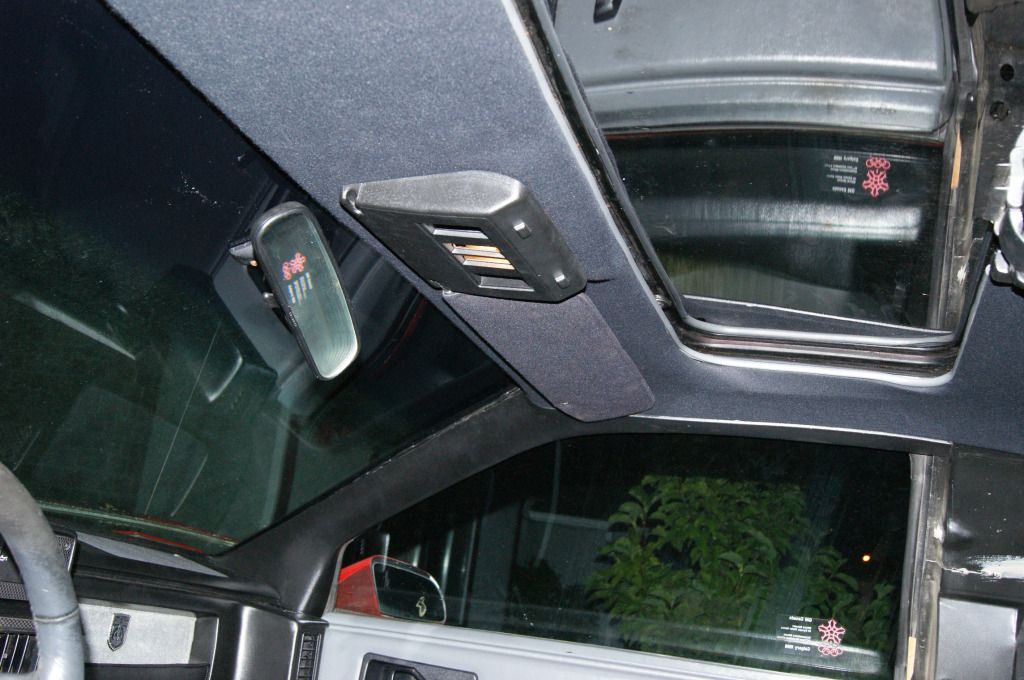
The headliner looks much darker than it does in the picture. A friend is coming by on the weekend to help with the sound system ( found the shifter cable grommet through firewall!) then I will install the firewall cover and seats, and work on getting the sub box covered and finished. |
Posted By: D_sensitized
Date Posted: 28 August 2012 at 9:29pm
 ------------- -Harrison 88GT 3800 SC1 F23 5-speed Chilliwack |
Posted By: Stevenr
Date Posted: 15 September 2012 at 4:28pm
|
Will get pictures of the finished project this
weekend. It turned out REALLY nice if I may say so myself and I'm very proud of it. |


 Stevenr wrote: