Build up thread of my "SS10 Blazer" |
Post Reply 
|
Page 123> |
| Author | |
Dr.Fiero 
Senior Post God 
Joined: 12 February 2007 Location: Canada Status: Offline Points: 1726 |
 Post Options Post Options
 Quote Reply Quote Reply
 Topic: Build up thread of my "SS10 Blazer" Topic: Build up thread of my "SS10 Blazer"Posted: 07 September 2008 at 2:45pm |
|
Warning! This thread has become SO NOT 56K friendly it's not funny!!!!!
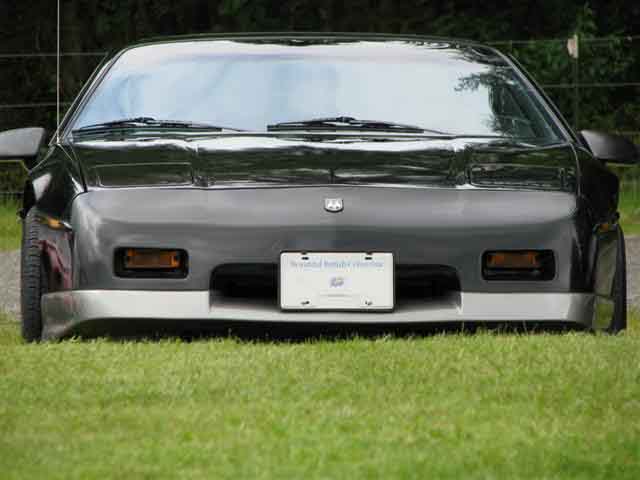
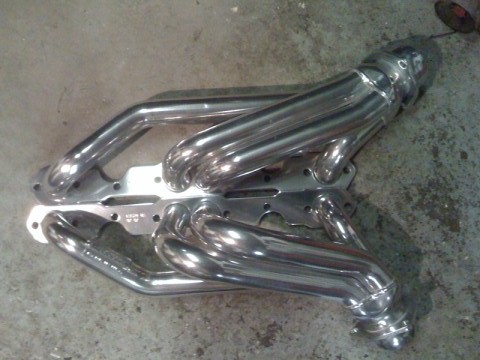
 SS10 is a name I've been tossing around anyhow. :)  Started off life as a VERY tired (385K km) 4dr 2 wheel drive Blazer. 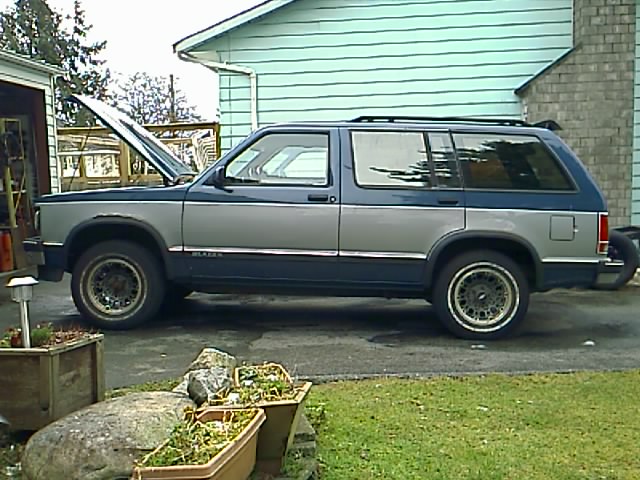 Body up front was really rusty (stick your hand through the hole size!), but they were all replaceable parts (THANKS STU!!!!!) so that wasn't a concern. It was optioned out with all the power toys (digital dash, AC, PW, PM, PDL, rear wiper, etc), so that was good. And with only about 5% of production being a 2WD, I figured I'd scoop it up. After a good deal of time (few months of very cold weather!) I ended up here'ish: 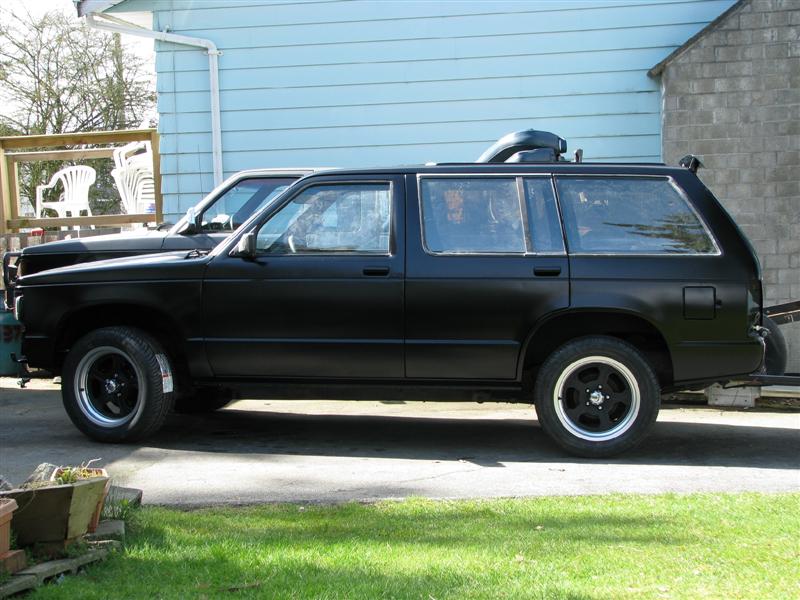 Still has the stickers on the brand new rubber as you can see! And it's still too high. So, some blocks in the back, and springs & spindles up front got it about here: 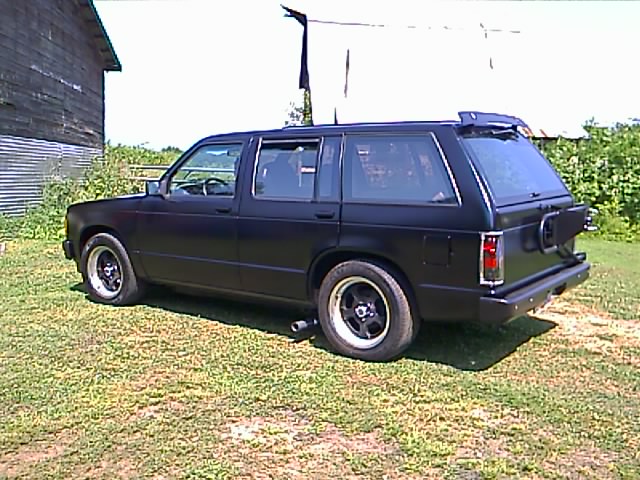 It's a 4spd auto, with a 4.3 that I added long tube headers onto: 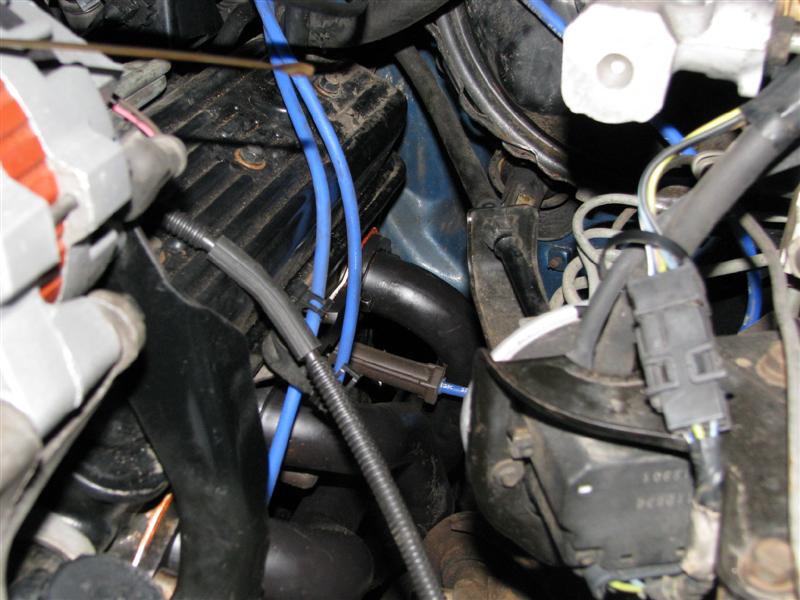 |
|
 |
|
|
Dr.Fiero
Senior Post God
Joined: 12 February 2007 Location: Canada Status: Offline Points: 1726 |
Post Options
Quote Reply
Posted: 07 September 2008 at 2:52pm |
|
Anyhow, I've been buzzing around in it for the summer, and it's... well... OK. Has a decent sound to it with the headers, going into a pair of Flowmasters with side pipes.
But, it's just not enough.... So, I picked up this! 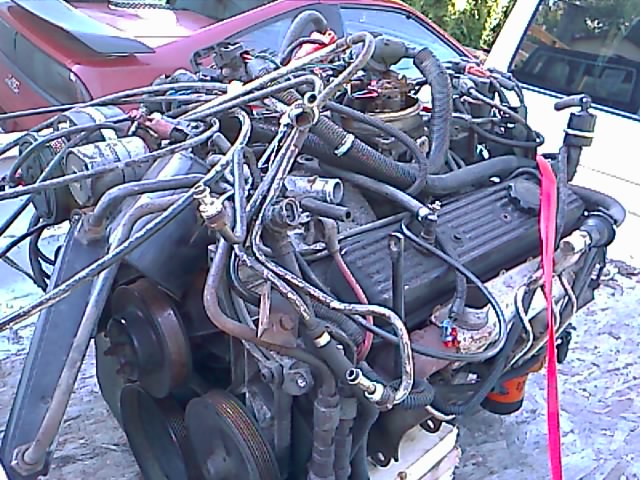 Which, when "peeled back" of all the hoses cables, wires and assorted crud leaves you with: 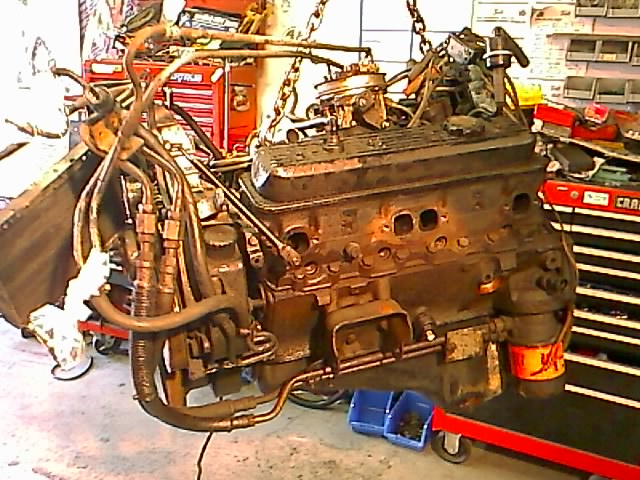 It's a 350/5.7L out of a 1990 Caprice cop car (9C1 package). It's a roller cam engine, and it's been on synthetic it's whole life. Has the external engine oil cooler you can sort of see. I've seen a video of a chase between a helicopter, and a stolen one of these cars - the copter couldn't keep up when the car exceeded 130MPH. That's pushing about a 6000lb car down the road - think how much fun it'll be with me at about 3500 lb's, and low 3.73 gears! :D I'll keep ya'll posted as I move along. Edited by Dr.Fiero |
|
|
|
|
Dr.Fiero
Senior Post God
Joined: 12 February 2007 Location: Canada Status: Offline Points: 1726 |
Post Options
Quote Reply
Posted: 08 September 2008 at 6:16am |
|
Oh yeah, forgot - for an engine with 'a few' miles on it, I was happy to see this:
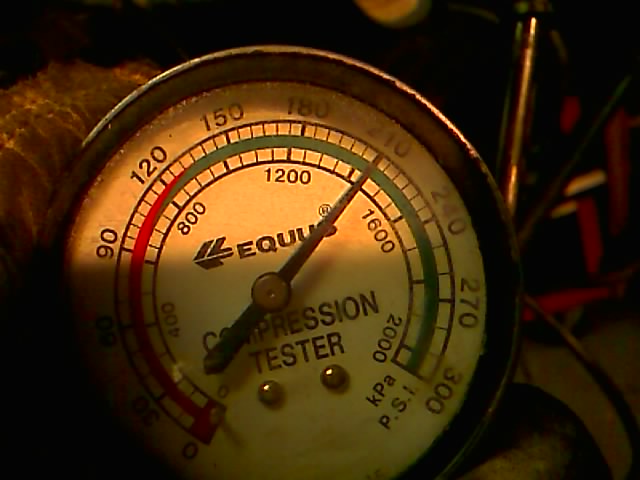 Pretty consistent across the board, with a couple hitting 220. It hasn't been run in a while, so the rings need to settle back in I think. Should be a good squueze for a nice hot cam. Headers (a must in this install) will be there as well. Going to look into an aluminum intake. AFR heads one day (they're like 150HP bolt on!). |
|
|
|
|
Dr.Fiero
Senior Post God
Joined: 12 February 2007 Location: Canada Status: Offline Points: 1726 |
Post Options
Quote Reply
Posted: 07 January 2009 at 12:36pm |
|
Been opening the wallet and pouring it all over the engine the last little bit.
I *was* going to just drop it in as-is, but.... I went to drain the oil out of it, and found LOTS of water in there. :( So, started tearing down a few things which turned into a "while I'm in there" mission - and then got even more carried away with recamming it, and all new bearings... which led to new Vortec heads, which of course required a new intake.... bla bla bla.... So, here it is with the covers off showing some of it's sexy bits.... 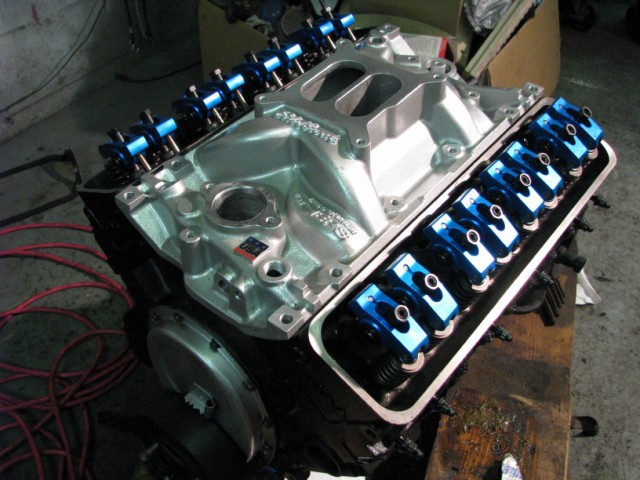 And with some of it's shiny bits sitting on it: 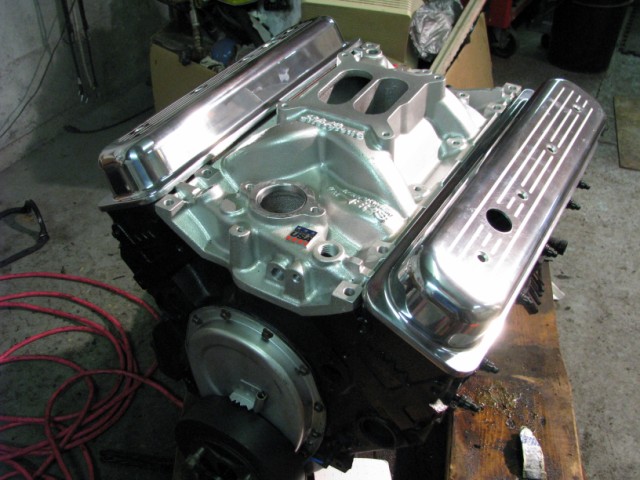 That's about it up until tuesday night. I keep working on it every night. Few more days it'll be ready to go in - I'm just not sure if I'M ready for it to go in!! :D |
|
|
|
|
Dr.Fiero
Senior Post God
Joined: 12 February 2007 Location: Canada Status: Offline Points: 1726 |
Post Options
Quote Reply
Posted: 07 January 2009 at 4:09pm |
I've only ever had it up to about 170 - but... It's factory BTW. I think it's more there to keep the crap from building up on the back window (which it does a very good job of). |
|
|
|
|
Dr.Fiero
Senior Post God
Joined: 12 February 2007 Location: Canada Status: Offline Points: 1726 |
Post Options
Quote Reply
Posted: 08 January 2009 at 7:01am |
Yeah, I yanked that off, and filled the holes. |
|
|
|
|
Dr.Fiero
Senior Post God
Joined: 12 February 2007 Location: Canada Status: Offline Points: 1726 |
Post Options
Quote Reply
Posted: 22 January 2009 at 9:44pm |
|
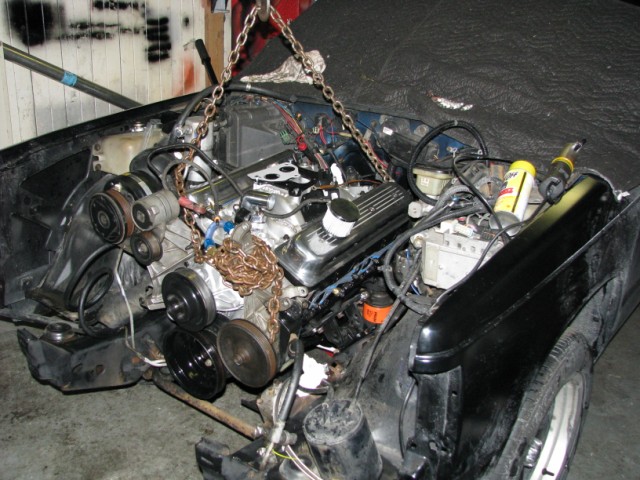
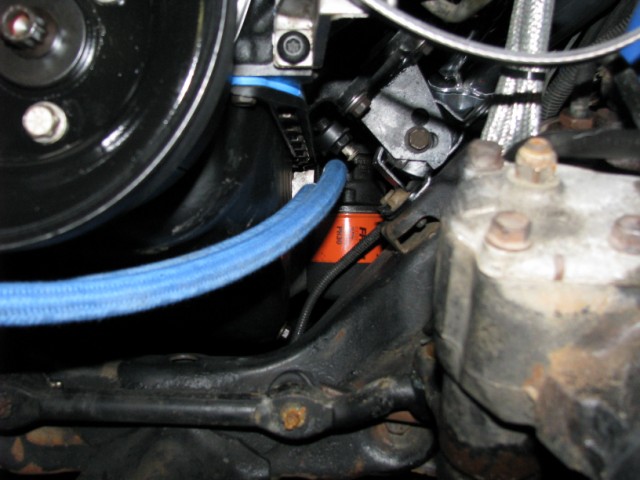
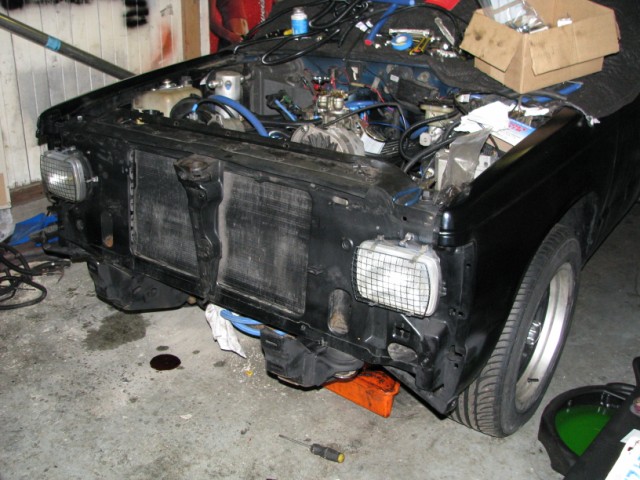
Got some 'visual progress' going on today...
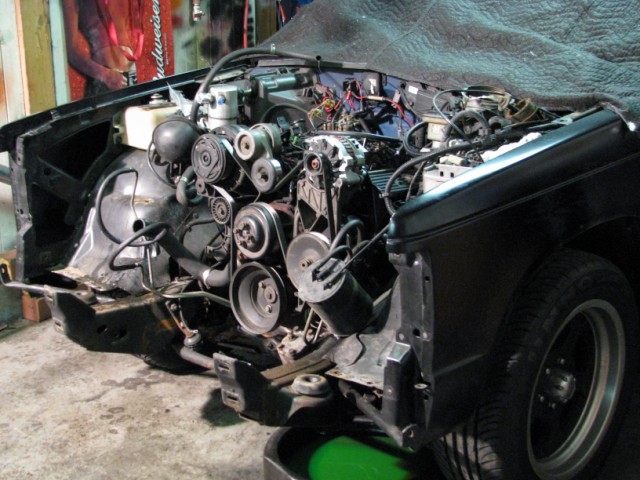 Front end torn off, closer to being ready to have the 4.3 yanked... 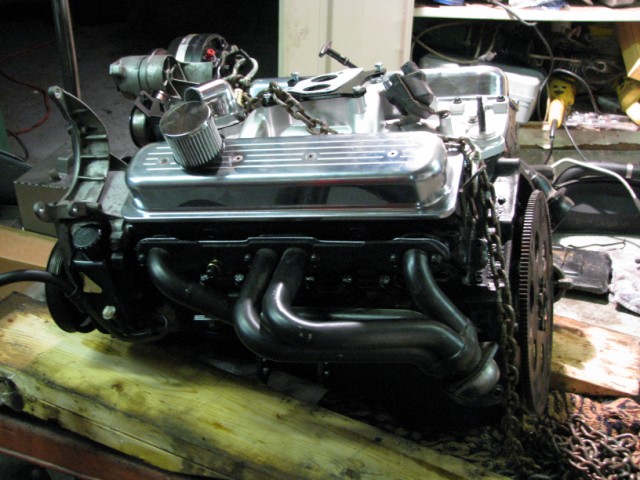 More or less ready to go in... 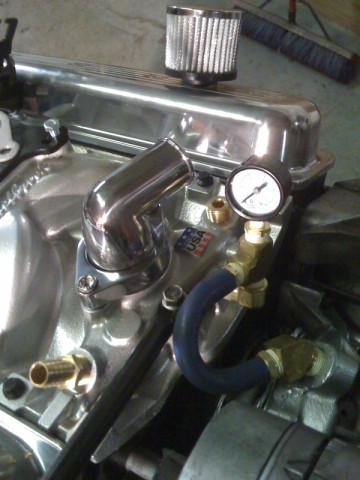 And as I'm sure most of you are aware... if there's a way to make something a little more complicated, and add a touch of cool - I'll do it. :D (yes, that's a water jacket pressure gauge!) |
|
|
|
|
Capt Fiero
Admin Group

Founding Member Joined: 12 February 2007 Location: Canada Status: Offline Points: 4039 |
Post Options
Quote Reply
Posted: 23 January 2009 at 10:06am |
|
LOL, I guess that beats my "squeeze" the hose to check for pressure in the cooling system. Hey I just thought of something. That gauge will also let you know if you ever start to have a head gasket failure. Once you have had it on there for a while and know what the "norms" are. You'll be able to tell rather quickly if the cooling system is getting over pressurized.
Damn that is a simply brilliant idea. Now you got me wondering where I could plumb one of those into my 4.9. Hmmnmmmm. |
|
|
Capt Fiero
88 Fiero GT 5spd V6 Eight Fifty Seven GT V8 5spd. |
|
|
|
|
Dr.Fiero
Senior Post God
Joined: 12 February 2007 Location: Canada Status: Offline Points: 1726 |
Post Options
Quote Reply
Posted: 25 January 2009 at 7:58pm |
|
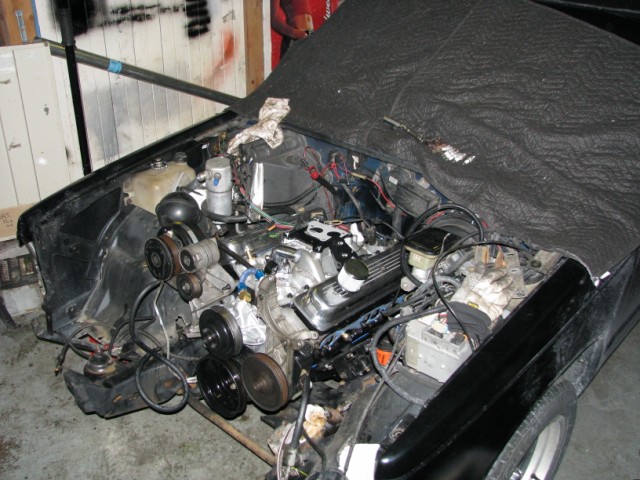
Just an update - more visual progress.
 No it's not really "in there", it's hanging in space. Ran out of time and had to go pick up the wife from work. Tomorrow though! It'll at least be bolted in. |
|
|
|
|
Dr.Fiero
Senior Post God
Joined: 12 February 2007 Location: Canada Status: Offline Points: 1726 |
Post Options
Quote Reply
Posted: 27 January 2009 at 8:25am |
|
OK - it's actually IN the hole now - bolted down tight, with a new poly tranny mount (guess the stock '91 unit didn't like being twisted and stretched THAT much! Oops. snap.).
 Plumbing and wiring today. |
|
|
|
|
Dr.Fiero
Senior Post God
Joined: 12 February 2007 Location: Canada Status: Offline Points: 1726 |
Post Options
Quote Reply
Posted: 27 January 2009 at 7:01pm |
|
Got more done... not as much as I wanted....
Had to stop early to stem the gushing flow of blood from my thumb where I skillfully took a razor knife and jammed it deeply into the tip of said thumb. Figured this was a sign to make it the end of my working day. I'll spare you the shots of my thumb. 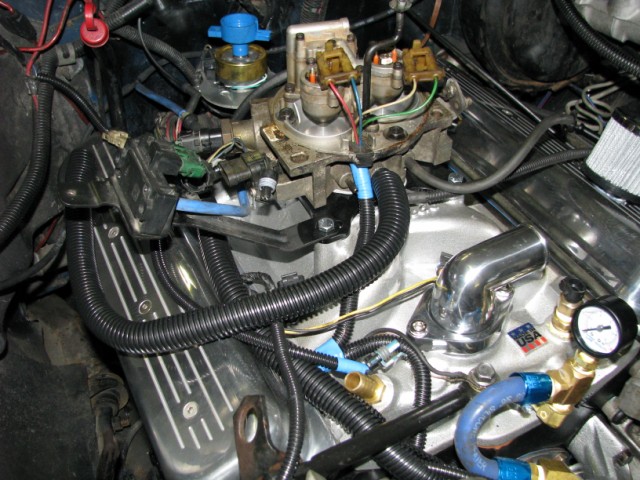 Distributor is in and eyeball timed. Most of the wiring is done, except the new throttle body uses a different TPS, so I'll have to rewire the connector for it. IAC was the same connector. Have to extend the temp sender lead (engine is longer than the 6cyl, so of course the sender is now further away!). Hoping I can reuse the stock wiring for the alternator by re-routing it. A/C compressor also uses a different plug, so I'll have to splice that as well. Oh well, no biggy. Replaced a bunch of very aging vaccum lines, and replaced almost all the 'turning to dust' convoluted tubing. Sent headers and battery tray off to get ceramic coated. Says they should be done Thursday, maybe Friday. Yay Kool Koat! |
|
|
|
|
Patrick
Newbie 
Joined: 19 April 2008 Location: Vancouver Status: Offline Points: 5 |
Post Options
Quote Reply
Posted: 27 January 2009 at 9:50pm |
|
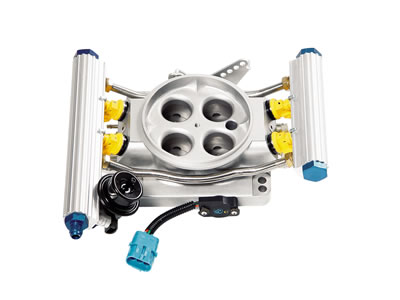
I never took you for being Emo, John. I notice the 2-barrel TBI on the 4-barrel intake manifold. Is there such a thing as a 4-barrel TBI that would sit on there (without the use of an adapter plate)? [EDIT] I guess I can answer my own question...
|
|
|
|
|
Dr.Fiero
Senior Post God
Joined: 12 February 2007 Location: Canada Status: Offline Points: 1726 |
Post Options
Quote Reply
Posted: 28 January 2009 at 6:10am |
|
That's what I'd LIKE TO be running - but with the price tag on it - it's going to have to wait.
The TBI unit that's on it is about 500cfm. I've got a 650cfm one that I can use with some modification. I'm going to run an external FPR, so I can kick the pressure up enough to compensate for the 60% increase in HP without leaning out. |
|
|
|
|
Dr.Fiero
Senior Post God
Joined: 12 February 2007 Location: Canada Status: Offline Points: 1726 |
Post Options
Quote Reply
Posted: 29 January 2009 at 5:51pm |
|
Bling bling day!
   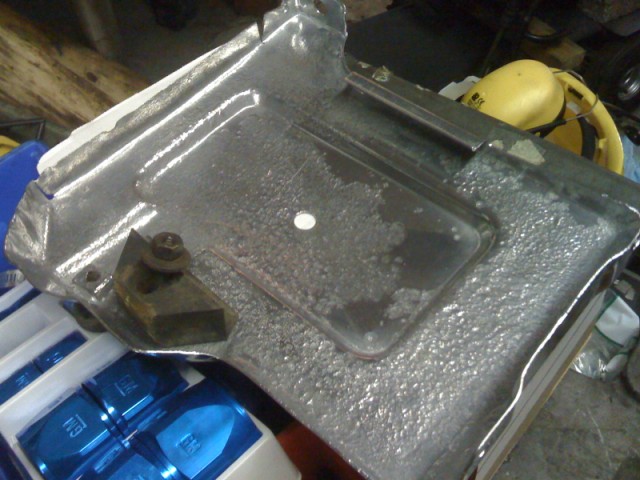 Yes - that's my battery tray! I had to get it blasted before it finished rusting away anyhow, so for like $10 or $15 more, I get it powder coated too! WTF - why not. |
|
|
|
|
Capt Fiero
Admin Group
Founding Member Joined: 12 February 2007 Location: Canada Status: Offline Points: 4039 |
Post Options
Quote Reply
Posted: 30 January 2009 at 4:30am |
|
Looking really good.
|
|
|
Capt Fiero
88 Fiero GT 5spd V6 Eight Fifty Seven GT V8 5spd. |
|
|
|
|
Dr.Fiero
Senior Post God
Joined: 12 February 2007 Location: Canada Status: Offline Points: 1726 |
Post Options
Quote Reply
Posted: 31 January 2009 at 6:05am |
|
Devils in the detail.... sigh....
Been stabbing at all the small things the last few days, and they're all non-photogenic. I see the changes, but it's not worth taking pics of. Anyhow, I'm off to get plumbing bits today, so I'll get more update shots later on. |
|
|
|
|
Dr.Fiero
Senior Post God
Joined: 12 February 2007 Location: Canada Status: Offline Points: 1726 |
Post Options
Quote Reply
Posted: 31 January 2009 at 8:56pm |
|
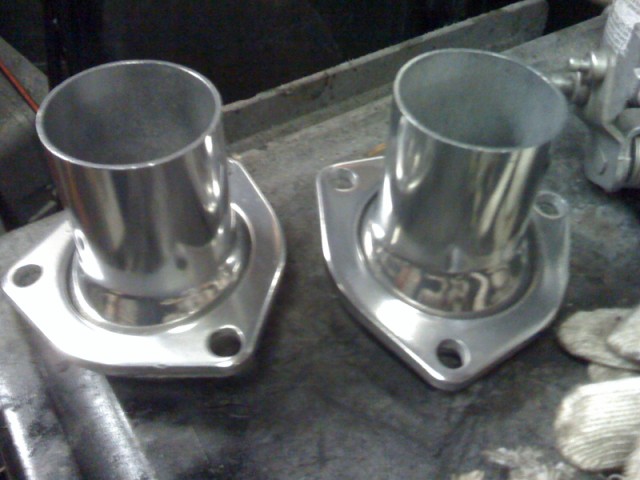
Ok - might be hard to see some changes, but... this is all the 'fiddly' stuff that REALLY takes the time!!!!
 Engine oil collar hoses 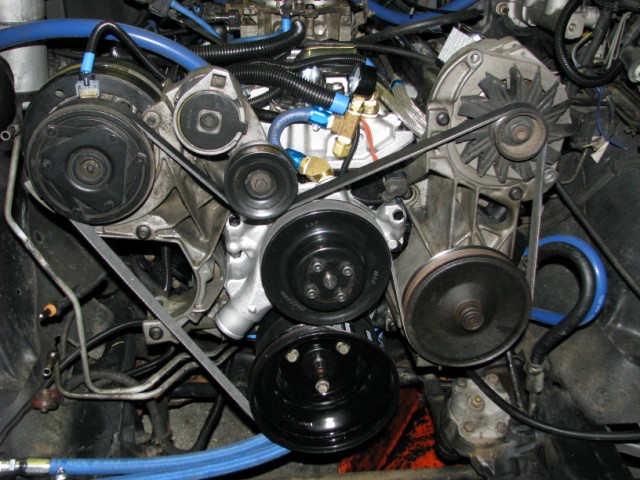 Belt n' stuff 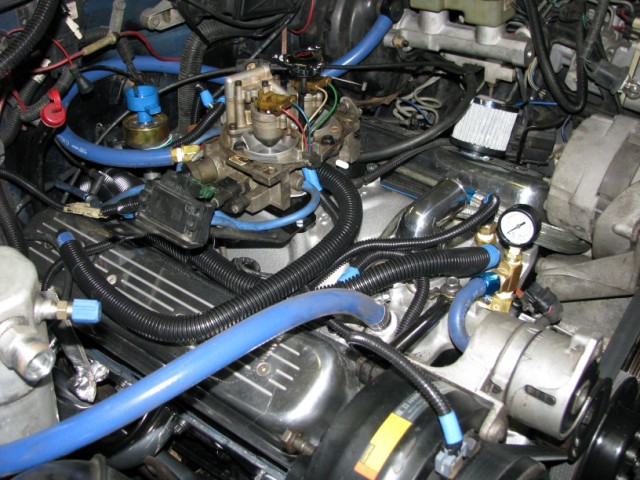 Overall picture 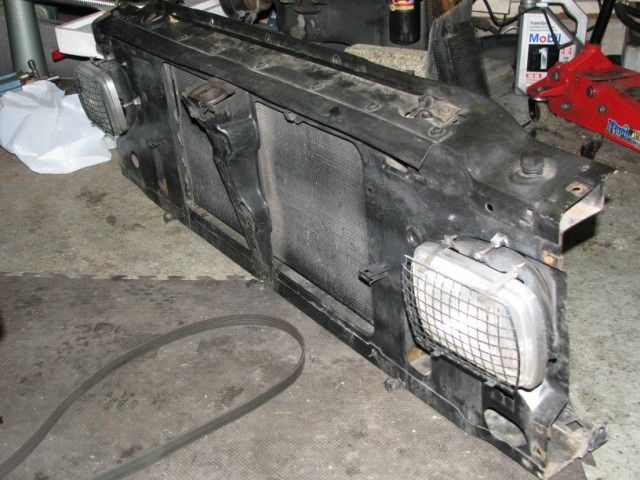 Rad support almost ready to go back in for good 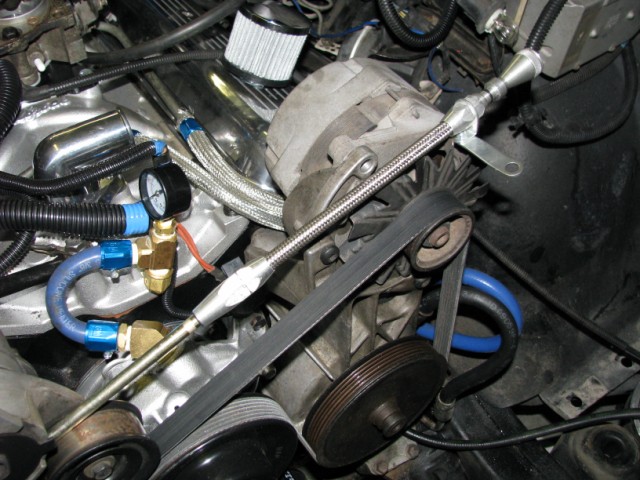 "Autoloc" billet dipstick w/flexible tube (stocker was WAY too fugly to put in) 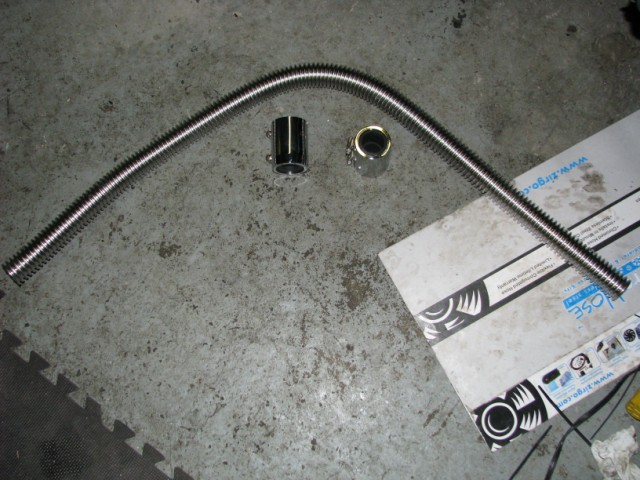 Formable stainless steel rad hose! Never used it before - should be interesting 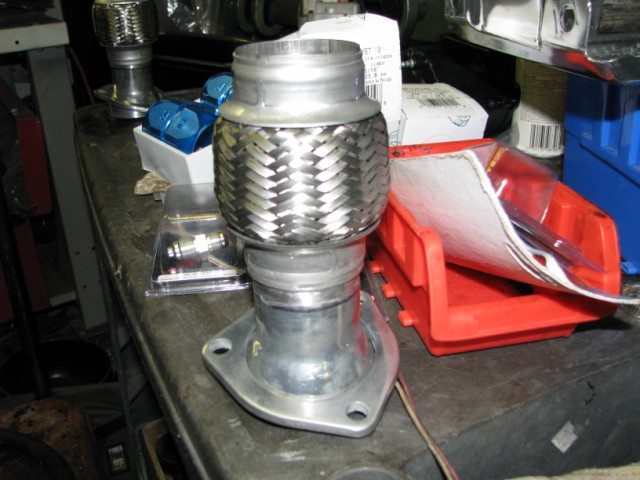 Exhaust header flange with flex coupling (unwelded yet) Anyhow - that's about the bulk of it for the day. Lots done, just not much visual 'big stuff'! :) |
|
|
|
|
Patrick
Newbie
Joined: 19 April 2008 Location: Vancouver Status: Offline Points: 5 |
Post Options
Quote Reply
Posted: 01 February 2009 at 2:46am |
|
Very nice!
|
|
|
|
|
Dr.Fiero
Senior Post God
Joined: 12 February 2007 Location: Canada Status: Offline Points: 1726 |
Post Options
Quote Reply
Posted: 03 February 2009 at 6:59am |
|
This was actually yesterday, but...
 "Nose" aka rad support back on 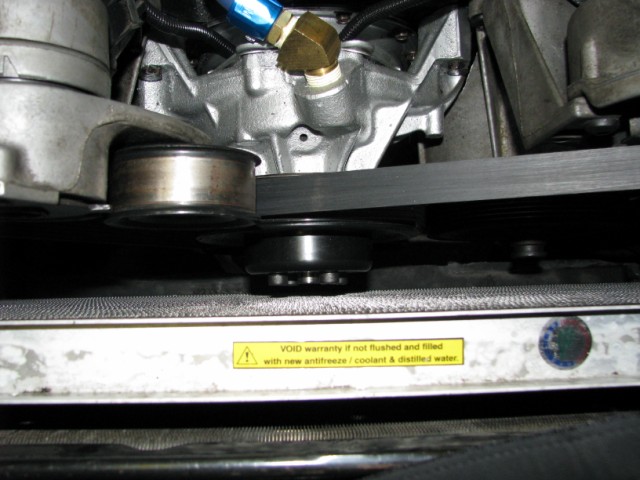 TIGHT! But a big sigh of relief when it actually fit. There's been more wiring etc going on as well - but nothing really visual that anyone would notice. Squishing my electric fans in is evidently going to be a challenge! Oh well. Oh yeah - the bearings in my alternator were pooched. Like, I'm talking REALLY pooched... move the pulley up/down 1/4" kinda pooched? Pulled the rotor and all the balls fell into my hand? Ok, you get the idea... Anyhow, I checked at Lordco, and they wanted like $40 for one, and $26 for the other end (WTF?!?!?!). Plus I'd have to pull/replace of course. Popped by Edmonds starter/alternator in BBY. Handed him the end plate and rotor and said "can you do anything?". Handed it all back to me about 5-10 min's later. Done. $25. Thanks - bye! Boo ya! :D |
|
|
|
|
Dr.Fiero
Senior Post God
Joined: 12 February 2007 Location: Canada Status: Offline Points: 1726 |
Post Options
Quote Reply
Posted: 03 February 2009 at 9:39pm |
|
Short day today, had other stuff to do (groceries, etc).
Anyhow, got the efans in: 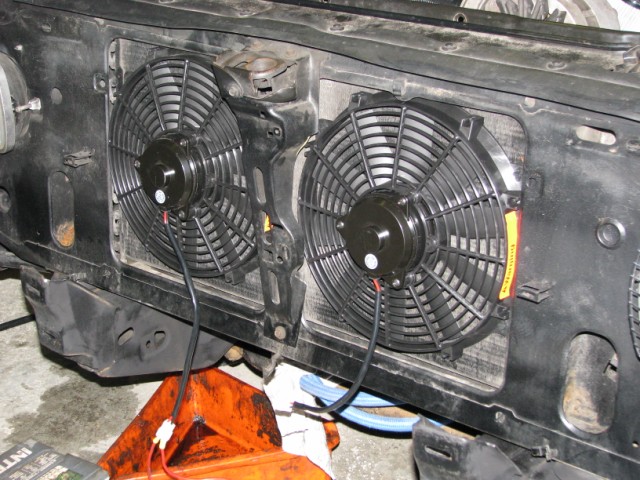 Needless to say they're not wired in. But all the sensors, fuses, relays etc are already in there from yesterday. Just need to pick up a couple pigtail connectors (the fans didn't come with them! Argh!). These things pump air like crazy - yet BOTH of them running draw 1/3 the current of a stock Fiero one. |
|
|
|
|
Post Reply
|
Page 123> |
 Tweet
Tweet
|
| Forum Jump | Forum Permissions You cannot post new topics in this forum You cannot reply to topics in this forum You cannot delete your posts in this forum You cannot edit your posts in this forum You cannot create polls in this forum You cannot vote in polls in this forum |


 Topic Options
 Matt wrote: