My 3800 SC1 swap |
Post Reply 
|
Page <1234 5> |
| Author | ||
D_sensitized 
Admin Group 
Executive Member Joined: 25 March 2008 Location: Canada Status: Offline Points: 601 |
 Post Options Post Options
 Quote Reply Quote Reply
 Posted: 20 December 2009 at 11:16am Posted: 20 December 2009 at 11:16am |
|
 Success! 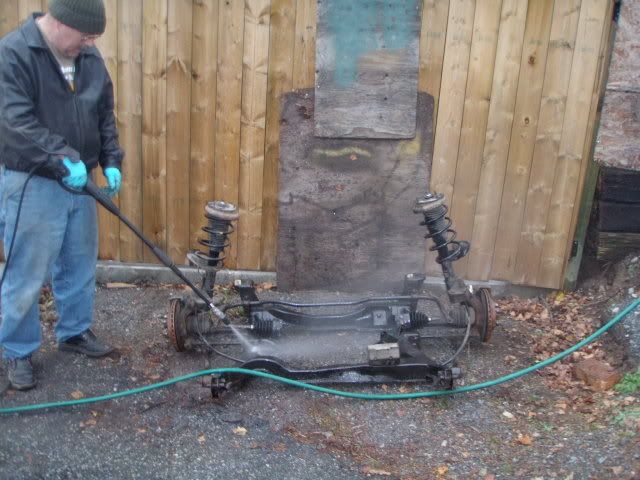 The trapped nut on the drivers side broke loose inside though, but still held in enough for me to get the cradle off but I will have to cut into there and fix that up. The cradle itself has a couple nicks and dings but is in good shape overall and pretty rust free. I started working on making templates for my alternator bracket and a tensioner pulley bracket. 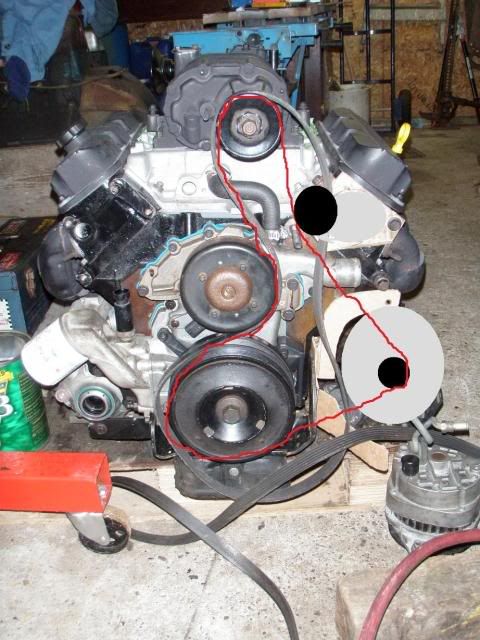 Thats my plan, the alt in the lower right and the tensioner up above. There is just enough room for about a 1/4" plate against the side of the head, I will probably have the hole threaded in the plate itself as well as a bit of a nut sticking up into the back of the tensionner housing. There is enough space to grind out for a nut just so there is more thread for the tensioner to hold onto. |
||
 |
||
|
Romeo
Senior Post God

Joined: 16 November 2008 Location: Canada Status: Offline Points: 3033 |
Post Options
Quote Reply
Posted: 21 December 2009 at 6:29am |
|
|
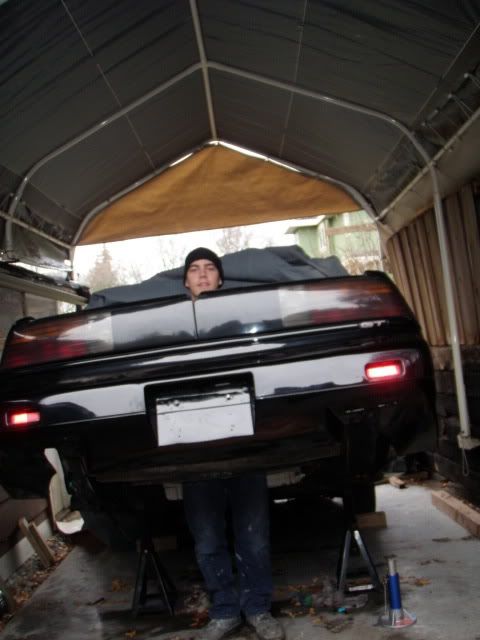
You might need to take away some slack. Seems a bit wobbly.

|
||
|
Never shift into reverse without a back-up plan.
|
||
|
||
|
Patrick
Newbie 
Joined: 19 April 2008 Location: Vancouver Status: Offline Points: 5 |
Post Options
Quote Reply
Posted: 21 December 2009 at 11:00pm |
|
|
I'd use something stronger than a red string as well.
|
||
|
||
|
Romeo
Senior Post God
Joined: 16 November 2008 Location: Canada Status: Offline Points: 3033 |
Post Options
Quote Reply
Posted: 22 December 2009 at 7:25am |
|
|
Yeah. I hear that can snap under load. Man, it's a good thing Patty and I are here to look out for you, that could've been disastrous...

|
||
|
Never shift into reverse without a back-up plan.
|
||
|
||
|
D_sensitized
Admin Group
Executive Member Joined: 25 March 2008 Location: Canada Status: Offline Points: 601 |
Post Options
Quote Reply
Posted: 22 December 2009 at 12:21pm |
|
|
Haha i guess I should make the alternator
mount out something other than cardboard too:p The other day I started working on the mounts. I got 2/3 mounts working and lined up but the front engine mount still needs some work. The mount I got off the minivan puts the rubber centered beneath the balancer but the mounting point on the cradle is offset 2 or 3 inches towards the front of the car. |
||
|
||
|
D_sensitized
Admin Group
Executive Member Joined: 25 March 2008 Location: Canada Status: Offline Points: 601 |
Post Options
Quote Reply
Posted: 23 December 2009 at 11:18pm |
|
|
I went out to the garage today just to tinker and see if I could get something to work.
I might try to trim a side of the front engine mount and move it as far over as possible and redrill all the mounting holes to make it work. I found that the front rubber from my '85 cradle is smaller and thinner so might give that one a shot as well but it doesn't look quite as beefy as the other one. the mounts that worked: the front transmission mount just dropped right in, no modification needed! I also have the same mount from the minivan that fits all the same holes but doesn't have that strut.  The fron trans mount needed a little trimming and for the whole to be lengthend but it all fits now. On this one I still used the stock fiero rubber with the donor cars bracket.  and this is the one that still needs work.  As you can see it needs to move over a couple inches, I know I could just buy the mounts and brackets but I would much rather make what I have work. The bottom left is the stock 88 fiero mount which is the exact same as on the donor car, the bottom right is form the '85 cradle- much thinner. The top mount is a broken one I found when I pulled the motor.  Also, isn't there supposed to be some sort of rubber or bushings here? the cradle was just bolted to the frame with nothing in between 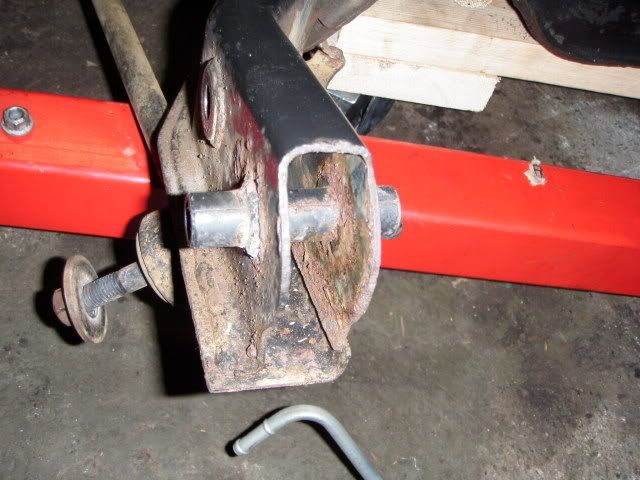 is that tube supposed to be welded in?  the '85 cradle has rubber in those same places.   |
||
|
||
|
Dr.Fiero
Senior Post God
Joined: 12 February 2007 Location: Canada Status: Offline Points: 1726 |
Post Options
Quote Reply
Posted: 24 December 2009 at 5:12am |
|
It's an '88 thing. They did away with the flex in the cradle there by solid mounting it. |
||
|
||
|
D_sensitized
Admin Group
Executive Member Joined: 25 March 2008 Location: Canada Status: Offline Points: 601 |
Post Options
Quote Reply
Posted: 30 December 2009 at 7:54pm |
|
|
Thanks for the info.
Success! I got the engine mounted to the cradle using the mounts I have. I just used the front mount from the 85, and redrilled the holes in the cradle and the bracket and it fits. i forgot to mention, the front trans mount(the one with the strut) did need one modification, it had a third stud out under the strut that i just chopped off. I will test fit it soon to make sure it all fits and to see that I have room for how I plan on doing the cooling hoses, alternator bracket etc. I would like to have the injectors cleaned before I put it all back together, does anyone know of a place that can clean them? |
||
|
||
|
Patrick
Newbie
Joined: 19 April 2008 Location: Vancouver Status: Offline Points: 5 |
Post Options
Quote Reply
Posted: 30 December 2009 at 9:51pm |
|
|
WitchHunter Performance down in Washington State are highly regarded and charge $19 per injector.
|
||
|
||
|
Romeo
Senior Post God
Joined: 16 November 2008 Location: Canada Status: Offline Points: 3033 |
Post Options
Quote Reply
Posted: 30 December 2009 at 10:44pm |
|
|
Hey, that's $19 american, which if I'm not mistaken, is around the $376000 range in canadian dollars. Oh, economy burn. |
||
|
Never shift into reverse without a back-up plan.
|
||
|
||
|
D_sensitized
Admin Group
Executive Member Joined: 25 March 2008 Location: Canada Status: Offline Points: 601 |
Post Options
Quote Reply
Posted: 30 December 2009 at 11:14pm |
|
|
Thanks Patrick,
Their site says they no longer ship to Canada though. I sent them an email asking if they would send it to a PO box in Blaine I may be able to use. We'll see how it goes. |
||
|
||
|
Patrick
Newbie
Joined: 19 April 2008 Location: Vancouver Status: Offline Points: 5 |
Post Options
Quote Reply
Posted: 30 December 2009 at 11:36pm |
|
|
It's getting pretty close to par the last time I checked!
Damn, I was unaware of that. If you decide to use them, hopefully they'll let you use a P.O. box at the border/Blaine. As long as they've been paid, they shouldn't have a problem with that.
|
||
|
||
|
D_sensitized
Admin Group
Executive Member Joined: 25 March 2008 Location: Canada Status: Offline Points: 601 |
Post Options
Quote Reply
Posted: 05 January 2010 at 6:19pm |
|
|
I sent them an email and the P.O. box in Lynden (not blaine) will work fine, I will just need to pay washington sales tax.I will send them out tonight.
I was tinkering around looking through all the stuff that came with my engine, I will need to figure out just what parts of the wiring harness I actually need since I have just about every wire from the donor car minus what goes into the doors and under the seats. (I even have some turn signal bulbs and all the way to the plug for the rear taillights harness as well as under the dash behind the radio, HVAC etc.)  This shows some engine bay wiring beyond a firewall passthru. 3 plugs off this section plug into the transmission  more stuff:   I still don't completely understand just what I'm supposed to do for making a wiring harness. I know I just need the C500 and C203 connectors from the fiero but I don't really know what to do with the ECM wiring. I found this thread http://www.fiero.nl/forum/Archives/Archive-000001/HTML/20070 315-2-074653.html on PFF that seems to be usefull but i don't know if it's much different being obd2 and I have obd1. tips and advice appreciated. I went through the engine harness to track down all the plugs for sensors etc and have those all figured out but 1.  2 wires, black and green, down near the front of the engine( the one on the left with the wires exposed) 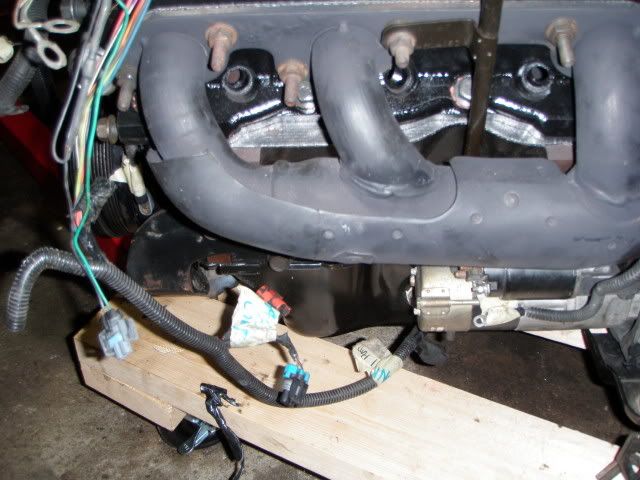 In the meantime I'll reread that PFF thread and look around for more info to help me. |
||
|
||
|
Romeo
Senior Post God
Joined: 16 November 2008 Location: Canada Status: Offline Points: 3033 |
Post Options
Quote Reply
Posted: 06 January 2010 at 11:53pm |
|
|
OBD II is much more integrated, typically speaking. As such, it tends to want more intel than an OBD I system. That may or may not be true in your case, but what is true is that the codes and software are globally applied to all cars running OBD II, rather than being brand specific, as was the case with OBD I.
|
||
|
Never shift into reverse without a back-up plan.
|
||
|
||
|
D_sensitized
Admin Group
Executive Member Joined: 25 March 2008 Location: Canada Status: Offline Points: 601 |
Post Options
Quote Reply
Posted: 09 January 2010 at 10:06pm |
|
|
Got the engine bolted to the cradle today, and just put more off the bolt ons back on.
Injectors have been cleaned and are on their way back. I was making a list of things that still need to be done/figured out. -Pulleys I got everything pretty much figured out, just need to get some steel plate for the tensioner bracket and when the alt is mounted I can find out what length belt I will need. I will leave some play before finalizing the alt bracket to put it in a good position for a common length belt. -Coolant lines For these is will be mostly stock, stock tstat, heater core running off the stock line in the intake manifold and putting a filler neck straight up off the now unneeded heater core return. -Wiring Still don't really know how I will be doing this, I got a bunch of wiring diagrams with the motor but they are for a oldsmobile 98 not an 88 so it won't be much good since things arent in the same spots. -Axles I have a few axle bits lying around so I will see what I can do with what I have and if not I will probably head over to pick a part to get anything needed. There are lot's of threads about them on PFF -Throttle/shifter cable I will need to get the engine in the car to see if the stock cables are long enough to go the routing I am thinking of so will wait on these. Hopefully the shifter bracket from the fiero trans will be short enough to fit next to the exhaust crossover. I will still need to dent into the heat shielding though. -Misc I can no longer mount the coil pack in the stock location since my belt tensionner is going there so i will mount it on the side of the other head, I can still use the stock bracket but might make a nicer one later down the line. I will need to get enough fuel/vacuum/coolant lines to make everything meet up. Get new rear cradle bolt for the one that stripped when it came out and cut into the frame so I can weld the trapped nut back in that broke loose when I took out the cradle. -Exhaust My plan is to have a small catalytic converter right off the manifold pointing down, then T off to 2 mufflers, one on each side and out the back. -Intake For now I will probably just route it to the stock airbox but will eventually make a better one when I get around to making sidescoops for the car. Lemme know if I'm overlooking anything. I will still need to buy stuff like all the fluids, spark plugs etc. |
||
|
||
|
D_sensitized
Admin Group
Executive Member Joined: 25 March 2008 Location: Canada Status: Offline Points: 601 |
Post Options
Quote Reply
Posted: 13 January 2010 at 9:55pm |
|
|
Well I've started on the wiring. I got the old harness all taken apart and looped it all up ready to start making the harness. The only wires I've cut we're the ones that came together to one joint. (12v power stuff mostly)
I just took all the connections out of the firewall connector and plan on reusing that same firewall plug to keep things clean. 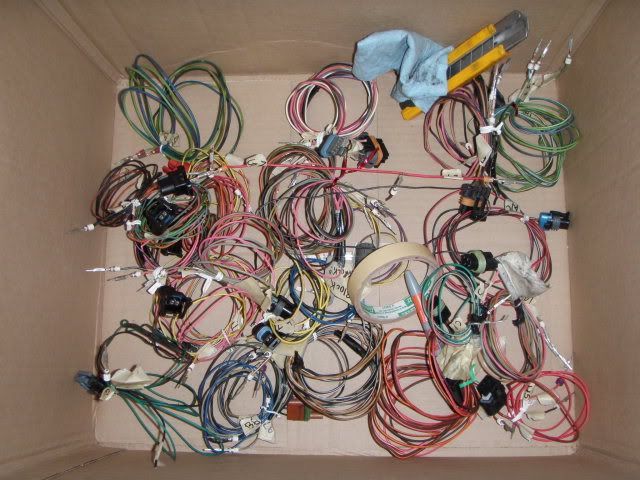 clean empty plug 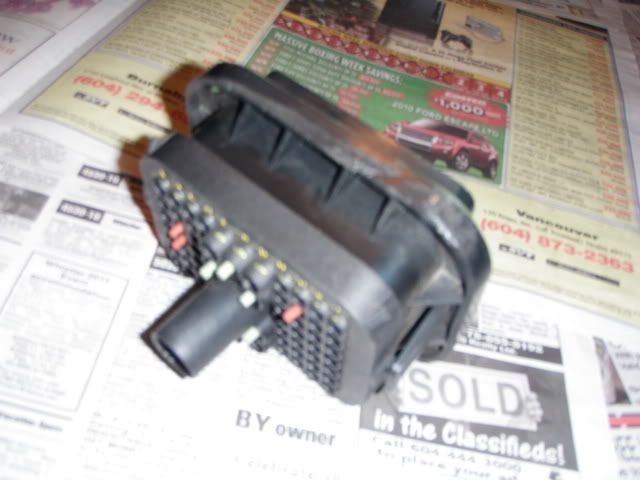 |
||
|
||
|
D_sensitized
Admin Group
Executive Member Joined: 25 March 2008 Location: Canada Status: Offline Points: 601 |
Post Options
Quote Reply
Posted: 19 January 2010 at 6:48pm |
|
|
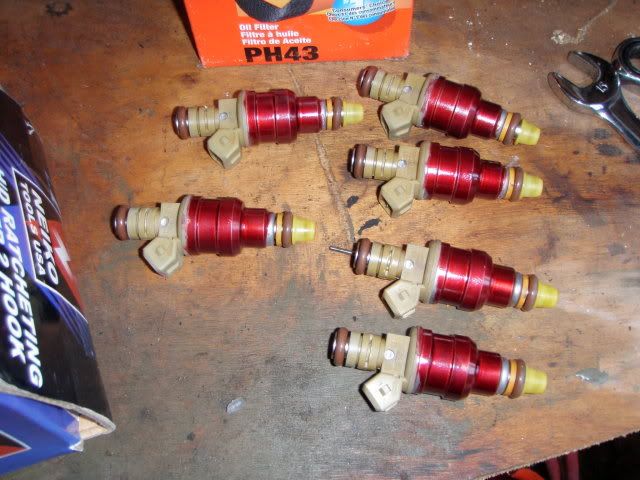
I got the injectors back from witchhunter performance. Actually they
got picked up from lynden last Tuesday so from the time I sent them out to when I got them back was no more then 8 days. And it looks like they did a good job. The injectors weren't too bad for the most part, before was about 3% variance and after was 1%. I got some shiney go fast red paint on and installed them. Sorry, I didn't have my camera when I installed them so I'll get some pics later. Looking at the back tranny mount, it's skewed towards the front of the engine a bit so I gotta pull it a off the cradle and widen the holes to move it over enough. I got the last gasket I needed from lordco today (throttle body) so I can get the whole engine together now minus belt. Tomorrow I'm hoping to get my alternator bracket bent up and installed and then start the wiring harness. I'll try to remember my camera this time :P |
||
|
||
|
D_sensitized
Admin Group
Executive Member Joined: 25 March 2008 Location: Canada Status: Offline Points: 601 |
Post Options
Quote Reply
Posted: 20 January 2010 at 11:50pm |
|
|
Pictures!
   Alternator bracket being made. 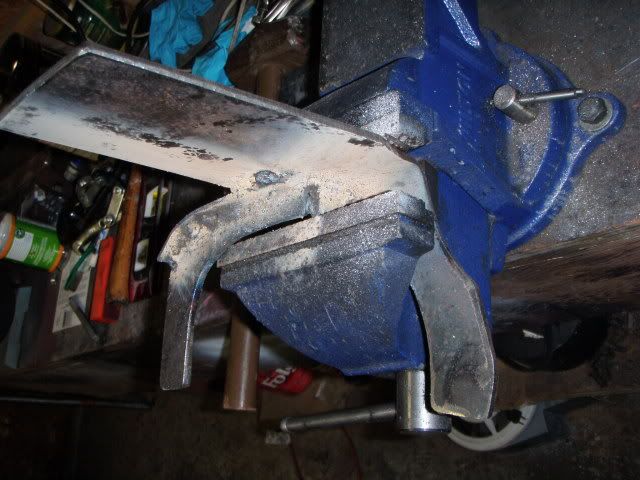 Bracket still needs modifications, some of the extra support we welded onto it is in the way of other things and all the holes drilled. |
||
|
||
|
D_sensitized
Admin Group
Executive Member Joined: 25 March 2008 Location: Canada Status: Offline Points: 601 |
Post Options
Quote Reply
Posted: 26 January 2010 at 7:27pm |
|
|
update:
been working on wiring mostly lately, alternator bracket still needs to be mounted but the holes are drilled to mount the alt to the bracket. I'm adding a firewall plug to the wiring which I know makes things more difficult for me since I pretty much have to make 2 harnesses (for each side of the firewall) but I like it better this way. I'm using the firewall plug from the donor car (pics earlier) but since none of the trans wiring went through I need some more connectors which I'll probably pick up tomorrow. Some wiring questions: Oil pressure sending unit- is it just wired the same as it was stock on the fiero? I'm going of the diagrams on the GMtuners website and it doesn't mention this. one of the wires off the TPS pin B I think. I got the other 2 wires done but I don't have anything that says where this one goes, is it needed? The sensor in the oilpan- again, I don't have anything that says what to do with it as I don't have the diagrams from the donor car. There's 2 plugs coming from the gear selector electronic dealie on the transmission around the shifter, I know what to do with the 4 wire plug, but nothing says anything about the other larger one, 6 or 7 pin i think, one is a larger gauge yellow wire. I will get some pics tomorrow or the day after of the connectors in question if no one knows which ones I'm talking about. The wiring diagram I'm going off: http://www.gmtuners.com/files/94-95_C-H-G-U_3800_PCM_Fiero.p df I know it says obd 1 for series 2 engines but if it's all the same electronics it shouldn't matter should it? |
||
|
||
|
D_sensitized
Admin Group
Executive Member Joined: 25 March 2008 Location: Canada Status: Offline Points: 601 |
Post Options
Quote Reply
Posted: 03 February 2010 at 11:25pm |
|
|
Well I'm almost done all the engine bay wiring, minus one trans plug and the C500. I got the rest of it loomed a little bit for now and will permanently do it all nice when I know it all runs right.
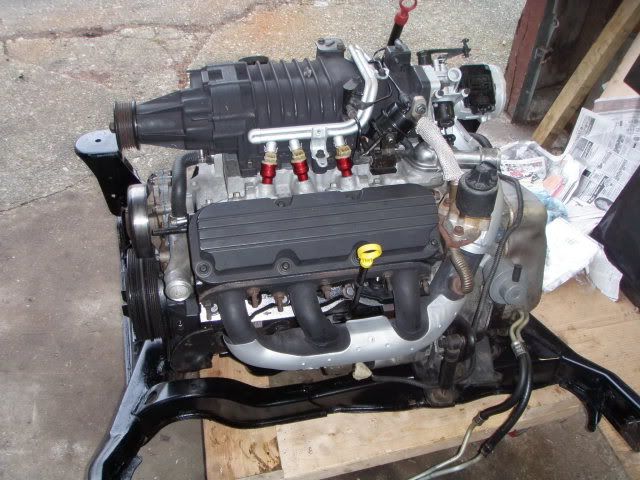
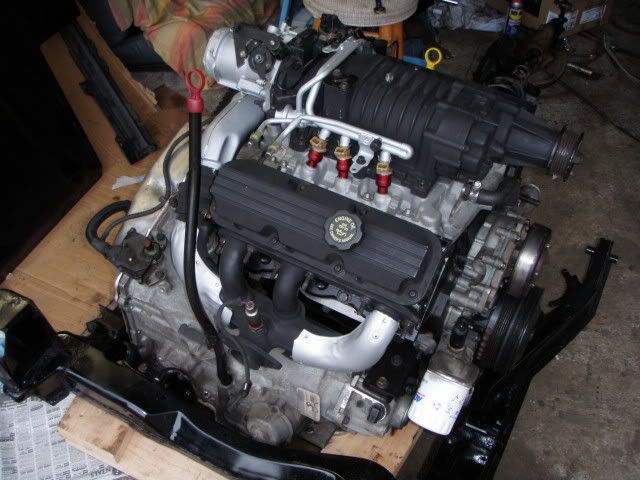
I got my alt bracket done and am just waiting for the paint to dry on that, it didn't work out the way I had originally planned it but i just spun the alt around to the other holes and after some spacers works perfectly. 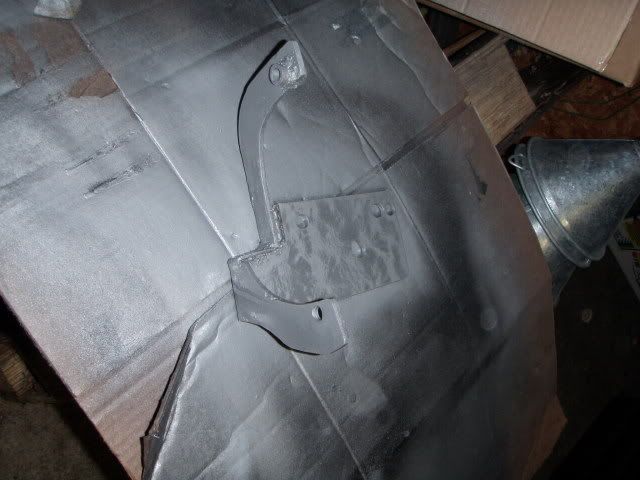 I put in my walbro fuel pump today finally and found out why my fuel gauge would never go below 1/3 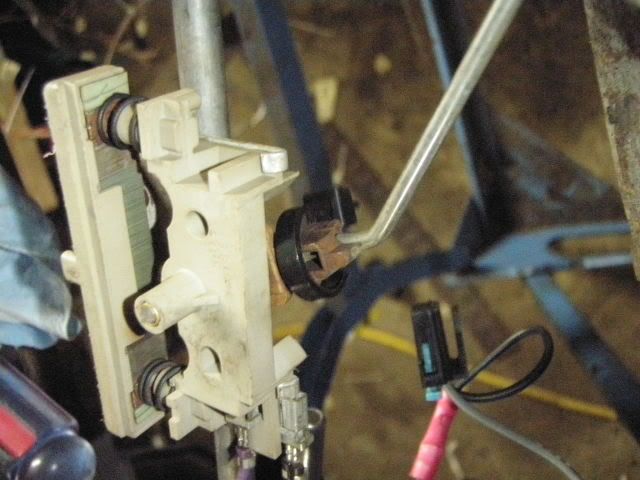 yes, that is a zip tie that gets in the way of letting the floater go all the way down. I also cleaned up the contacts so my fuel guage should be as accurate as ever when its done. 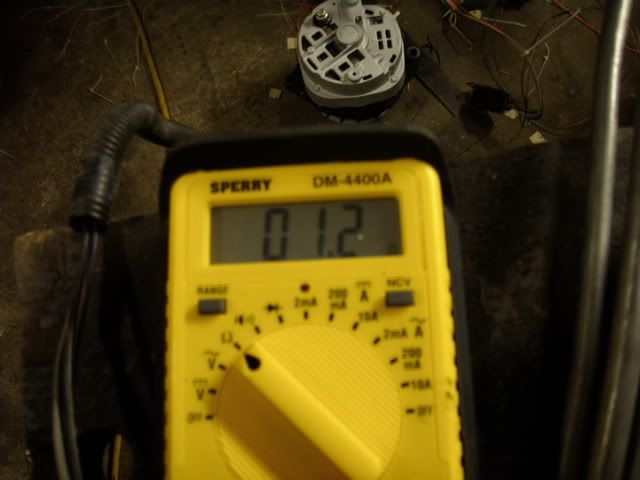 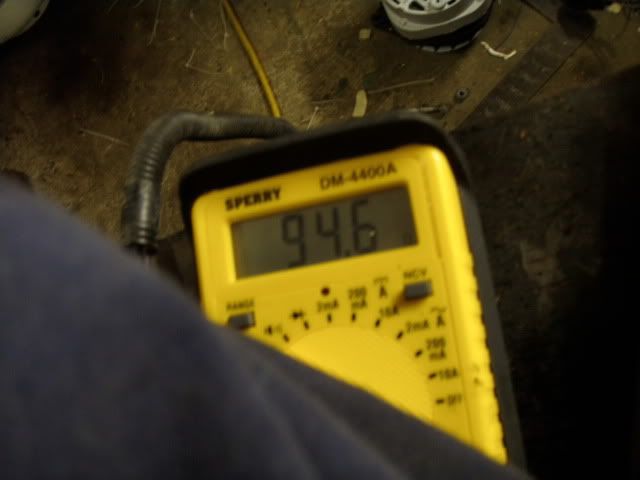 and here is the engine right now 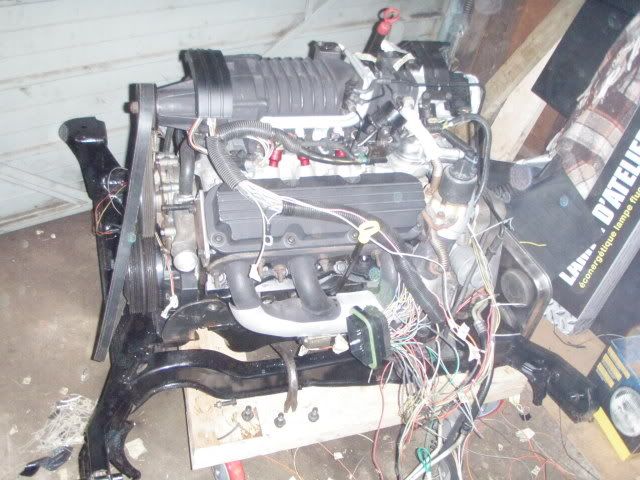 |
||
|
||
|
Post Reply
|
Page <1234 5> |
 Tweet
Tweet
|
| Forum Jump | Forum Permissions You cannot post new topics in this forum You cannot reply to topics in this forum You cannot delete your posts in this forum You cannot edit your posts in this forum You cannot create polls in this forum You cannot vote in polls in this forum |


 Topic Options
 D_sensitized wrote: